
 Follow this tutorial and learn to draw a cute glowing jellyfish in 10 easy steps, using basic geometric shapes, Pathfinder panel, and various Effects. We’ll be applying vivid gradients to make our character look glowing and bright. Are you ready to explore the underwater fauna together? Let’s start!
Tutorial Details
- Program: Adobe Illustrator CS6 – CC
- Difficulty: Intermediate
- Topics Covered: Shape Building, Pathfinder Panel, Effects, Stroke Panel, Gradient Tool
- Estimated Completion Time: 20 minutes
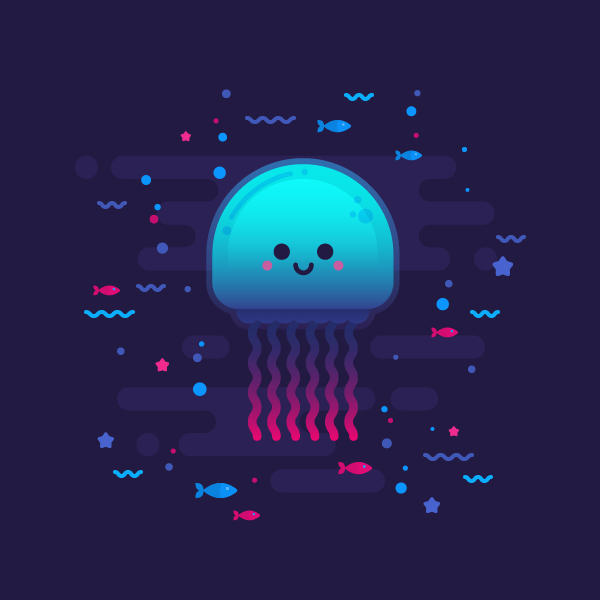
Final Image: Cute Glowing Jellyfish
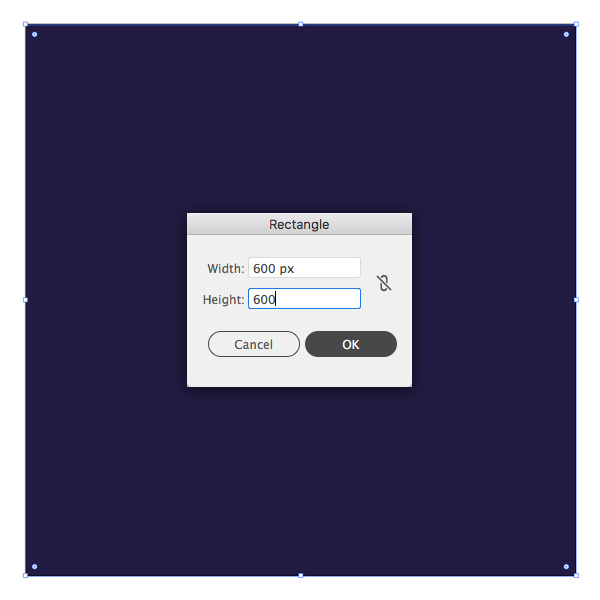
Step 1
Let’s start with the background. Take the Rectangle Tool (M) and single-click it anywhere on the background to create a 600 x 600 px dark-blue square.
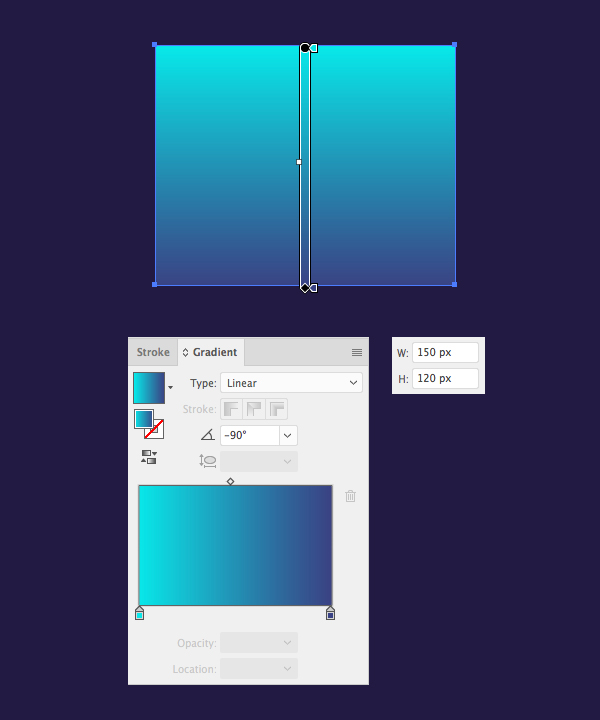
Step 2
Continue using the Rectangle Tool (M) and make a 150 x 120 px rectangle. Open the Gradient panel (Window > Gradient) and set the color of the sliders to electric blue and dark navy blue. Use the Gradient Tool (G) while holding down Shift to adjust the direction of the fill.
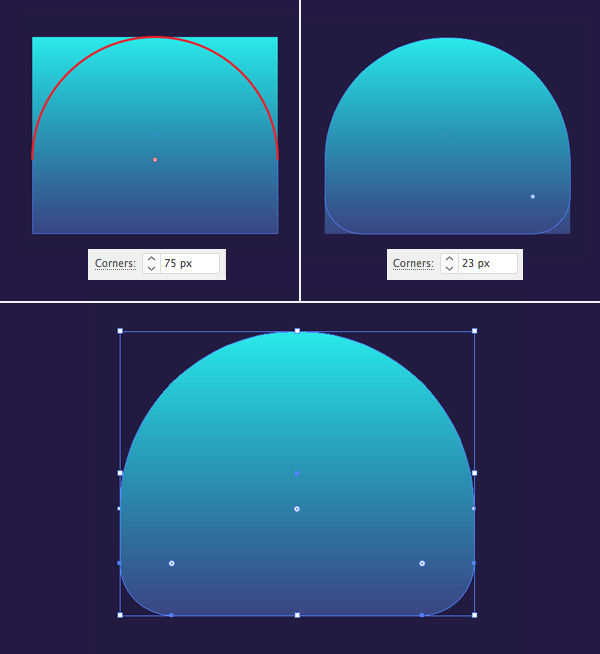
Step 3
Select both top anchor points of the shape with the Direct Selection Tool (A) and make the corners fully rounded by pulling the circle marker of the Live Corners.
Make the bottom corners a bit rounded as well, forming a «head» of the jellyfish. We can also adjust the Corner Radius from the control panel on top by setting the desired value.
Step 4
Now let’s make a «hood» of our jellyfish. Grab the Ellipse Tool (L) and make a 20 x 20 px circle with dark-blue linear gradient fill. Press Control-[ to Send Backward.
Switch to the Selection Tool (V), hold down Alt-Shift and move the shape to the right this way making a copy.
Press Control-D multiple times to repeat the previous action, creating more circles. Group (Control-G) all the circles together. Now we can select both objects and click Horizontal Align Center in the Align panel.

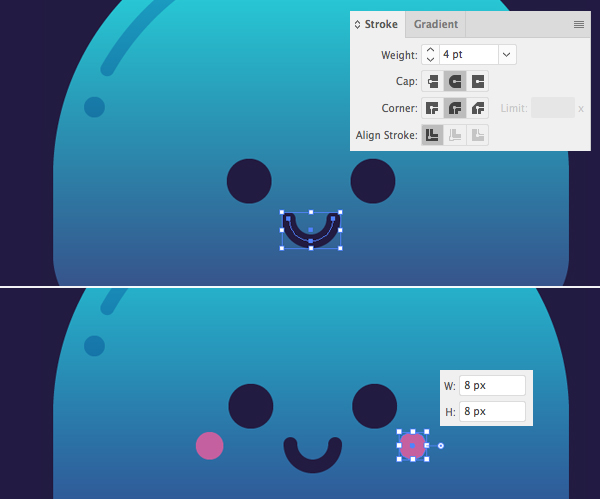
Step 5
Use the Arc Tool to add a stroke on top of the head. Set the Stroke Color to dark-blue in the Color panel and adjust the Weight in the Stroke panel (Window > Stroke). Set the Cap to Round Cap.
Add a small circle beneath the stroke, making the image more detailed.

Step 6
Let’s move on to the face! Use the Ellipse Tool (L) to make two 13 x 13 px dark-blue circles for the eyes. Create another small circle for the mouth and let’s modify it a bit. Grab the Scissors Tool (C) and click both left and right anchor points to split the circle apart. Delete its top half.

Step 7
Press X to Swap Fill and Stroke and make the line thicker by setting the Weight to 4 pt in the Stroke panel.
Add two small pink spots for the blush on the cheeks of our jellyfish.
Step 8
Now it’s time to add the tentacles or the arms of the jellyfish! Use the Line Segment Tool (\) to draw a straight vertical line while holding Shift. Make it 7 pt thick and go to Effect > Distort & Transform > Zig Zag.
From here, set the
- Size to 2 px;
- Absolute;
- Ridges per Segment to 8;
- Points to Smooth.
You can check the Preview box and play with the parameters a bit more if something doesn’t look good. Click OK once you’re happy with the result.

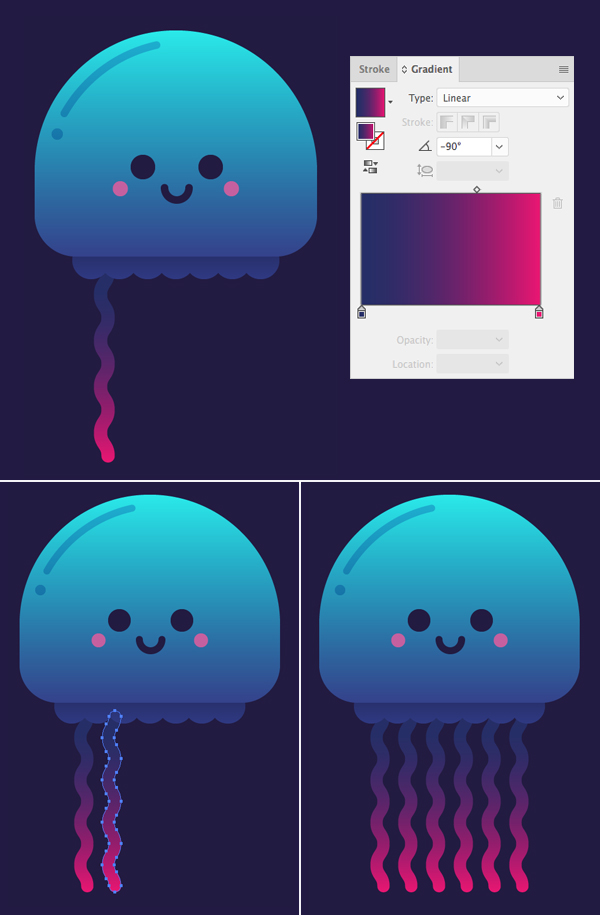
Step 9
Object > Expand Appearance of the tentacle to apply the effect and then Object > Expand again to turn the Stroke intro a shape. Press Control-[ a few times to place the tentacle beneath the hood.
Use the Gradient Tool (G) and the Gradient panel to fill the shape with a glowing linear gradient from dark-purple on top to bright magenta in the bottom.
Click and drag the tentacle while holding Alt-Shift to create a copy. Press Control-D a few times to make more copies.
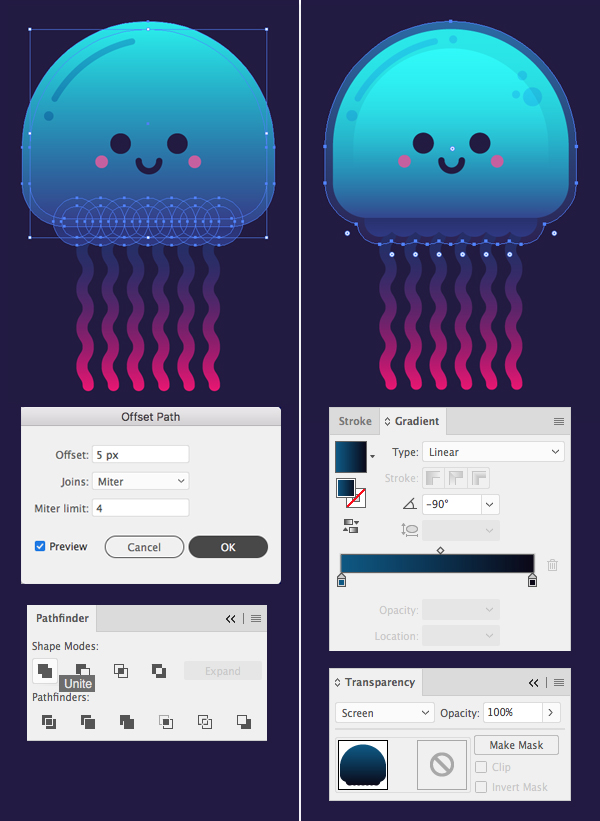
Step 10
Just a few finishing strokes left! Let’s select the head of our jellyfish together with those circles beneath it and go to Object >Path > Offset Path. Set the Offset value to 5 px and click OK. Click Unite in the Pathfinder panel while the shapes are still selected in order to merge them.
Fill the new shape with a dark linear gradient from blue to black and set the Blending Mode to Screen in the Transparency panel.
Congratulations! Our Cute Glowing Jellyfish is Finished!
Great job, everyone! Now we can add some minor details to the background, such as bubbles and tiny fish to make the composition look more balanced.
Feel free to use these tips and tricks to create more underwater creatures.
Have fun!
Author: Yulia Sokolova
2D/3D artist and tutorial instructor, focusing on character creation, icons, lettering design, and illustrations.


Thank u very much for the Helpful Tutorial, I wanna be as good as u in the near future.
very gooood
خیلی عالیه مرسی
Mrci
Great tutorial, thank you!
Very vibrant colors and cute character. Reminds me some of the MBE’s works.
Wow it is very simple yes to draw.
thanks dear