

In this shining Martini Glass Vector tutorial you will learn how to work effectively with simple geometric shapes, and then learn how to create amazing lighting effects, using different blending modes and gradient fills. Symbols and Symbol Sprayer Tool will help you to create splashes quickly for your festive martini glass vector. With just a little bit of effort you can create an awesome martini glass vector illustration on your own.
Tutorial Details: Martini Glass Vector
- Program: Adobe Illustrator CS2 – CC
- Difficulty: Beginner
- Topics Covered: Transparency blending modes, gradient fills, Symbol Sprayer Tool
- Estimated Completion Time: 45 minutes
Final Image: Festive Martini Glass Vector

Step 1
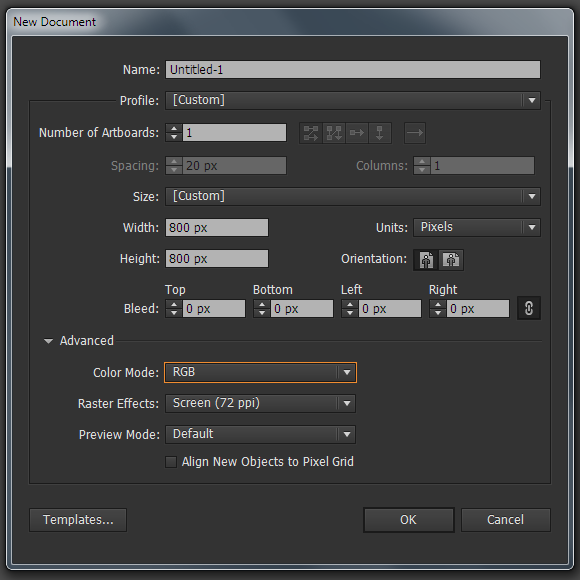
For this martini glass vector tutorial, we’ll start in Adobe Illustrator, then go to the File > New …. In the opened dialog box, set the necessary size of our artboard and choose the RGB color mode.
Step 2
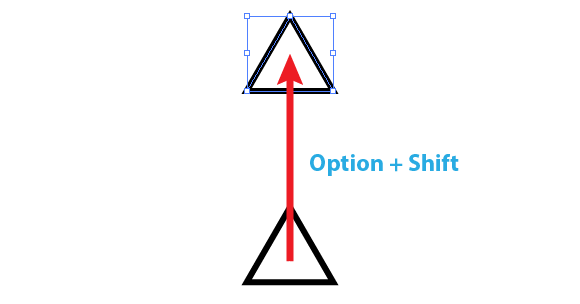
Take the Polygon Tool and click on the artboard. In the dialog box, set the number of sides equal to three in order to create a triangle.

Drag the triangle up, hold Opt / Alt and Shift, which will lead to duplication and will allow to move the object vertically up.
Step 3
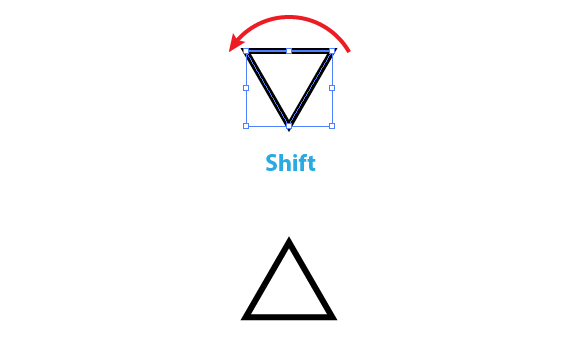
Rotate the top rectangle 180 degrees using the Selection Tool (V) and bounding box and holding the Shift.
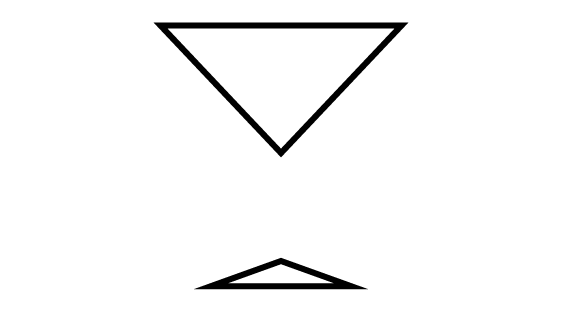
Change the height and width of the rectangle, as shown in the picture below. Use the Selection Tool (V) for this purpose. The beginning of a martini glass vector!
Step 4
Take the Rectangle Tool (M), position the pointer of the tool at the point A, then hold the Opt / Alt, create a rectangle elongated vertically.
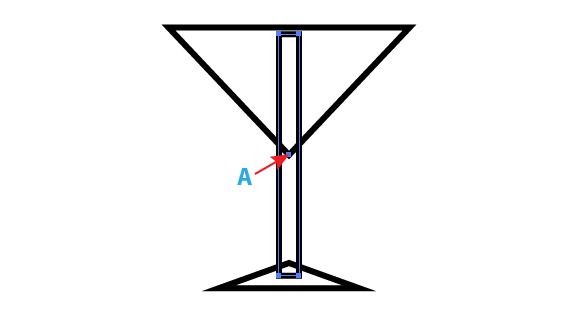
Select all the created objects, and then click Unite button in the Pathfinder panel.
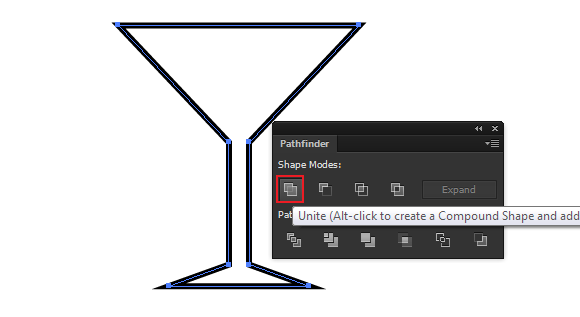
From simple geometric shapes we created the shape of martini glass vector.
Step 5
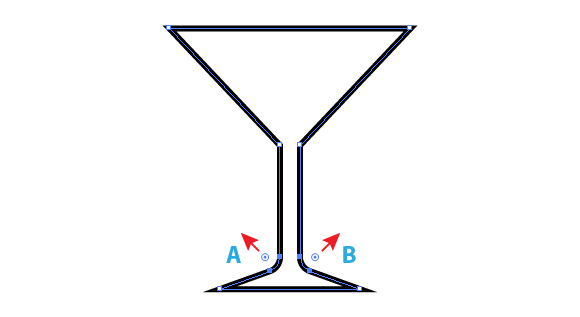
Take the Direct Selection Tool (A) and select the angles A and B. Change the rounding radii of these angles using Corner Widgets (View > Show Corner Widget). This feature is available only in the latest releases of Adobe Illustrator (CC17 – CC2014). If you are using earlier releases of the application, VectorScribe plug-in with Dynamic Corners Tool can be used for these purposes.
Step 6
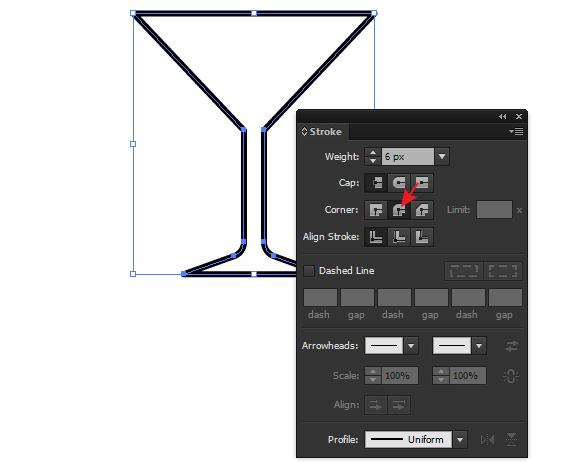
Set the stroke width equal to 6px and select Round Join for Corner in the Stroke panel (Window > Stroke). This will make the base of the martini glass vector not so harsh, and more realistic.
Turn off the fill of this object. Now using the Rectangle Tool (M) create a rectangle filled with black color. The sizes of this rectangle must correspond to the sizes of the background of your illustration. Place the shape of the martini glass vector above the black background and change the color of the stroke to white.

Step 7
Take the Scissors Tool (C) and cut the path at points A and B. Now, select and delete the smaller part of the path.

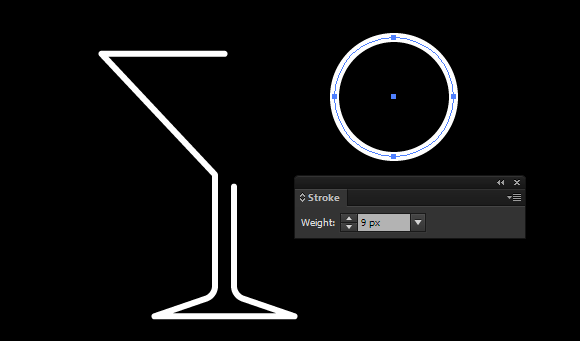
Step 8
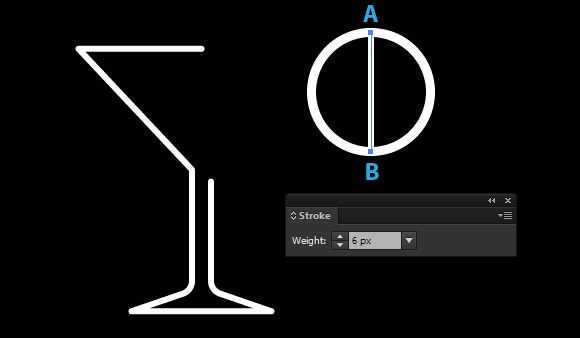
Proceed to the creation of slices of lime that will garnish your martini glass vector. Take the Ellipse Tool (L) and create a circle with no fill and stroke of white color. Set the stroke width equal to 9px in the Stroke panel.
Using the Line Tool (\) create a vertical straight-line segment between points A and B.
Now go to Object > Transform > Rotate … and in the opened dialog window set the angle of 45 degrees, and then click on the Copy button.
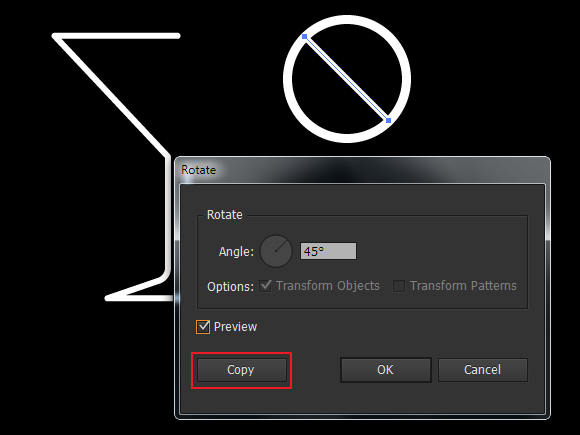
Press twice Cmd / Ctrl + D shortcuts for the consecutive repetition of the previous action.

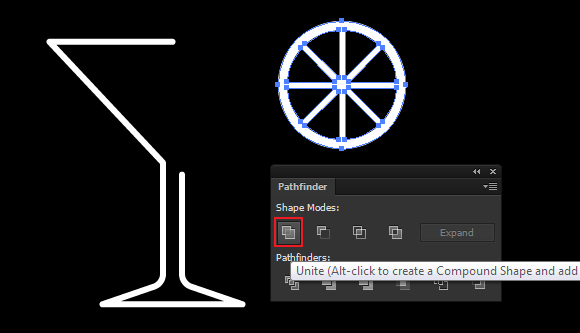
Step 9
Select all the elements of the lime, then go to Object > Path > Outline Stroke.
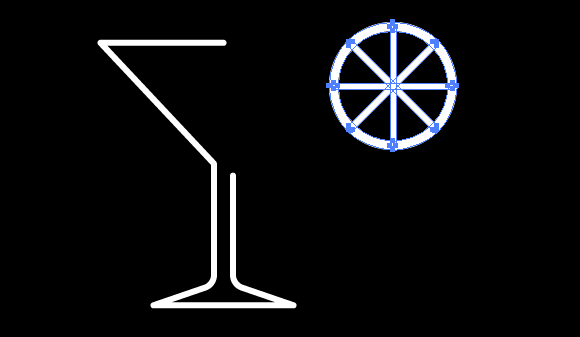
Now press the Unite button in the Pathfinder panel.
Take the Eraser Tool (Shift + E), hold Opt / Alt, and remove the lower part of the lime.
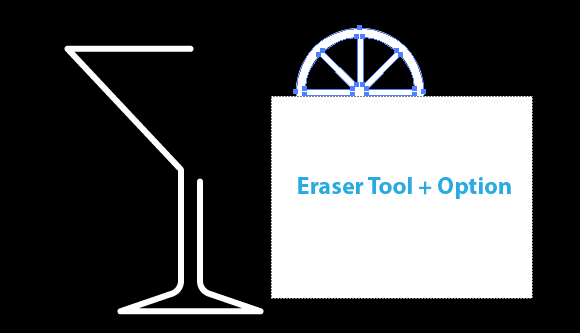
Rotate the object at 45 degrees using the Selection Tool (V) and bounding box and holding Shift. Place lime on the edge of the martini glass vector as shown below.

Group up the glass and lime (Cmd / Ctrl + G).
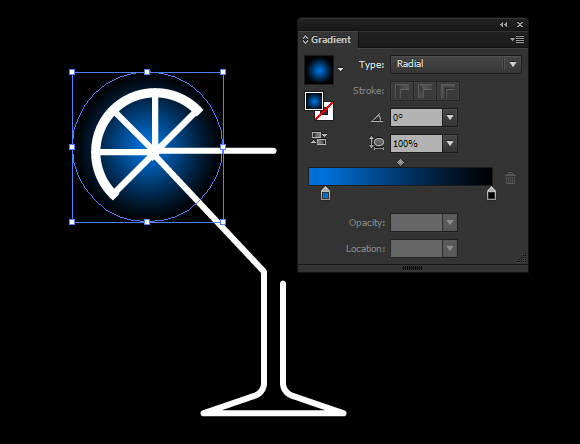
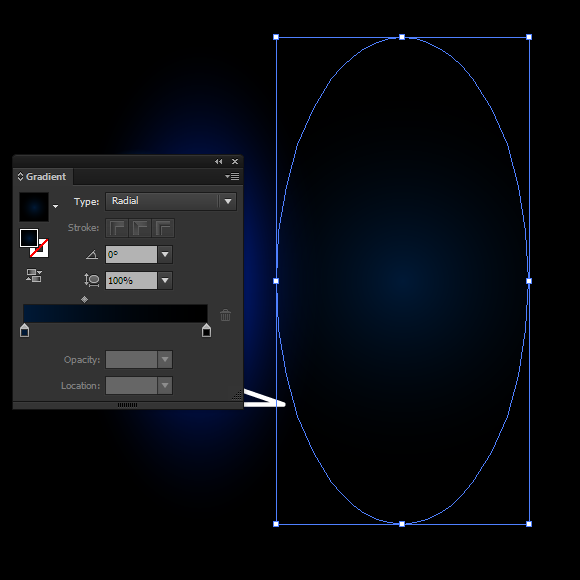
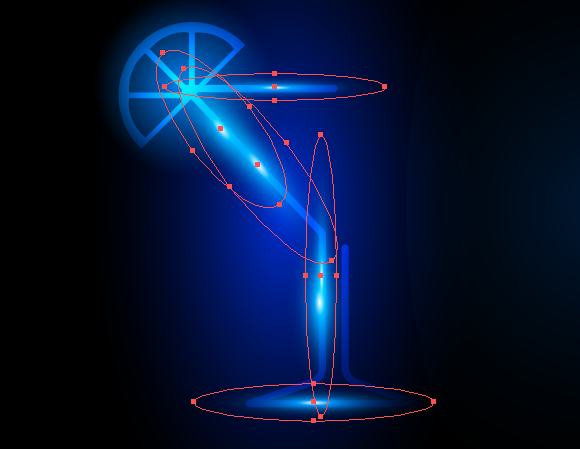
Step 10
Proceed to the creation of light effects. Draw a circle using the Ellipse Tool (L) and fill it with a radial gradient from blue to black. Place this circle below the group with white objects.
Create another circle with a similar fill, then transform it into an ellipse using the Selection Tool (V).
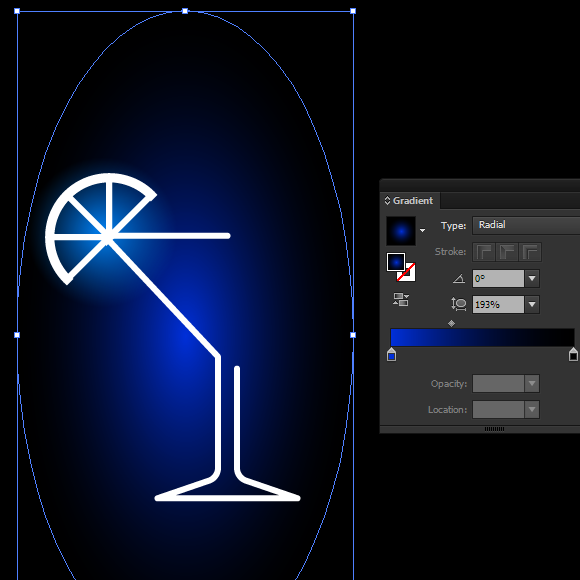
Using this technique, create the third ellipse with a radial gradient. Place this ellipse to the right of the glass. Blue color of the gradient is darker than in the previous cases.
Step 11
Select all ellipses, then set the Screen blending mode in the Transparency panel.
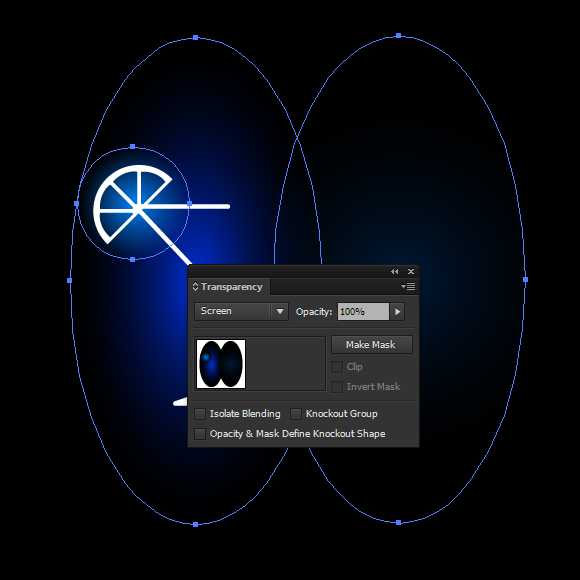
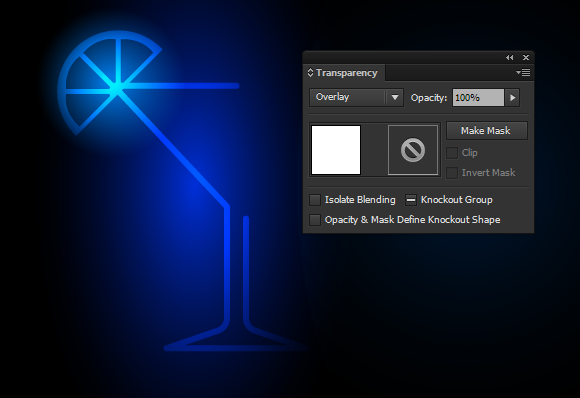
Select the group with white objects, then set the Overlay blending mode in the Transparency panel.
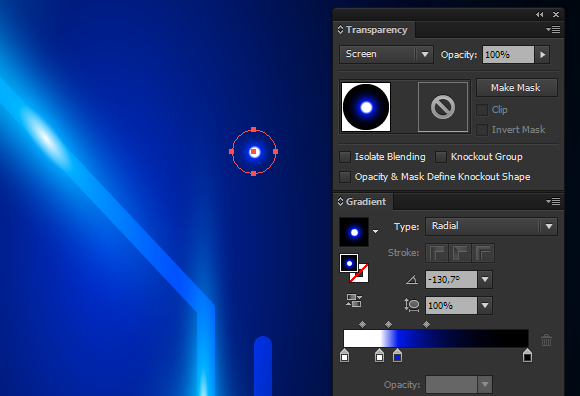
Step 12
Now we can locally create glare on the edges of the martini glass vector. Create a circle filled with a radial gradient, which includes two white, blue and black colors. Deform the circle into an ellipse, then apply the Screen blending mode to it.
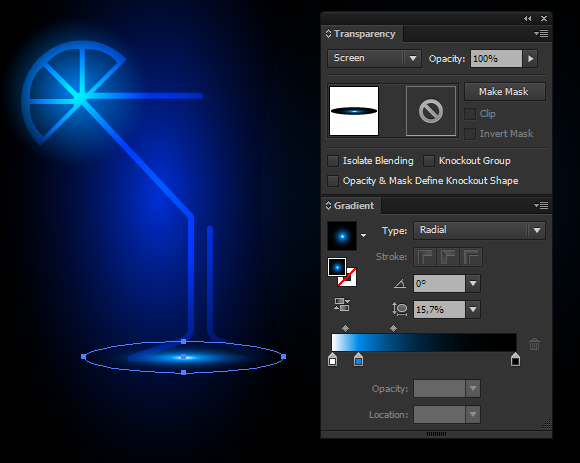
Place similar objects in places where you want to create glares.
Step 13
Proceed to the creation of light splashes. Draw a circle with a radial gradient fill, which contains two white, blue and black sliders. Apply the Screen blending mode to the circle.
Save the circle as a new symbol in the Symbols panel. Draw a new circle filled with a radial gradient from blue to black color and apply the Screen blending mode to it.
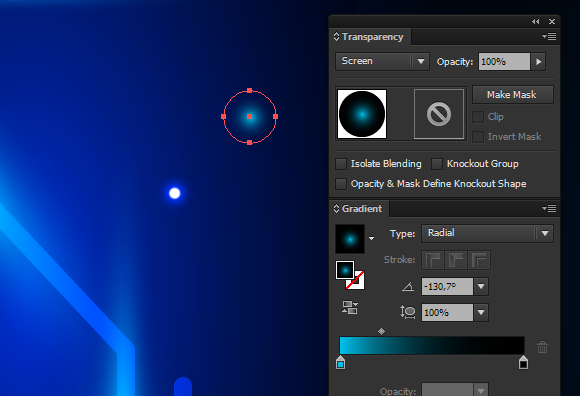
Keep this circle as a symbol in the Symbols panel.
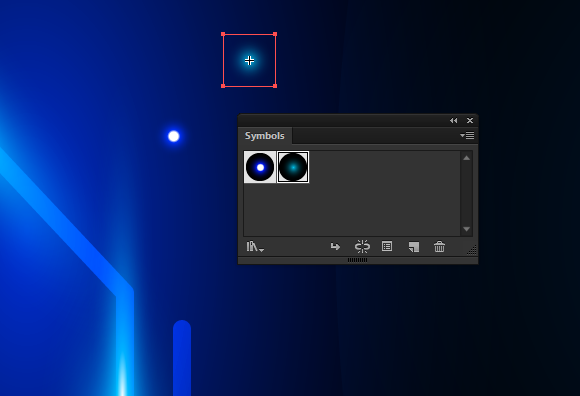
Step 14
Take the Symbol Sprayer Tool (Shift + S), select the first symbol and start spraying on the surface of the background.
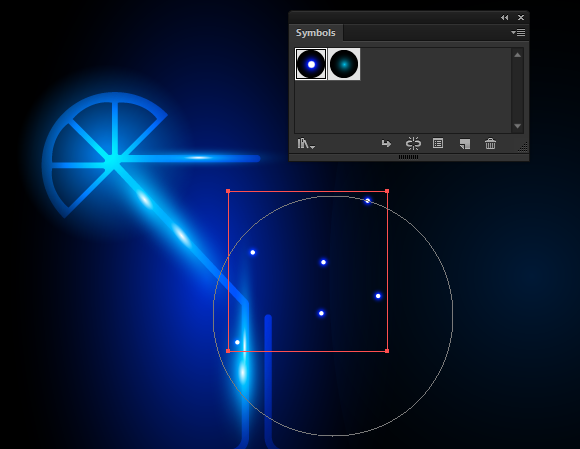
Now select the second symbol, and spray it.
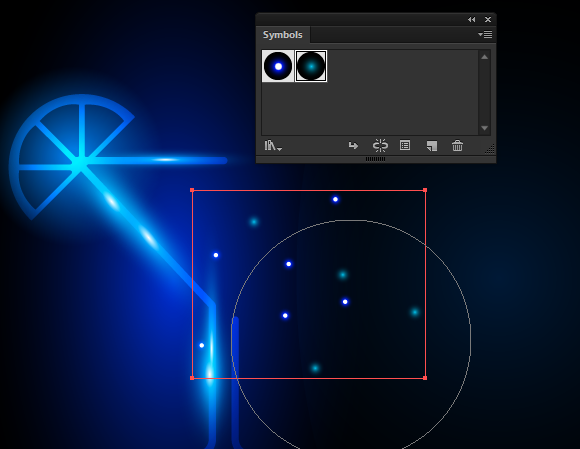
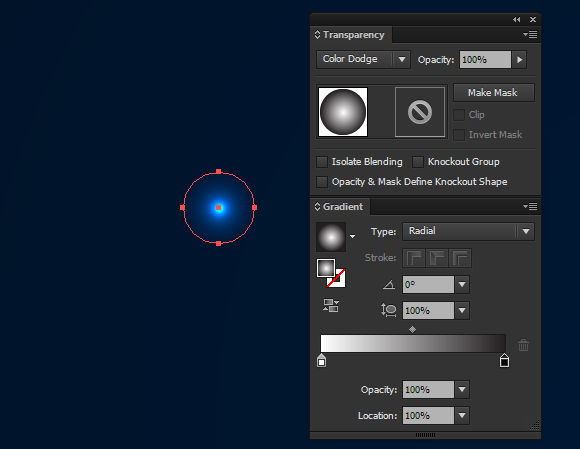
Step 15
Create less dense splashes. Draw a 3 by 3px circle filled with a radial gradient from white to black color and apply the Color Dodge blending mode to it.
Save this object as a symbol and is sprayed on the surface of the background using the Symbol Sprayer Tool.
Using symbols allows us to quickly create a large number of similar objects. In addition, you can quickly change the size of some of them. Symbol Sizer Tool is designed for that.
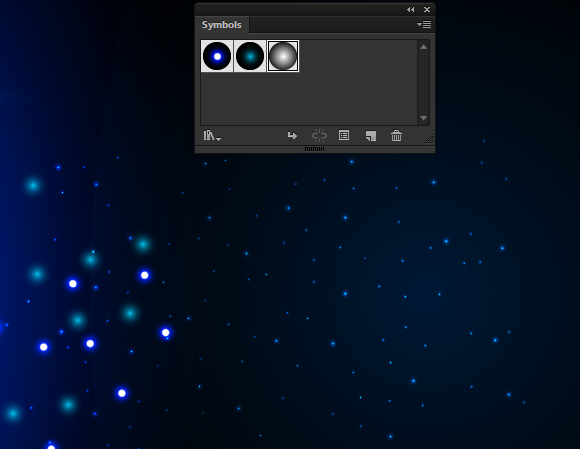
Step 16
After a few minutes of experimenting I got a splashes shown in the picture below – such a festive martini glass vector already!

For further acceleration of work, select and group up all the objects of splashes (Cmd / Ctrl + G). Now you can duplicate the group, resize, rotate and place its copies where needed.

I hope you will achieve good results! This martini glass vector would be perfect for any festive holiday, New Year’s Eve, a party invitation, or just to celebrate happy hour at the end of a work day. Cheers!

Author: Iaroslav Lazunov
My name is Iaroslav Lazunov, I am a graphic designer from Ukraine. I am glad that I finally found a job in my life that I can share my knowledge and experiments with you in my tutorials. Follow me on Twitter or visit my blog Vectorboom.com


Awesome tips. Thank you so much for the article
Am addicted to this site tips you are great. i will recommend you you to my friends.
Nice one thanks for tips……….
my gradients all have hard edges. the circle gradient behind the lime over the gradient behind the glass. do have another tutorial explaining your gradient technique? many thanks.
Love this!! Wish there were more tutorials up like this about making neat things. Really enjoyed creating this. Thanks so much!
Sorry, I just can’t do the step 11 the part when I put Overlay, all becomes black. Why? Help in this part please.
You should use RGB color mode (see step1).
awesome tip..!! I’m gonna impress my tutor by doing this as assignment..!! thnx for sharing..!!
i am stuck on step 11. so frustrated! for some reason the transparency does not alter at all.