In this tutorial, we’ll learn how to create an astronaut vector using simple shapes and trendy gradients! We’ll quickly go over steps to add depth and volume when designing out-of-this-world illustrations. Get ready to launch Adobe Illustrator in 3-2-1!
Final Image:

Tutorial Details – How to Create an Astronaut Vector:
- Program: Adobe Illustrator CS6-CC
- Difficulty: Intermediate
- Topics Covered: Shape Building, Gradient Tool, Pathfinder Panel, Move Tool, Clipping Masks
- Estimated Completion Time: 20 Minutes
Step 1
When you’re learning how to create an astronaut vector, you can start your design simply. We’ll begin our illustration by creating a New Document in 600 x 600 px size and RGB Color Mode (make sure you don’t select CMYK, as some of the effects won’t work).
Use the Rectangle Tool (M) to create a rectangle of the same size and fill it with dark purple color for the background.

Step 2
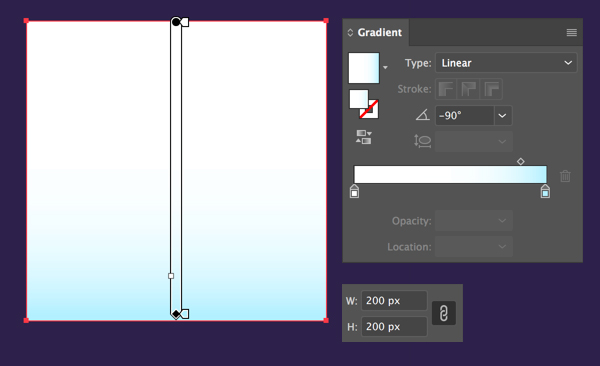
Start forming the helmet of the space suit by making a 200 x 200 px rectangle. Fill it with a linear gradient (white on top and blue in the bottom).
Use the Gradient panel (Window > Gradient) to select the Type of gradient, and use this panel to apply the desired colors to the sliders. From here, we can also adjust the direction of the gradient by setting the Angle to -90 degrees. Or we can use the Gradient Tool (G); just click and drag over the image while holding down Shift.
Step 3
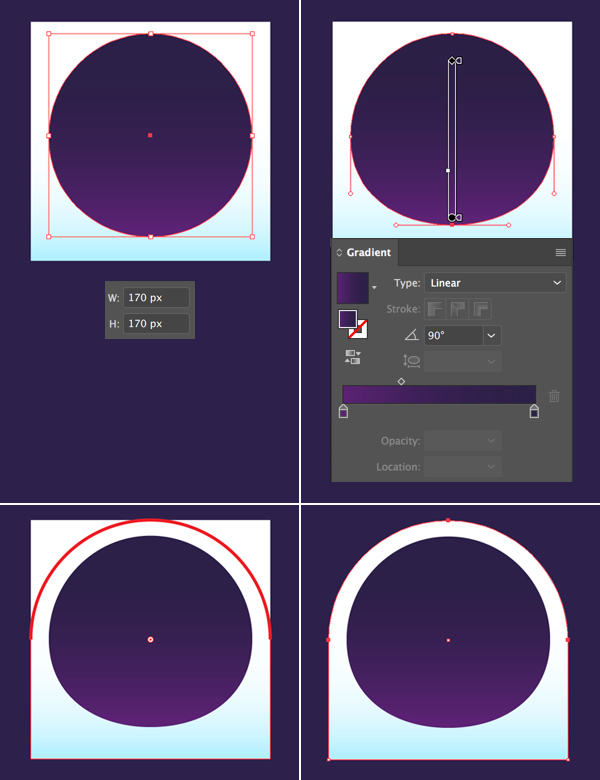
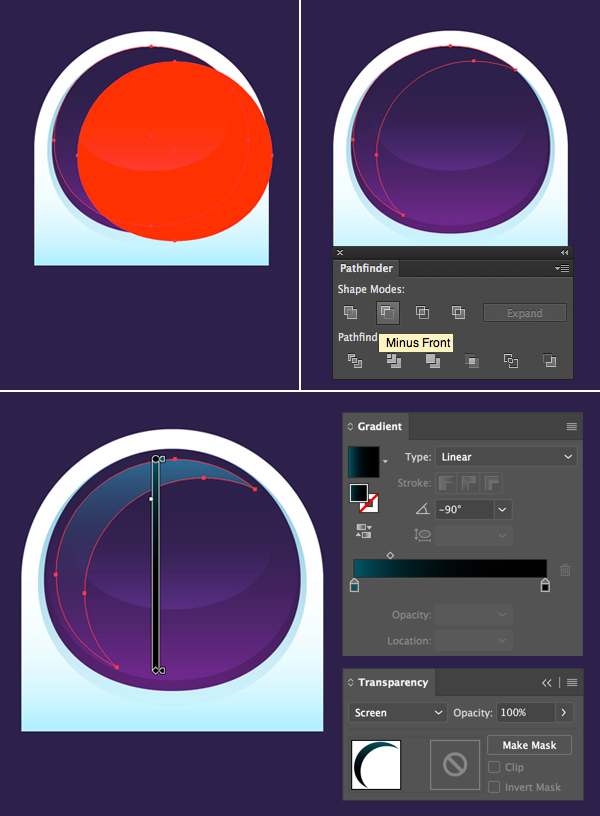
Now we’ll form the glass part of the helmet. Take the Ellipse Tool (L) and make a 170 x 170 px circle. Fill it with a vertical linear gradient (dark purple on top and lighter purple on the bottom).
We can also make its bottom part a bit flatter by selecting the bottom anchor point with the Direct Selection Tool (A) and moving it a few pixels up by pressing the up arrow key.
Get millions of stock images and videos at the best price
Unlimited access. No attribution required. Starts at just $9/month.

Continue using the Direct Selection Tool (A) to select the top left and right anchor points of the white rectangle. Then, pull the Live Corners circle marker to make the corners fully rounded. We can also adjust the Corner Radius from the control panel on top.
Step 4
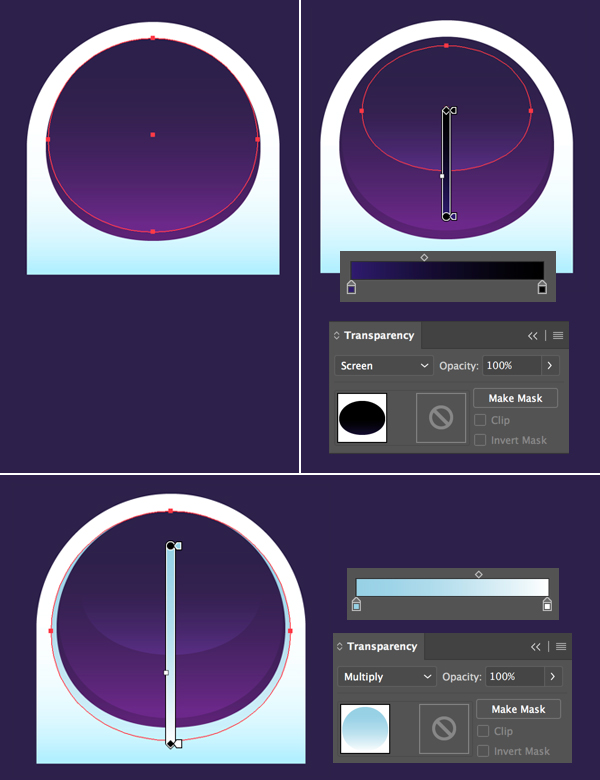
Let’s Copy (Control-C) the purple circle and Paste in Front (Control-F). Make it a bit smaller and adjust the colors of the gradient, making them brighter, so that the bottom circle forms a shadow.
Make another copy on top of the glass (Control-F) and reduce its size even more. Change the colors of the gradient to dark purple and black. Once you’ve done that, switch the Blending Mode to Screen in the Transparency panel. This way, we’re making the black part of the gradient fully transparent, forming a nice highlight on the glass’ surface.
Let’s select our first circle, and this time, Paste in Back (Control-B). Make the new copy slightly larger and fill it with a light gradient (blue to white). Switch its Blending Mode to Multiply, forming a gentle shadow.
Step 5
Let’s add another glossy overtone to the helmet. We still have our purple circle in the clipboard. Let’s Paste in Front twice (Control-F > Control-F) and Bring both copies to Front (Shift-Control-]). Move the top copy a few pixels down and to the right. Select both copies and apply Minus Front function of the Pathfinder panel to cut out the top circle, creating a crescent shape.
Make the shape a bit smaller and fill it with a vertical linear gradient (blue on top to black in the bottom). Switch to the Screen mode, creating a highlight.
Step 6
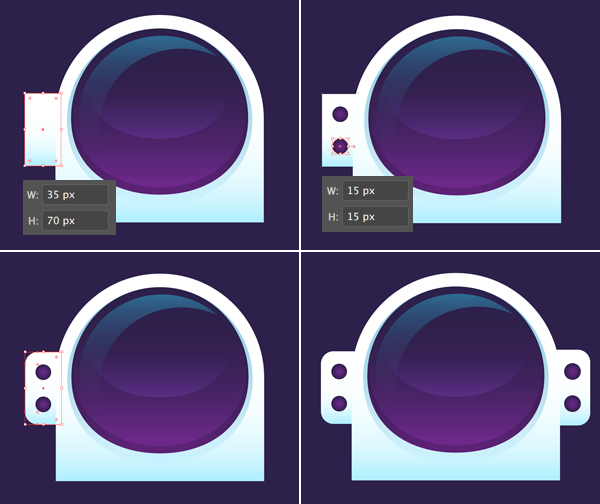
Now we’ll add the side parts of the helmet. Use the Rectangle Tool (M) to make a 35 x 70 px shape by the left side and use the Eyedropper Tool (I) to pick the white-blue gradient from the helmet.
Add two 15 x 15 px circles and fill them with a dark purple gradient (the same as we have for the glass), but this time, change the Type of the gradient to Radial.
Select the top and bottom left anchor points of the rectangle with the Direct Selection Tool (A), and use the Live Corners feature to make the corners rounded.
Make a copy of the created group of elements and attach it to the opposite side of the helmet, making the corners of the rectangle’s right edge rounded.
Step 7
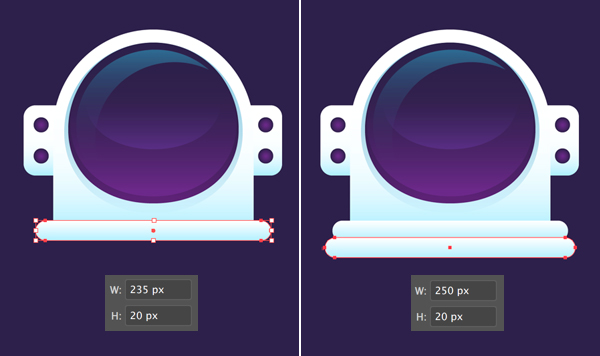
Let’s add a bottom to the helmet. Use the Rounded Rectangle Tool to make a 235 x 20 px rounded stripe. Create another rounded rectangle, this time in 250 x 20 px size, and attach it to the previous one.
Use the Align panel (Window > Align) if you want to have all the shapes perfectly centered. From there you can Horizontal Align Center everything to the Artboard.
Step 8
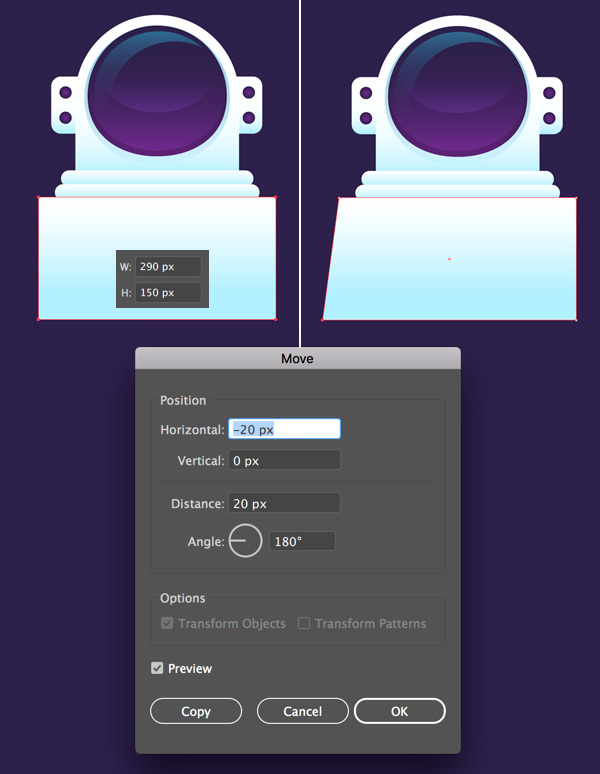
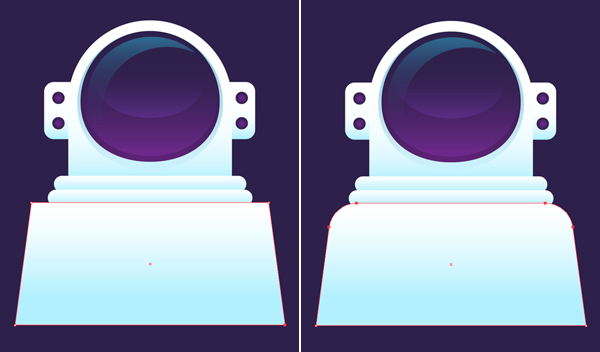
When I was perfecting how to create an astronaut vector for this tutorial, I noticed giving the character a body really made it pop. So, our next step is to design the astronaut’s torso. You can do this by creating a 290 x 150 px rectangle for the body, then applying the same white-blue gradient.
Select its bottom left anchor point with the Direct Selection Tool (A), and hit the Enter key to open the Move options panel. From here, set the Horizontal value to -20 px and Vertical to 0 px. Click OK to move the point 20 px to the left.
Step 9
Repeat the same for the opposite anchor point, but this time, set the Horizontal value to 20 px, thus moving the point 20 px to the right.
Select both top anchor points with the Direct Selection Tool (A) and make them slightly rounded, forming the shoulders.
Step 10
Let’s add a gentle shadow to the suit. Make a squashed ellipse and place it over the top of the shoulders, as shown in the image below. Make a copy of the body shape and Paste it in Front (Control-C > Control-F). Select both the body copy and the ellipse, and apply the Intersect function of the Pathfinder to cut off the unneeded pieces of the ellipse.
Finally, fill the remaining shape with blue-white linear gradient, and switch its Blending Mode to Multiply.

Step 11
Let’s add a few more elements to the space suit. Make a 75 x 75 px circle with dark blue linear gradient. Duplicate (Control-C > Control-F) it and make the copy slightly smaller (50 x 50 px) and its colors slightly lighter.
Add a rounded rectangle by the right side of the circles.
Now we can finally group (Control-G) all the elements of the astronaut together.

Step 12
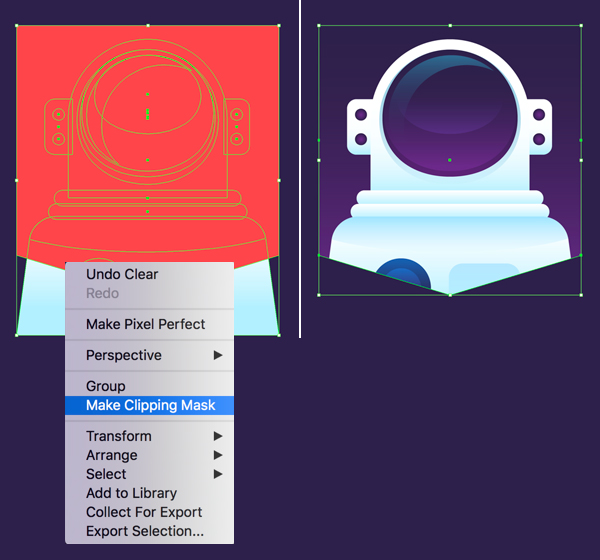
Now that our astronaut is ready, let’s add a simple frame to hide the bottom part of the suit. Create a 330 x 290 px rectangle of any color and add an anchor point in the middle of its bottom edge. You can do this using either the Pen Tool (P), or via Object > Path > Add Anchor Points.
Select the created point and press Enter to open the Move window. This time set the Horizontal value to 0 px and Vertical to 50 px, moving the point 50 px down.

Step 13
Now select the astronaut together with the top shape. To do this, click the right mouse button, then select Make Clipping Mask. This way, we’re placing all the objects inside the top shape (like the inside of a container).
As you can see, I have a gentle purple gradient beneath the astronaut. We can make it either by using the copy of the top shape, or we can add a rectangle with dark purple gradient beneath the astronaut (inside the Clipping Mask).
Step 14
Looking great so far! We’re almost done learning how to create an astronaut vector. Now we can add any minor details to our liking. For example, I’ve speckled some circle stars around the astronaut to make the composition look completed.

Houston, we now know how to create an astronaut vector!
Great job, guys! I hope you’ve enjoyed following this tutorial. Hopefully you now know how to create an astronaut vector, and maybe you even discovered some new tips and tricks along the way. Use what you’ve learned in this tutorial to keep designing, illustrating, and creating.
And remember, have fun!