
 In this tutorial, we’ll create a simple windmill vector in a trendy, flat style—all in just 10 steps! Learn about basic geometric shapes, strokes, the Free Transform Tool (E), and handy shortcuts in Adobe Illustrator. Let’s start!
Tutorial Details – Flat Windmill Vector
- Program: Adobe Illustrator CS6 – CC
- Difficulty: Intermediate
- Topics Covered: Shape Building, Stroke panel, Free Transform Tool (E)
- Estimated Completion Time: 20 minutes
Final Image: Flat Windmill in Adobe Illustrator

Step 1
To start making your windmill vector, first take the Rectangle Tool (M) and make a base of our building from a 120×140 px white rectangle.
Now grab the Free Transform Tool (E) and click and hold one of the top anchor points. Press Alt-Control-Shift and move the point closer to the center of the top edge, this way making the top of the rectangle narrower.

Step 2
Use the Pen Tool (P) to make an additional anchor point in the center of the top edge or go to Object > Path > Add Anchor Points.
Select the created point with the Direct Selection Tool (A) and drag it up, making the roof of the building pointed.

Step 3
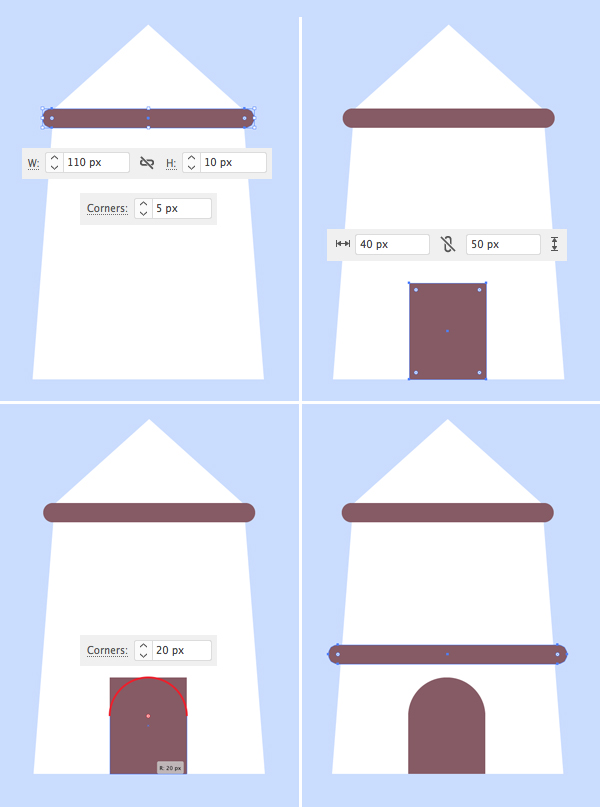
Use the Rounded Rectangle Tool to create an 110×10 px brown shape with 5 px Corner radius at the top of the building.
Use the Rectangle Tool (M) to add a 40×50 px shape for the door. Select both top corners of the door using the Direct Selection Tool (A) and pull the circle markers of the Live Corners to make the top of the shape 20 px rounded.
Add another rounded rectangle above the door.
In order to make sure that everything is centered perfectly, select all the elements and click Horizontal Align Center in the Align panel (Window > Align).
Step 4
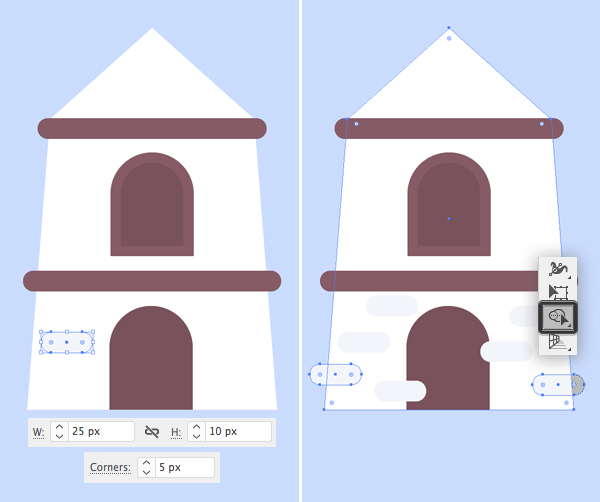
Select the door using the Selection Tool (V), hold Alt-Shift and drag it up, creating a copy to depict the window.
Keeping the created copy selected, go to Object > Path > Offset Path. Set the Offset value to -5 px and click OK. Make the frame of the window a bit lighter.

Step 5
Let’s add some bricks to the bottom half of this windmill vector. Make a 25×10 px light-grey rounded rectangle with 5 px corners radius.
Add more bricks and make some of them cross the edges of the mill.
Select the mill and the bricks that are crossing the edges. Take the Shape Builder Tool (Shift-M), hold Alt and click the pieces that we need to delete.
Step 6
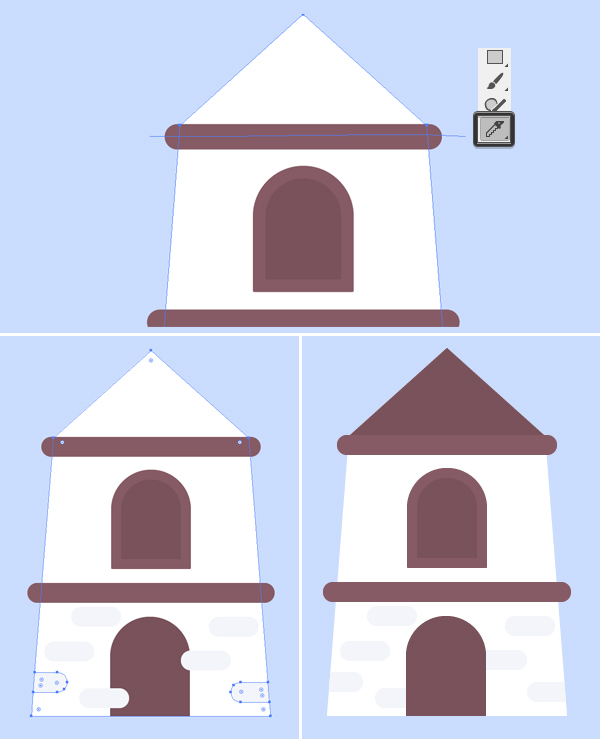
Now let’s color the roof. Select the base of the mill and duplicate it (Control-C > Control-F). Keeping the top copy selected, take the Knife tool and make a line across the building, separating the triangular top.
Now we can select the created triangle with the Direct Selection Tool (A) and change its color to dark-brown.
Step 7
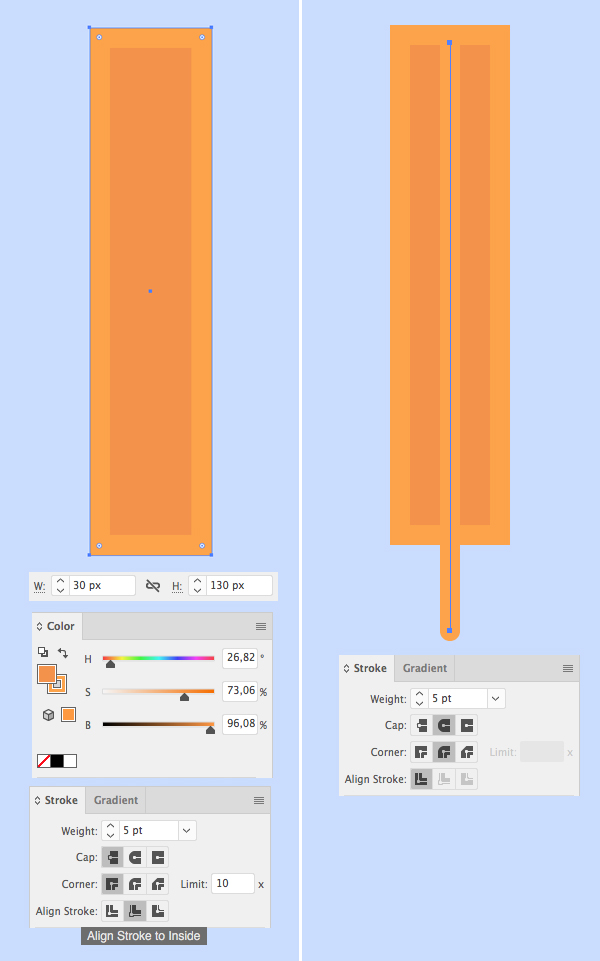
Let’s make the arm of the mill from a 30×130 px rectangle. Set its Fill color to dark-orange and its Stroke color to lighter orange. Open the Stroke panel (Window > Stroke) and set the Weight to 5 pt, Align Stroke to Inside.
Use the Line Segment Tool (\) while holding down Shift to make a vertical stroke across the rectangle. Set its Weight to 5 pt. Use the Align panel to center both shapes horizontally.
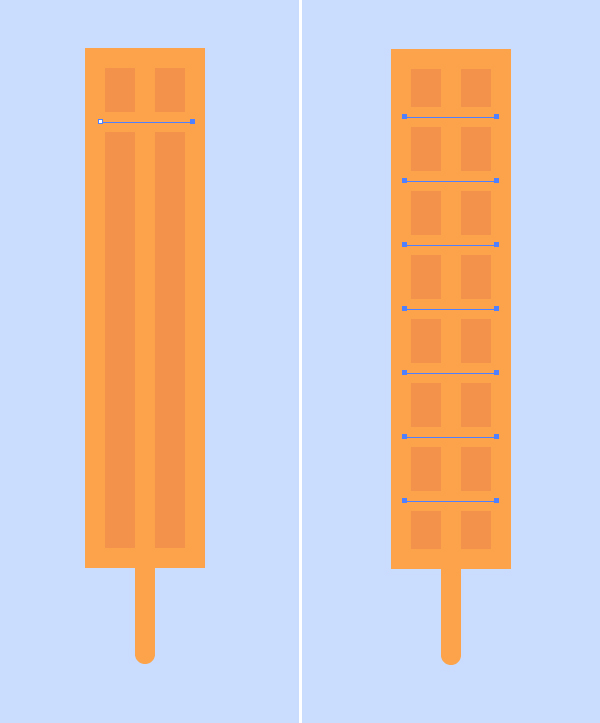
Step 8
Add a short horizontal stroke across the rectangle. Select it with the Selection Tool (V), hold Alt-Shift and drag down to create a copy. Press Control-D multiple times to create more copies.
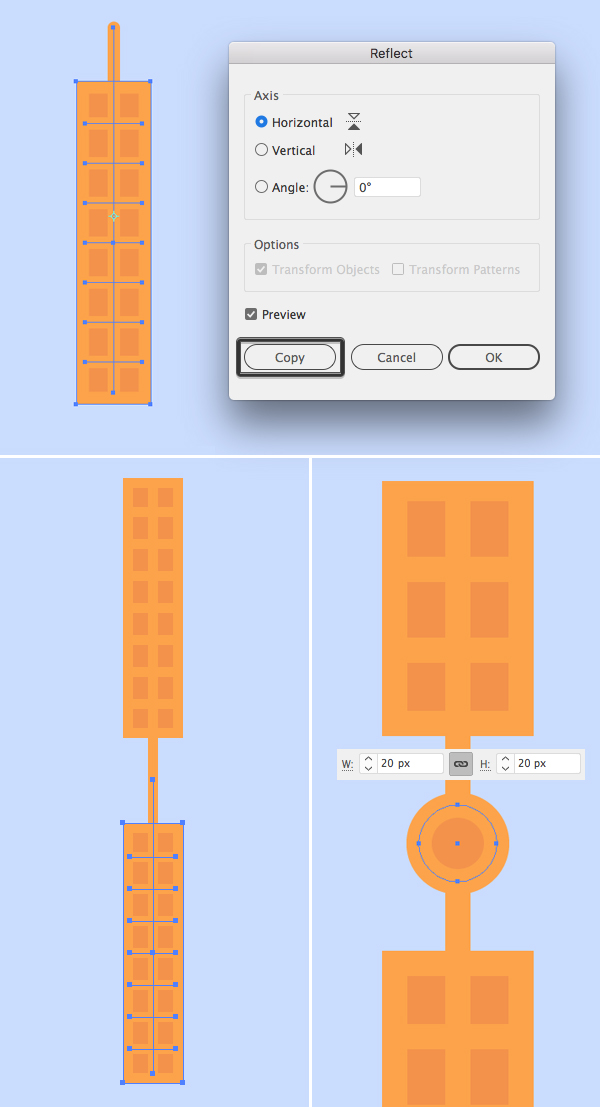
Step 9
Group (Control-G) all the elements of the arm and double-click the Reflect Tool (O). Flip the object over the Horizontal Axis and click Copy.
Hold Shift and drag the copy down. Create a 20×20 px circle at the point where two arms meet.
Step 10
Select the two arms that we’ve created and duplicate (Control-C > Control-F) them. Rotate the copies 90 degrees using the Selection Tool (V).
Attach the arms to our mill and rotate the construction 45 degrees.
Add minor details to the mill – a rounded rectangle at the bottom edge and two crossed planks in the window.

Congratulations! Our Windmill Vector is Ready!
Use the Rounded Rectangle Tool if you want to make the composition look a bit more completed by adding a ground and the clouds.
You’re all done! I hope you’ve enjoyed following this simple tutorial and learned some new tips and tricks! Use them to create new flat illustrations and have fun!
Author: Yulia Sokolova
2D/3D artist and tutorial instructor, focusing on character creation, icons, lettering design, and illustrations.


Thank you very much for the tutorial …it’s very useful for me to teach my students.
Thanks for the tutorial! Very easy, and a nice introduction to flat illustration!
This is such a great tutorial. I love flat design.