
In this tutorial I will show you how to turn your doodles and sketches into vectors! This tutorial uses custom brushes, the Paintbrush tool, Pen tool, and the Live Paint Bucket tool. Even if your not a huge fan of the cuteness, you can use these techniques for other illustrations, logos, and vector elements.
Final Image
Below is the final image we will be working towards.

Tutorial Details
Program: Adobe Illustrator CS4
Difficulty: Intermediate
Topics Covered: Custom Brushes, Paintbrush Tool, Live Paint Bucket tool
Estimated Completion Time: 1-1.5 hours
Step 1
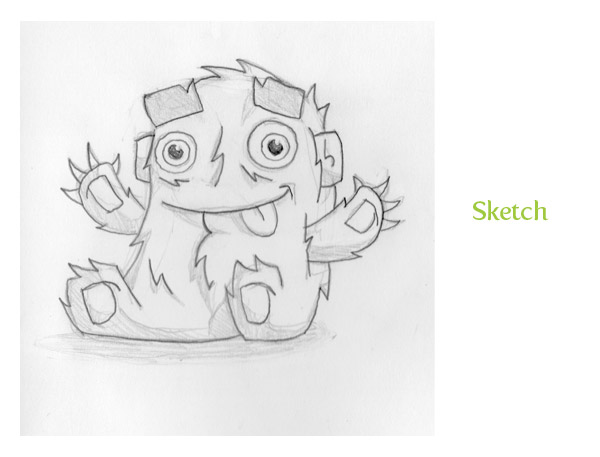
Create a sketch with traditional media or in a design application like Photoshop. Once created, scan in the image and save it on your computer.
Step 2
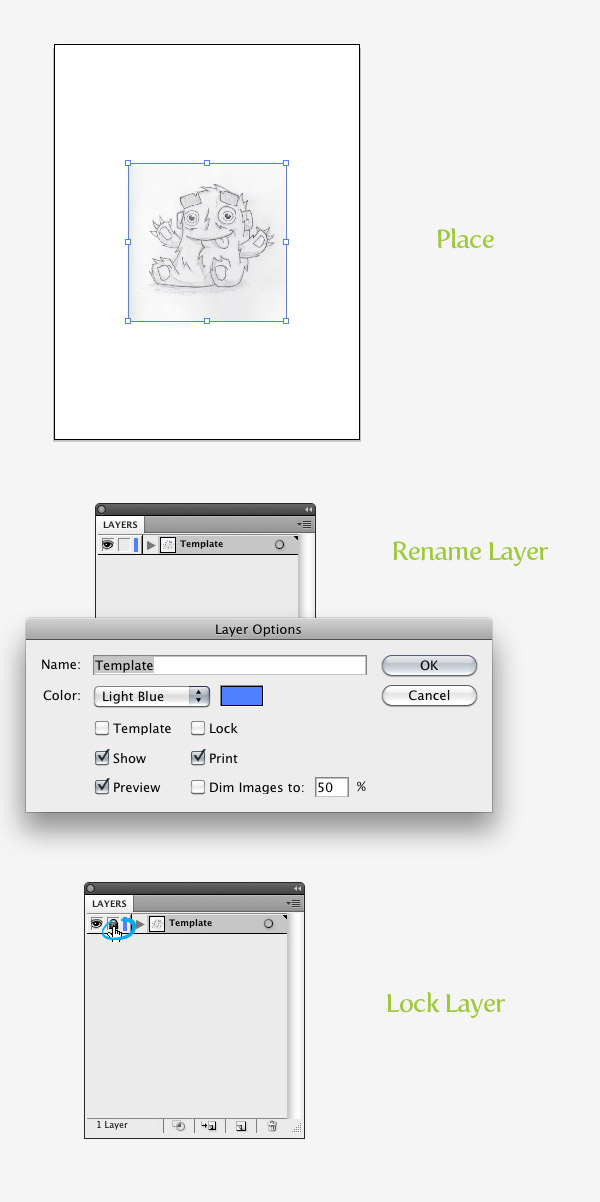
In Illustrator, create a new document, go File > Place, find your image, and place it on your document. From the Layers panel, rename the current layer by double-clicking on layer and typing “Template”. Next, press the Lock icon for the “Template” layer from the Layers panel.
Step 3
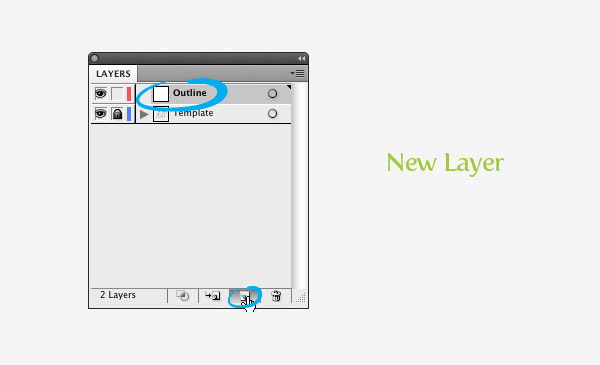
Press the Create New Layer button from the Layers panel and rename it “Outline”.
Step 4
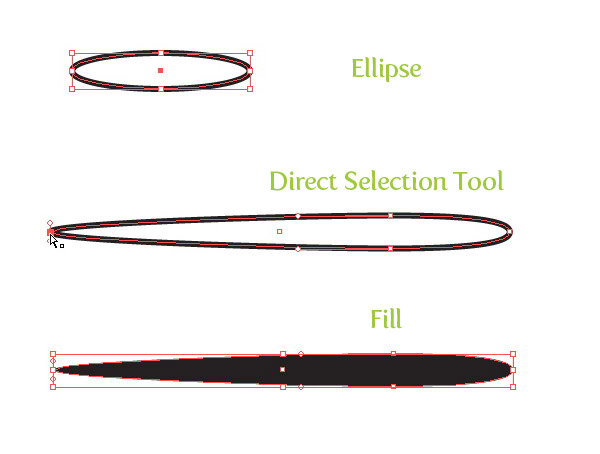
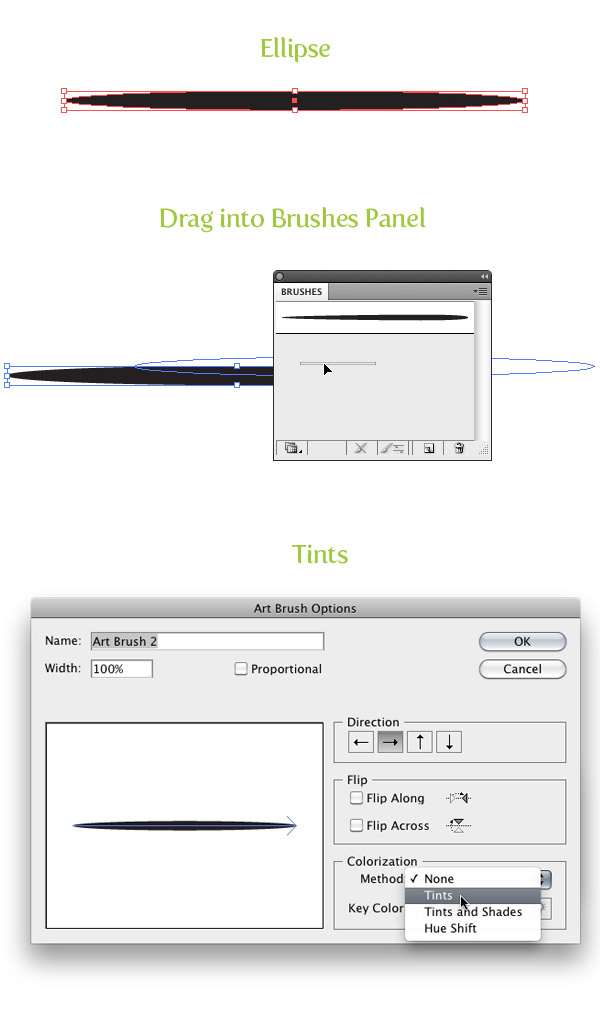
For the outline of the creature we are going to create two custom Art Brushes. For the first one, use the Ellipse tool (L) and create a oblong ellipse. With the Direct Selection tool (A) grab the left anchor point and drag it to left, doubling its width. Next, take off any stroke and fill it with black.
Step 5
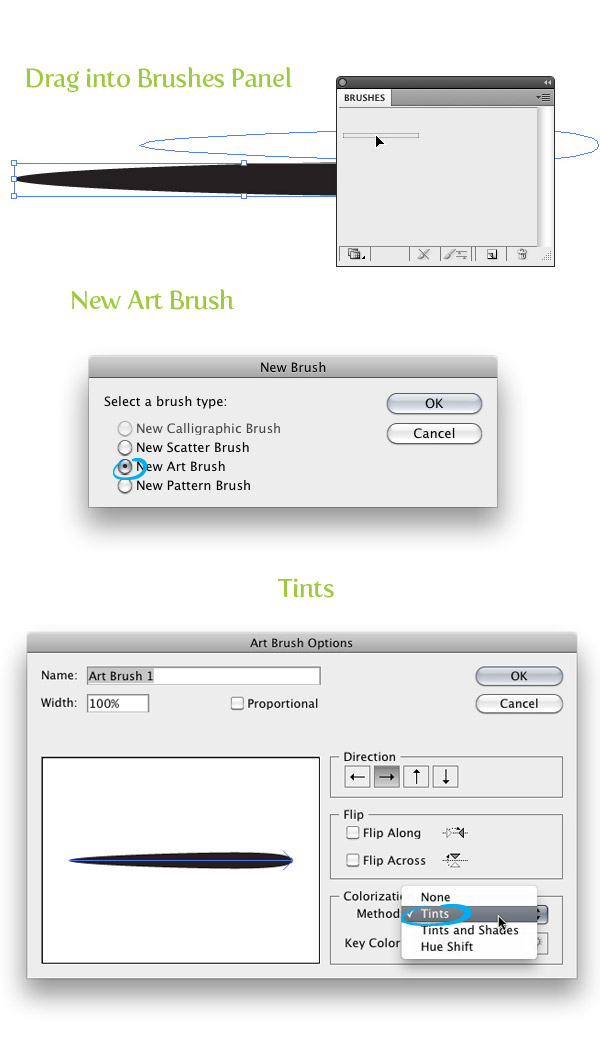
Drag the new ellipse shape into the Brushes panel and choose New Art Brush from the New Brush dialog. With the Art Brush Options dialog open, keep the default options except change the Method to Tints from the Colorization Method drop-down menu.
Step 6
For the second custom brush, create a very narrow ellipse and fill it with black. Like in the previous step, create a new Art Brush and set the Colorization Method to Tints.
Step 7
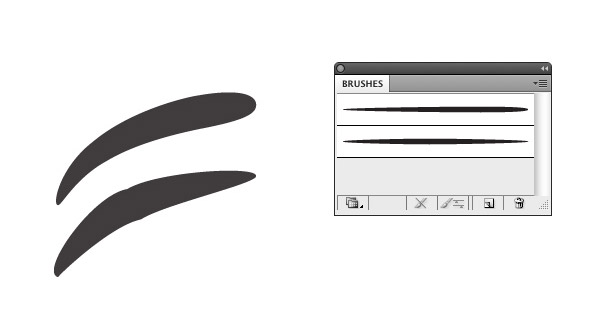
Now that we have our two custom brushes, we can start tracing the sketch, But before we start, there are some tips you should be aware of.
Paintbrush tool or Pen tool
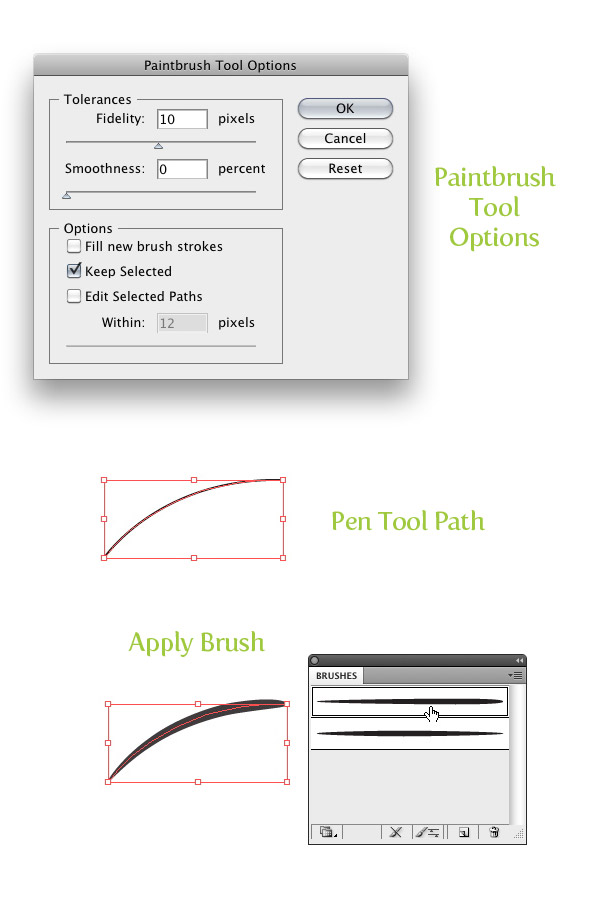
You can use the Pen tool (P) or Paintbrush tool (B) to create the paths that you will apply the custom brushes to. I prefer to use the Paintbrush tool (B) because it is quick and your selected custom brush is automatically applied to the path. If you are going to use the Paintbrush tool (B), it is a good idea to set some of the Paintbrush tool’s (B) options. To do this, double-click on the Paintbrush tool (B) from the Tools panel. When the Paintbrush Tool Options dialog opens, change the Fidelity to 10. This creates a smooth line with using the Paintbrush tool (B). If you are going to use the Pen tool (P), simply selected your created path and select the desired brush from the Brushes panel.
Avoid Paths with Sharp Angles
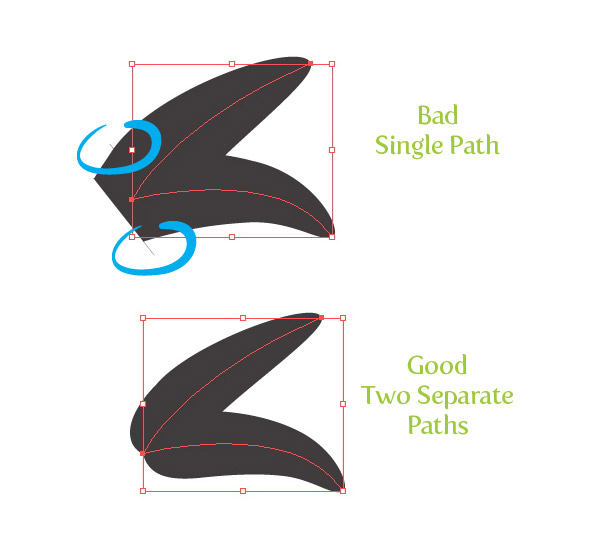
When creating stroked paths with the custom brushes I try to stay away from creating paths with angle less then 90 degrees. As you can see in the example below, Illustrator tends to add weird remnants in angled paths. To get around this I use two different paths each with minimal anchor points. Curvier paths are usually alright.
Use Stroke Weight
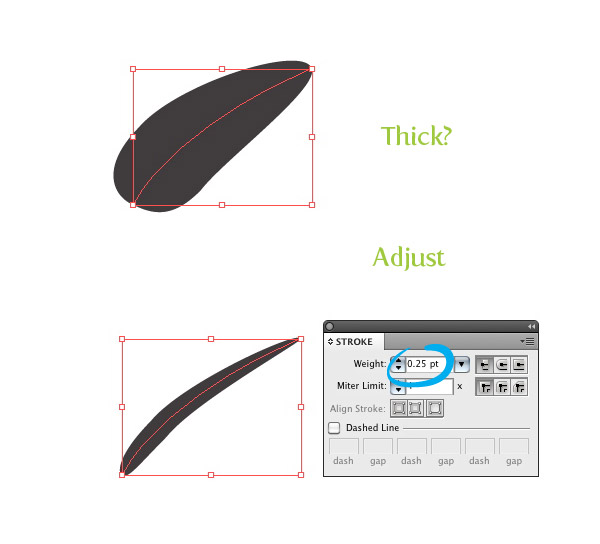
If the brush you apply is too thick, you can adjust the Stroke Weight form the Stroke panel.
Alternate Brushes
Use the different brushes we created to add line variance in the trace. I use the first brush when I want a stroke thicker at one end compared to the other.
Change Direction of Brush
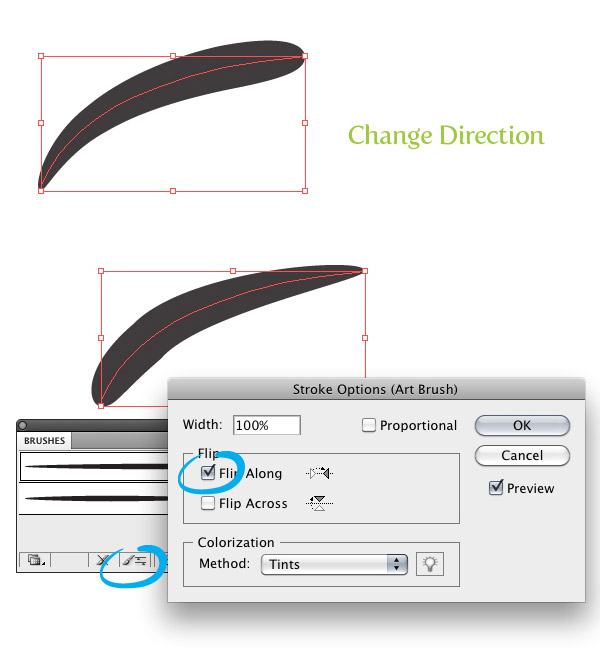
To change the direction of the brush stroke, select your stroke and press the Brush Options button at the bottom of the Brushes panel. In the Stroke Options dialog, you can check the Flip Along or Flip Across check-box until you reach the desired direction. This works great for the first brush we created. Depending on the path, you might need to switch the direction so the thick or thin part of the stroke is on the desired side of the path.
Step 8
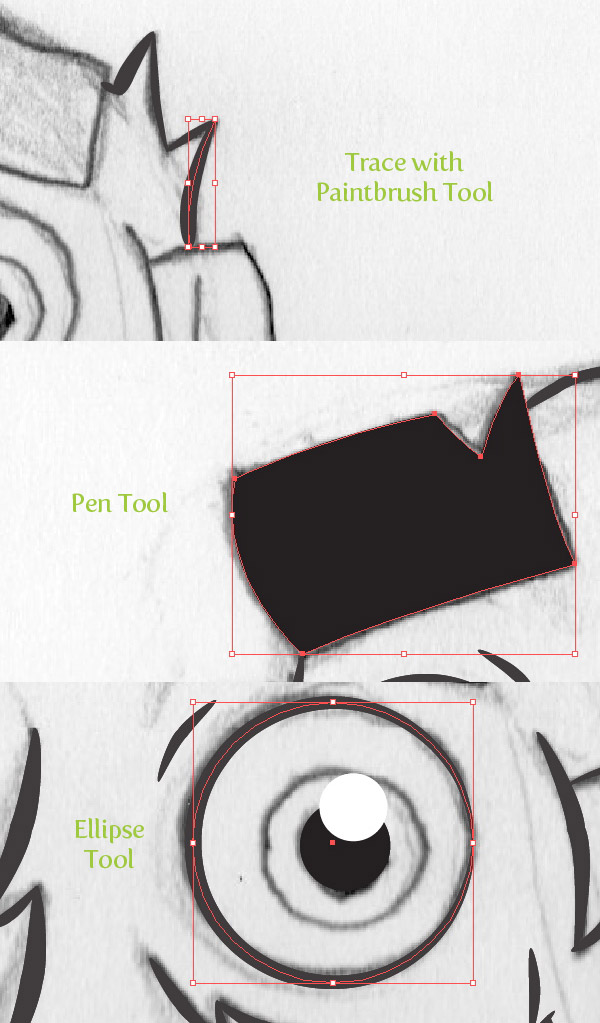
With the Paintbrush tool (B) or Pen tool (P) start tracing your sketch making sure you are in the “Outline”layer and you are thinking about the tips in the step above. For the shapes that will be filled black, use the Pen tool (P) to create the shape. You can also use the Ellipse tool (L) or Rectangle (M) for any shapes like the eyes of the creature.
Step 9
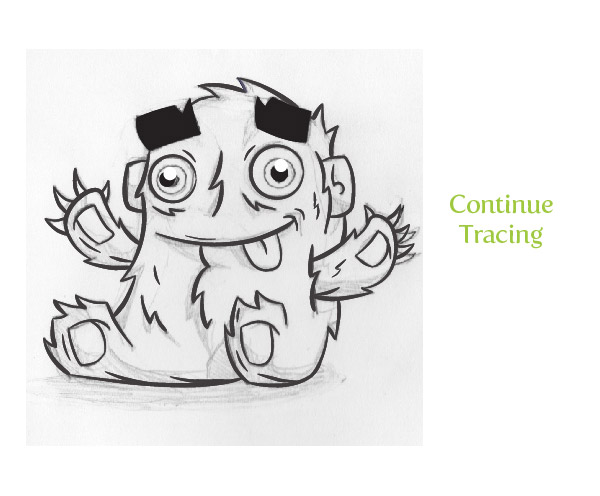
Finish outlining all the dominate lines and shapes of the sketch.
Step 10
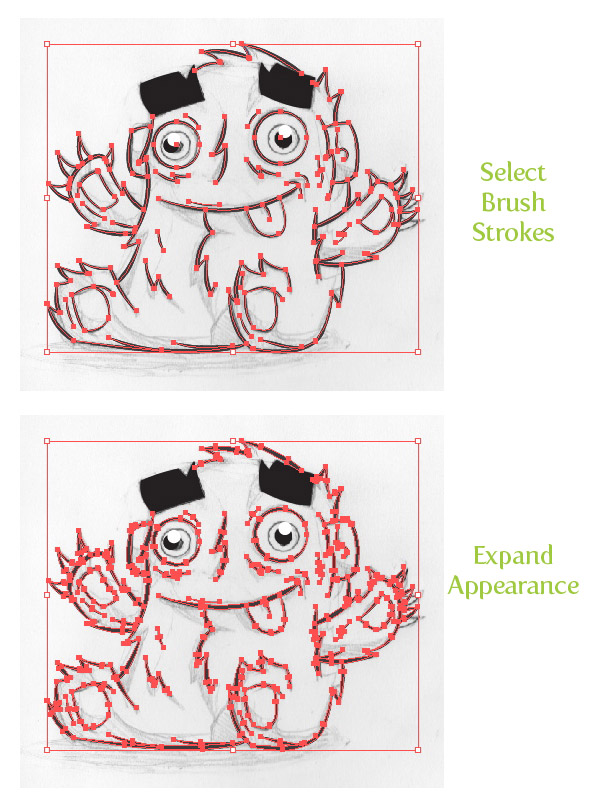
Select all the brush strokes by going Select > Object > Brushed Strokes and the go Object >Expand Appearance.
Step 11
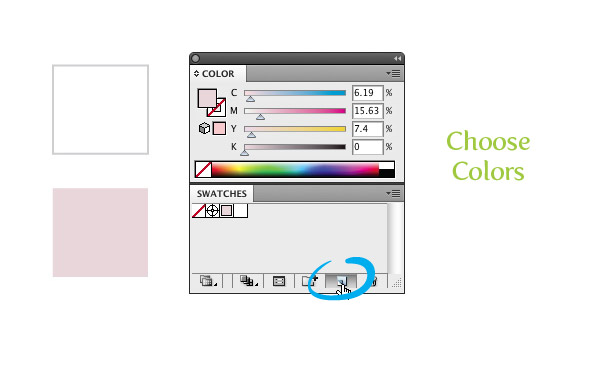
Now that we are done creating the outlines for the character we can start coloring the illustration with the Live Paint Bucket (K). First select a set of main colors for the creature. I chose pink and white. You can create these colors by mixing them in the Color panel and pressing the New Swatch button in the Swatches panel.
Step 12
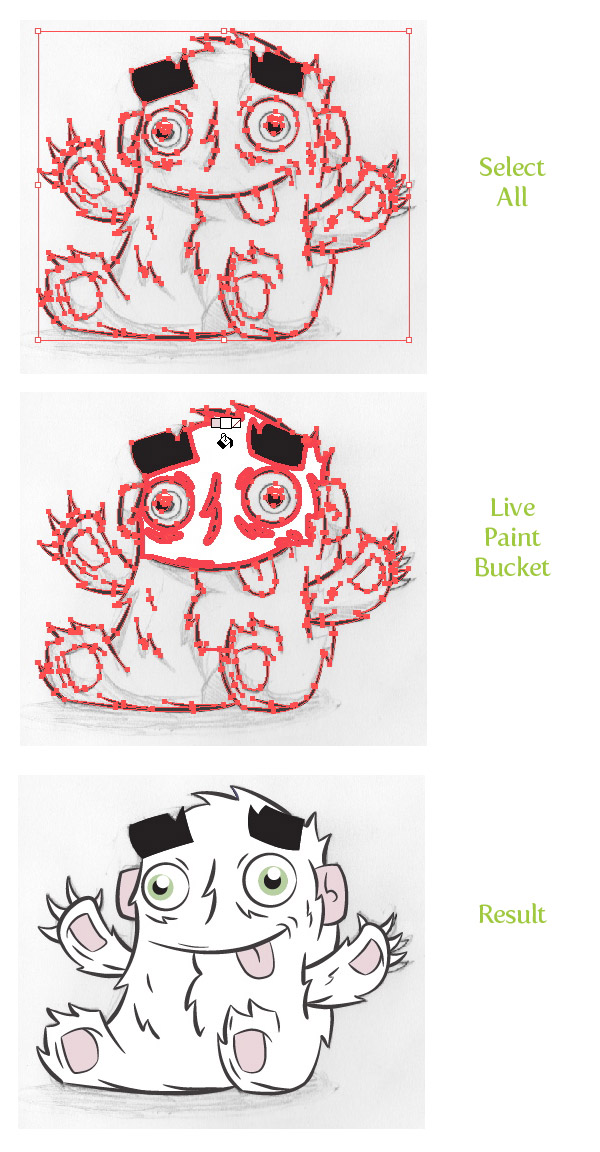
Select all your artwork and choose the Live Paint Bucket (K) from the Tools panel. This will automatically convert the artwork into a Live Paint Group. With the Live Paint Bucket, hover over the open spaces you want to fill. Use the arrows keys to cycle through the colors you want to fill the spaces with. When you cycle to the desired swatch, click in the desired open area to fill it.
Step 13
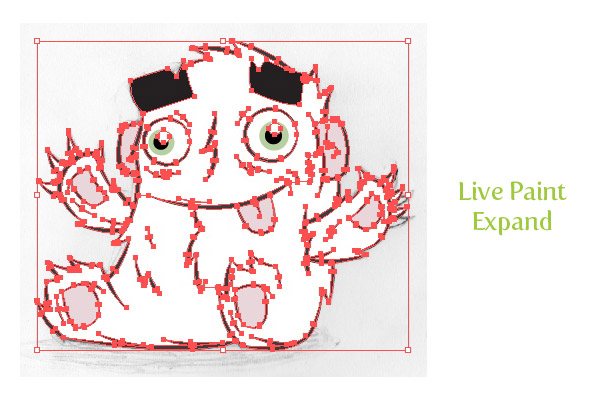
Select the Live Paint group and go Object > Live Paint > Expand.
Step 14
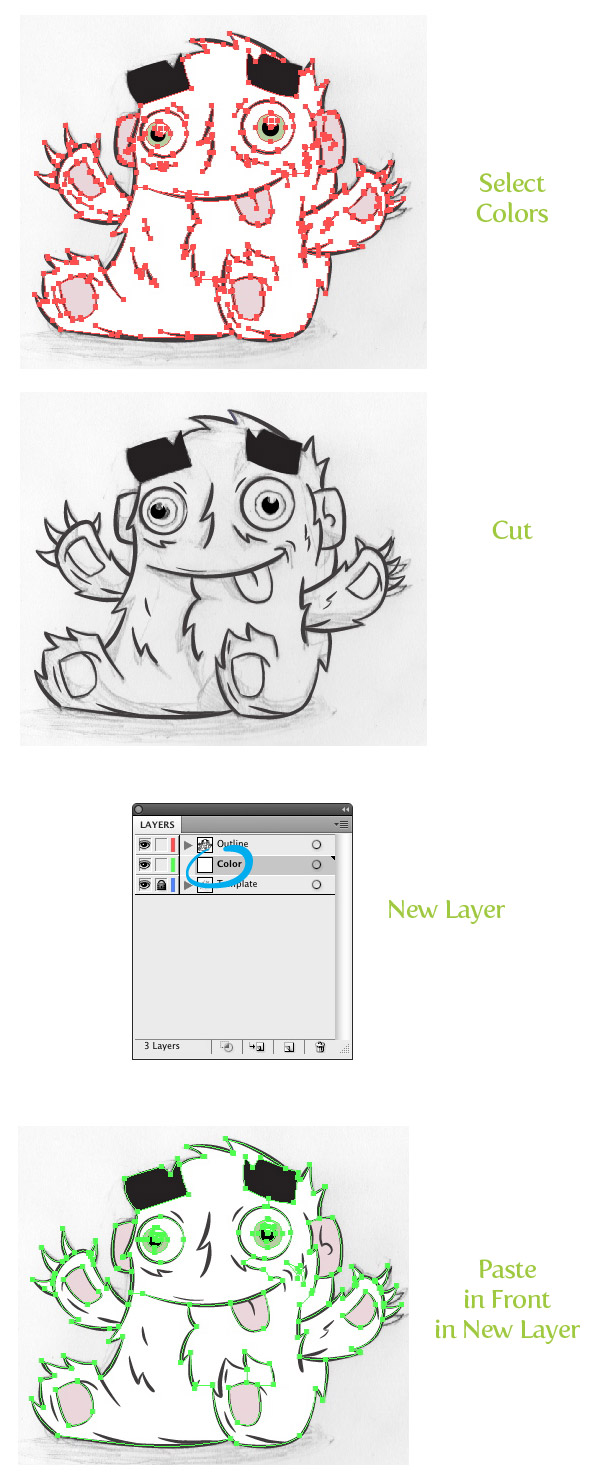
Now that the Live Paint Group is expanded, use the Magic Wand tool (Y), hold down the Shift Key, and select all the colors in the artwork. Once selected, Cut (Command + X) the shapes. Create a new layer from the Layers panel, label it “Color”, place the new layer below the “Outline” layer and Paste in Front (Command + F) the colored shapes.
Step 15
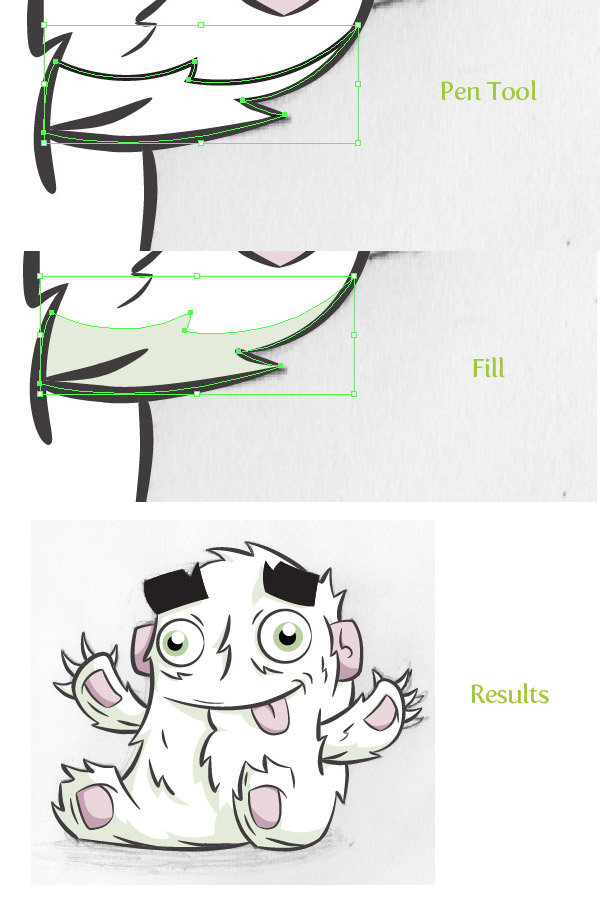
The creature is looking pretty good, but let’s add some shadows to give it more depth. With the Pen tool (P), create shadow shapes in the “Color” layer. Fill the shadow shapes with darker colors than your original colors. Continue until you have created all the shadow shapes.
Step 16
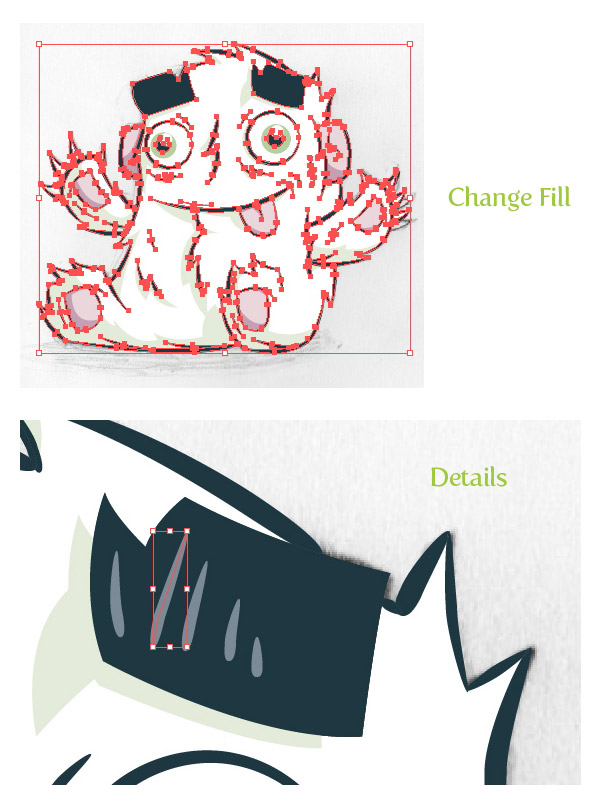
To make the colors a little more vibrant, change the fill color of the outlines in the “Outline” layer. I also used one of my custom brushes to add more detail to the eyebrows. This is a good point to touch up or add any more detail you think the illustration is lacking.
Step 17
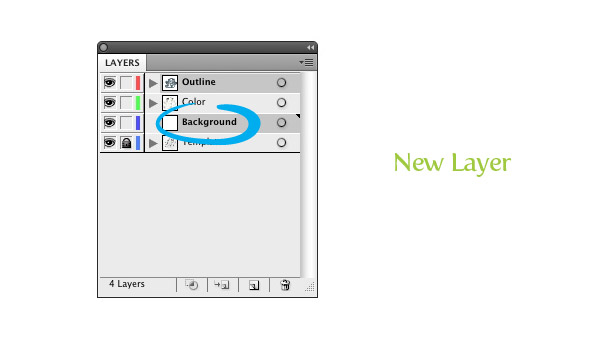
We are almost done, but to make the illustration really pop, let’s put it on a colored background. Create a new layer from the Layers panel, label it “Background”, and place it above the Template layer and below the “Outline” and “Color” layers.
Step 18
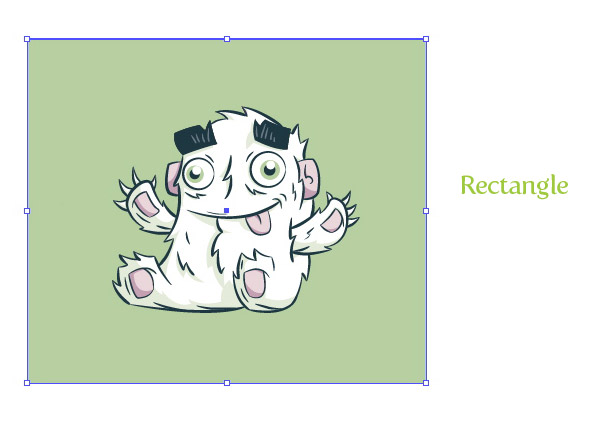
With the Rectangle tool (M), create a rectangle, and fill it with a color.
Step 19
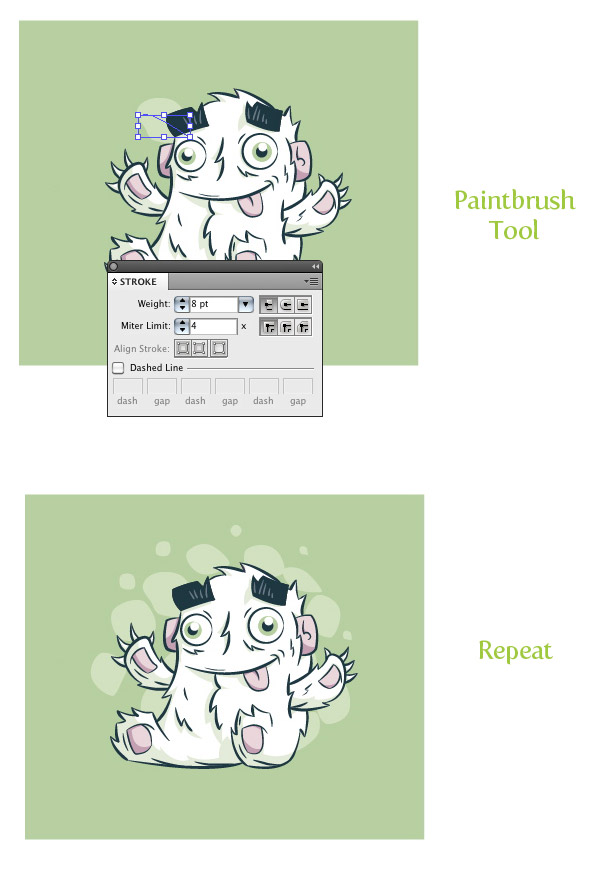
We can also add some depth to the background by creating some bigger brush strokes. Use the Paintbrush tool (B), select a color slightly lighter than your background, set stroke weight very high (around 8 pt depending on the size of your artwork), and create a brush stroke. Create about 15 more brush stroke and mix up the Stroke Weight for some of them.
Step 20
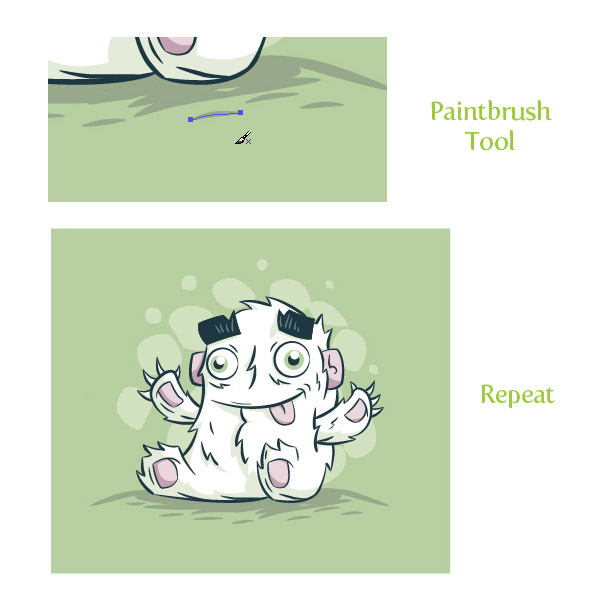
For the finishing touches create some shadows below the creature with the Paintbrush tool (B) and a darker color than your background. All done!
Final Image
Below is the final image again. These techniques work really great on other illustrations and vector artwork especially for t-shirt designs.




you do really nice work on this website! this guy is super cute! all of your tuts are super good tho! keep it up! ^_^
cool!
Awesome. I have many sketches I want to put through Illustrator but wasn’t sure how to design them besides all school methods…this really helps reduce the amount of time I sometimes spend recreating my sketches…Thanks.