

In this tutorial you’ll learn how to create dimensional text inspired by vintage packaging designs and logotypes. Pour a cup of coffee, sit back, and let’s create some text with the help of Illustrator effects, the Blend Tool, and textures fit for the branding of a coffee house.
Tutorial Details
- Program: Adobe Illustrator CS5-CC
- Difficulty: Intermediate
- Topics Covered: 3D Text, Blend Tool, Textures
- Estimated Completion Time: 35 minutes
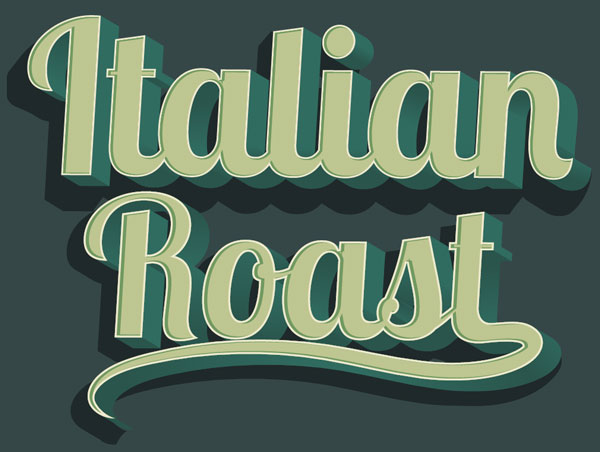
Final Image
Step 1
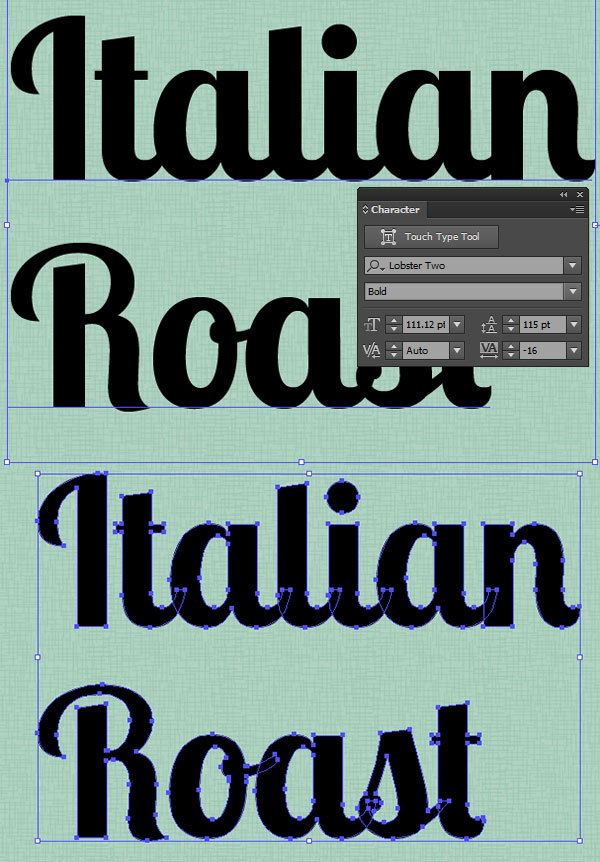
Start with your font of choice. In this case, I chose Lobster 2, but also recommend Lobster, ChunkFive, or Birra. Write out your text or title with the Type Tool (T). I chose “Italian Roast”, as it’s the name of a type of coffee, and I find this text effect goes well with all things coffee, packaging, and cafe related. Expand your text to outlines under Object, and then Ungroup your text.
Step 2
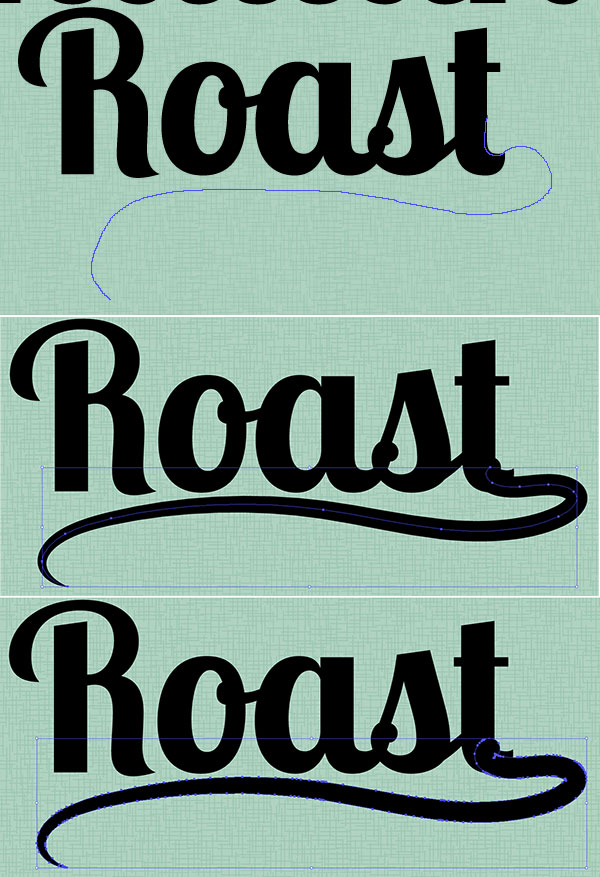
I think the word “Roast” needs a flourish. Using the Pencil Tool (N) I drew a swooping line from the letter “T” that moves to the left and stops below the “R”. Apply a thick stroke to the path in the Stroke panel. Use the Width Tool (Shift – W) to taper the tail of the flourish by placing points with the tool near the end of the tail and dragging our mouse to make the path thinner at that end. Once you’ve got the flourish in a position and shape that you enjoy, Expand it in Object and Group together with your word (in this case it’s been Grouped with “Roast”).
Step 3
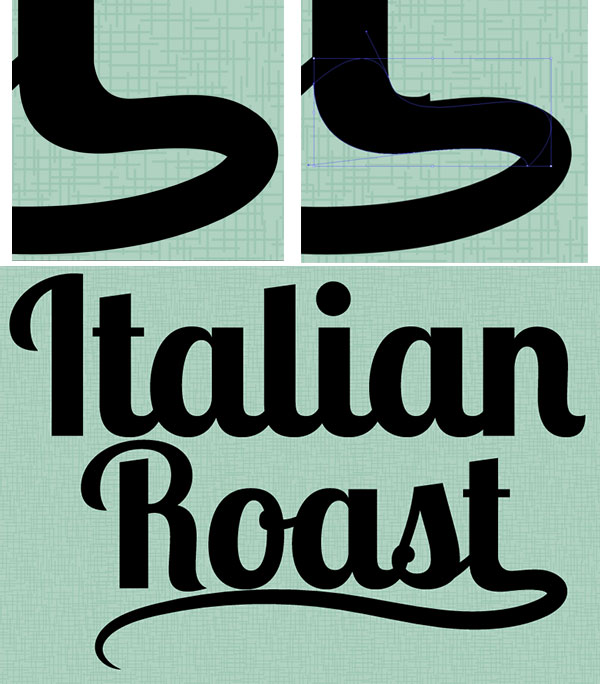
In order to make sure the flourish drawn in the previous step fits in with the text group seamlessly, Zoom (Z) in so you can work on the details of the final letter. I’ve used the Pen Tool (P) in order to draw a shape that hides the little kick on the end of the “T” and flows into the expanded flourish path. This may be easier to do if you’re using a graphics tablet and the Pencil Tool (N) if you want your curves to flow with quickly drawn lines.
Step 4
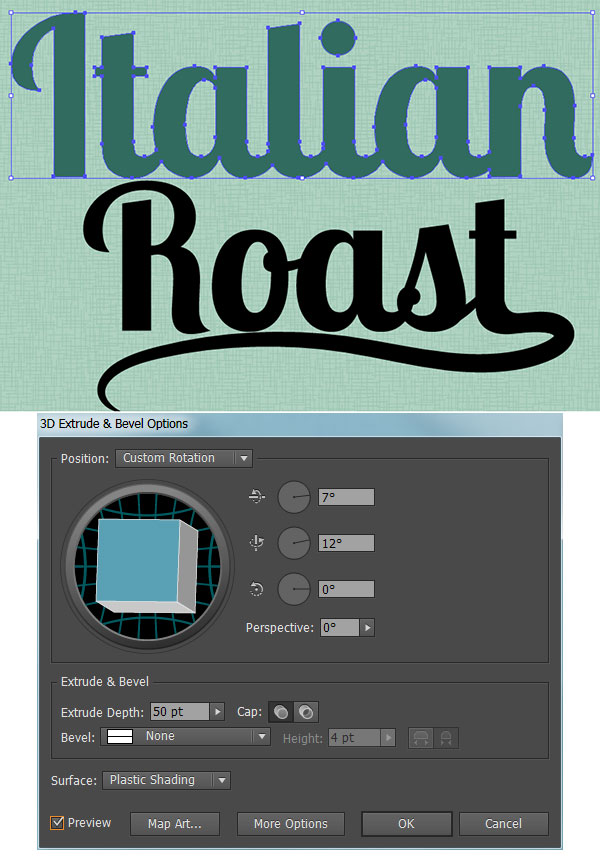
I’ll mainly focus on the word “Italian” in this tutorial, since the process for the text treatment is the same for both word groups. Select the “Italian” group and hit Unite in the Pathfinder panel. With the newly compound shape selected, go to Effect > 3D > Extrude & Bevel and apply the following attributes:
- X Axis: 7°
- Y Axis: 12°
- Z Axis: 0°
- Extrude Depth: 50pt
- Surface: Plastic Shading
Step 5
With your new 3D text selected, Expand Appearance under Object and Ungroup. Select the face of the text (the letters without their 3D counterpart) and set the fill color to a light color: cream, pale mint, etc. Group together the 3D components of lettering. We’ll be adjusting the fill colors of those pieces in the following steps.
Step 6
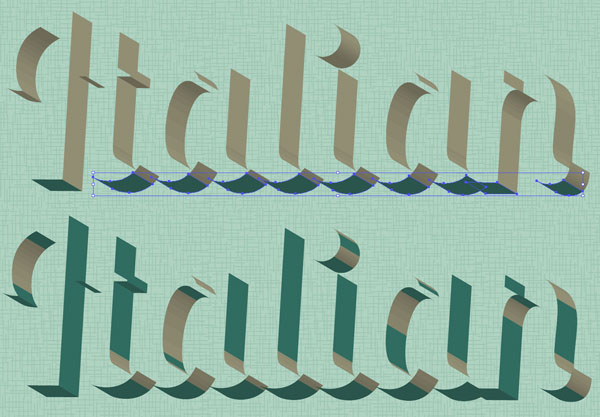
You’ll need two colors for the 3D components of your text. In this case I chose teal and darker teal. Using the Direct Selection Tool (A), select the bottom components of the 3D text and apply the darkest shadow color as the fill color (see below). For anything that is on the right side of each letter and not a part of a curve, apply the lighter shadow color as the fill color (see below).
Step 7
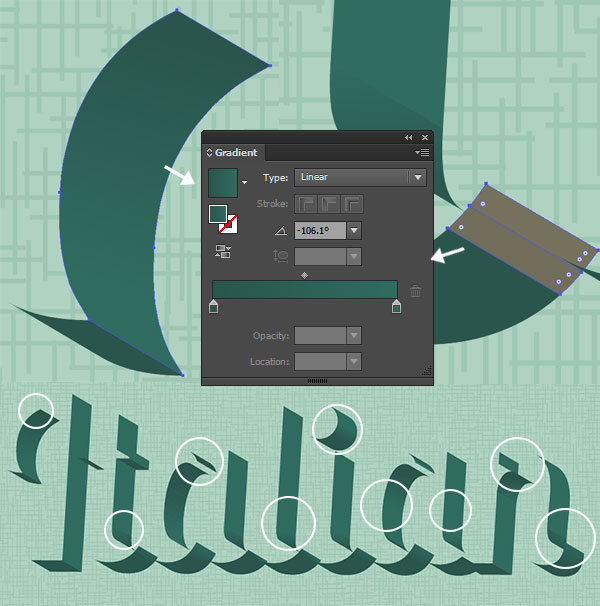
For curving shapes in the 3D text, you’ll apply a Linear Gradient going from the lighter shadow color to the darker shadow color using the Gradient panel to sort out the gradient’s angle. I’ve circled the sections of the 3D portion of the text where the gradients were placed. Once satisfied with the shadow colors and gradients of the 3D text, make sure it’s all Grouped together and Unhide the rest of your text. Repeat Steps 4-7 on any other text you may have in your artboard.
Step 8
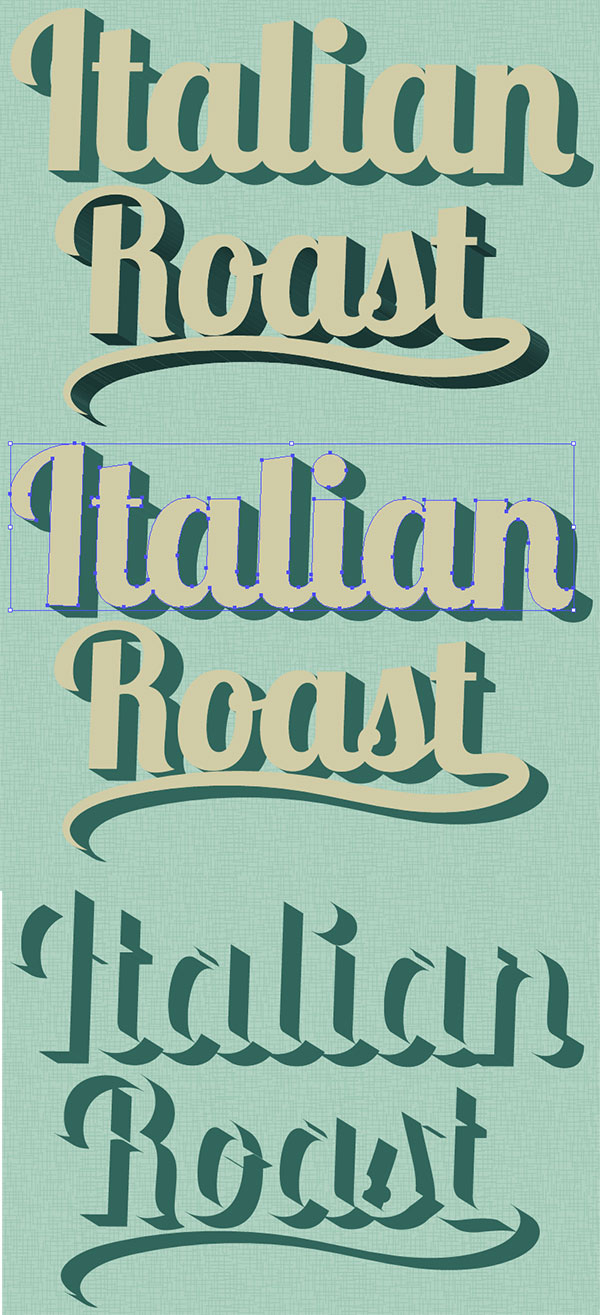
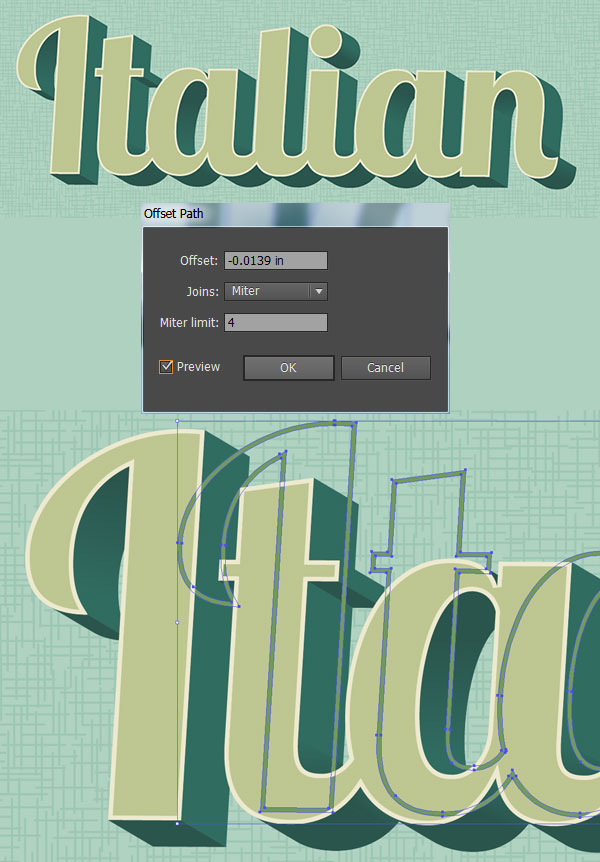
Select the face of your text (the group from Step 5), Copy (Control – C), Paste (Control – V), and go to Object > Path > Offset Path… where you’ll apply a -1px Offset. With both the copied text face and the offset objet selected, hit Minus Front in the Pathfinder panel. For the fill color, choose something lighter than the text’s face color (light cream, seen below). Copy and Paste this outline shape and apply a color darker than the mint used for the face of the text.
Step 9
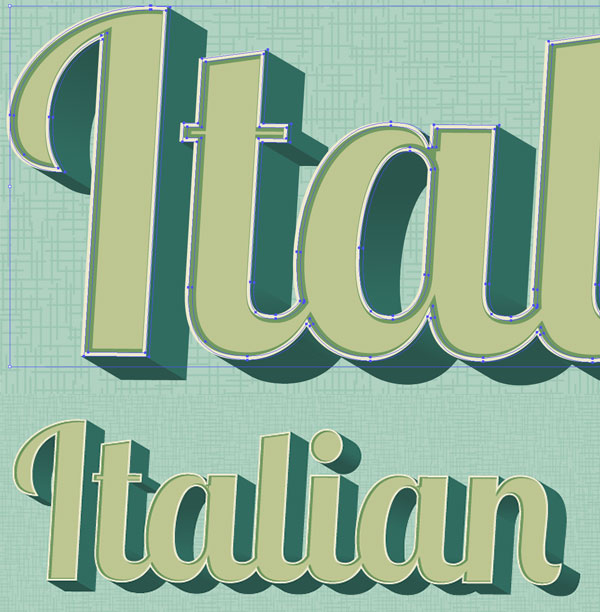
Place this second outline shape to the right of the light cream outline shape and below it in the Layers panel. Copy, Paste, and Align (in the Align panel) the text’s face group with itself. With the copied face and the green outline shape selected, hit Control-7 in order to create a Clipping Mask. Repeat Steps 8-9 on your other text (if applicable).
Step 10
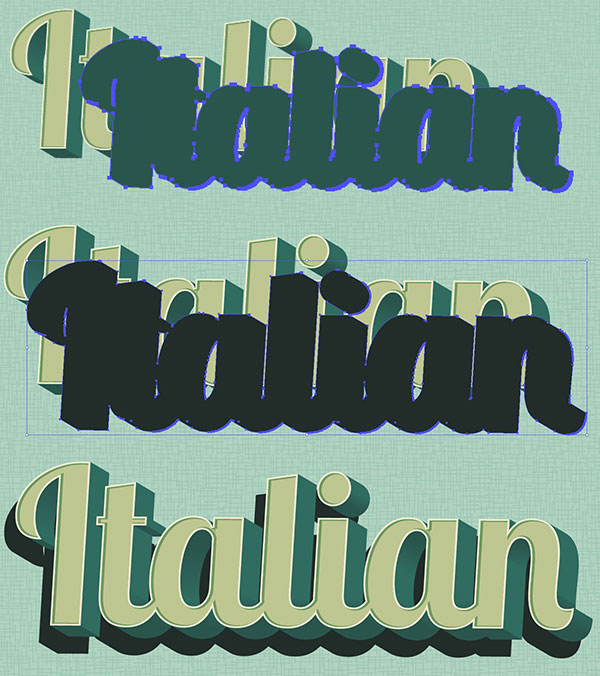
Group your retro text together, Copy, and Paste. Unite the Pasted text group in Pathfinder. Set the fill color to an even darker color (in this case a very dark teal) and place it behind the text group in the Layers panel. Move it to the left and downward (see below) so it forms a bit of a drop shadow.
Step 11
The background I’ve been using (whose texture was not covered in this tutorial, since it’s not a part of the final retro text piece) is much too light for this color scheme. Using the Rounded Rectangle Tool, I drew a rounded rectangle over the artboard, behind the text groups, in a green-gray color.
Step 12
Reapeat Step 10 and give any other text a simple drop shadow.
Step 13
Copy and Paste the drop shadows twice into two separate groupes. Reduce the Opacity of the second group to 10% in the Transparency panel. Make sure it has been moved to the left and downward from the first group. Use the Blend Tool (W) to apply a smooth blend of 45 Steps. Place this blend group behind the drop shadows and retro text.

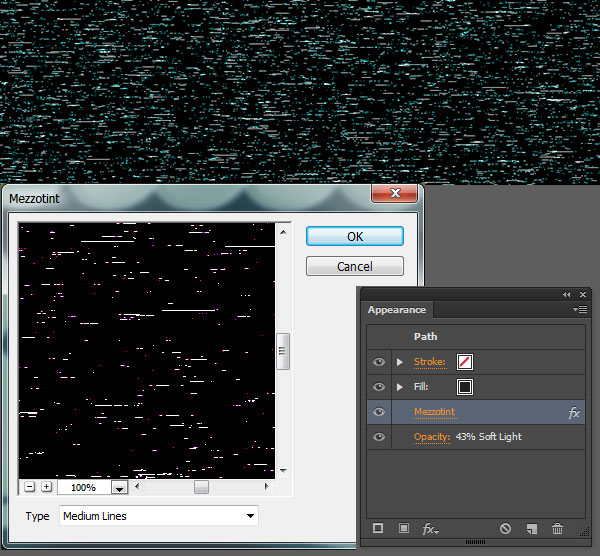
Step 14
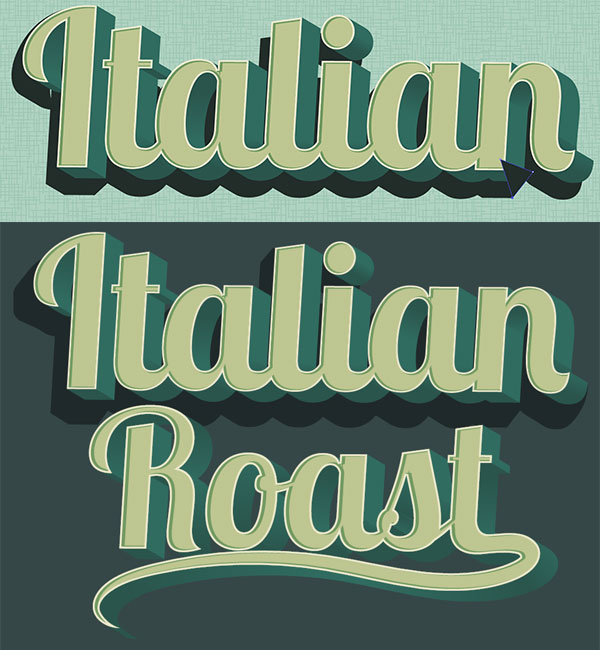
For the texture used over the top of the retro text effect, Copy and Paste the background rounded rectangle, but make sure it’s above the other layers in the Layers panel. Set the fill color to dark gray and go to Effect > Pixelate > Mezzotint. Choose Medium Lines as the Mezzotint type. In the Transparency panel, set the Blend Mode to Soft Light and Opacity to 43%.
Great Job, You’re Done!
You’ve done it! Your retro text has been given a kick in the right direction. Play with long shadow shapes behind the retro text, add in other flourishes, effects, and designs in order to take this fairly simple text effect to the next level.
Author: Mary Winkler
Mary works under the brand Acrylicana® designing apparel, jewelry, and illustrating for companies like Disney, Jakks Pacific, Envato, and more. Check out Acrylicana.com for more artwork, tutorials, and more.


I am very new to AI, using the latest “2020” version .. are these instructions for an older version of AI? In step 9 what type of aligning am I supposed to use? I tried every different align option and it just wrecked the text. Is this because there needs to specific layers and artboard layout in a certain way from the get-go? This is a cool Typography effect I’d like to learn it is just not explained in a way for new users to understand .. or it is for an older version of AI .. I just do not know. I have spent a lot of time on this Tutorial and feel more lost then that I’ve learned anything! :/
This is a good start for a tutorial, but it’s missing a lot of directions. I was able to add the line to the “t”, but with a great deal of effort smoothing it out. More explanation would be helpful. Like others, Step 9, is entirely unclear. Multiple steps missing here. I have followed other tutorials with more complicated designs. In the end, I did not learn anything with this tutorial. Save your time, and try a different one.
3d style very important
what about the background ? how do we chose and make the exact backgournd.
since you didnt mention and started on that particular background from the very beginning.
Same – step 9??? I need to do some more learning I feel.
When i hit unite on step 5, there is an extra line added to connect the end of the swoop to the t. How do I make it stop doing this?
Thank you so much to study for this lesion.
Your tutorial is missing quite a few steps that need to be included for visual learning. Your showing objects that are hidden but not stating that they should be on different layers, items to be grouped that should not be grouped, and paths offsetting that cannot be offset based on the written instructions provided. Please revise.
Very nice tutorial! Thanks
I read it over and over…..you lost me on step 9.
Do you mind if I quote a few of your articles as long as I provide credit and sources back to your site?
My blog is in the exact same area of interest as yours and my visitors would genuinely
benefit from a lot of the information you provide here.
Please let me know if this okay with you. Thanks a lot!
You’ll need to contact Vectips directly, as the authors are just commissioned by the site (typically we’re the ones replying to comments since the deal with each post content directly).