

Create something on the sweet side with custom brushes and the Rotate Tool in Adobe Illustrator CC. We’ll speed up the process of illustrating a decadent cake vector with a couple useful techniques, ready for a plethora of designs.
Tutorial Details: Rotated Cake Vector
- Program: Adobe Illustrator CS5
- Difficulty: Intermediate
- Topics Covered: Custom Brushes, Rotate Effect, Gradients
- Estimated Completion Time: 30 Minutes
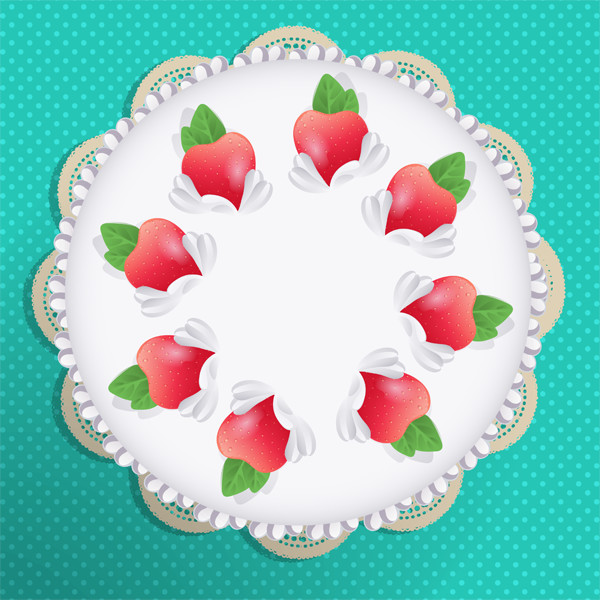
Final Image: Rotated Cake Vector
Step 1: Rotated Cake Vector
To begin our sweet sweet cake vector tutorial, create a New Document of 800 px square. Use the Rectangle Tool to draw a square around your Artboard.

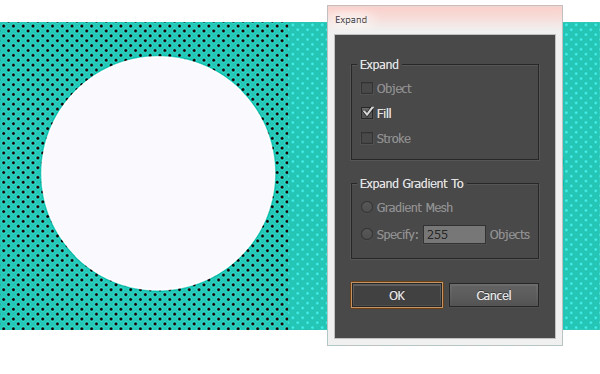
Step 2
Draw a second square and fill it with a default dot pattern from the Swatches panel. Expand the pattern and use the Magic Wand Tool to select the bounding boxes around each pattern section and delete them. Unite the dots in the Pathfinder panel. Set the fill color of your compound shape to white. Set the Blend Mode to Overlay and Opacity to 70%, or so, in the Transparency panel.
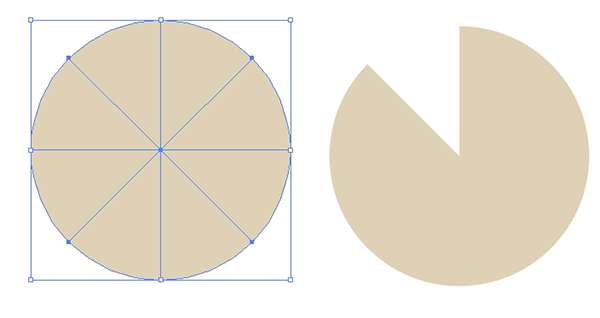
Step 3
For the lacy doily that will go on the bottom of the cake vector, draw a circle with the Ellipse Tool and set the fill color to tan or off-white. Use the Line Segment Tool to draw four lines (one horizontal, one vertical, and two diagonal) and Align them so they are centered in the circle. Select all five objects and hit Divide in the Pathfinder panel. Select one of the pie slices and move it over to create our design in the next step.
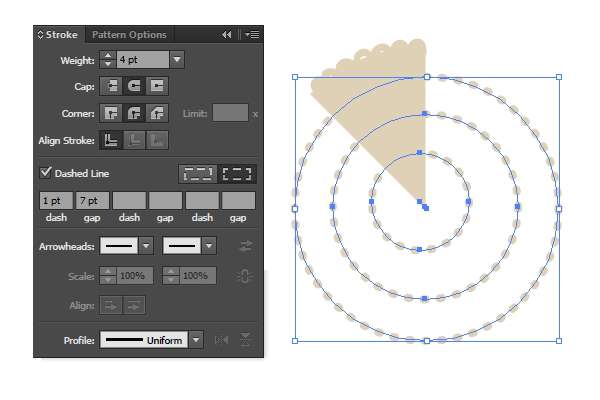
Step 4
I found it easiest to draw circles with dashed lines. In the Strokes panel, set the caps and corners to rounded, weight to 4-6 pts, dashes to 0.5-1 pt and gaps to 6-9 pts. Expand your dashes strokes into objects, Unite them and then hit Minus Front in the Pathfinder panel.
Step 5
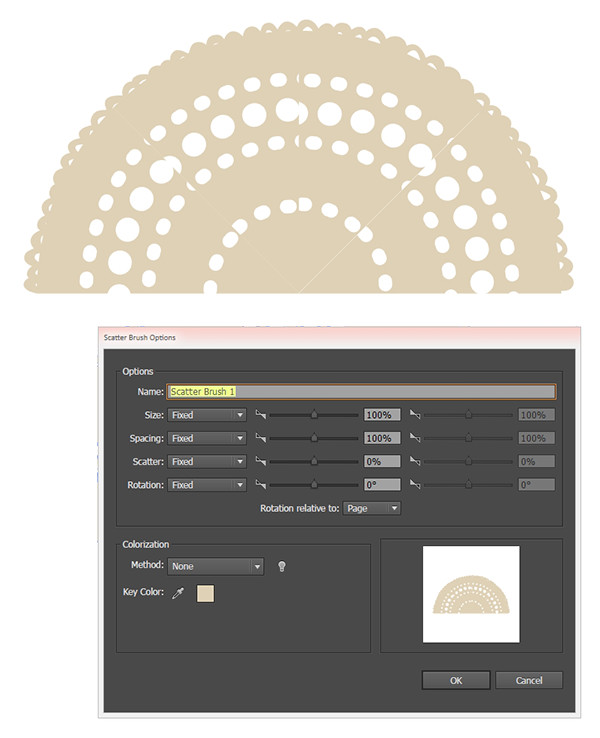
Rotate the pie slice by 45° and create three copies of that rotation with the Rotate Tool. Line the four pieces up against their edges (you may need to Zoom in) and Unite your lacy half circle. You can also add other cut-out details or scalloped edges to your design at your discretion.
Select your lace shape and in the Brushes panel, create a new Scatter Brush, making sure it follows the Path and not the page when used.
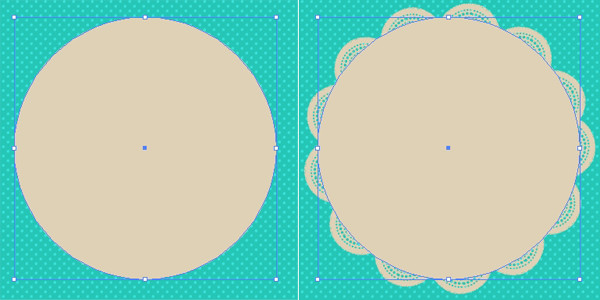
Step 6
Draw a large circle with your Ellipse Tool and apply the newly made brush as the stroke (with the same tan used previously as the fill color).
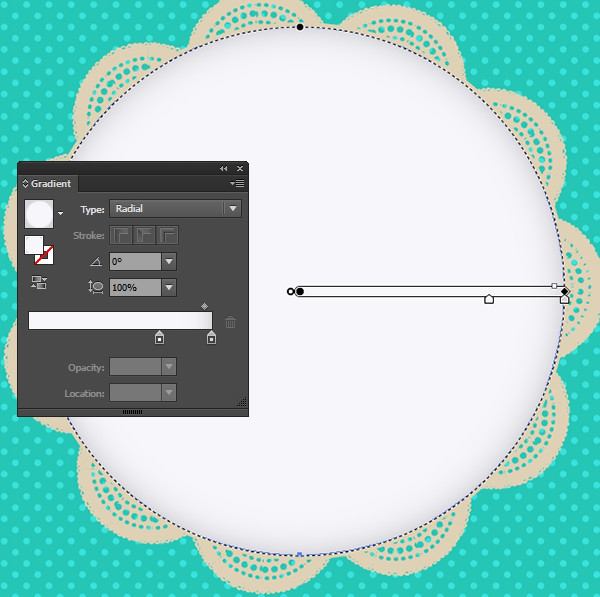
Step 7
Draw a white circle in the center of the doily. Set the fill color to a Radial Gradient going from gray to white in the Gradient panel. Adjust the radius so the gray is around the edges with the Gradient Tool.
Step 8
Let’s create another scatter brush! Using the Pencil Tool, with the Fidelity set to Smooth, draw an icing shape similar to what’s seen below: three scallops that taper to a point that will go on the edges of the cake vector. Use the Pen Tool or Pencil Tool to draw a few gradient shapes going from gray to gray (light for highlights, dark for shadows). Select all of your shapes, Group them together, and then Expand Appearance.

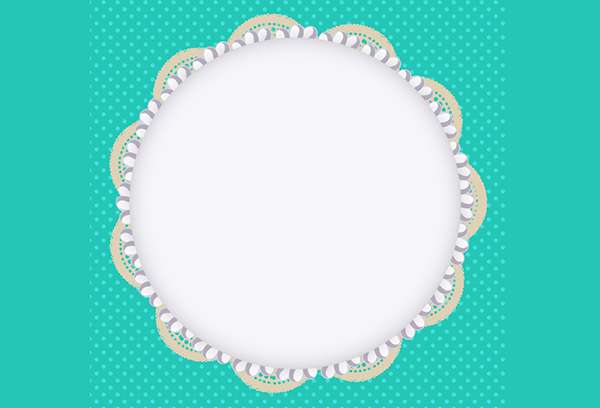
Step 9
Like the lace brush before, create a new Scatter Brush and apply it to another circle. Set this one between the lace and cake circles in the Layers panel.
Step 10
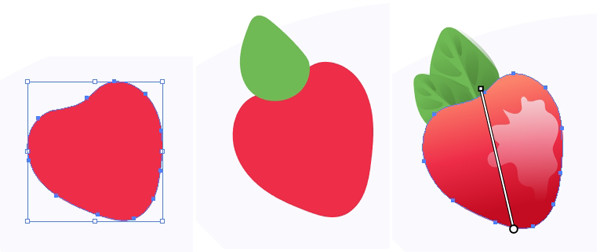
Let’s work on the strawberries. Draw a heart-like shape with the drawing tool of your choice. Set the fill color to a Linear Gradient going from light orange to red to dark red. For the leaves, I drew imperfect leaf shapes and then created each segment with a linear gradient shape going from dark green to medium green. Group together your leaf and then Copy, Paste, and Scale it down to create the second one.
Step 11
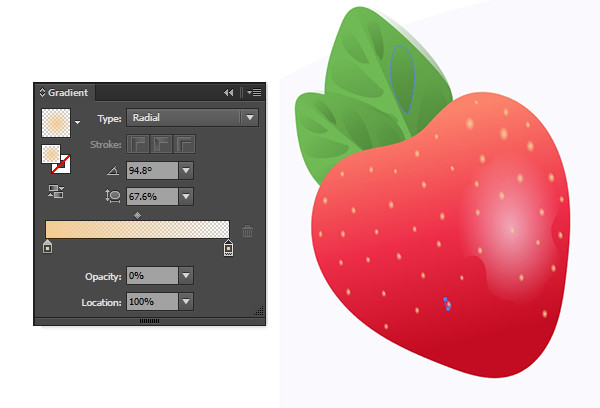
For the seeds, I drew small teardrop and oval shapes with the Pencil Tool and filled them with a Radial Gradient going from orange at 100% Opacity to 0% Opacity. The highlight shape on the strawberry was drawn with the Pencil Tool as well and is filled with a Radial Gradient going from white at 100% to 0% Opacity. Its overall Opacity was reduced down to 50%, or so, in the Transparency panel as well.
Step 12
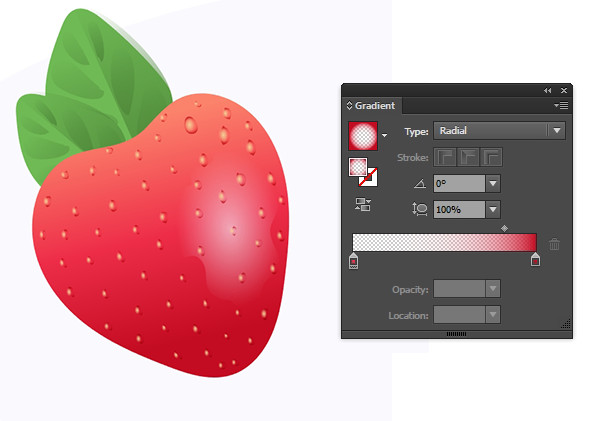
Group together your seed objects. Copy, Paste, and change the gradient color from orange to dark red. Set the Blend Mode to Multiply and place it below the seed group in the Layers panel. Offset it slightly so it looks as though the seeds are indented into the strawberry a bit.
Step 13
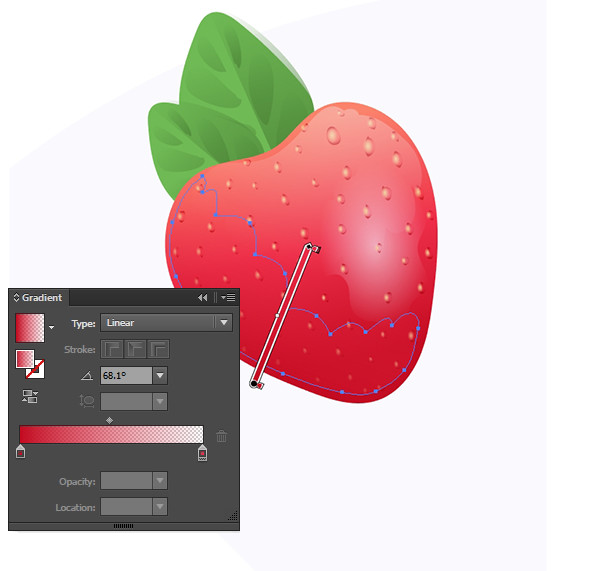
Draw a shadow shape with the drawing tool of your choice and set the fill to a Linear Gradient going from dark red at 100% to 0% Opacity.
Step 14
Like we did before, draw some icing shapes. These were elongated teardrops with shadow and highlight shapes overtop. All gradients consist of shades of gray. Gather a few around the strawberry and Group it all together.
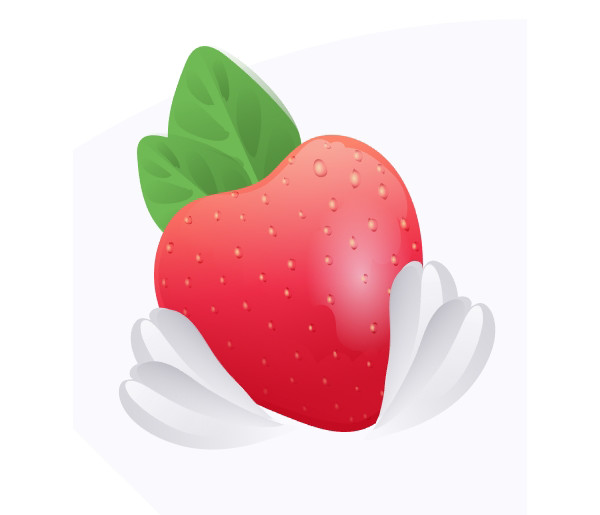
Step 15
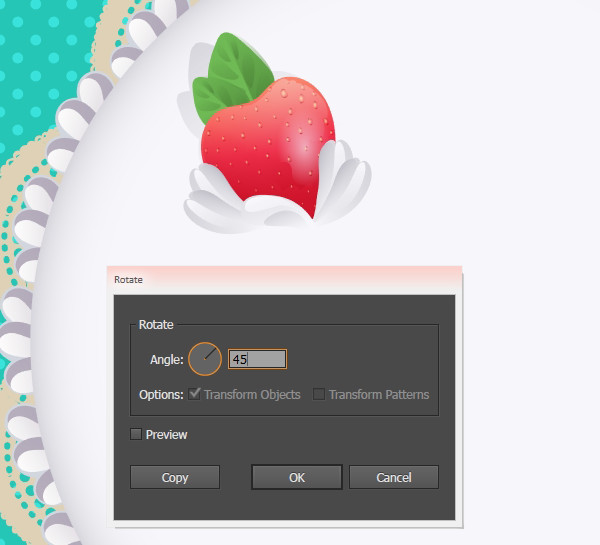
Place your strawberry on the cake vector. Select the strawberry group and use the Rotate Tool to rotate a copy of the strawberry by 45°. Rotate and copy each strawberry until you have eight total.
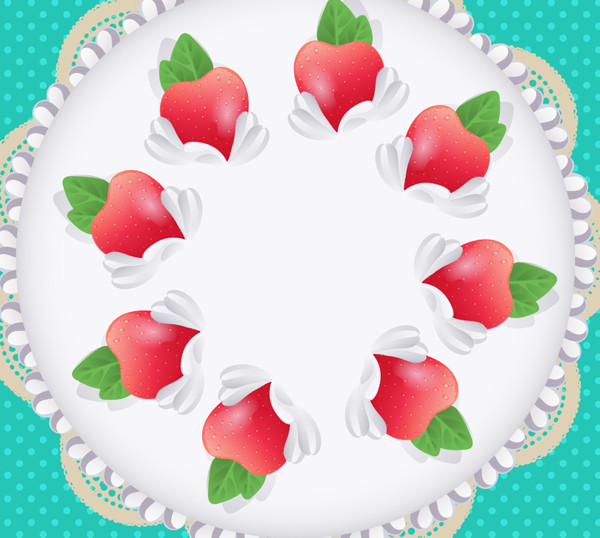
Step 16
Place your strawberries around the cake. You can add shadow shapes, additional fruits, or icing with this method as well.
Step 17
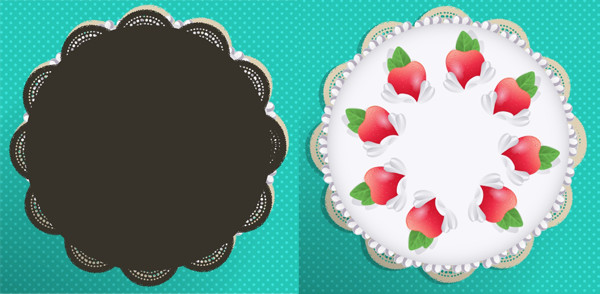
Add a bit of dimension to your illustration or icon with a doily shadow. Copy and Paste the doily. Expand it and set the fill color to dark gray. Set the Blend Mode to Multiply and the Opacity to 40% in the Transparency panel. Place it beneath the original doily in the Layers panel and offset it slightly.
Conclusion: Rotated Cake Vector
Well done you! Now that you’ve quickly made an entire cake (take that, Julia Child), what other uses can you find for rotating copies of vector objects and creating simple, but artistically complex brushes? Share your delicious creations in the comment section below!
Author: Mary Winkler
Mary works under the brand Acrylicana® designing apparel, jewelry, and illustrating for companies like Disney, Jakks Pacific, Envato, and more. Check out Acrylicana.com for more artwork, tutorials, and more.


Thanks for this wonderful tutorial.