
 Turn on the light with this icon and illustrative light bulb vector. In the tutorial below you’ll create the light bulb vector from simple shapes, manipulate gradients, gradient meshes, and blending modes all in pursuit of a semi-realistic light bulb vector design.
Tutorial Details: Light Bulb Vector
- Program: Adobe Illustrator CC
- Difficulty: Intermediate
- Topics Covered: Blend Modes, Gradient Mesh, Live Corners, Rendering
- Estimated Completion Time: 45 Minutes
Final Image

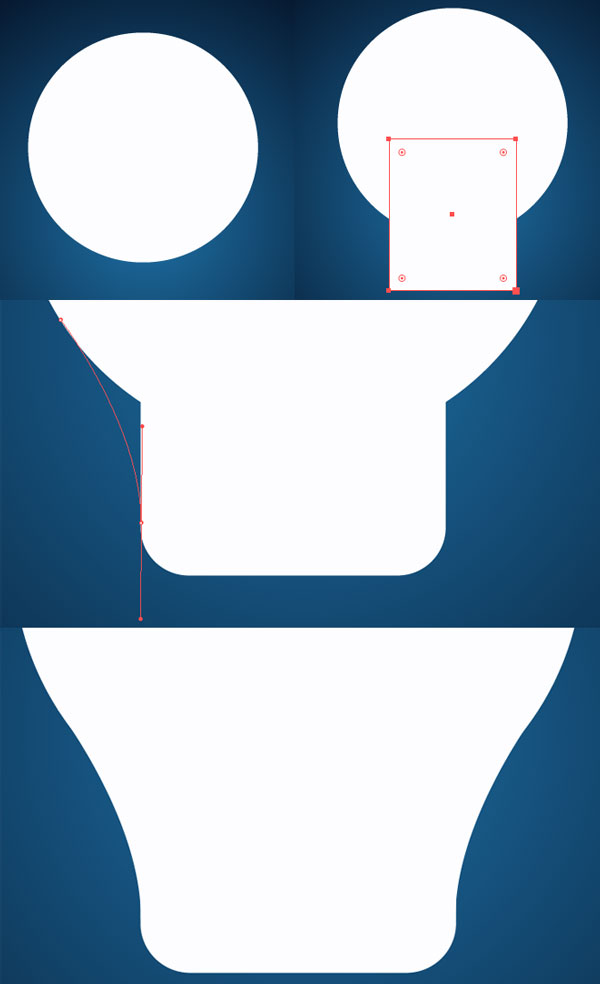
Step 1
First step in creating this light bulb vector is drawing the bulb. Use the Ellipse Tool (L) to draw a circle and the Rectangle Tool (M) to draw a box on the bottom of it. If you’re using Adobe Illustrator CC or above, pull the Live Corners inward in order to round the corners of the box (or manipulate the corners in the Transform panel). Using the Direct Selection Tool (A), pull the top left and right anchor points upward to the outer sides of the circle. Curve the paths by manipulating the handles of the anchor points (see below for desired bulb shape). Unite the two objects in the Pathfinder panel.
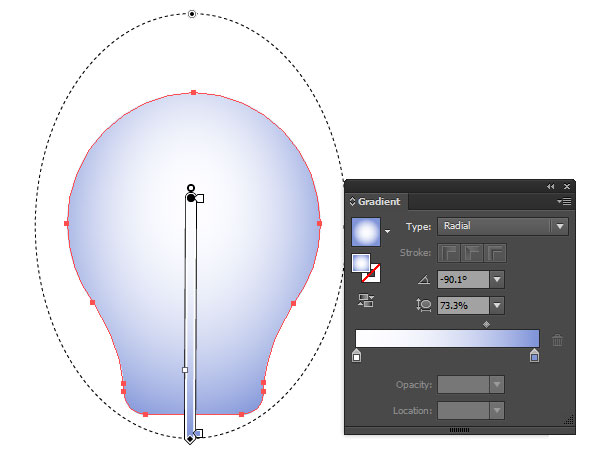
Step 2
Apply a Radial Gradient to the bulb shape using the Gradient Tool (G). The gradient shown below goes from white to a light, cornflower blue. Adjust the gradient’s shape so it’s oval and the darker color is concentrated on the edges of the light bulb vector shape.
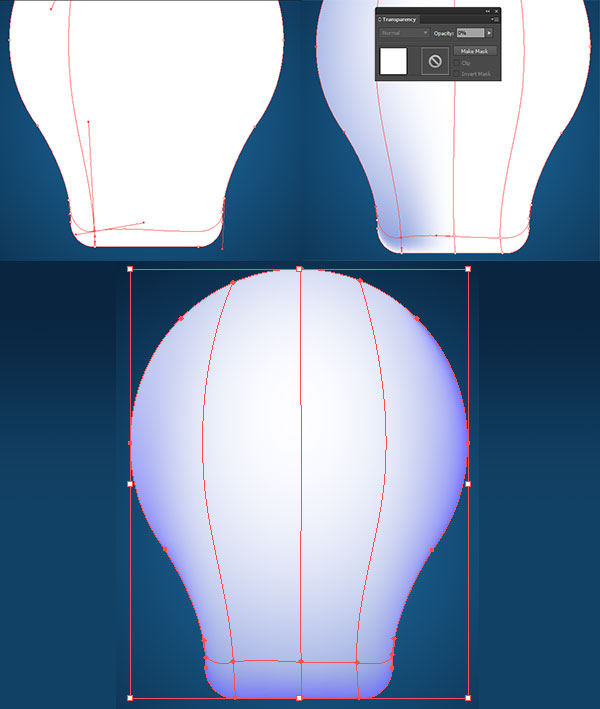
Step 3
Copy (Control-C) and Paste (Control-V) the light bulb vector shape, Align to the original bulb and change the fill color to white. Use the Gradient Mesh Tool to define areas of blue around the edges of the bulb. Use the Direct Selection Tool in order to select the anchor points elsewhere within the mesh that are remaining white and reduce their Opacity to 0% in the Transparency panel.
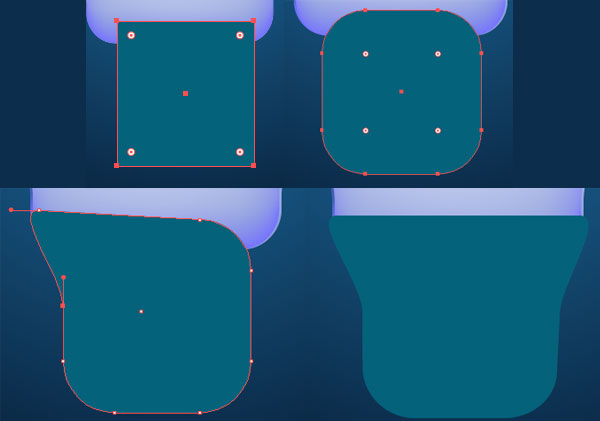
Step 4
For the screw cap of the light bulb vector, draw a gray or blue square on the bottom of the bulb shape. Grab the Live Corners and pull them inward slightly to round the corners, as was done in Step 1. Use the Direct Selection Tool to select and pull the top anchor points upward and to either side of the light bulb. The screw cap should be a bit wider than this. Continue to manipulate the shape until you have the look you want for the screw cap.
Step 5
Apply a Radial Gradient to the screw cap shape. Since I decided on blue, at the time, the inner color is a bright blue while the outer color is navy blue. Concentrate the darker color of the gradient towards the edges.
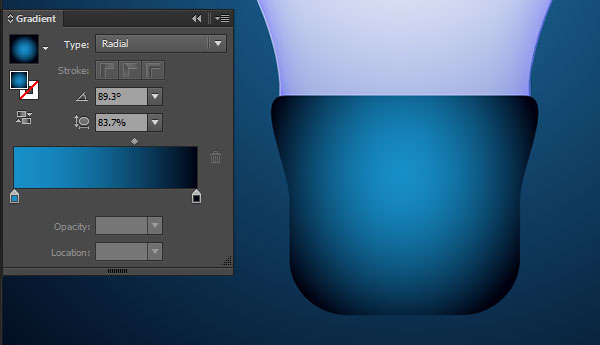
Step 6
Use the Ellipse Tool to draw a gradient ellipse at the top of the screw cap. Use the same gradient from the screw cap shape, but change its Type to Linear and the bright blue’s Opacity to 0% in the Gradient panel. Use the Shape Builder Tool (Shift-M) to delete the non-intersecting component of the ellipse from the screw cap by Selecting both objects with the Selection Tool (V) and then selecting the extraneous portion with the Shape Builder Tool. Deselect and Delete the unnecessary portion of the ellipse.
Draw three rounded rectangle shapes (either with the Rectangle Tool or the Rounded Rectangle Tool beneath the screw cap, each smaller than the last (see below). Set the fill color to dark blue or gray, or select a subtle gradient.

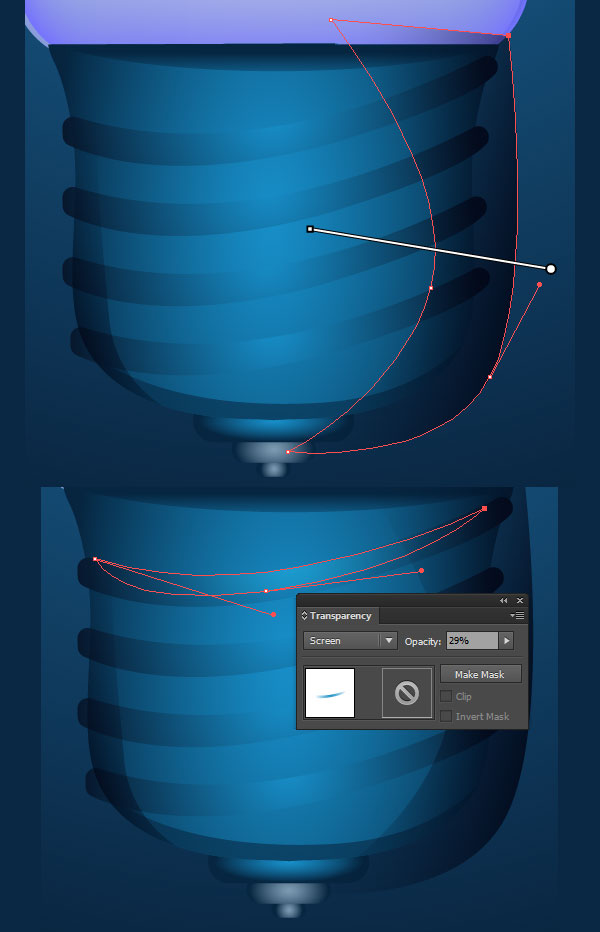
Step 7
Draw curving lines on the cap of this light bulb vector with the Paint Brush Tool (B) to indicate the screw threads. Set the width of the stroke in the Stroke panel to 2-4pts (depending on the size of your illustration these may be larger or smaller). Expand the strokes under Object and apply the same Radial Gradient used in Step 5 to each thread. Draw highlight shapes (see below) on each thread with the Pen Tool (P) with the same gradient as before. Set the Blend Mode to Screen and Opacity to 20%, or so.
Step 8
Strengthen the shadows and highlights on the light bulb vector by drawing additional gradient shapes (see below) in each threaded section. There are four gradient shapes drawn in the sections between each thread, the shadows on each thread were drawn in darker, and there’s cast shadow shapes drawn below the last thread. Each gradient is Radial, Blend Mode set to Normal and the colors in the gradient go from Opaque to Transparent.

Step 9
Group (Control-G) together all of the screw cap components. Copy and Paste the group and Unite the copy in the Pathfinder panel. Apply a Radial Gradient going from light blue or gray at 100%-0% Opacity. With the Gradient Tool, adjust the shape of the gradient so it’s a vertical oval within the united cap shape.

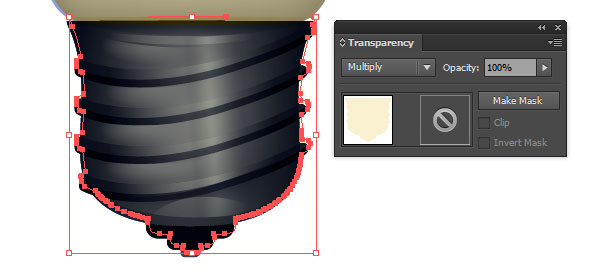
Step 10
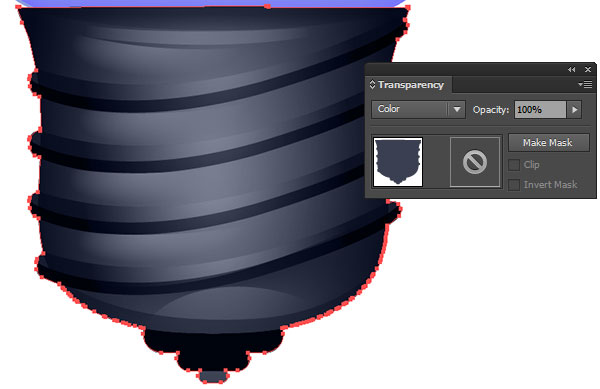
Changing the overall color of the light bulb vector is wonderfully easy. Doing so, you can create a whole rainbow of light bulbs within a couple minutes. Paste a second instance of the screw cap and change the fill color to dark gray (or whatever color you wish) and the Blend Mode to Color in the Transparency panel.
Step 11
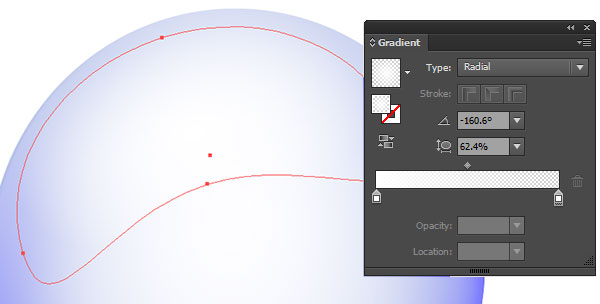
Draw a curving highlight shape with the Pen Tool (or manipulate a circle or sketch it out with the Pencil Tool, and apply a Radial Gradient going from white at 100% Opacity to white at 0% Opacity in the Gradient panel.
Step 12
Changing the light bulb vector color is as simple as the process from Step 10. In this case, I chose a light yellow for a warm bulb look.

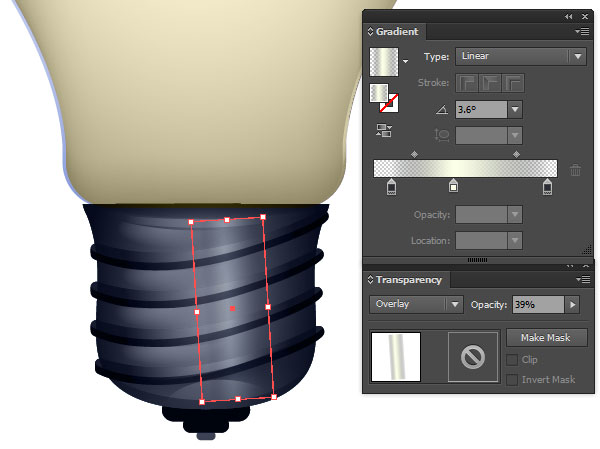
Step 13
Create additional highlight areas by drawing a vertical rectangle on the screw cap of the light bulb vector. This time, the gradient will be Linear with transparent instances of dark gray on either side of creamy yellow, the Blend Mode set to Overlay, and the overall Opacity set to 37% in the Transparency.
Step 14
I decided I wanted to warm up the grey used previously a bit further. As such, I repeated the process from Step 10 but the fill color was set to light yellow and the Blend Mode to Multiply. Making quick changes like this, instead of changing the entire color palette allows for a wider range of design variations.
Step 15
For the background, draw a large rectangle over the artboard, beneath the light bulb vector design in the Layers panel and apply, once again, a Radial Gradient going from dark gray to a very warm yellow (or whatever tone your lightbulb has). Adjust the gradient shape so that it primarily radiated outward from the bulb portion of the design.

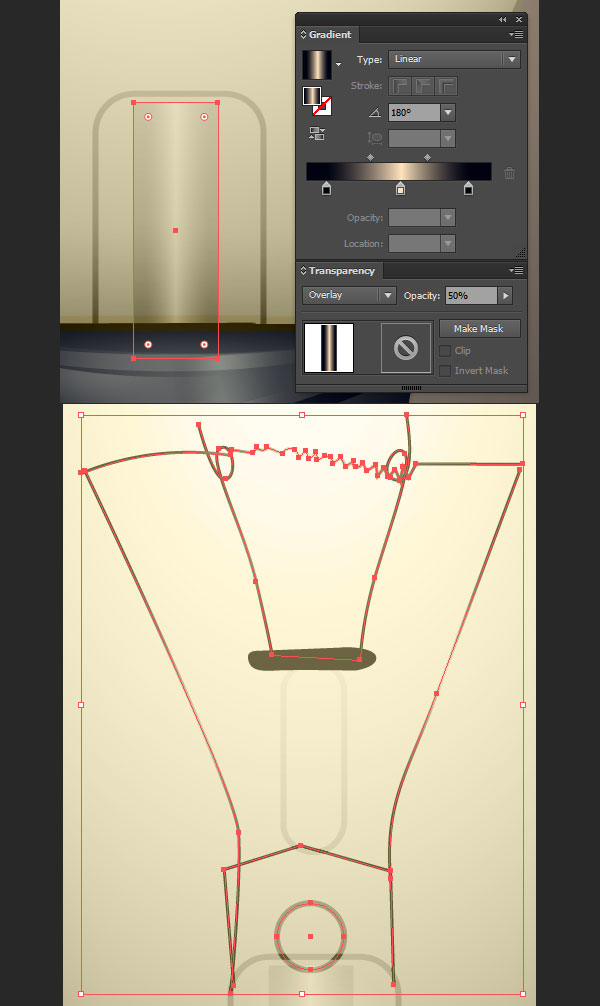
Step 16
For the inside of the bulb, I drew the general idea of the bits and pieces found there. I Copied and Pasted the gradient shape from Step 13 as well as drew a circle and rounded rectangle in a simple 1pt black stroke (each set to Multiply. The rest of the shapes were quickly drawn with the Paint Brush Tool while referencing a light bulb for the general idea of its wires. Feel free to create a more detailed composite in your design.
AHA! Your Light Bulb Vector is Complete!
Now that you’re done, consider additional design styles: is the light bulb vector floating, hanging from a wire, or screwed into a lamp socket? What additional light bulb vector shapes can you create with the same techniques explored in this tutorial? Let us know below. Happy drawing!

Author: Mary Winkler
Mary works under the brand Acrylicana® designing apparel, jewelry, and illustrating for companies like Disney, Jakks Pacific, Envato, and more. Check out Acrylicana.com for more artwork, tutorials, and more.


Very nice post. I just stumbled upon your blog and wanted to say that I have truly enjoyed surfing around your blog posts. After all I all be subscribing to your feed and I hope you write again soon!
Thanks again for the blog post.Really thank you! Awesome.
A lot of thanks for each of your hard work on this website. Kim really loves participating in internet research and it is simple to grasp why. A lot of people hear all about the dynamic way you create both interesting and useful steps on the web site and as well as foster contribution from other people on that area of interest so our own girl is undoubtedly starting to learn a whole lot. Take advantage of the remaining portion of the year. You’re doing a really good job.
Really enjoyed this blog.Really looking forward to read more. Really Cool.
great tutorial
Very well written brief tutorial. We have featured it here at http://www.byteswire.com/latest-adobe-illustrator-tutorials-first-week-july/
Incandescent??! Booooo! Go LED!
It’s an illustration. 😉
wow this is a cool lightbulb. Great tutorial in that it teaches a lot of concepts in one exercise.