

Hop on the net and surf the web: everything old is new again with this throwback to the early days of digital graphics. Create a fun 3D geometric text effect in Adobe Illustrator in under 15 steps!
Tutorial Details: 3D Geometric Text Effect
- Program: Adobe Illustrator CS2 – CC
- Difficulty: Intermediate
- Topics Covered: Text Effect, 3D Effect, Blending Modes
- Estimated Completion Time: 25 Minutes
Final Image: 3D Geometric Text Effect

Step 1: 3D Geometric Text Effect
In a New Document, write out the text of your choice with a simple, geometric-looking sans-serif font. Convert the text to outlines and set the fill color to the bright color of your choice.

Step 2
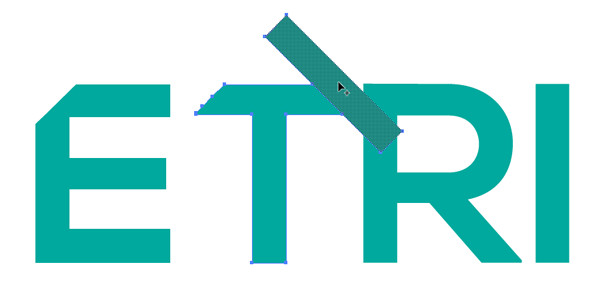
Draw a thin rectangle with the Rectangle Tool and use it to cut off some of the corners of each letter. You can either use the Shape Building Tool to do so or the Pathfinder panel. If you use Pathfinder to do so, you’ll have to redraw or Copy and Paste the rectangle each time you want to delete a portion of a letter.
Step 3
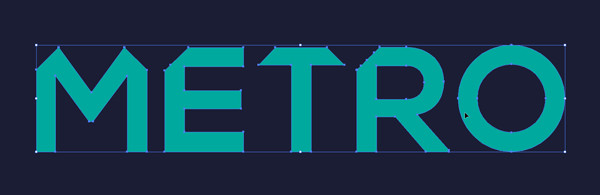
I decided I didn’t like the “IC” of “Metric” and opted for “Metro” instead. You can do whatever you want with your word or letters. Once you’re satisfied with your design choice, let’s move on!

Step 4
Draw a large rectangle behind your letters for your background color. I rather enjoy the look of teal on navy blue, especially for this style of design.
Step 5
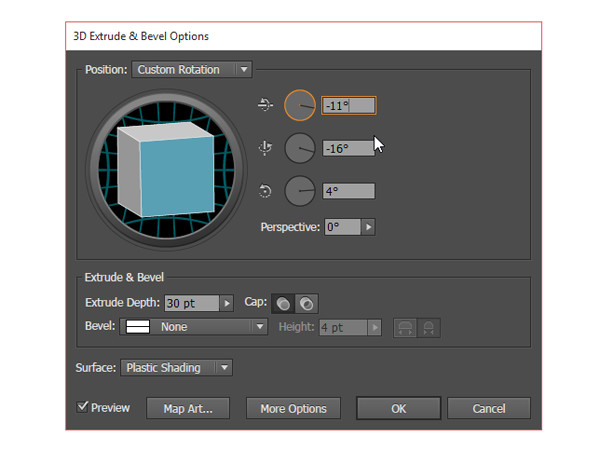
Select your text group and go to Effect > 3D > Extrude & Bevel and apply the following attributes to the effect:
- X-Axis: -11°
- Y-Axis: -16°
- Z-Axis: 4°
- Perspective: 0°
- Depth: 30 pt
- Surface: Plastic Shading
Step 6
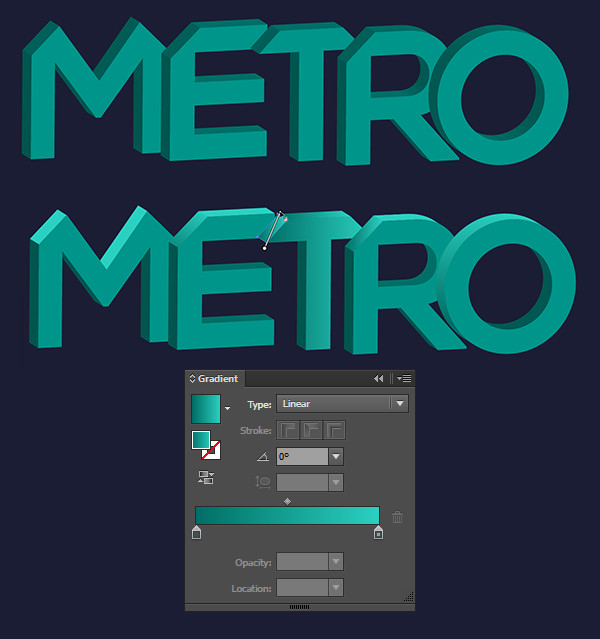
Overlap your letters a bit on their right sides. Then, go letter by letter and Unite each of their planes in the Pathfinder panel. For reference, the M, E, and R have six planes each, the T has four planes, and the O has three planes. Apply Linear Gradients to each of the plans and define their highlights and shadows. You can see how I did this below. Basically, side planes are darker than the face of each letter and top planes are lighter than the face of each letter. There are three shades of teal used in total.
Step 7
Here’s my text so far: each letter has had a linear gradient applied with the Gradient Tool to each of its planes as discussed above.

Step 8
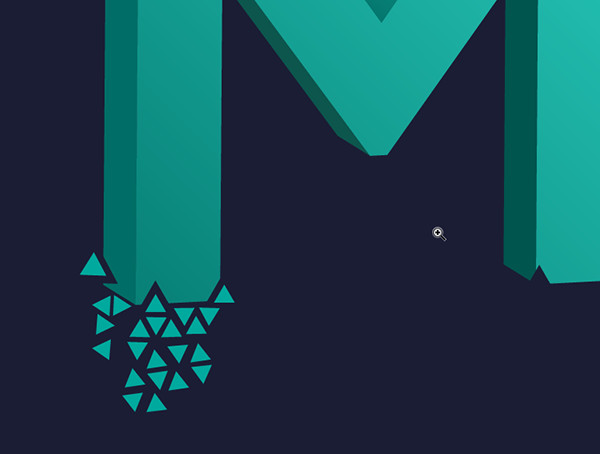
Here’s the fun but tedious part of this tutorial: arranging geometric shapes! Using one of your main design colors (shades of teal here) and your background color (navy blue here), use the Polygon Tool to draw the polygon of your choice. I chose triangles. Arrange triangles around the ends of your letters. Use the background color to “chip” away at your text and your text color to allow pieces to “break apart” from your design. Scatter them around in funky patterns.

Step 9
As you can see I’ve used the angles of my triangles and letters to create a simple pattern below my letter’s leg. Repeat this step for each of your letters along their bottom edges.
Step 10
It’s up to you how much of your letters will look like they’re breaking apart. Mine are fairly conservative in terms of how far I could have pushed this. Vary the shades of teal (or whatever color you’re using) depending on which side of your letter you’re placing polygons. Group sections of polygons together as you go.

Step 11
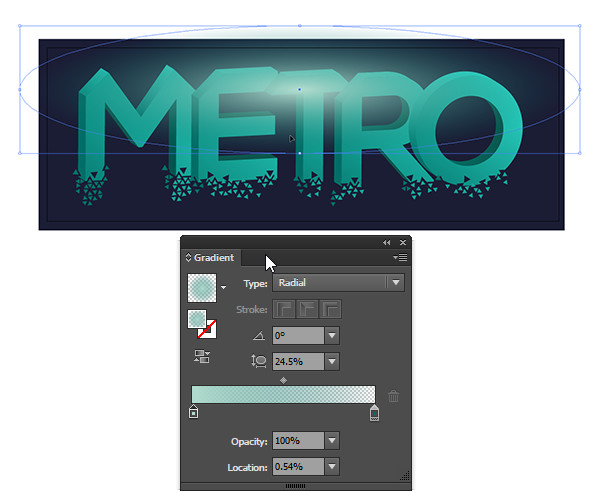
When you’re satisfied with your polygons, Group everything but the background together. Draw an ellipse with the Ellipse Tool and apply a Radial Gradient to it. In the Gradient panel, set the center color to a lighter shade of your main color with its opacity at 100%. Set the outer color to your main color and its opacity at 0%. In the Transparency panel, set the Blending Mode to Overlay.
Step 12
At this point, your text may be done. alternatively, you can check out the final steps for some finishing touches.

Step 13
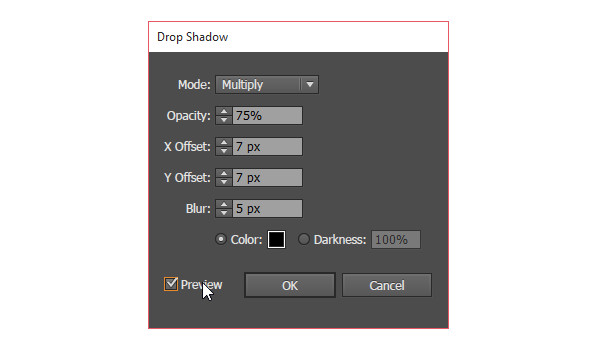
Select your text and polygon group, and apply a Drop Shadow to it by going to Effect > Stylize > Drop Shadow. These are the attributes I used for mine:
- Mode: Multiply
- Opacity: 75%
- X Offset: 7px
- Y Offset: 7px
- Blur: 5px
- Color: Black
Adjust your effect as you see fit.
Conclusion: 3D Geometric Text Effect
Scatter triangles or your geometric shapes of choice around your design and apply a textured pattern to your piece to finish it off. Share your throwback geometric text design in the comment section below or print off a copy and tape it to your Trapper-Keeper.
Author: Mary Winkler
Mary works under the brand Acrylicana® designing apparel, jewelry, and illustrating for companies like Disney, Jakks Pacific, Envato, and more. Check out Acrylicana.com for more artwork, tutorials, and more.


I was thinking if I could 3D effect any picture also with the same method explained here?
excellent list undoubtedly a marker for quick reference.
This is very informative for me, thanks for sharing.
I really love this tutorial. It is the most easiest and informative tutorial for 3D geometric text effect i ever seen. Thanks a lot for sharing this.
this is one of the best 3D front art. valuable design. thanks for sharing.
I really looking for these kinds of posts for a long time. Thank you for sharing with us. Useful and informative article you have written . Its also effective specially for me . I appreciate this blog
Deeply analysis how to Create a Shattered 3D Geometric Text Effect in Adobe Illustrator. Lovely analysis with 13 steps. These is great articles for Designer.
I am always searching for quality posts & articles & this is what I found here, I hope you will be adding more.
I was the first time trying to make 3D geometric text effect in Adobe Illustrator and me successfully create that. Thanks
Great tutorial. You explained it very easily. Thanks for sharing this.
Finally, I got my expectation, I’m tried to find proper TEXT EFFECT tutorial now I got it. Thanks for the great tutorial.
Really great tutorial to make 3d effect on the text.
Thanks for your information.
This looks very nice thanks for the tip 😀 I always find your tutorials very simple and nice, glad they are still online : )
One of my lovable arts is 3d and really I am very happy to see here. I tried to do but failed.
Great! easy to understand tutorial.