

In this Halloween pumpkin vector sticker tutorial we will learn how to create fun Halloween pumpkin sticker, passing all the steps of design, including sketching, coloring and creating shadows and glares. The method described here to create shadows using Blend Tool will keep you away from artifacts that normally occur on objects of complex shape. I hope that this maximum optimizing methods presented here will help you to work more efficiently, that will save plenty time in the future. So let’s get started!
Tutorial Details: Halloween pumpkin sticker
- Program: Adobe Illustrator CS2 – CC2014
- Difficulty: Beginner
- Topics Covered: Pencil Tool, Pen Tool and Blend Tool
- Estimated Completion Time: 30 minutes
Final Image: Halloween Pumpkin Vector Sticker

Step 1: Halloween Pumpkin Vector Sticker
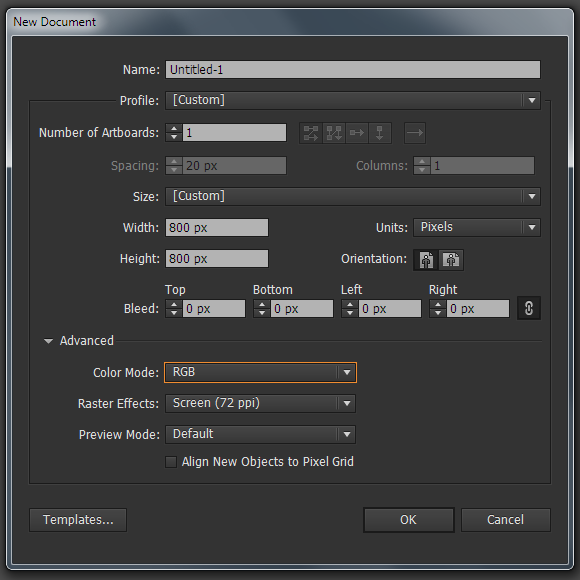
For this Halloween pumpkin vector sticker vector tutorial, we’ll start in Adobe Illustrator, then go to the File> New …. In the opened dialog box, set the necessary size of our artboard and choose the RGB color mode.
Step 2
Now let’s create a sketch. You can draw a pumpkin with a pencil on paper, then scan the drawing into a Halloween pumpkin vector. Then paste it into Adobe Illustrator (File> Place …). Or you can create a sketch directly in Adobe Illustrator, like I did. Pencil Tool (N) is normally used for this purpose. The settings of this tool are shown in the following picture.
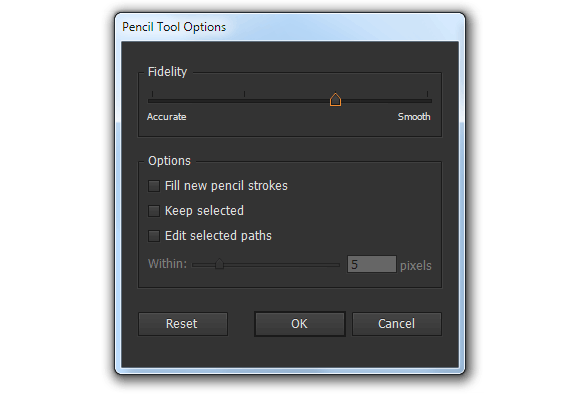
To open the Pencil Tool Options dialog window, double click on the tool icon in the Tools panel.
Step 3
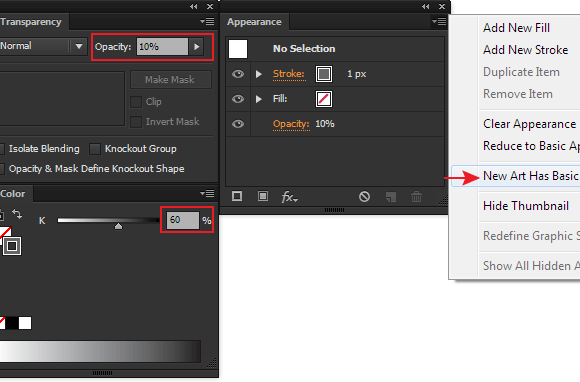
Set a neutral gray color for the stroke and reduce the opacity to 10% in the Transparency panel. In order all the paths repeat the properties of the first path, untick New Art Has Basic Appearance in the fly-out menu of the Appearance panel.
These settings will help you draw a sketch in a more natural manner. Now draw a fun face of the pumpkin.
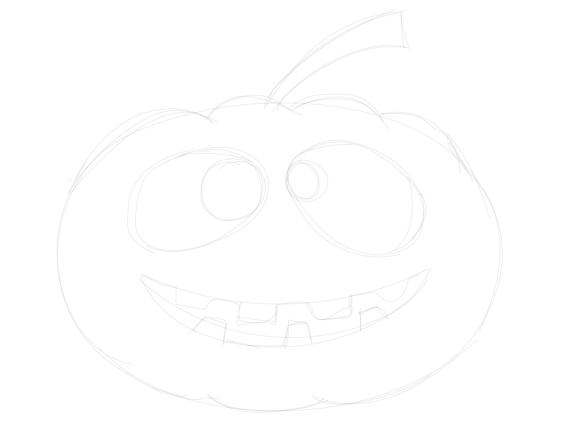
Do not try to draw an even line right away –a few strokes will help you to achieve the necessary shape. Indeed, doesn’t it look like a pencil drawing?
Step 4
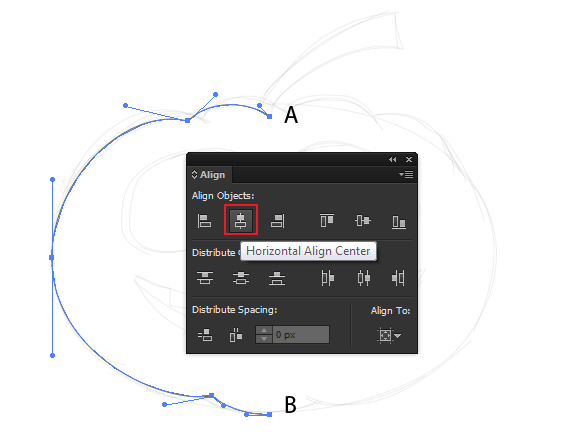
Group up all the paths of the sketch (Cmd / Ctrl + G), then lock them in the Layers panel. Take the Pen Tool (P) and create a path that corresponds to the outline of half of a pumpkin.

Align points A and B horizontally using the Align panel.
Step 5
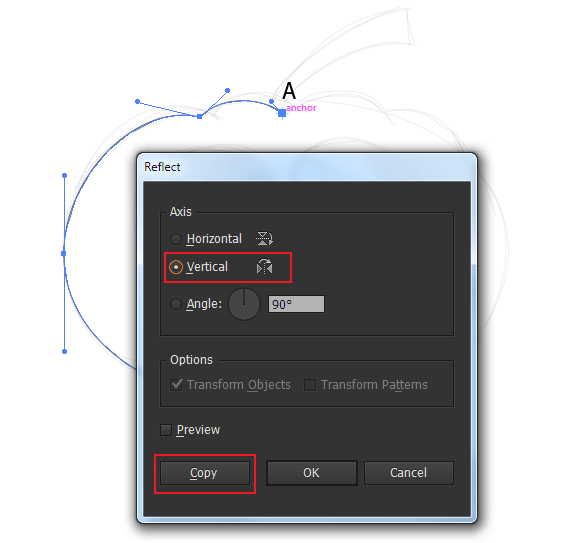
Take the Reflect Tool (O), hold Opt / Alt, click at point A. In the dialog window, select the Vertical option and click on the Copy button.
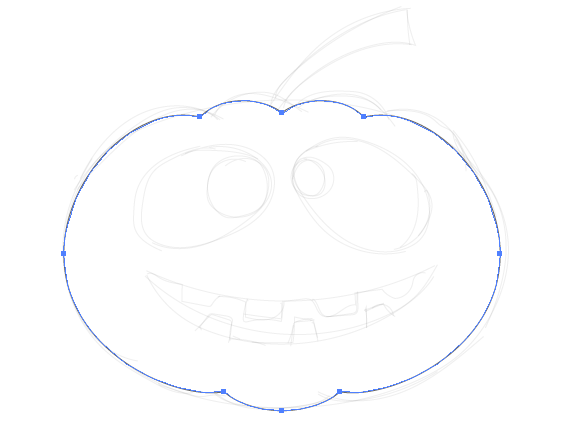
Select both of the created paths, then go to Object> Path> Join (Cmd / Ctrl + J).
Step 6
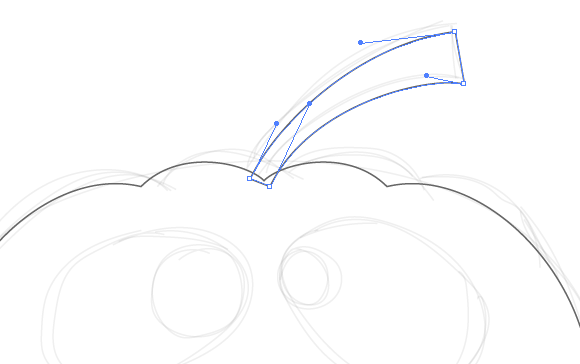
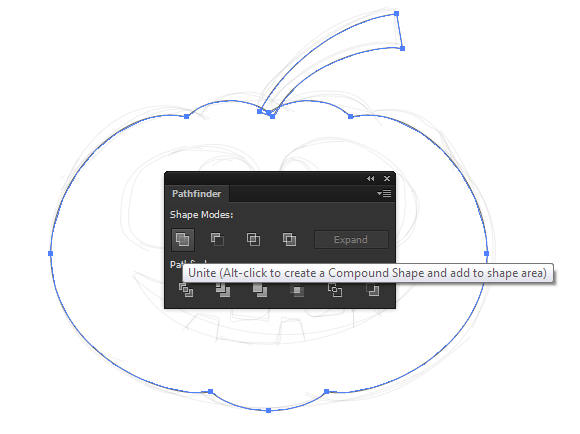
Using the Pen Tool (P) create a shape of a stem of the Halloween pumpkin vector.
Select the shape of the Halloween pumpkin vector and stem, and then click on the Unite button in the Pathfinder panel.
Step 7
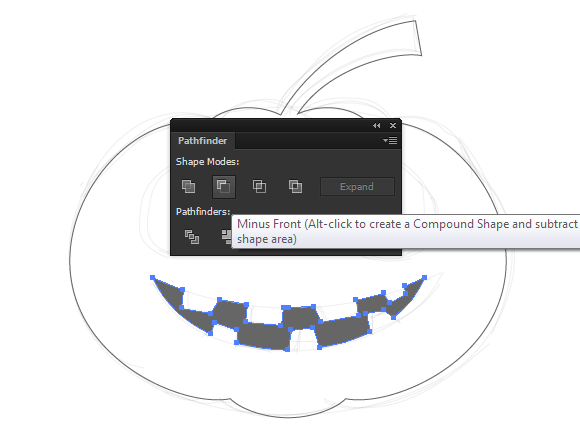
Using the Pen Tool (P) create the shape of the mouth and teeth, as shown in the following pictures.

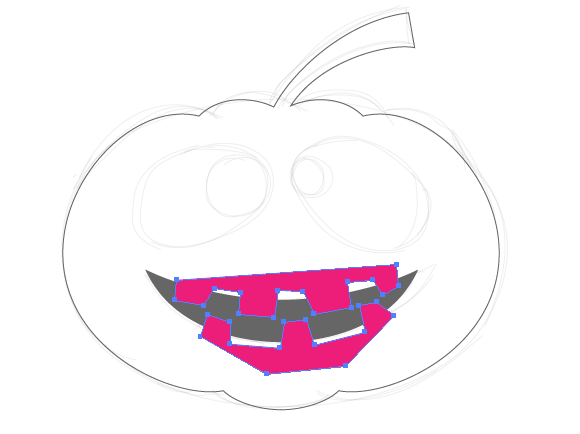
Select both shapes that correspond to the teeth, then go to Object> Compound Path> Make (Cmd / Ctrl + 8). Now select the shape of the mouth and Compound Path, and then click on the Minus Front button in the Pathfinder panel.
Step 8
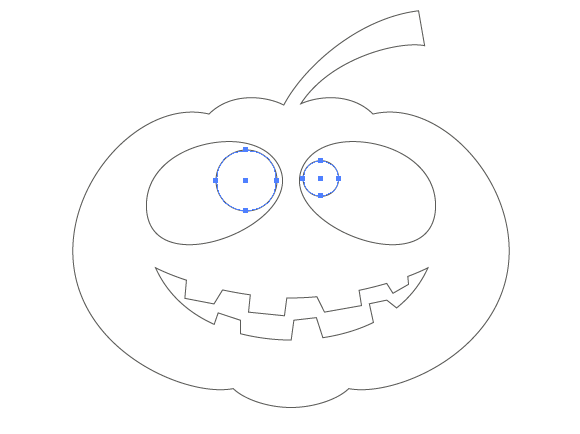
Draw the shape of the eyes of the Halloween pumpkin vector using Pen Tool (P).
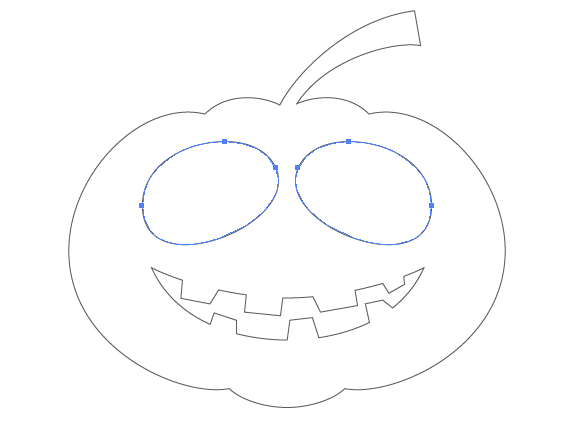
Now take the Ellipse Tool (L) and create the pupils in the shape of two circles.
Step 9
Select the outer outline of our Halloween pumpkin vector sticker and go to Object> Path> Offset Path…. In the dialog window set 14px.
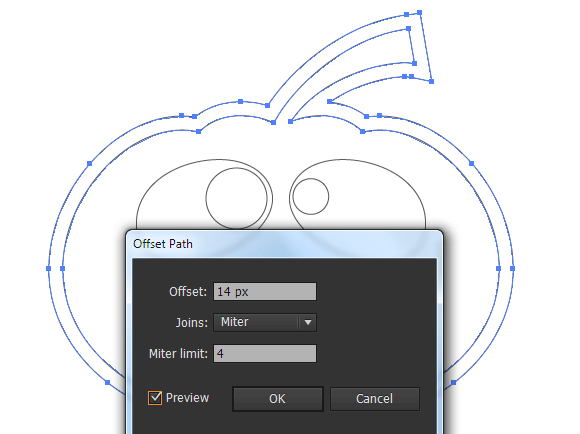
As you can see, a new path has more points than we would like it to have. I know that I will continue to work with this outline and the number of points is substantially difficult to handle. In such cases, I use Smart Remove Brush Tool (VectorScribe plug-in ) for points removal work. See how fast and easy it is to remove extra points
Step 10
It’s time to color our Halloween pumpkin vector sticker. Select the inner outline of the pumpkin, both pupil and mouth, then go to Object> Compound Path> Make (Cmd / Ctrl + 8). Now fill obtained object with a linear gradient, which consists of four sliders of two shades of orange color.
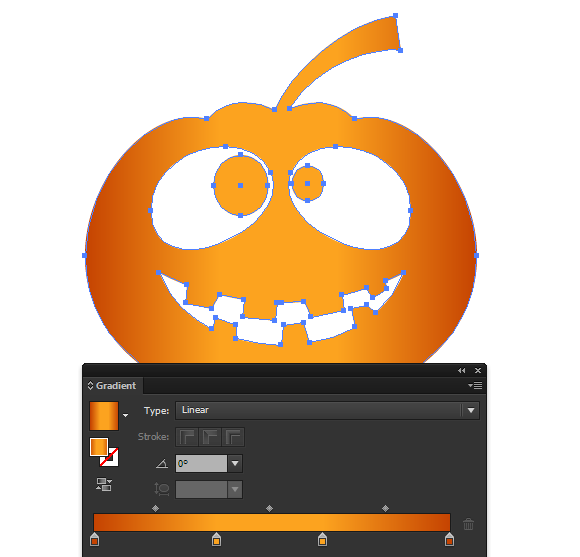
Fill the outer outline of the pumpkin with a linear gradient, which consists of four sliders of two shades of gray color.

Step 11
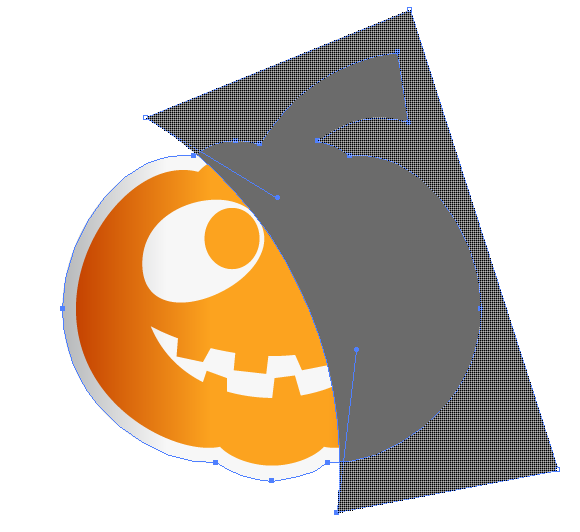
Now, let’s create glare on the sticker. Create a shape using the Pen Tool (P) like shown in the following picture.

Select the outer shape of the sticker, and this shape. Then remove the part of the gray object that goes beyond the shape of the Halloween pumpkin vector using the Shape Builder Tool and holding the Option / Alt.
Step 12
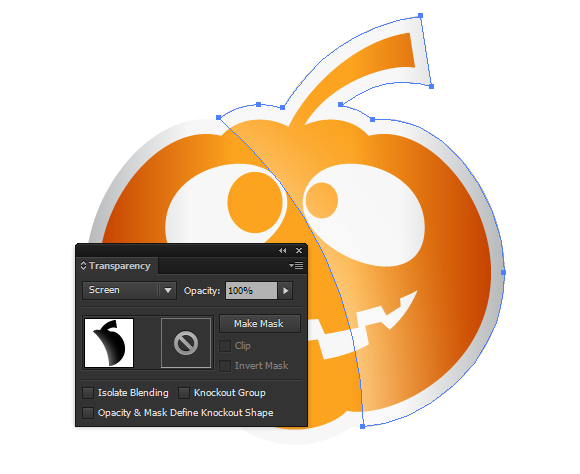
Fill the obtained shape with a radial gradient from white to black.
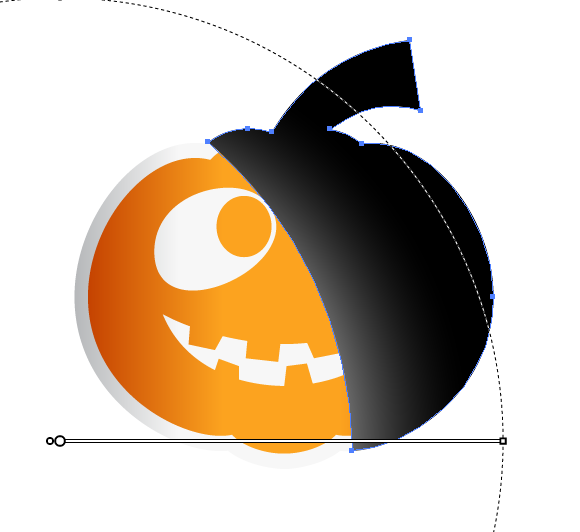
Now apply the Screen blending mode in the Transparency panel.
Step 13
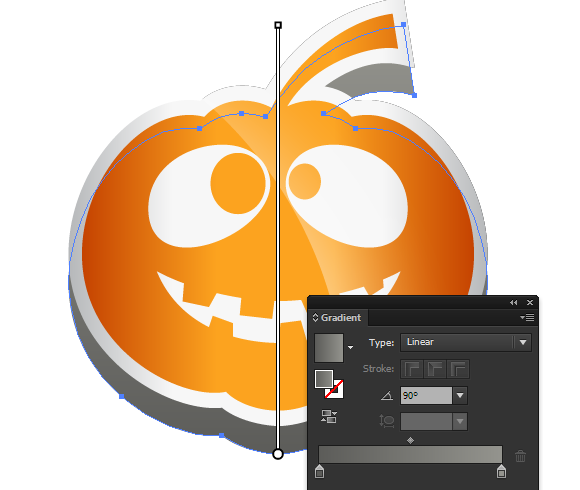
Proceed to the creation of the shadow of the Halloween pumpkin vector sticker. Copy the outer shape of the sticker, and then paste it back (Cmd / Ctrl + C; Cmd / Ctrl + B). Recolor the new object in the white and move it slightly down.
Copy the white object, and then paste it in front (Cmd / Ctrl + C; Cmd / Ctrl + F). Fill the new object with a vertical linear gradient from gray to dark gray color.
Step 14
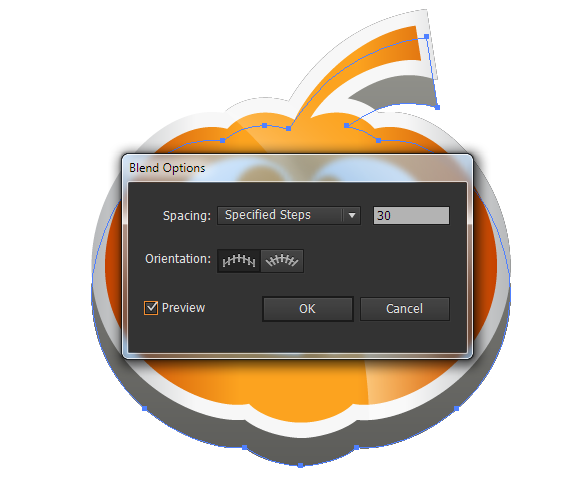
Select the white and gray shapes created in the previous step (it is convenient to do it in the Layers panel). Now go to Object> Blend> Make. Double-click on the icon of the Blend Tool (W) in the Tools panel, and in the opened dialog box select the required number of the specified steps (I usually limit it to 30 steps).
Step 15
Using the Direct Selection Tool, move the points of the upper object inside the shape in order to achieve a smooth transition.

Now you will probably understand why, I removed the extra point in step 9. Select the entire blend object and set the Multiply blending mode in the Transparency panel. This will give a transparent look to the shadow on any background.
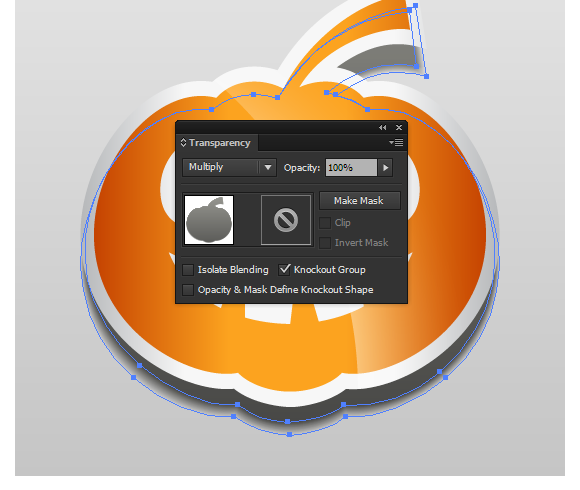
The method of creating a blend object from complex shapes, that is described in steps 13-15, will exclude artifacts. You can read more about this in my article How to Avoid Problems while Creating Blend Objects.
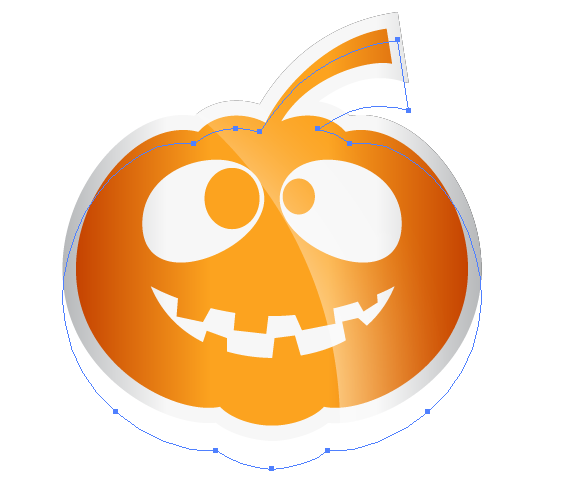
Congratulations! You’ve completed your Halloween pumpkin vector sticker. Now go out and do some trick or treating!

Author: Iaroslav Lazunov
My name is Iaroslav Lazunov, I am a graphic designer from Ukraine. I am glad that I finally found a job in my life that I can share my knowledge and experiments with you in my tutorials. Follow me on Twitter or visit my blog Vectorboom.com


Thank you ever so for you article post. Thanks Again. Much obliged!.
Amazing Illustrator tutorial, we have featured it here : http://theneodesign.com/best-illustrator-tutorials-october-2014/