
 In this tutorial we’ll create a delicious fruit vector design from basic shapes and create a dynamic composition perfect for print and web media alike!
Tutorial Details: How to Create a Simple Shape Composition Design
- Program: Adobe Illustrator CS6
- Difficulty: Intermediate
- Topics Covered: Design Theory, Shape Building, Compositional Skills
- Estimated Completion Time: 30 Minutes
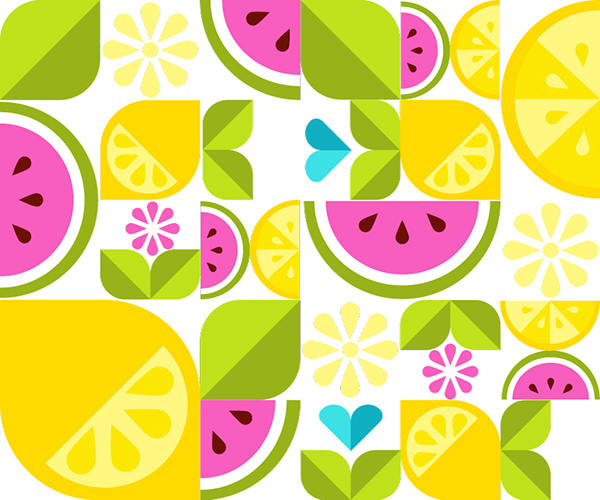
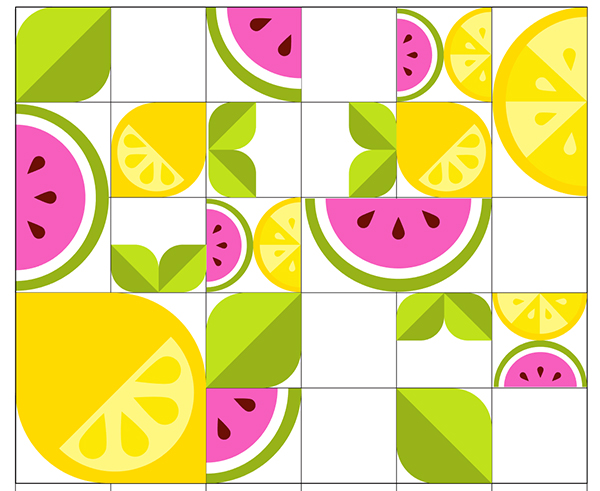
Final Image: Simple Shape Composition Design
Step 1
Let’s start with some very basic shapes! Using the Ellipse Tool, draw a circle. Overlap it with a rectangle drawn with the Rectangle Tool. Select both and hit Minus Front in the Pathfinder panel. Repeat with smaller shapes to form each layer of the watermelon. For the seeds, draw a circle and pull the topmost anchor point upward with the Direct Selection Tool. Convert the anchor point to a sharp point and place three of them on the watermelon piece.

Step 2
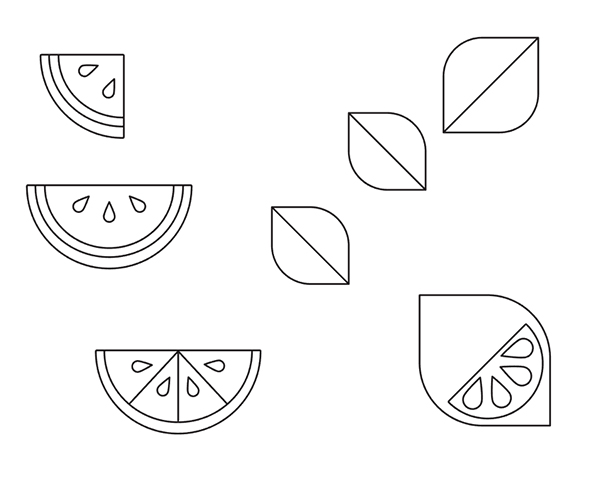
Other objects in your motif may include leaves, oranges, and lemons (as this is what my composition includes). For a simple leaf, draw a square and pull two of it’s corners (they should be diagonal from each other) inward to round the corners off. Don’t pull the corners all the way to the center since you want the shape to be fat versus thin.
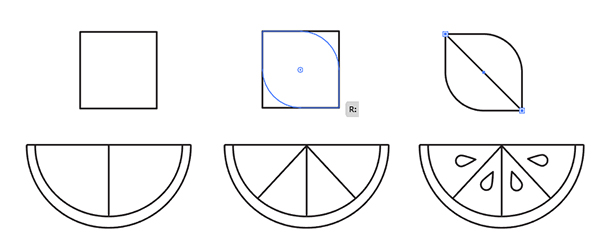
For an orange, draw a couple half circles like you did for the watermelon. Use line segments to create four sections in the design. Add a seed to each of the segments.
Step 3
Lemons are simply larger leaves with a half circle and big seeds showing. Watermelon and orange slices are simply a quarter circle designs. Each leaf should have a line bisecting them.
Step 4
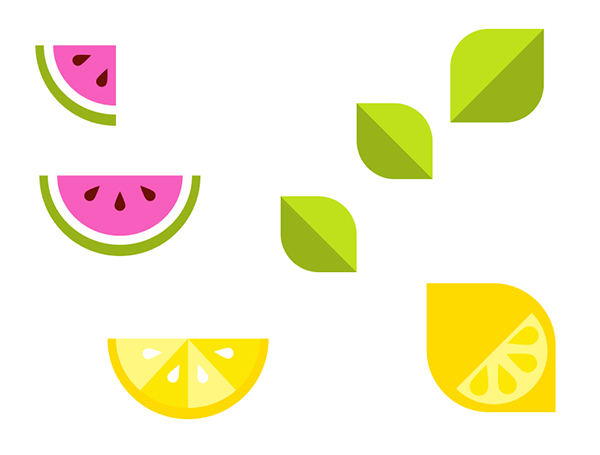
Fill in each shape. for the leaves and orange slices, you’ll need to Divide the object’s sections and apply a flat color to each. Keep your color palette to eight or so. A limited palette is best for a design like this; at least to start. You can create fantastic complex compositions and color palettes with each successive design.
Step 5
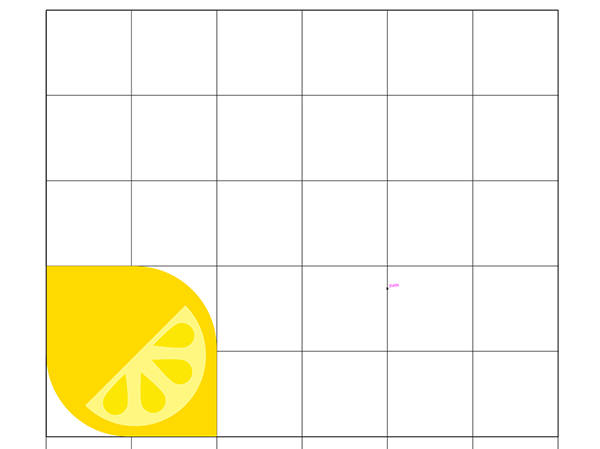
Use the Line Grid Tool to create a simple line grid on your Artboard. You’ll want to make sure each cell is a perfect square, so hold Shift when you draw the grid. Lock the grid in your Layers panel. Begin to place design elements inside the grid.
Step 6
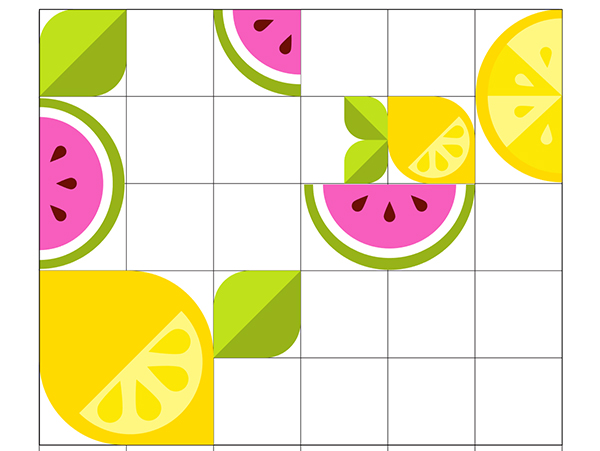
Vary the size and orientation of your elements around the grid. Make sure each object takes up one cell or more in even denominations. For smaller objects for for one half or one quarter of the cell, making sure to add in multiple pieces. You want to really hammer home the idea of this being a modular design.
Step 7
Vary element types. Try to keep like objects from touching and blending into each other. The same goes for the orientation of each object. You don’t want everything to face the same direction. Do your best to keep elements random in their placement.
Conclusion: Simple Shape Composition Design
When you’re finished with your design, delete the grid from your layers panel. You’ll now have a perfect composition, ready for print and web media alike! Share your results in the comment section below and don’t forget to share this tutorial on social media.
Author: Mary Winkler
Mary works under the brand Acrylicana® and has illustrated and designed for companies like Disney, Jakks Pacific, Jada Toys, Envato, and more. Check out Acrylicana.com for artwork, tutorials, and more. Follow Acrylicana on Instagram, Facebook, and Twitter!


How do I divide the objects sections so that I can fill both sides of the leaves different color?
I’m practicing vector design for quite some time and hopefully, I’ll be able to recreate those shapes by following your instructions. 🙂
And what if i want to create completely different shapes? is there any tutorial for this?
Hi, Mary, thank you for this tutorial, again. Please look at my outcome here:
http://agotaaa.deviantart.com/art/How-to-Create-a-Simple-Shape-Composition-Design-613869732?ga_submit_new=10%253A1465328396
Very nice! I’ll try to do it immediately 🙂