
In this tutorial you will learn how to create a semi-realistic vector TV Remote in Adobe Illustrator. You will find out how to add shadows and highlights to your TV Remote using different Blending Modes and how to create several other interesting effects. Let’s begin!
Tutorial Details
- Program: Adobe Illustrator CS5 – CC
- Difficulty: Beginner-Intermediate
- Topics Covered: Gradient Tool, Basic Tools and Effects, Transform techniques and the Appearance panel
- Estimated Completion Time: 1 hour
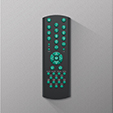
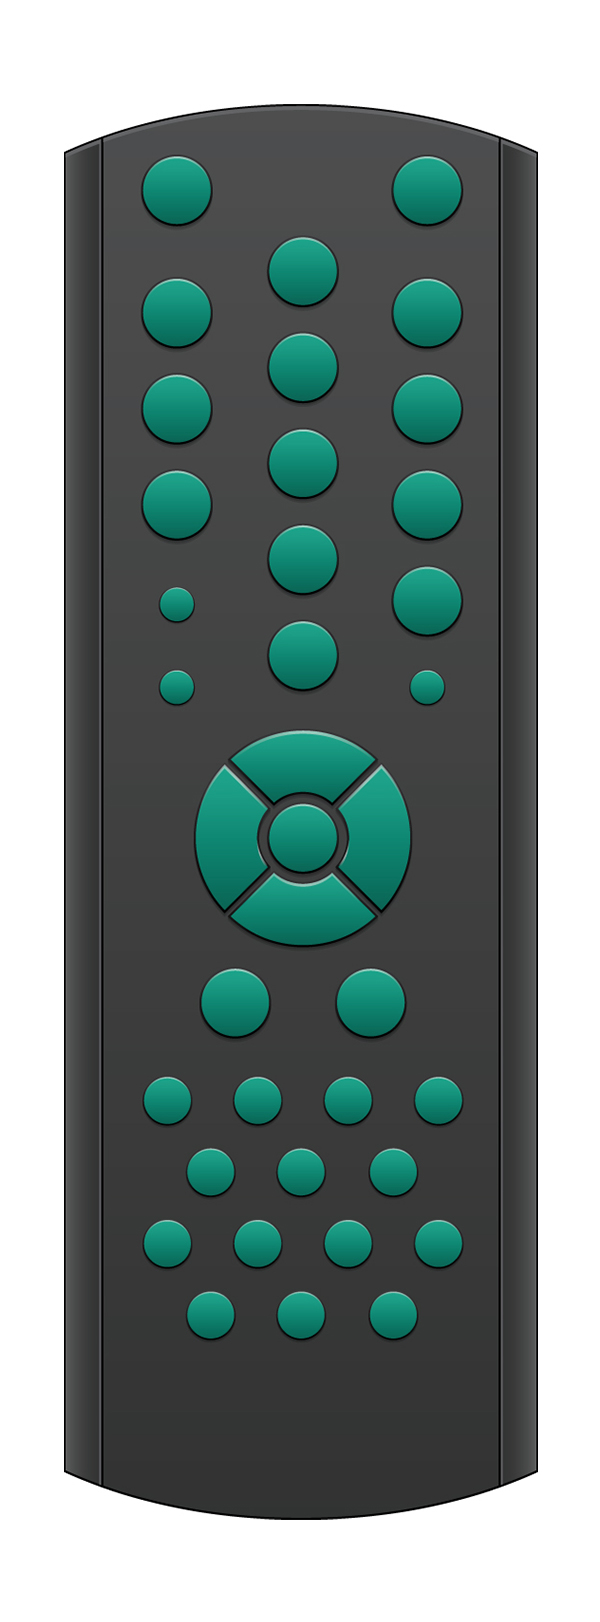
Final Image
This is the final image that we’ll be creating:
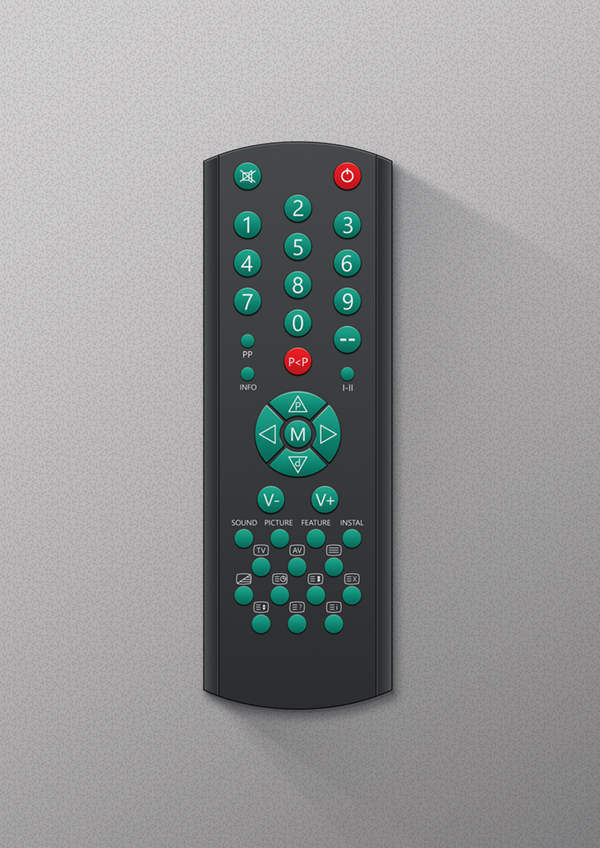
Step 1
Open Adobe Illustrator and create a new document (Ctrl + N). Select CMYK Color Mode, 300 PPI Raster Effects and make sure that Align New Objects to Pixel Grid is unchecked.
Next, go to Edit > Preferences > General and set the Keyboard Increment to 1 pt.
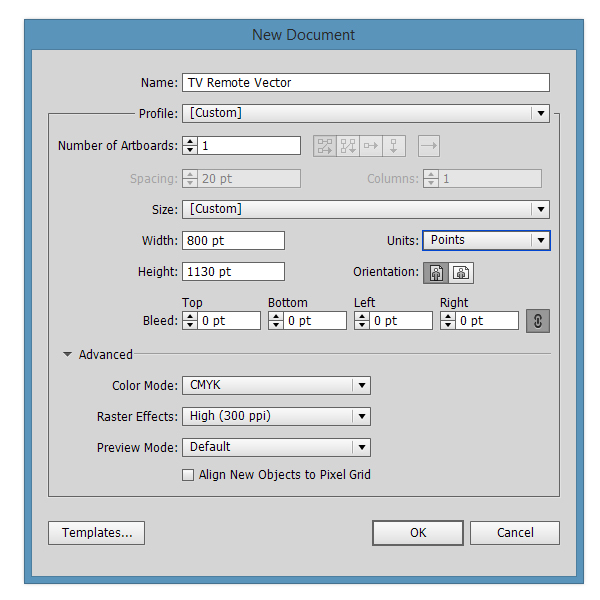
Step 2
Pick the Rectangle Tool (M) and draw a 250 x 750 pt rectangle.
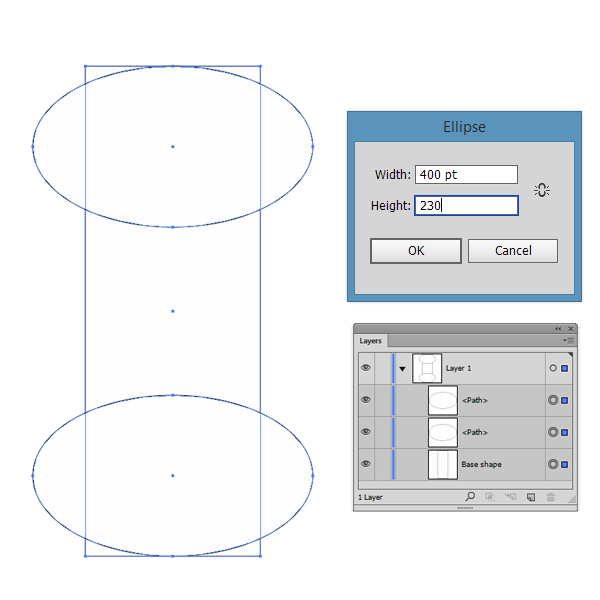
Step 3
Pick the Elipse Tool (E) and draw two 400 x 230 pt circles. Position them as shown in the image below.
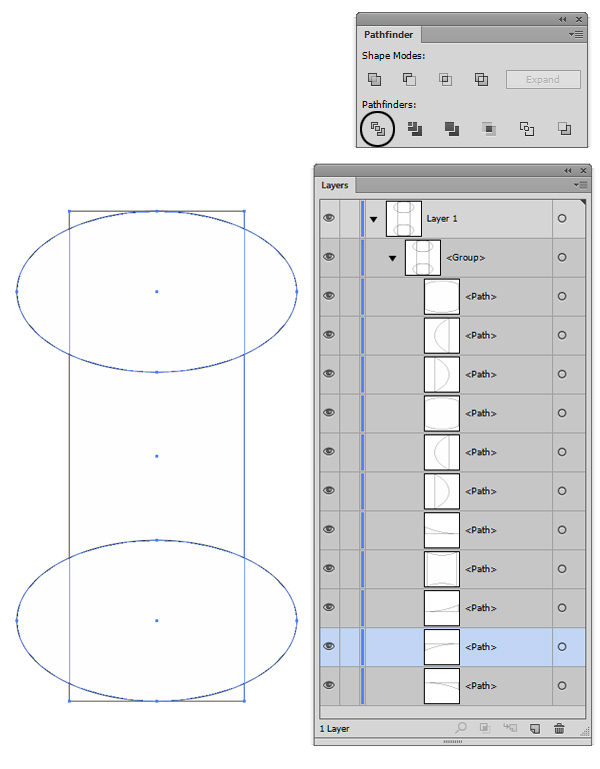
Step 4
Select all three shapes and hit the Divide button from the Pathfinder Panel.
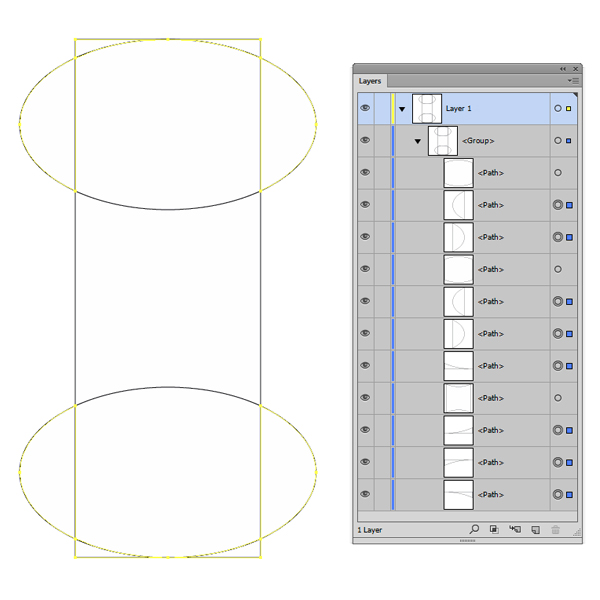
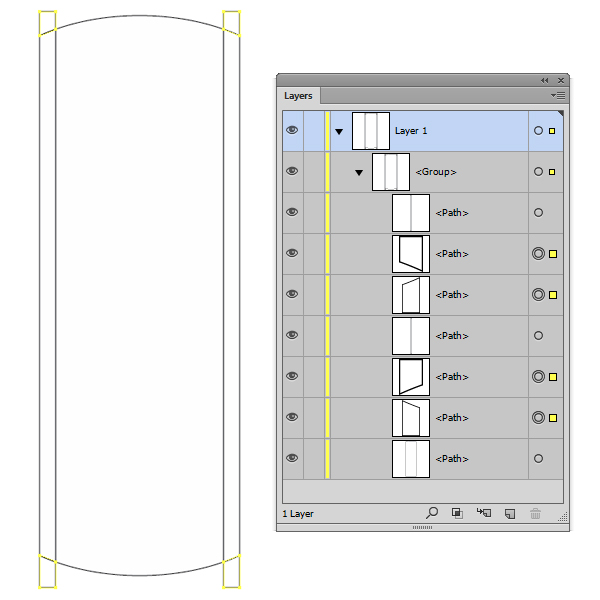
Step 5
Now select the resulted shapes that you don’t need from the Layers Panel and hit the Delete button from the keyboard.
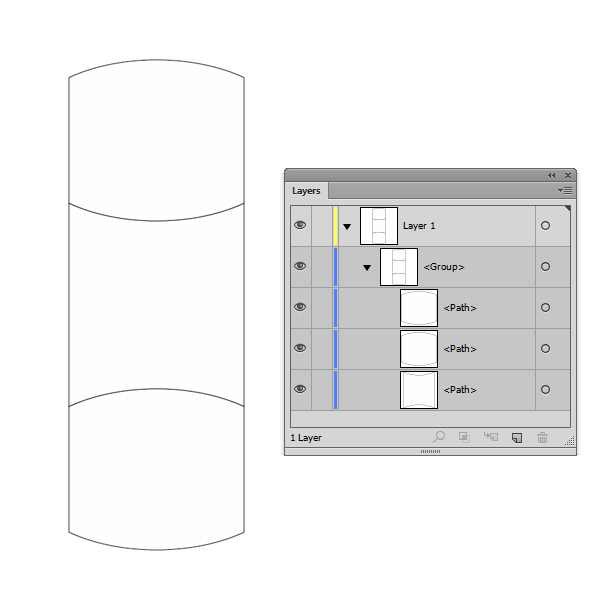
After deleting the unnecessary shapes, this is what will remain: three separate shapes.
Step 6
Select all three shapes and hit the Unite button from the Pathfinder Panel.
This will be the resulted shape:
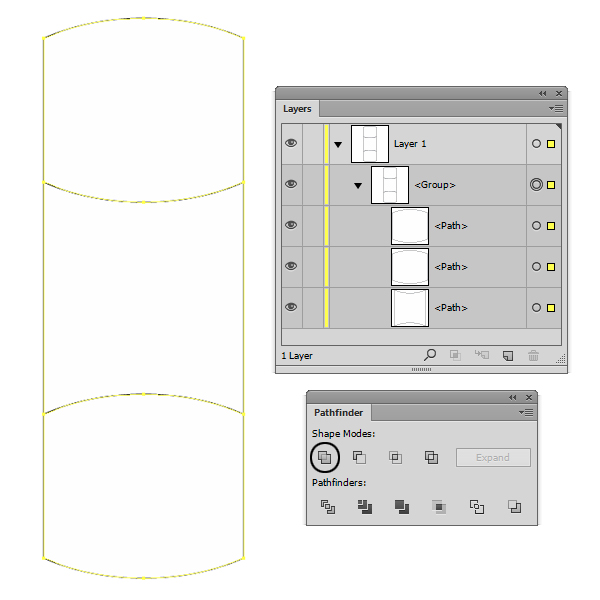
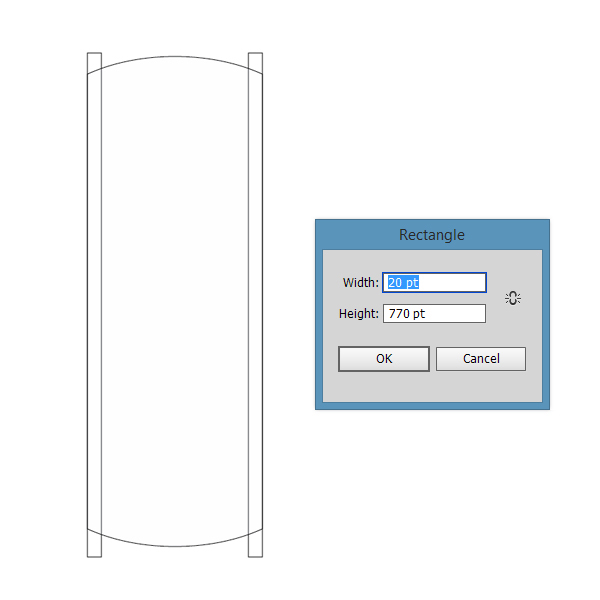
Step 7
Pick the Rectangle Tool (M) and draw two 20 x 770 pt rectangles. Position them as shown in the screenshot below.
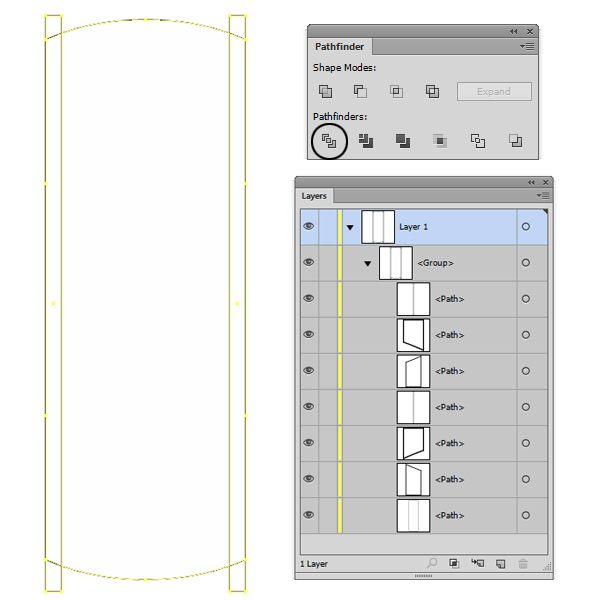
Step 8
Select all three shapes and hit the Divide button from the Pathfinder Panel.
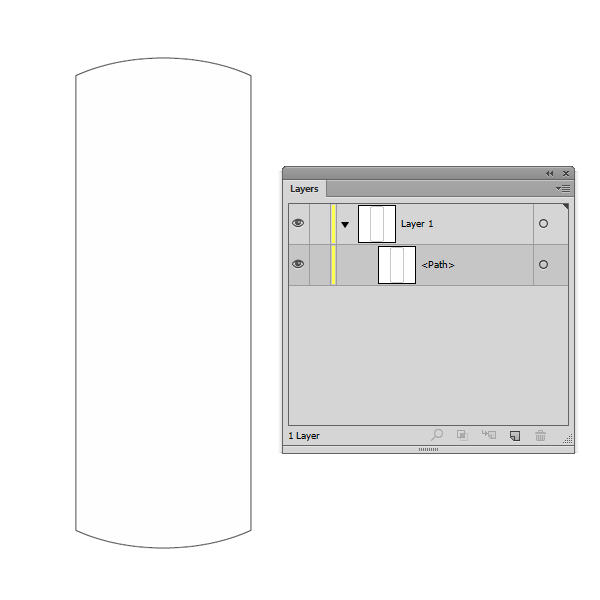
Step 9
Now select from the Layers Panel the resulted shapes that you don’t need and hit the Delete button from the keyboard.
After deleting the unnecessary shapes, this is what will remain: three separate shapes.

Step 10
Fill the main shape with C=0 M=0 Y=0 K=20 and the remaining two shapes with a darker color C=0 M=0 Y=0 K=60 in order to see them better.
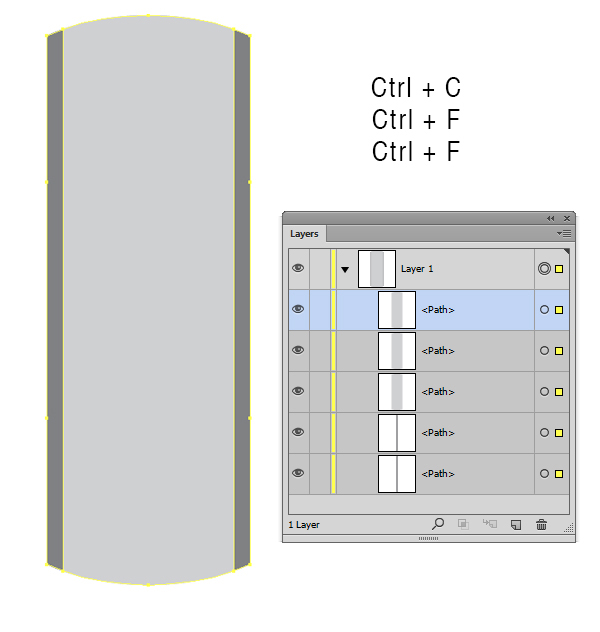
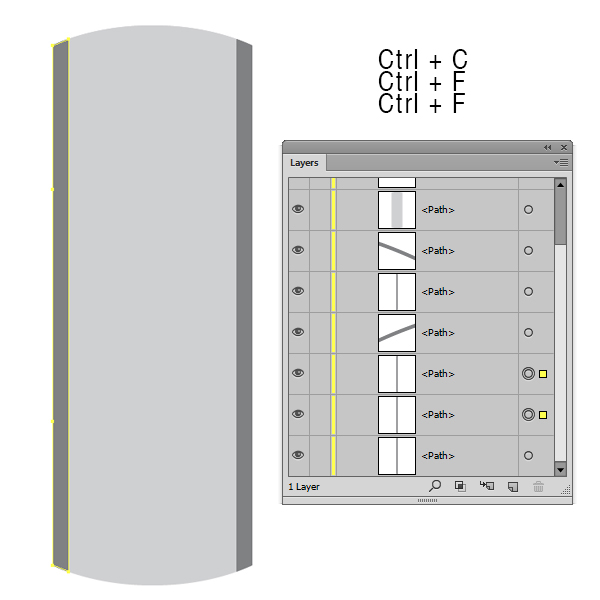
Step 11
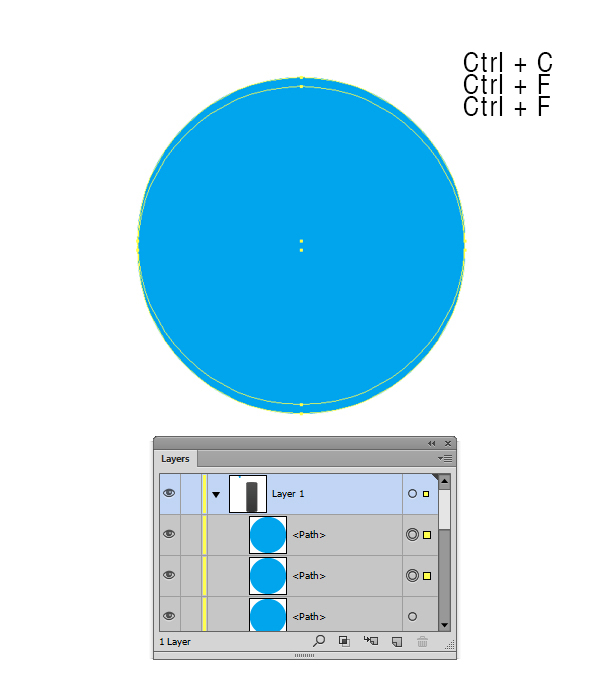
Select the main shape and make two copies in front of it (Ctrl + C > Ctrl + F > Ctrl +F).
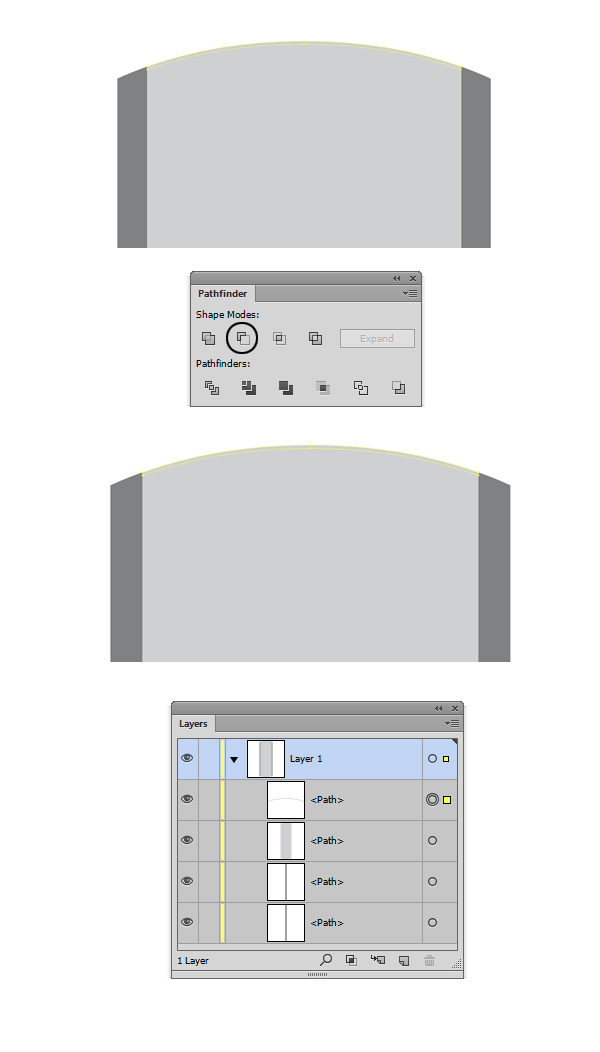
Step 12
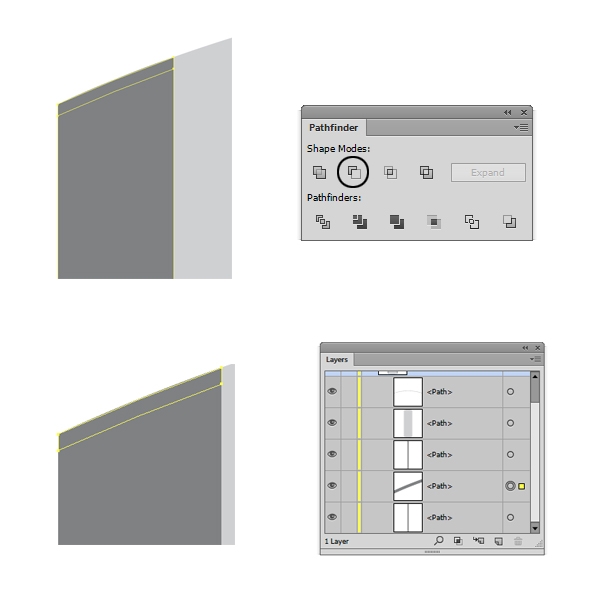
Select the copy that is on top of the others and, with your keyboard arrows, move it 2 points down. Select both copies and click the Minus Front button from the Pathfinder Panel.
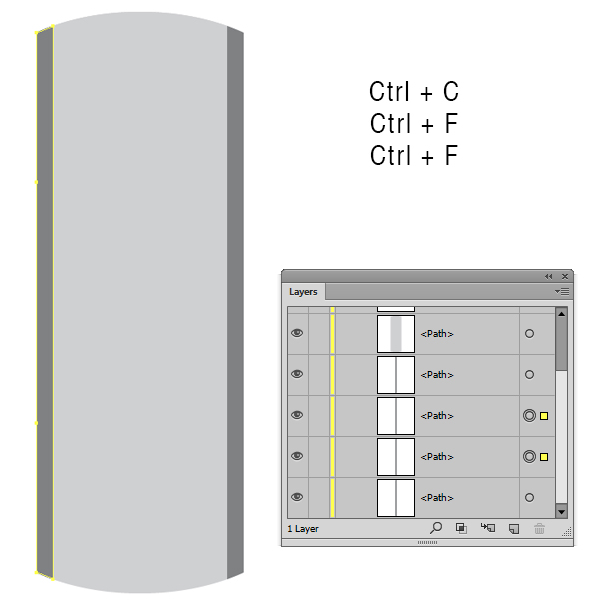
Step 13
Select the left shape and make two copies in front of it (Ctrl + C > Ctrl + F > Ctrl +F).
Step 14
Select the copy that is in front of the other and, with your keyboard arrows, move it 2 points down. Select both copies and click the Minus Front button from the Pathfinder Panel. Now repeat steps 13 and 14 for the right shape.
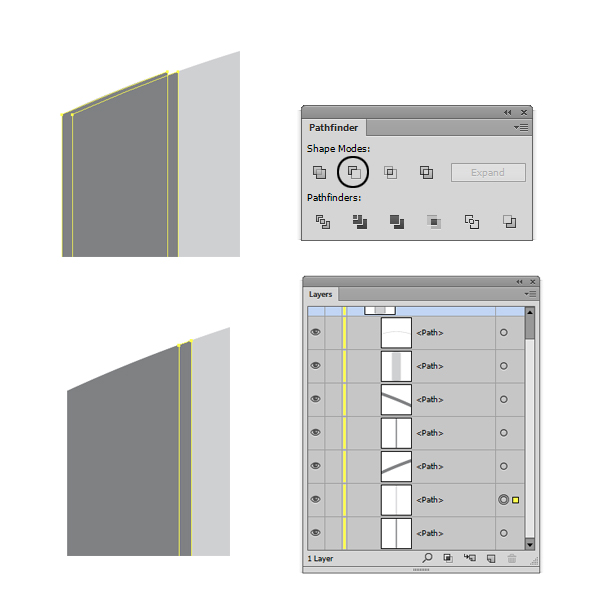
Step 15
Select the left shape and make two copies in front of it (Ctrl + C > Ctrl + F > Ctrl +F).
Step 16
Select the copy that is in front of the other and, with your keyboard arrows, move it 2 points to the left. Select both copies and click the Minus Front button from the Pathfinder Panel. Now repeat steps 15 and 16 for the right shape, but, instead of moving the shape (that is on top) 2 points to the left, move it 2 points to the right.
Step 17
This is how it should look. I’ve added different colors to better see the shapes.
Step 18
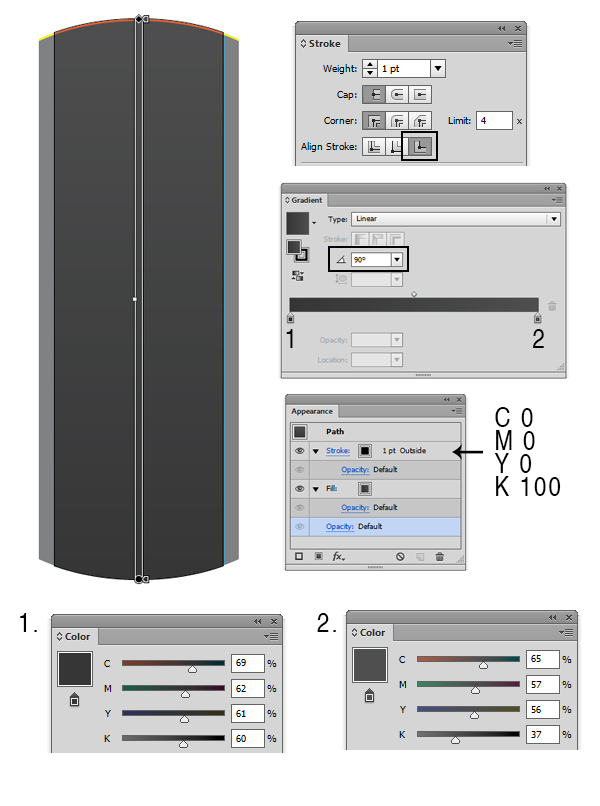
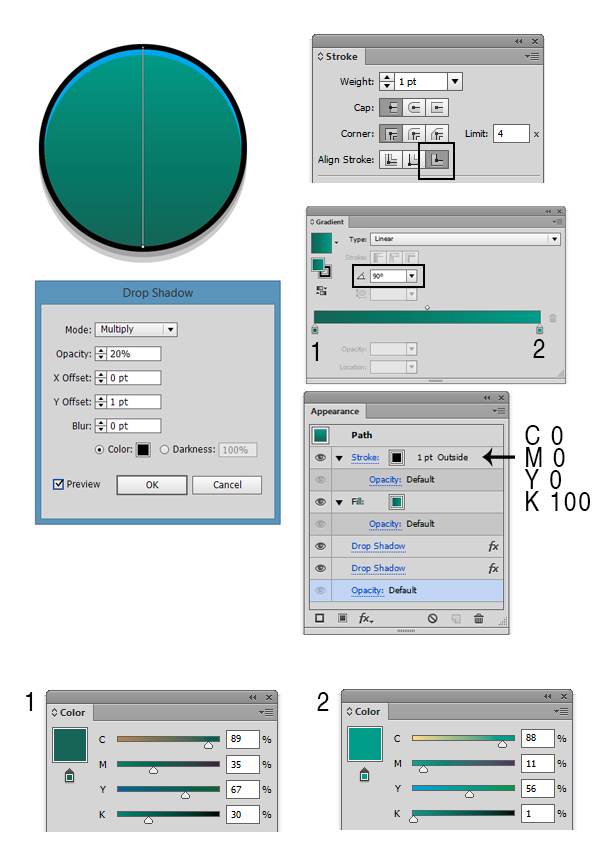
Select the main shape and add a 1 point black (C=0 M=0 Y=0 K=100) stroke. Go to the Stroke Panel (Window > Stroke) and align the stroke to outside. Fill the shape with a two-color gradient (Window > Gradient). Change the angle of the gradient to 90 degrees. Select the Left slider from the Gradient Panel and fill it with C=69 M=62 Y=61 K=60. Then select the Right slider and fill it with C=65 M=57 Y=56 K=37.
Step 19
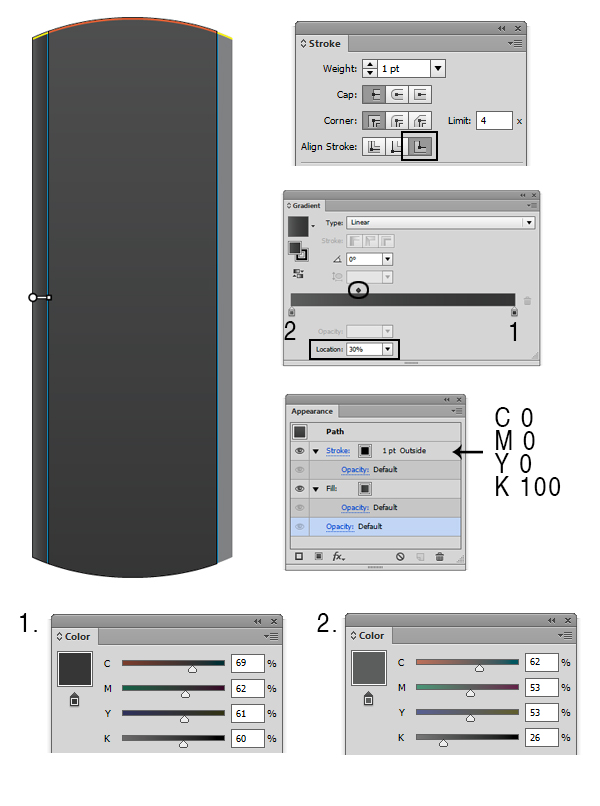
Select the left shape and add a 1 point black (C=0 M=0 Y=0 K=100) stroke. Go to the Stroke Panel (Window > Stroke) and align the stroke to outside. Fill the shape with a two-color gradient (Window > Gradient). Change the location percentage to 30% from the Gradient Panel. Select the Right slider from the Gradient Panel and fill it with C=69 M=62 Y=61 K=60. Then select the Left slider and fill it with C=62 M=53 Y=53 K=26.
Step 20
Select the right shape and add a 1 point black (C=0 M=0 Y=0 K=100) stroke. Go to the Stroke Panel (Window > Stroke) and align the stroke to outside. Fill the shape with a two-color gradient (Window > Gradient) with the following steps. Change the location percentage to 70% from the Gradient Panel. Select the Left slider from the Gradient Panel and fill it with C=69 M=62 Y=61 K=60, then select the Right slider and fill it with C=62 M=53 Y=53 K=26.

Step 21
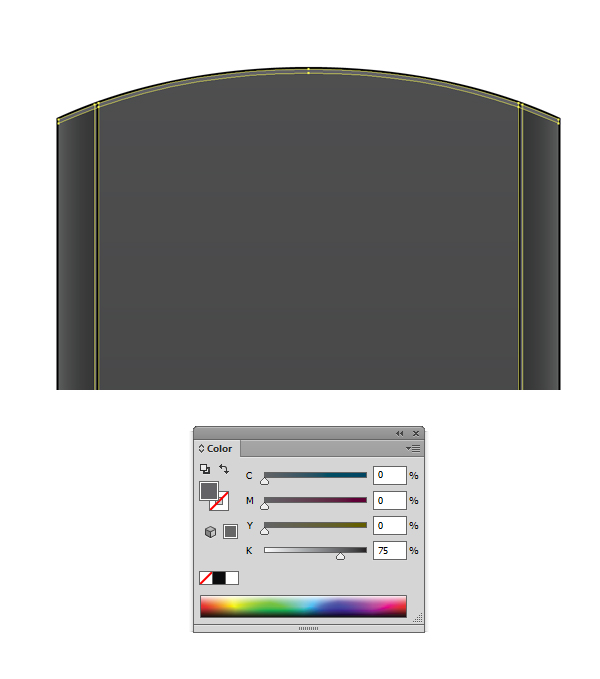
Select the small shapes we’ve created at steps 12, 14 and 16 and fill them with C=0 M=0 Y=0 K=60.
Step 22
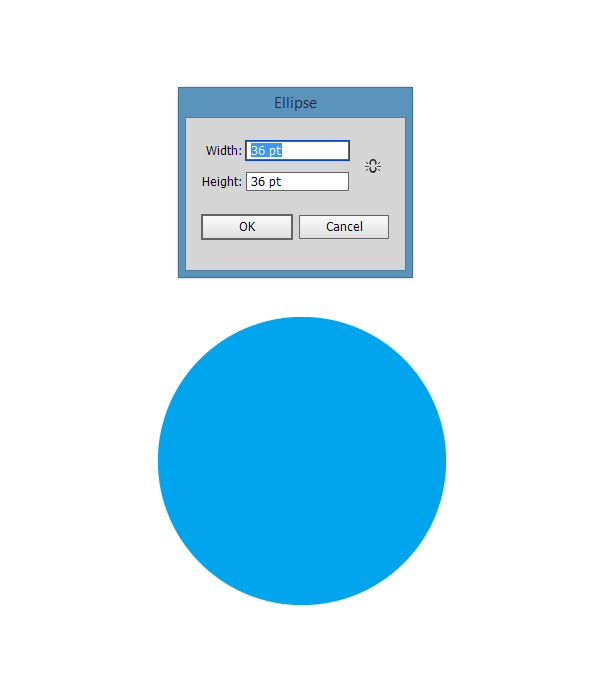
Now let’s create the buttons for our TV Remote. Pick the Elipse Tool (L) and create a 36 x 36 pt circle.
Step 23
Select the circle shape and make two copies in front of it (Ctrl + C > Ctrl + F > Ctrl +F).
Step 24
Select the copy that is on top of the other and, with your keyboard arrows, move it 1 point down. Select both copies and click the Minus Front button from the Pathfinder Panel.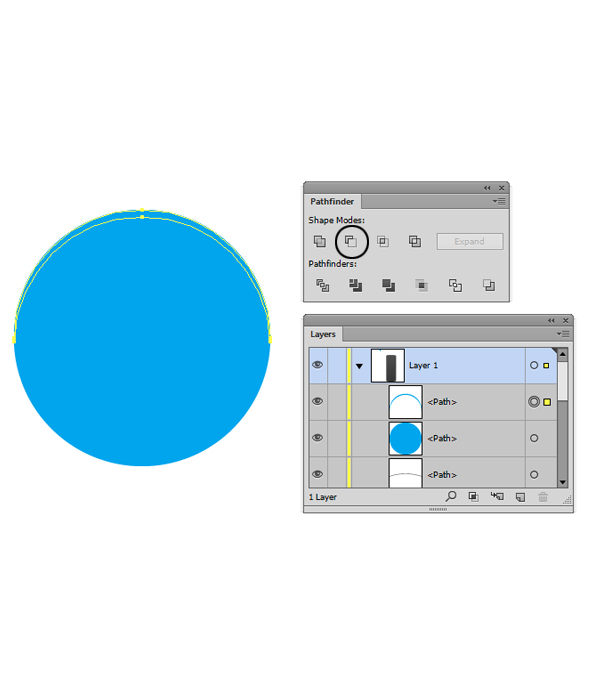
Step 25
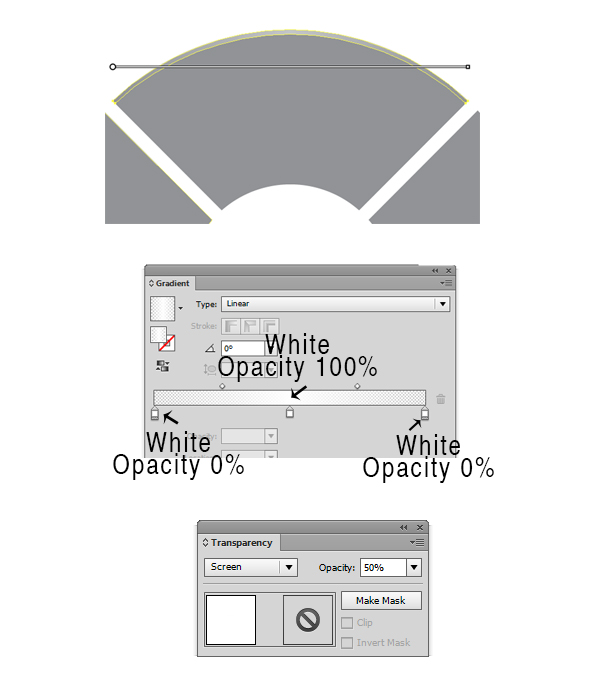
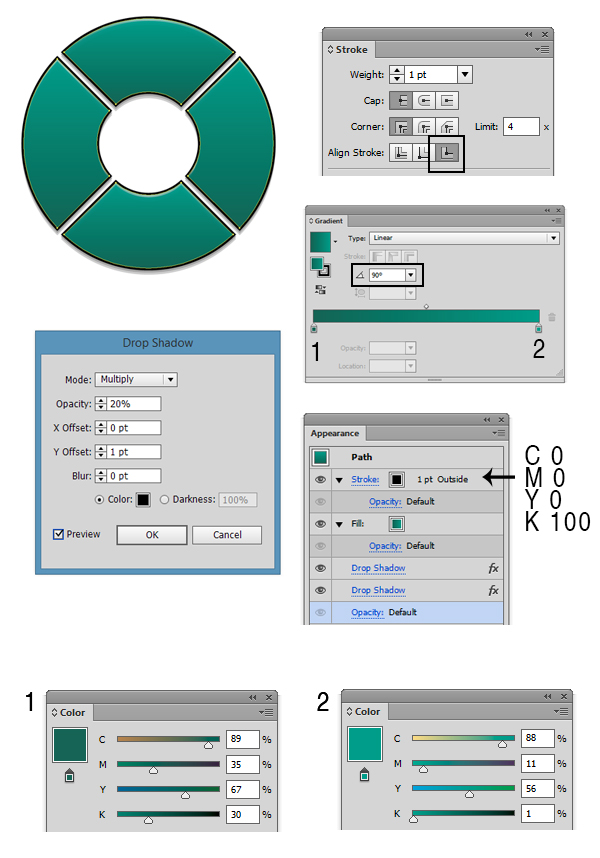
Select the elipse and add a 1 point black (C=0 M=0 Y=0 K=100) stroke. Go to the Stroke Panel (Window > Stroke) and align the stroke to outside. Fill the shape with a two-color gradient (Window > Gradient) by doing the following: Change the angle to 90 degrees from the Gradient Panel. Select the Left slider from the Gradient Panel and fill it with C=89 M=35 Y=67 K=30; then select the Right slider and fill it with C=88 M=11 Y=56 K=1. Add a Drop Shadow (Effects > Stylize > Drop Shadow) and enter the same values as in the image below. Go again to Effect > Stylize > Drop Shadow and add a new Drop Shadow. An alert message will appear, then click Apply New Effect button.
Step 26
Select the shape we’ve created at step 24 and fill it with a three-color gradient (Window > Gradient); then lower the Opacity to 50% and change the Blending Mode to Screen.
Step 27
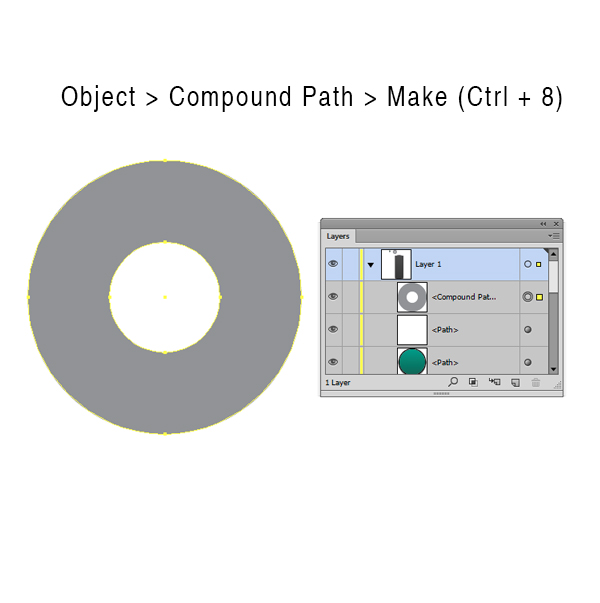
Using the Ellipse Tool (L), create two circles as in the image below.
Step 28
Select both circles and go to Object > Compound path > Make (Ctrl + 8) in order to create a compound path.
Step 29
Using the Rectangle tool (M) create two 3 x 150 pt rectangles. Position them as in the image below.
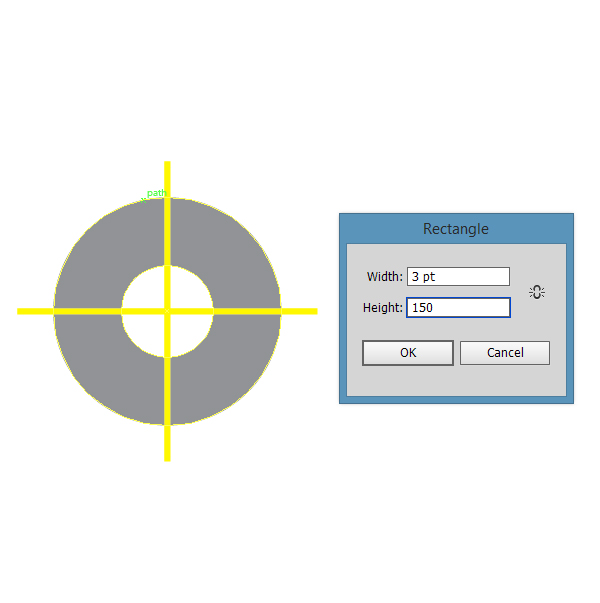
Step 30
Select all three shapes and hit the Minus Front button from the Pathfinder Panel.
Step 31
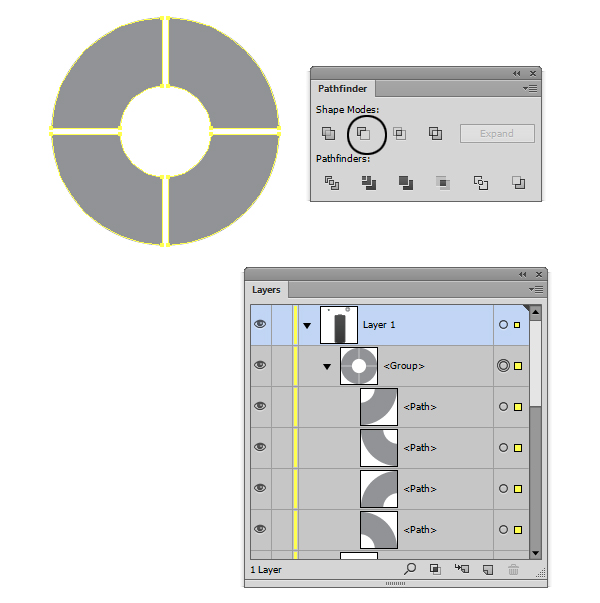
Select all four shapes and rotate them 45 degrees using the Rotate Tool (R).

Step 32
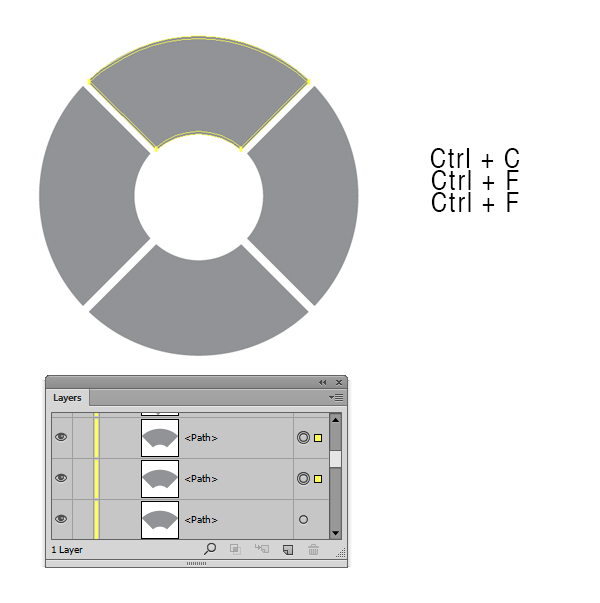
Select the top shape and make two copies in front of it (Ctrl + C > Ctrl + F > Ctrl +F). Select the copy that is on top of the other and, using the keyboard arrows, move it 1 point down. Then go to the Pathfinder Panel (Window > Pathfinder) and hit the Minus Front button.
Step 33
Fill the resulted shape with a three-color gradient shown below (Window > Gradient). Then lower the Opacity to 50% and change the Blending Mode to Screen.
Step 34
Now repeat the steps 32 and 33 for the rest of the three shapes. That’s what you should obtain: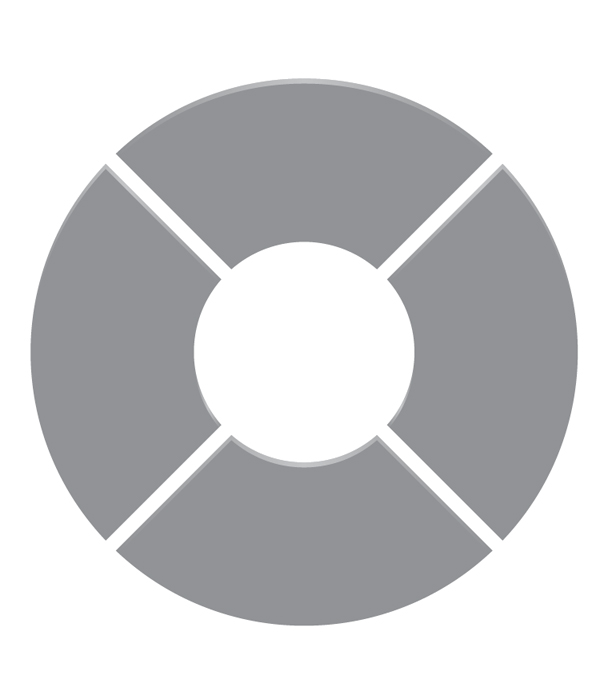
Step 35
Select all four shapes (without the shapes we created at steps 32 and 33) and add a 1 point black stroke (C=0 M=0 Y=0 K=100). Go to the Stroke Panel (Window > Stroke) and align the stroke to outside. Fill the shape with a two-color gradient (Window > Gradient). Change the angle to 90 degrees from the Gradient Panel. Select the Left slider from the Gradient Panel and fill it with C=89 M=35 Y=67 K=30, then select the Right slider and fill it with C=88 M=11 Y=56 K=1. Add a Drop Shadow (Effects > Stylize > Drop Shadow) and enter the same values as in the image below. Go again to Effect > Stylize > Drop Shadow and add a new Drop Shadow. An alert message will appear; then click Apply New Effect button.
Step 36
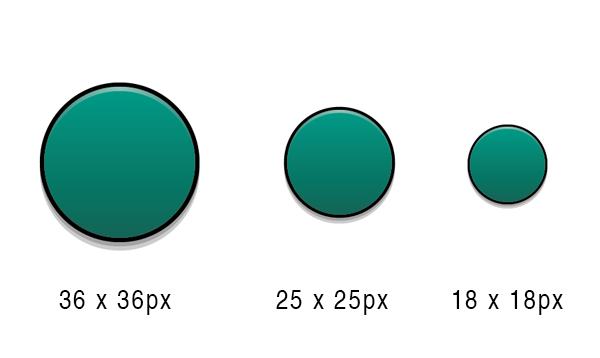
Now select the buttons we’ve previously created (from step 22 to step 26) and make three different versions, as in the image below.
Step 37
Now that we have all the shapes we need, let’s arrange them like in the image below or feel free to arrange them as you like.
Step 38
Now let’s add labels to our buttons using the Type Tool (T) and the Pen Tool (P). Feel free to use whatever font you want and, of course, you can make your own unique icons.
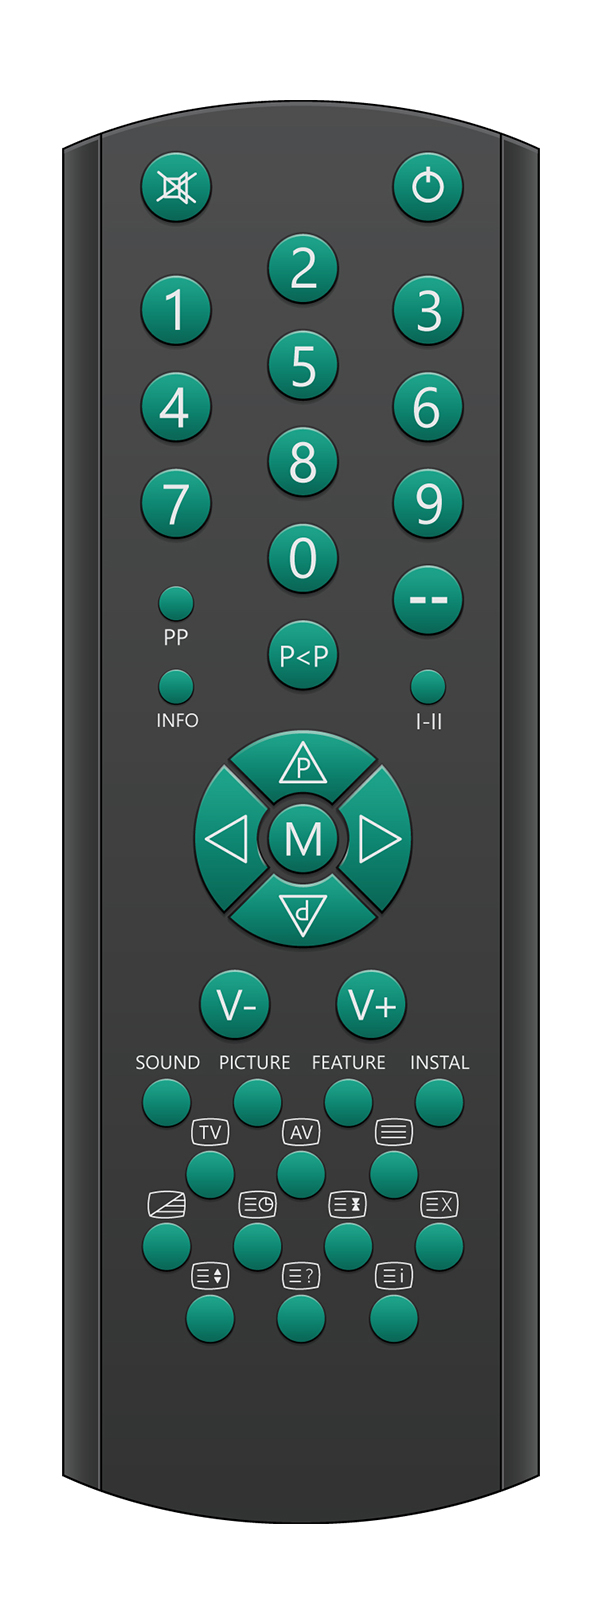
And we’re done!
![]()
Author: Andrei Urse
My name is Andrei Urse. I’m a graphic designer from Romania. I love creating logos and complex vector art using Illustrator, but I also use Photoshop and InDesign on a daily basis. You can find all of my work on Behance.


Hi,
can you send me the Final File?
Outstanding tutorial, it has developed my skills in understanding the software illustrator much better than before. Kudos to the presenter/writer of this tutorial! Attached is the design I created from your tutorial which has been posted on twitter making sure that vectips.com will get the credit and hopefully many new subscribers to your organization, enjoy and thank you so much!
http://vectips.com/tutorials/create-vector-tv-remote/