
Need some customizable holiday sale tags? Why not make your own? With rectangles, circles, and triangles, you’ll have a set of holiday sales tags in 15 minutes!
Tutorial Details: Holiday Sales Tags
- Program: Adobe Illustrator CC 2014
- Difficulty: Beginner
- Topics Covered: Gradients, Shape Building, Drop Shadows
- Estimated Completion Time: 15 Minutes
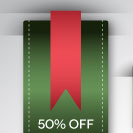
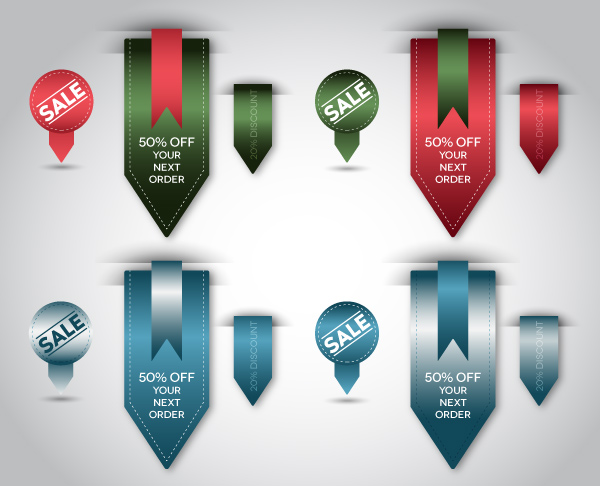
Final Image: Holiday Sales Tags
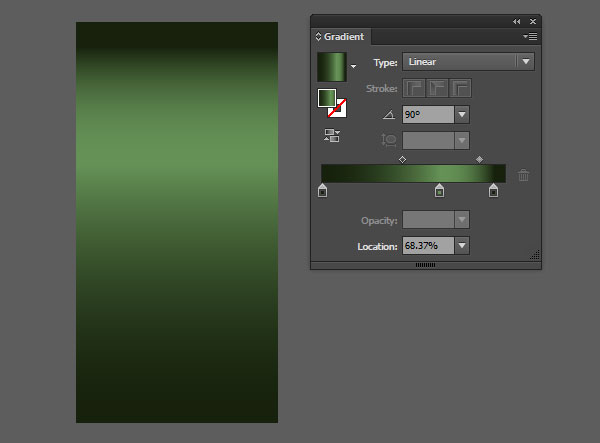
Step 1: Holiday Sale Tags
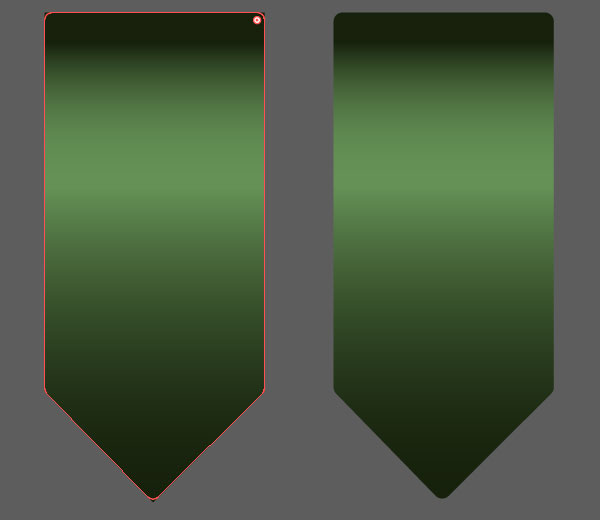
First off for this holiday sales tags tutorial, use the Rectangle Tool (M) and draw a vertical rectangle. Set the fill color to a Linear Gradient that goes from dark green to green and back to dark green again. Make sure the angle of the gradient is set to 90°.
Step 2
Use the Pen Tool (P) to draw a triangle that meets each of the bottom anchor points of the rectangle. Unite the two shapes in the Pathfinder panel.
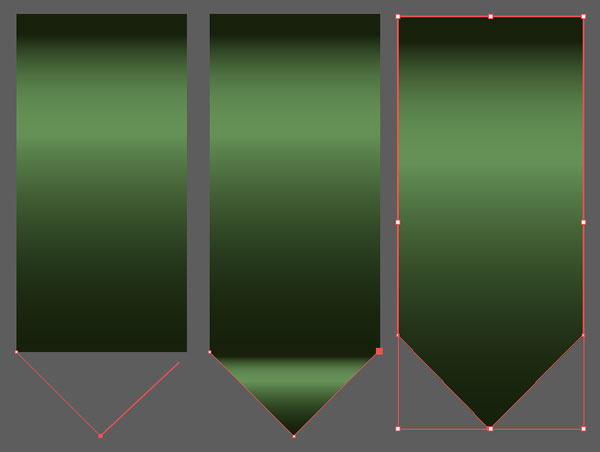
Step 3
Select the newly united shape with the Direct Selection Tool (A) and pull the Live Corners inward, toward the center of the holiday sales tags shape, to round the corners slightly.
Step 4
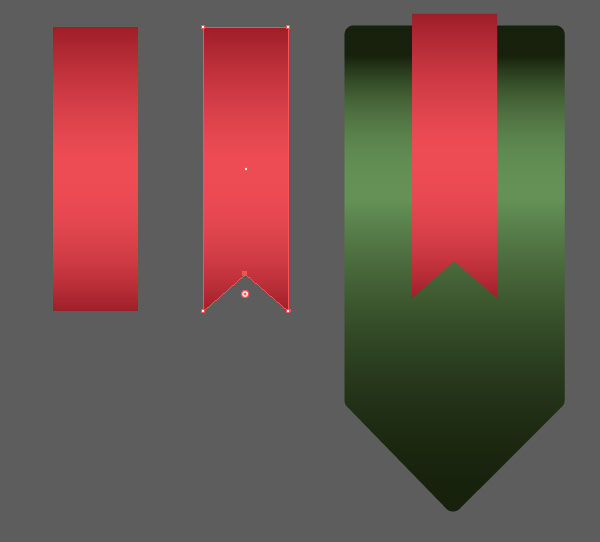
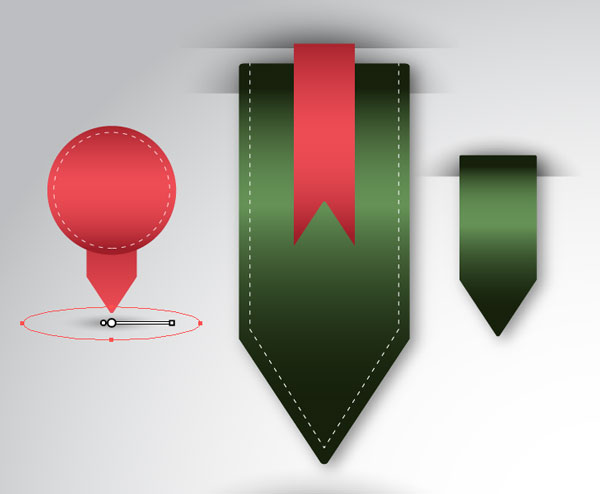
For the ribbon tail on the first of our holiday sales tags, draw another vertical rectangle with the Rectangle Tool (M). This time, though, set the Linear Gradient to red hues. Use the Add Anchor Point Tool (+) to add an anchor point t othe bottom edge of the red rectangle. With the Direct Selection Tool, pull the anchor point upward, splitting the tail. Use the Selection Tool (V) to move the ribbon to the upper center of the green object. We will complete the details of this tag momentarily.
Step 5
Moving on to the next holiday sales tags design, draw a circle using the Ellipse Tool. Apply the same Linear Gradientas was used on the red ribbon. Copy (Control-C) and Paste (Control-V) the green arrow shape. Change the colors to red hues in the Gradient panel. Scale the arrow shape down and place it behind the circle in the Layers panel in the manner seen below.

Step 6
The final tag shape is another smaller green arrow object. Once again, Copy and Paste the green tag and Scale it down. Adjust the gradients of each shape as needed with the Gradient Tool (G).

Step 7
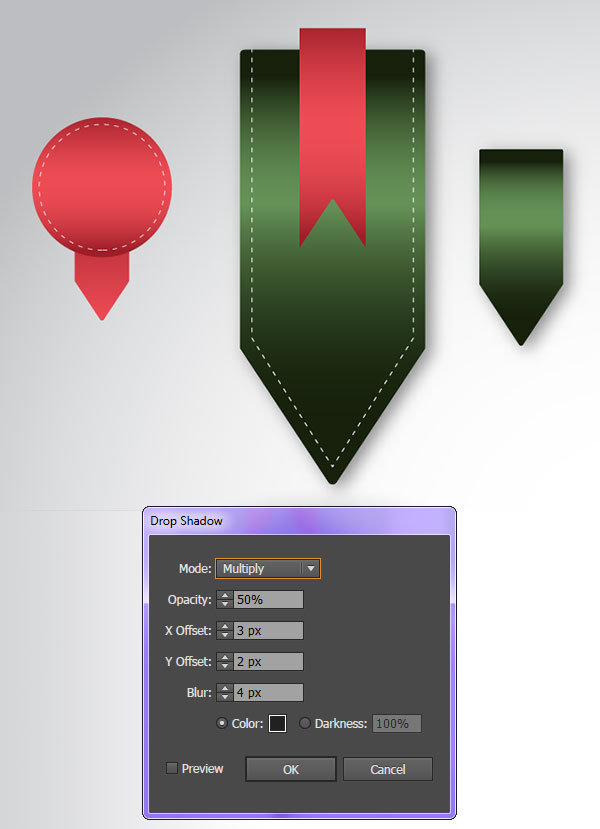
Draw a circle with the Ellipse Tool and set the fill color to null and the stroke color to white. In the Strokes panel, choose Dashed Line and set up the dash and gap of your choosing. Additionally, make sure the weight of the stroke is the thickness you desire. I opted for 0.5 pt weight, 2 pt dash, and a 3pt gap. Repeat with the outline on the larger tag (drawn with the Pen Tool).
Group (Control-G) together your central holiday sales tags components. In the Appearance panel, apply a Drop Shadow effect (Effect > Stylize > Drop Shadow) with the following attributes:
- Mode:
Multiply
- Opacity:
50%
- X Offset:
3 px
- Y Offset:
2 px
- Blur:
4 px
- Color:
#212121
Repeat with the smaller green tag.
Step 8
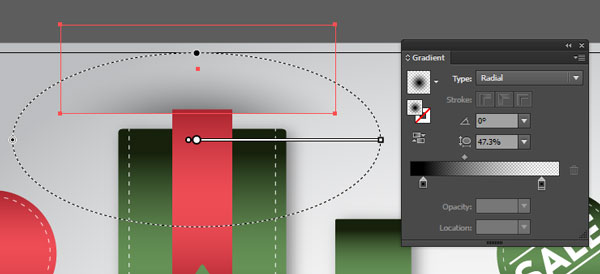
Use the Rectangle Tool to draw a rectangle above and slightly behind the red ribbon. Apply a Radial Gradient going from black at 100% to 0% Opacity. Use the Gradient Tool to adjust the radius of the gradient so that it’s lower than the rectangle (see below for placement). Place the rectangle behind the red ribbon in the Layers panel. Copy and Paste two instances of this rectangle behind both of the green tags (see the next step for exact placement).
Step 9
Draw an ellipse with the Ellipse Tool below the red tag design. Apply the same radial gradient as used before. Adjust the transparency in the Transparency panel and the placement of the radius with the Gradient Tool.
Step 10
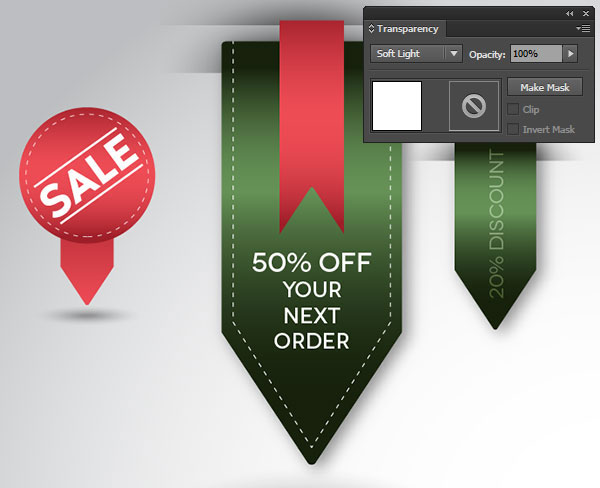
Choose the sans-serif of your liking. Use the Type Tool (T) to add notes about sales, discounts, coupons, etc. For the red tag, I used the Line Segment Tool (\) to add the lines above and below the word “sale”. For the text on the smaller green tag, I set the text object’s Blend Mode to Soft Light in the Transparency panel.
Step 11
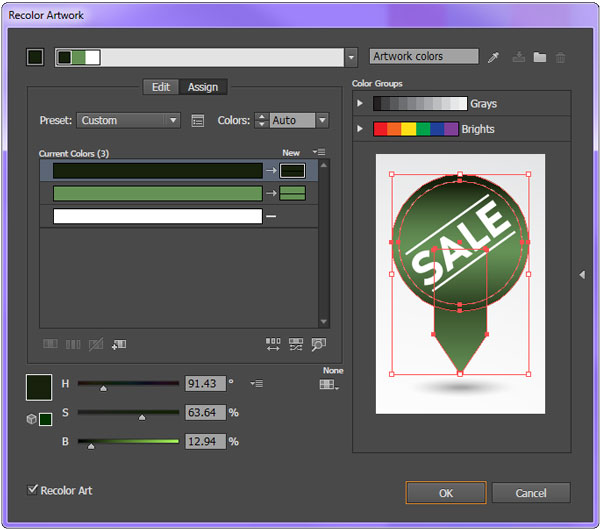
To easily create sets of these holiday sales tags designs without having to either recreate the objects themselves or manually adjust each color in the Gradient panel, go to Edit > Edit Colors > Recolor Artwork. From this panel you can quickly change all instances of colors within a selected object (the image of the object was superimposed into the panel as an example).
Conclusion: Holiday Sale Tags
There you have it: quick and easy holiday sales tags perfect for email blasts, print media, and web advertisements. Easily change colors, shapes, and details within the tag designs to suit your holiday and sale needs. Add a simple gradient background to your design, or keep it transparent for versatility’s sake. Show off your tags in the comment section below!
Author: Mary Winkler
Mary works under the brand Acrylicana® designing apparel, jewelry, and illustrating for companies like Disney, Jakks Pacific, Envato, and more. Check out Acrylicana.com for more artwork, tutorials, and more.


It’s a great and useful piece of information. I’m glad you have shared this awesome design with us. Please share with us more design. Thanks.
Thanks for sharing Holiday Sales Tags which helps a lot to design tags for marketing and other purposes. It helps to boost sales and increase brand awareness of our products.
Very useful tutorials. sometimes i need to use tags. now i had new ideas. good stuff
Yes this is important to change ta sales tag during holiday or religon occation or somethin like that.
Mery, I truly like your work process. Each instructions you’ve shared are very effective to follow and customize a holiday sales tag will be easier by following this step by step process.
All are so amazing design and helpful adobe illustration tutorial. This is especially very helpful for beginner .. thanks step by step details
Thanks for sharing Holiday Sales Tags which helps a lot to design tags for marketing and other purposes. It helps to boost sales and increase brand awareness of our products.
Hey Mary! Professional and creative design, thanks for sharing your creative technique with us.