

Ring in the new year with glitz, glam, and this Happy New Year vector text effect tutorial that’s sure to bring cheer to all.
Tutorial Details: Sparkling Happy New Year Vector Text
- Program: Adobe Illustrator CC
- Difficulty: Intermediate
- Topics Covered: Blends, Gradients, Offset Paths, Custom Brushes
- Estimated Completion Time: 30 Minutes
Final Image: Sparkling Happy New Year Vector Text Treatment

Step 1: Sparkling Happy New Year Vector Text Treatments
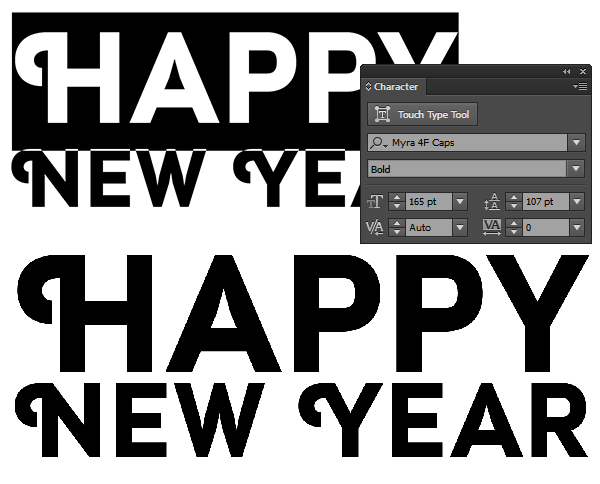
Like with most text effects, let’s start with the Type Tool (T) for this happy new year vector text. Choose a display font that you really dig. I opted for Myra4F Caps. In the Character panel, you’ll be able to modify selected portions of your text. The aim is for both lines of text to align. To do so, increase the first line of text’s font size and set the leading between the two lines so the bottom line of text is much closer to the top (see my settings below).
Step 2: Happy New Year Vector Text
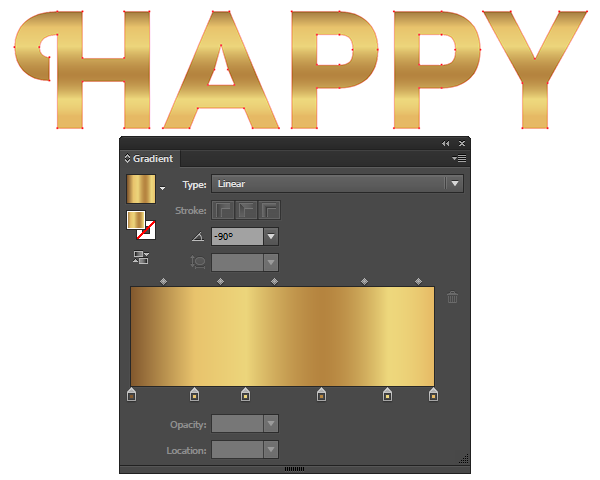
Expand your text under Object. Let’s start with the line “Happy”. Make sure the word is Grouped (Control-G) together. Use the Gradient Tool (G) to apply a golden gradient of the following six colors, from right to left:
#83592E#E8C36C#ECD57B#B5843F#EDD77C#E6B964
Step 3
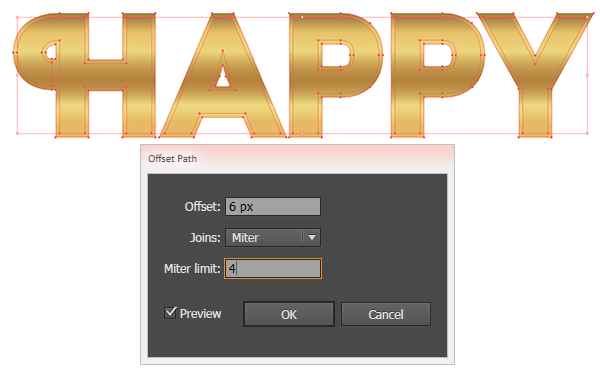
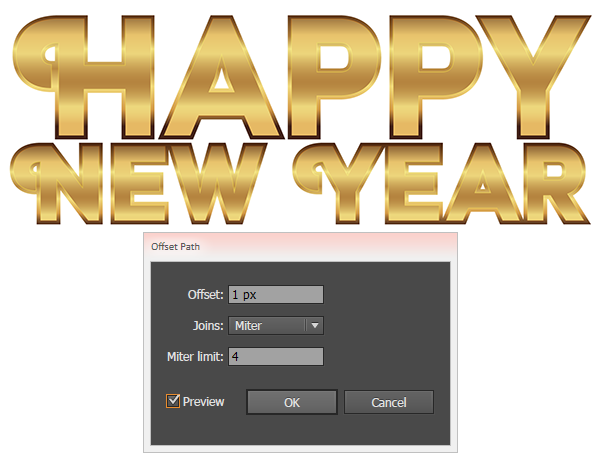
Select the “Happy” group and offset the path by going to Object > Path > Offset Path. Enter 6 px, or so, for the Offset amount.
Step 4
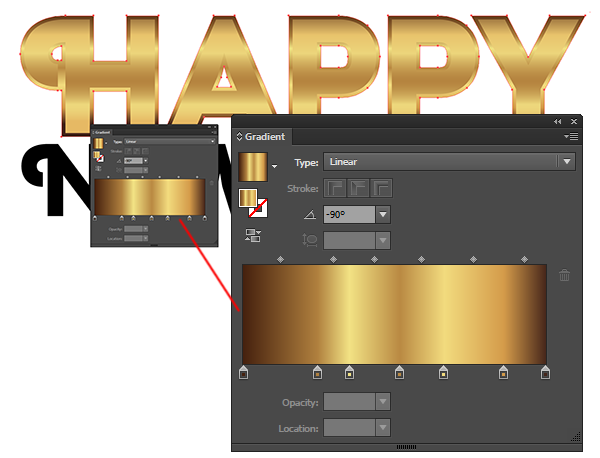
Next up for this happy new year vector text tutorial, apply another Linear Gradient to the offset group. This one consists of the following seven colors, which can be configured in the Gradient panel:
#46210E#B0803E#F2E284#B98942#F2DB7E#D49B4A#45251A
Step 5
Repeat Steps 2-4 on the second line of text. Offset the inner text group (the one created in Step 2) by 1 px with a Linear Gradient of light yellows to give an extra highlight between the main gradient groups.
Step 6
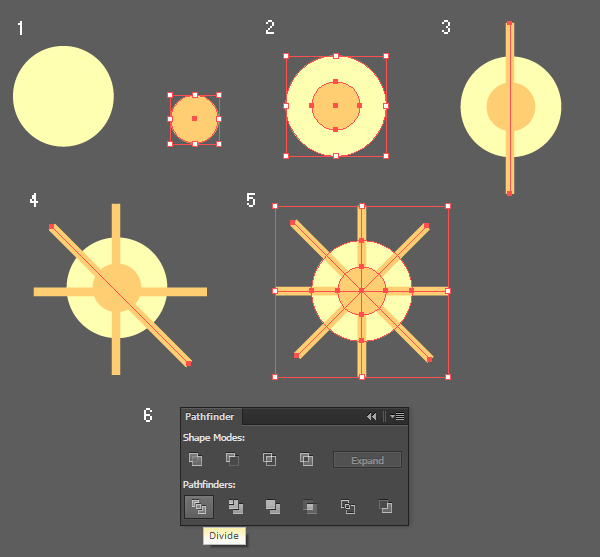
Let’s work on the gems and studs. Use the Ellipse Tool (L) to draw two circles with one smaller than the other. Align the two circles. Use the Line Segment Tool (\) draw a line that bisects the circles vertically. Draw a horizontal and vertical line over the circles. Make sure all components are aligned to their centers. The goal is to have four lines and eight total sections in each circle. Select four lines and the large circle and hit Divide in the Pathfinder panel.
Step 7
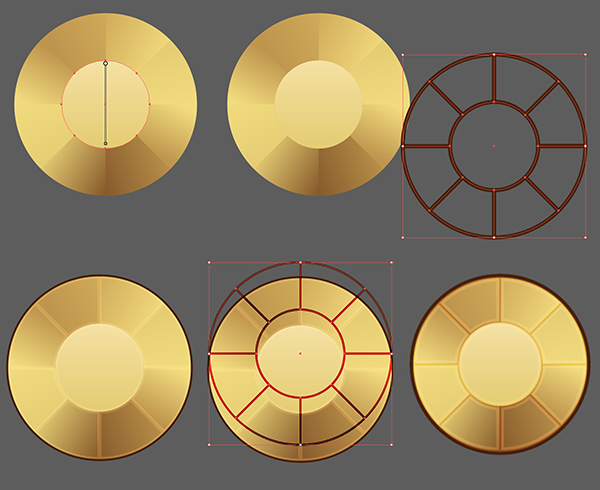
Keep the smaller circle a light yellow while each section of the larger circle should be one of the yellows from the golden gradients used previously. Apply a Linear Gradient to each section. Each consists of two colors and they’re positioned to blend into each other slightly.

Step 8
Set the smaller circle to a light yellow to yellow Linear Gradient. Group together your gold stud components. Copy (Control-C) and Paste (Control-V) the group and set the fill color to null and the stroke to 1 pt weight (or something thicker, depending on the size of your components).
Align the two groups and set the stroked circle group to Screen in the Transparency panel. Paste a second copy of the outlined circle, set the Blend Mode to Multiply, and the stroke weight to 0.5 pt or smaller. Group all components together.
Step 9
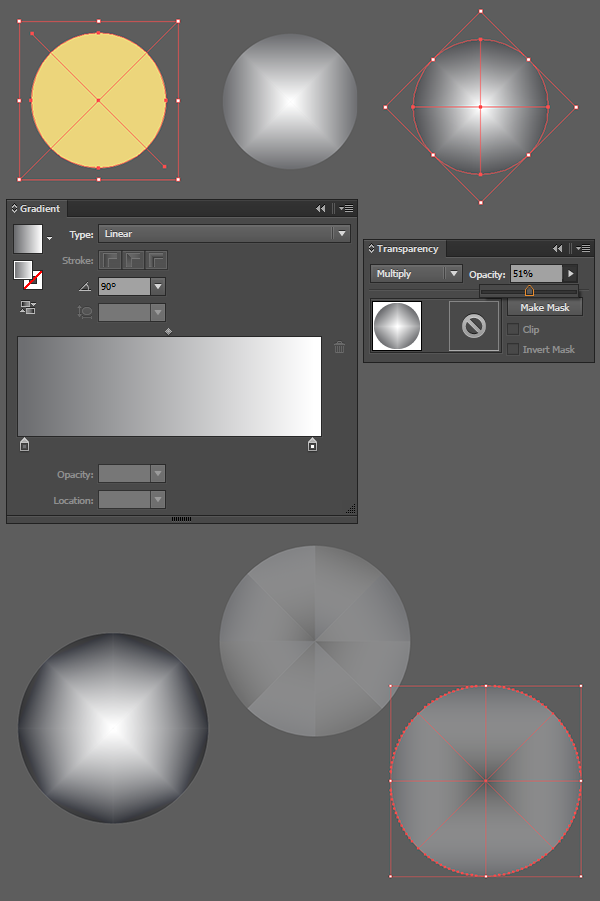
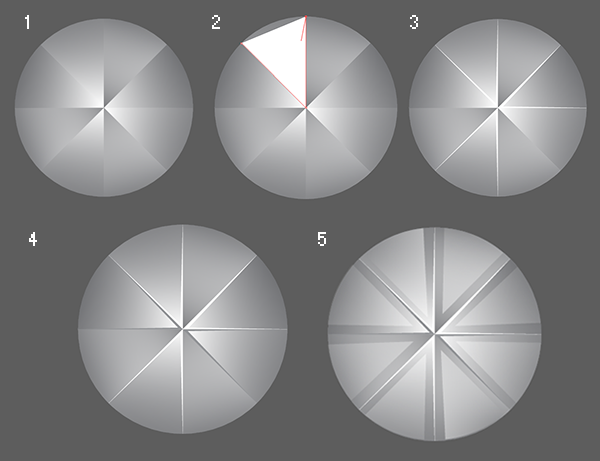
For the sparkly gems in this happy new year vector text, draw a circle with the Ellipse Tool. Use the Line Segment Tool to draw two diagonal lines across the center of the circle. Divide the components in the Pathfinder panel. Set each section to a Linear Gradient going from white to gray with white toward the center of each section. Copy and Paste the circle group and Rotate it 90°.
Set the second circle group’s Blend Mode to Multiply and Opacity to 51%. Play with additional layers of sectioned gradient circles that go from gray at 100% Opacity to white at 0% Opacity. Note how the gradients are all going in different or alternating directions.
Step 10
Group together your gem components. Use the Pen Tool (P) to draw the start of a triangle, using each section’s anchor points as a guide. Make the triangle into a thin V-Shape on three of the sections in white. Repeat with two or three gray V-Shapes. Draw small triangles over each section. Set the Linear Gradient in each to white at 100% to 0% Opacity. Once again, Group all of your gem components together.
Step 11
Copy and Paste the gold stud group and place them around the inside of the “Happy” group of the happy new year vector text. Alternatively, you can set one of the gems as a Symbol in the Symbols panel and use the Symbol Sprayer Tool (Shift-S) to place the gems in your text group. You may find, though, that they are harder to control if they’re in the same symbol group, but it should save on virtual memory, which my design took quite a bit of in its creation.

Step 12
Repeat the previous step, with whatever method you chose, to add the silver gem groups to the “New Year” section of the happy new year vector text.

Step 13
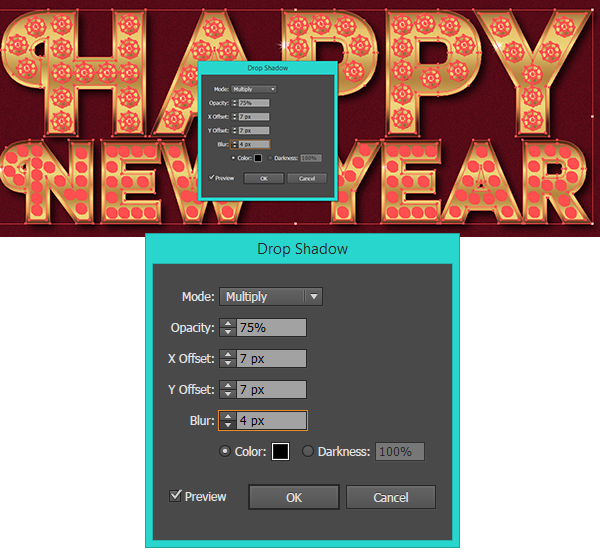
Group together all of your text effect components. In the Appearance panel, apply a Drop Shadow effect (Effect > Stylize > Drop Shadow) with the following attributes:
Mode: Multiply
Opacity: 75%
X Offset: 7 px
Y Offset: 7 px
Blur: 4 px
Color: Black
Step 14
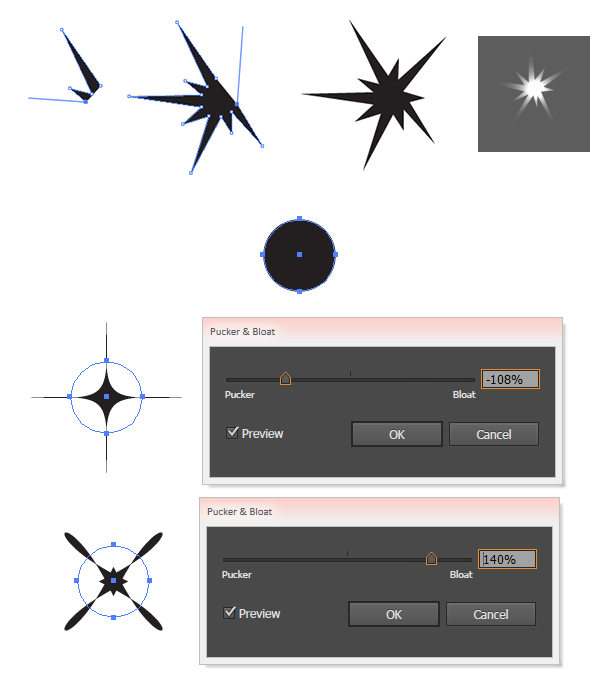
For sparkles on the happy new year vector text, you have a couple options. Either, use the Pen Tool to draw spiky shapes. Or, you can draw a circle with the Ellipse Tool and then go to Effect > Distort & Transform > Pucker & Bloat and use the slider in either direction for different sparkle styles. If you go the Pucker & Bloat route, remember to Expand your shape under Object. Additionally, whatever style of sparkle shape you create, apply a Radial Gradient of white at 100% to 0% Opacity.
Step 15
Copy and Paste sparkle shapes drawn in the previous step around the letter forms. I find it best to place them on edges, gems, or studs where gradients are at their lightest.

Step 16
For a final shiny touch on this happy new year vector text, draw a long ellipse with the right and left anchor points converted to points. Draw a very thin version of that pointy ellipse inside the first shape. Set both shapes’ fill colors to white with the larger of the two set to 0% Opacity.
Use the Blend Tool (W) to create a blend of 50 Steps or so (this depends on how smooth you want your blend to be. Select your blend group and in the Brushes panel, create a New Art Brush.

Step 17
Using the Paintbrush Tool (B) to draw small strokes with your new brush in areas on your text where the gradients are the lightest. Set each stroke’s Blend Mode to Overlay in the Transparency panel so the brush blends in with the happy new year vector text a bit more.

Conclusion: Sparkling Happy New Year Vector Text Treatment
Now that you’re done with your metallic sparkly happy new year vector text, what other styles of metal, studs, and gems can you create on this theme? Share with us in the comment section below and have a Happy New Year!
Author: Mary Winkler
Mary works under the brand Acrylicana® designing apparel, jewelry, and illustrating for companies like Disney, Jakks Pacific, Envato, and more. Check out Acrylicana.com for more artwork, tutorials, and more.


İ would want a new year tree