
Want to create a sleek and modern metal icon suite? Need a brushed metal texture vector background? With this brushed metal texture vector tutorial you’ll be able to learn this super useful technique in just minutes. This brushed metal technique utilizes Illustrator’s Effects and is pretty simplistic when you break it down – easy to replicate numerous times. You can use the brushed metal texture in almost anything, but I find myself using it in icons, logos, and interfaces.
Notes: Brushed Metal Texture Vector
This brushed metal texture vector tutorial was created with Illustrator CS3.
Keyboard shortcuts are displayed in orange. ⌘ is displayed for the Command key (mac), with the Ctrl key being the Windows equivalent (not displayed).
Brushed Metal Texture Vector
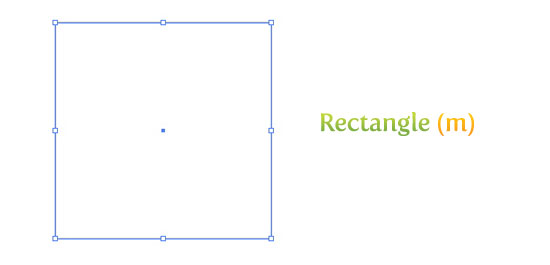
Let’s kick this heavy metal kick off by creating a 5 inch by 5 inch rectangle with the Rectangle Tool (m). An easy way to draw an exact rectangle is to click on the artboard with the Rectangle Tool (m) to bring up the Rectangle dialog to enter dimensions.
Gradient
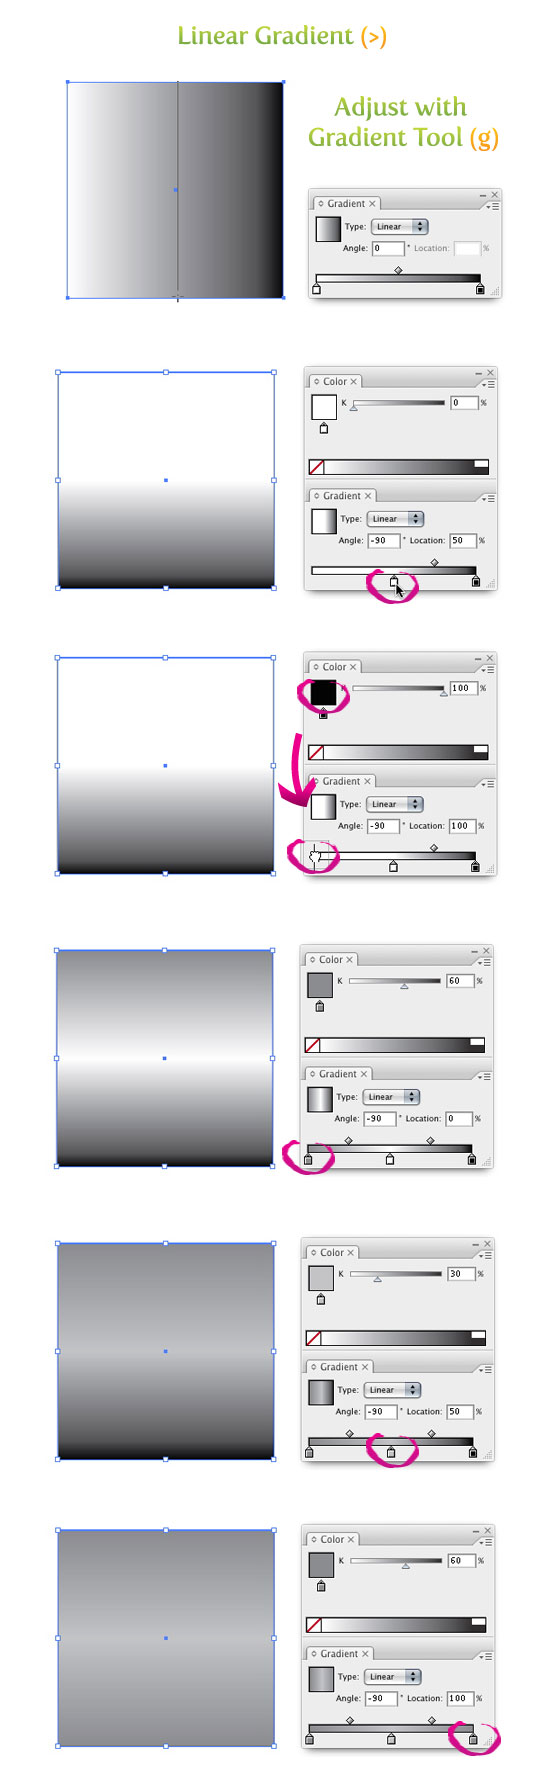
Next for this brushed metal texture vector comes the gradient. Create a Linear Gradient (>) from the Gradient Panel and take off the stroke. Adjust the gradient with the Gradient Tool (g) by clicking and dragging from the top of the rectangle to the bottom. In the Gradient Panel grab the left swatch and drag it to the middle of the Gradient Slider. Next, select the black swatch on the Gradient Slider. If you look in the Color Panel, you will see it is now black. Click on the large black thumbnail and drag it into the Gradient Panel on the left side of the Gradient Slider. If you did it correctly, you should have a black swatch on the left, a white swatch in the middle, and another black swatch on the right in the Gradient Slider. Select the first black swatch and change it to a 60% black, select the white swatch and change it to a 30% black, and change the last black swatch to a 60% black.
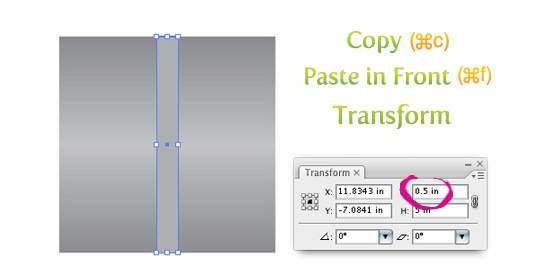
Next Copy (⌘c) the rectangle and Paste In Front (⌘f). With the copied rectangle selected, change the dimensions in the Transform Panel to .5 inches wide and fill the rectangle with a 40% black.
Texture
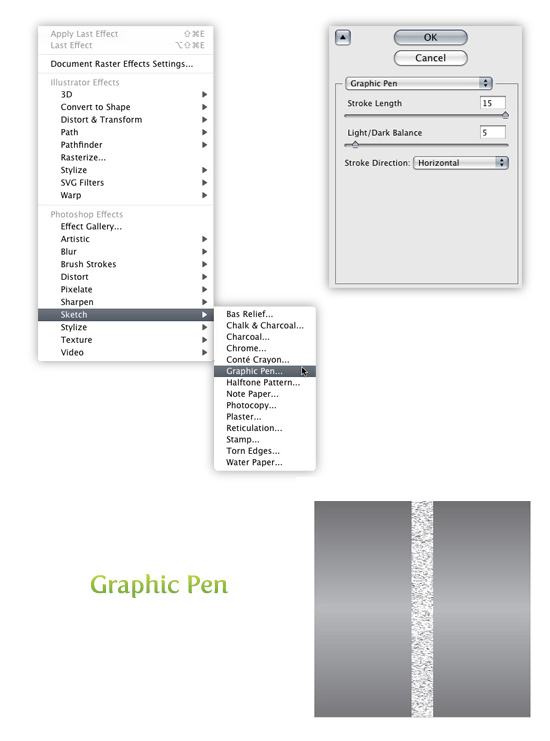
For the grungy element of this design and to really start seeing your brushed metal texture vector come together, select the narrower rectangle and go Effect > Sketch > Graphic Pen. When the Graphic Pen Effect dialog comes up change the following settings.
- Stroke Length = 15
- Light/Dark Balance = 5
- Stroke Direction = Horizontal
Trace and Expand
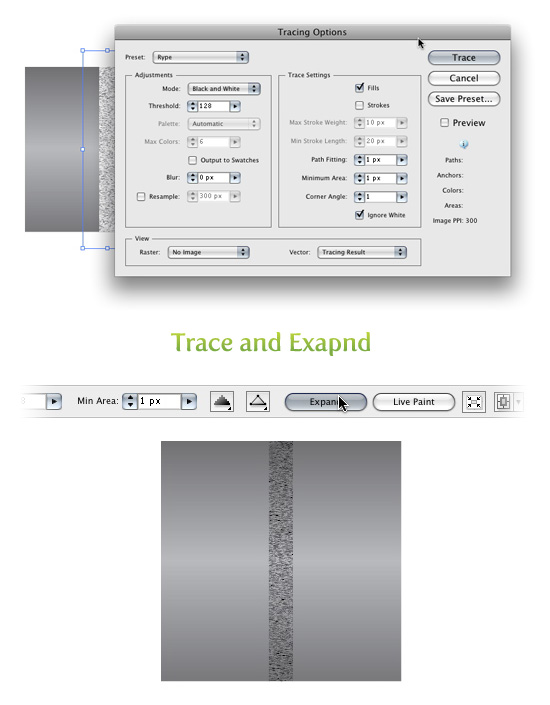
With the texture layer of your brushed metal texture vector selected, go Object > Expand Appearance. With the new image selected, the Control Panel defaults to the Live Trace options. Click the arrow beside the Live Trace Button and select Tracing Options. Or you can go Object > Live Trace > Tracing Options. You don’t have to change all the options, just the ones below.
- Mode: Black and White
- Path Fitting: 1px
- Minimum Area: 1px
- Corner Angle: 1
- Ignore White: Check this box
I like to save a preset in the Tracing Options. It makes it easy to recall these setting. If you have read previous tutorials, you will see I use these setting all the time for tracing. Next, press the Expand button on your tool bar.
Transform Texture
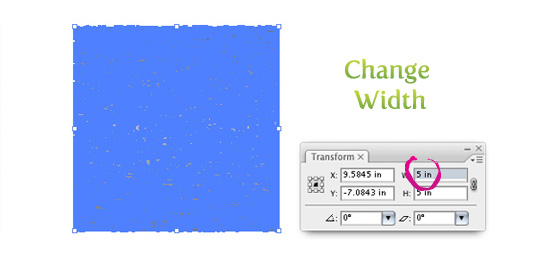
With the texture selected, change the width to 5 inches from the Transform Panel.
Color Texture
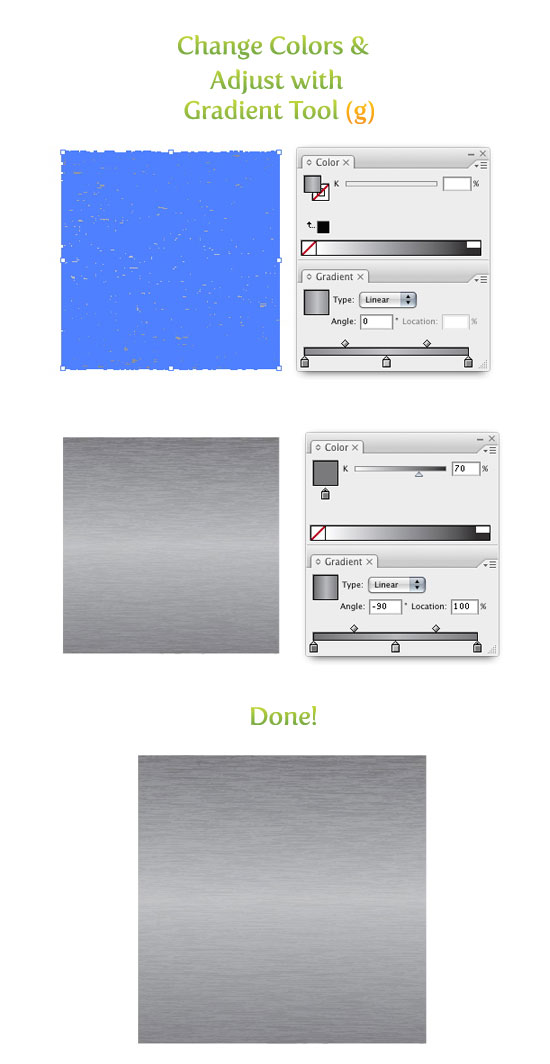
With the texture selected, create a Linear Gradient (>) from the Gradient Panel and take off the stroke. Illustrator will remember the last gradient used, so you should have the same gradient fill from the first rectangle. If not, repeat the steps for the gradient from the first rectangle or use the Eyedropper Tool (i) and sample the first rectangle. Once the texture is the same gradient, select the first 60% black and change it to a 70% black, then change the 30% black to 35% black, and then change the last 60% black to a 70% black. With the Gradient Tool (g) click and drag from the top of the texture to the bottom to adjust the gradient. And your brushed metal texture vector is done!
Experiment
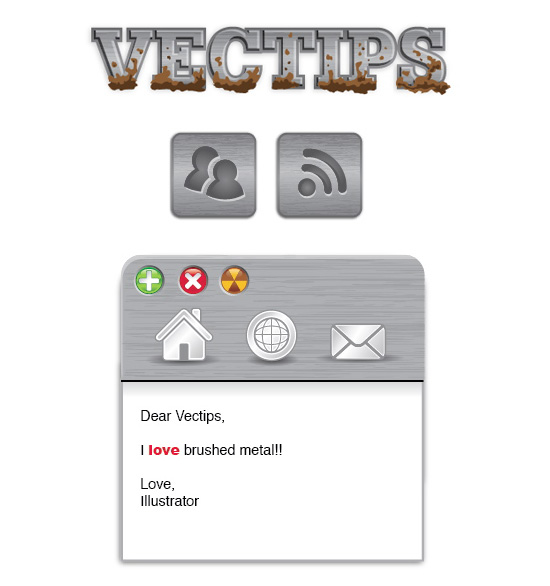
This brushed metal texture vector is great to incorporate into logos, icons, interfaces, and much more. Look below for some examples.


Thanks so much for providing individuals with a very marvellous possiblity to read critical reviews from this web site. It is always very cool and stuffed with amusement for me and my office colleagues to visit your website on the least three times per week to learn the new guides you have. And of course, we are at all times impressed considering the staggering solutions served by you. Some 4 points in this post are essentially the finest I have had.
I have the same question as Dom, CC versions do not have trace options so the brushed metal effect does not come out quite the same. Is there an updated version to this tutorial?
Live Trace is not available in CC versions of Illustrator. Any idea how to do the “Trace and Expand” portion with Image Trace in Illustrator CC?