
 This time, we’ll learn how to draw a whale vector using basic geometric shapes in Adobe Illustrator. We’ll learn working with Live Corners, the Scissors Tool, the Pathfinder panel, and we’ll use other beneficial vector tools and functions. Let’s get started!
Tutorial Details – How to Draw a Whale Vector in Adobe Illustrator
- Program: Adobe Illustrator CS6 – CC
- Difficulty: Intermediate
- Topics Covered: Shape Building, Live Corners, Pathfinder Panel, Stroke Panel
- Estimated Completion Time: 20 minutes
Final Image: Cute Blue Whale

Step 1
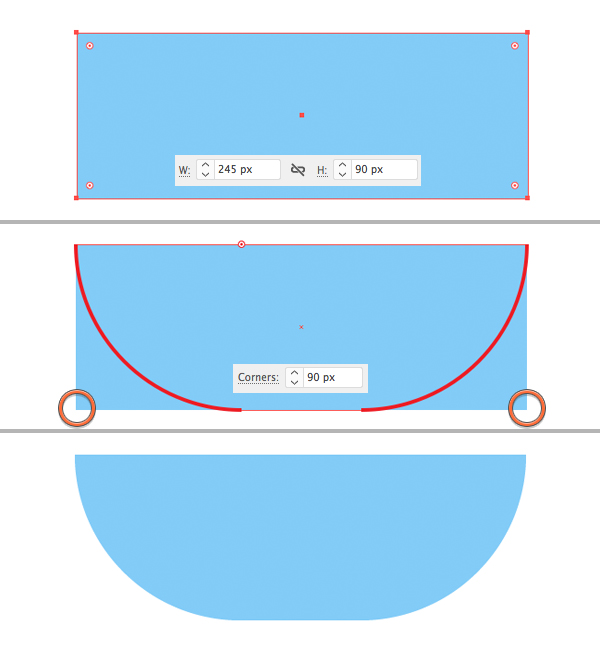
Let’s start learning how to draw a whale vector by first making the whale’s body. Take the Rectangle Tool (M) and make a 245 x 90 px blue shape.
Grab the Direct Selection Tool (A) and select both bottom corners of the rectangle. Pull the circle marker of the Live Corners to the center of the shape, making the corners rounded. You can also set the exact value manually in the control panel on top. Here I set it to 90 px.
Step 2
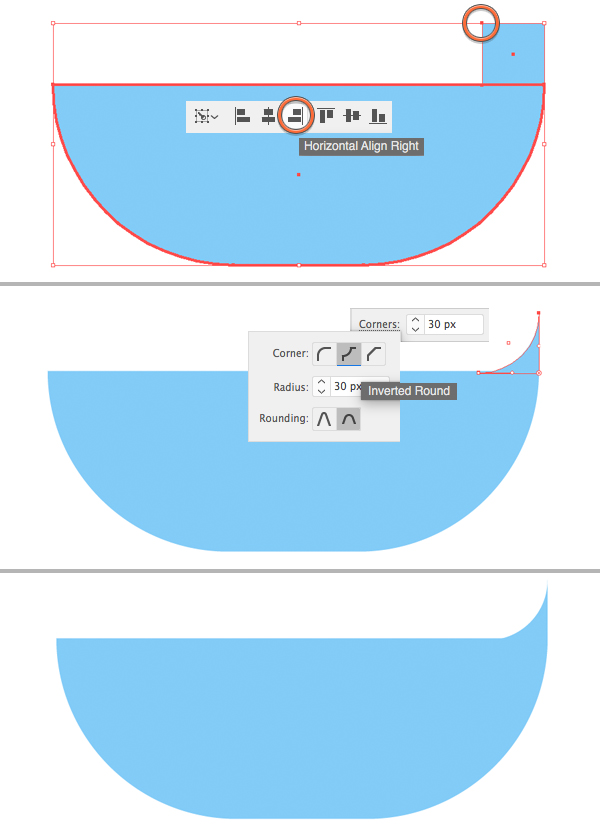
Now let’s add a piece of the tail. Use the Rectangle Tool (M) while holding down Shift to create a 30 x 30 px square. Place it on the top right part of the body shape, as shown in the image below.
Let’s make sure that the shapes are aligned perfectly. Select both shapes and click the body shape once again using the Selection Tool (V). Now that the body shape has thicker selection, it is the Key Object to which all other shape will be aligned. Head to the control panel on top and click Horizontal Align Right. There we have it!
Now let’s give a proper shape to the tail. This is an important aspect to learning how to draw a whale vector. Select its top left corner with the Direct Selection Tool (A) and make the corner 30 px rounded. Finally, click the Corners submenu in the control panel on top and select Inverted Round to make the shape rounded inwards.
Step 3
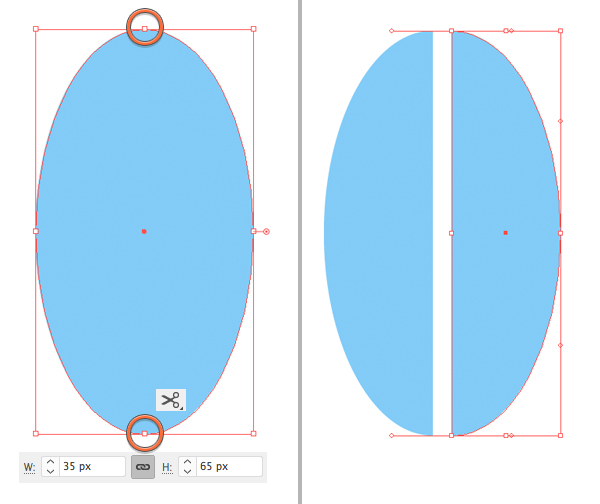
Let’s make the top part of the tail. Take the Ellipse Tool (L) and make a 35 x 65 px shape.
Grab the Scissors Tool (C) and click the top and bottom anchor points of the shape to split it apart. Now we have two separate elements of the tail.
Step 4
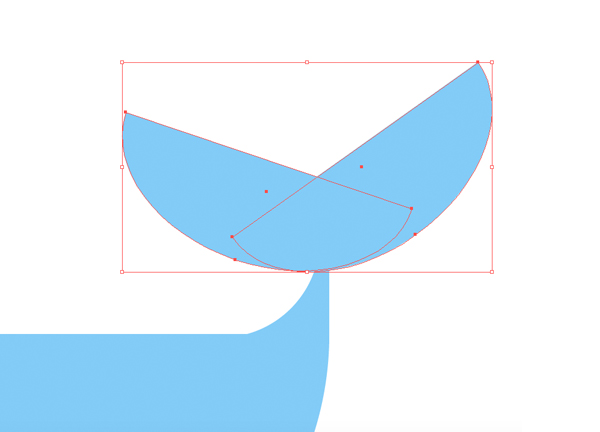
Rotate the elements and make them overlap as shown in the screenshot below. Place the elements on the tip of the tail.
Step 5
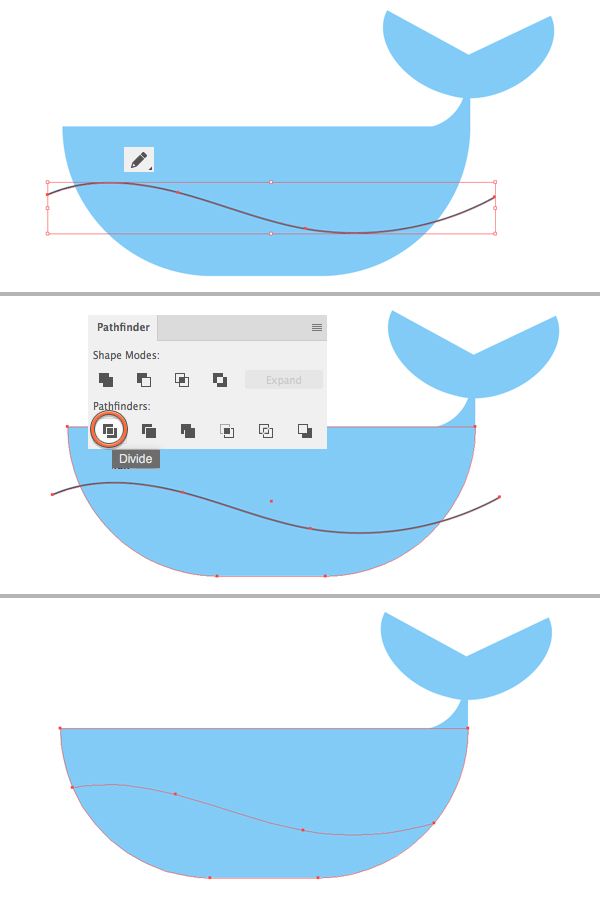
Let’s draw a tummy of our cute blue whale. Take the Pencil Tool (N) and set the Fill color to None in the Color panel. Draw a wavy curve across the body.
Now select both the body and the curve, open the Pathfinder panel (Window > Pathfinder) and click Divide to split the body shape apart.
Step 6
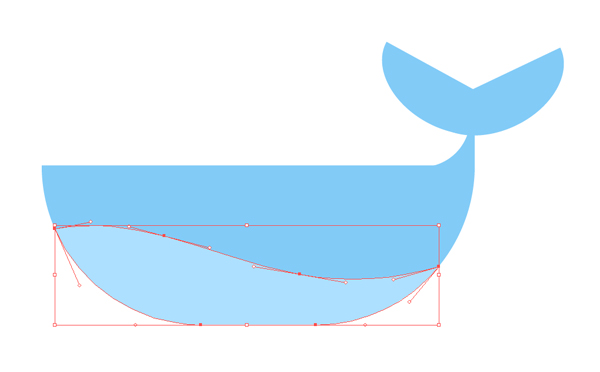
We’re over halfway to learning how to draw a whale vector successfully! For step 6, apply a light-blue color to the tummy of our whale.
Step 7
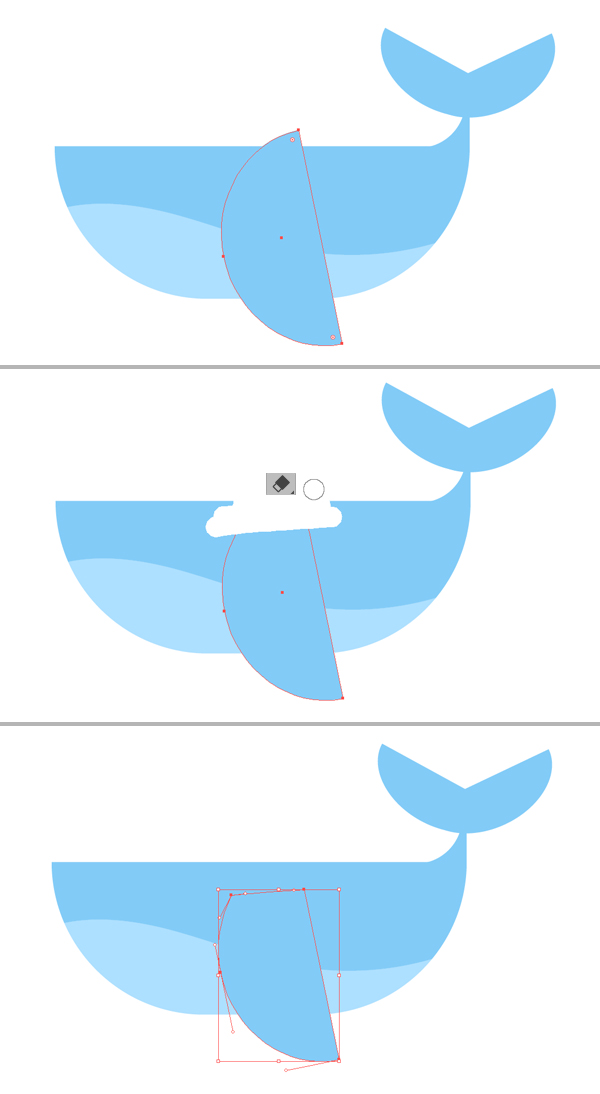
Now let’s add a fin. We’ll use a half-circle shape that we’ve made for the tail. Duplicate the shape (Control-C > Control-V) and make it larger. Rotate the fin and attach it to the middle of the body.
If it’s upper tip is sticking out from the top of the body, we can easily fix it using the Eraser Tool (Shift-E). Keeping the shape selected, take the Eraser Tool (Shift-E) and draw over the piece that you want to delete.
Step 8
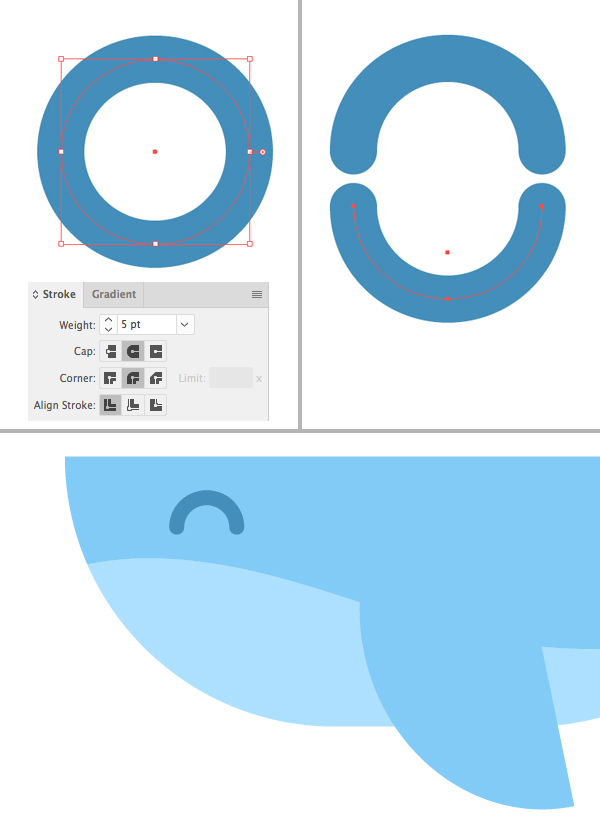
Now we’ll draw an eye. Take the Ellipse Tool (L), hold down Shift and make a circle. Set its Fill color to None and its Stroke color to dark-blue.
Open the Stroke panel (Window > Stroke) and set the Weight to 5 pt, Cap to Round Cap. Use the Scissors Tool (C) and click the left and right anchor points to split the shape into two arches.
Delete the lower piece. Place the second half on the whale’s muzzle, making a closed eye as if he was smiling.
Step 9
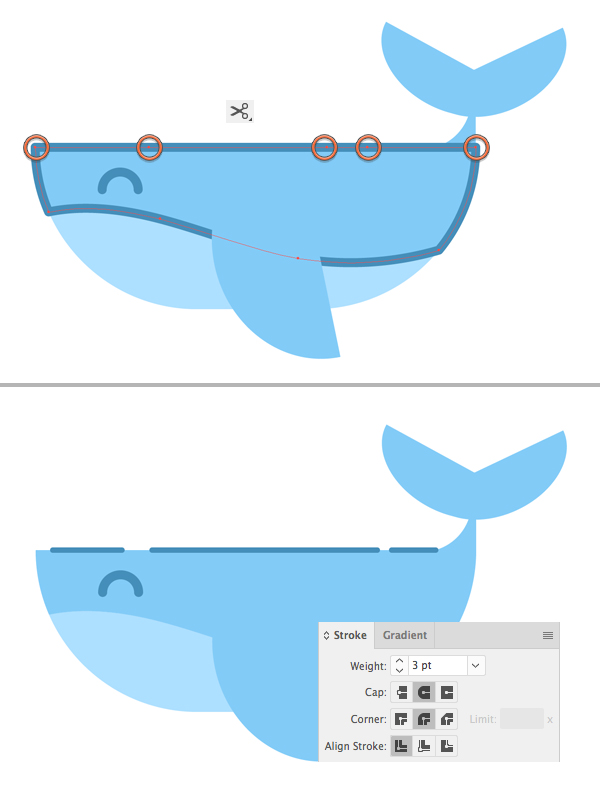
Let’s make our illustration more detailed by adding some outlines to the silhouette. Start by selecting the top part of the body, Copy (Control-C) and Paste in Front (Control-F). Set the Fill color of the copy to None and the Stroke color to dark-blue. Take the Scissors Tool (C) and click the points that are marked in the screenshot below. If there is no anchor point, you can click the line itself to create a point and split it with the Scissors Tool (C) as well.
Delete the unneeded piece of the outline completely and move the points with the Direct Selection Tool (A) to create the gaps between the lines.
Set the Stroke Weight to 3 pt, making the lines a bit thinner.
Step 10
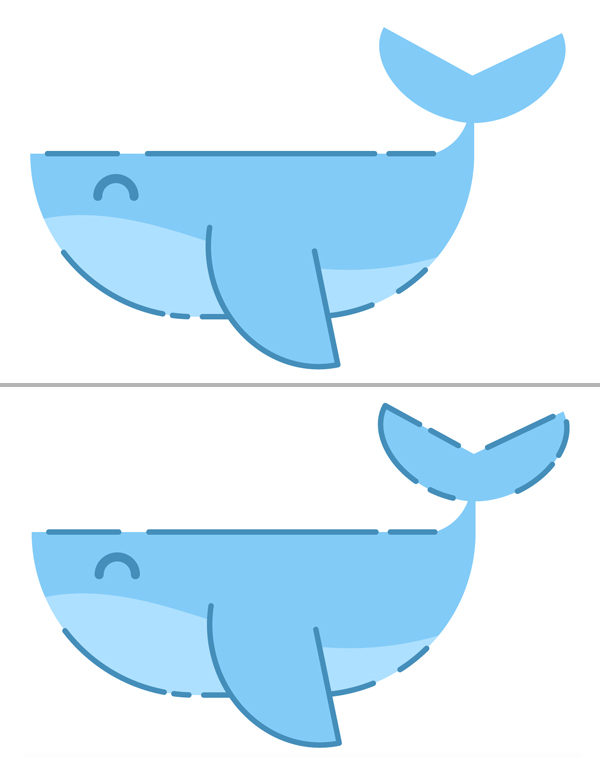
Add more lines, using the same technique with the strokes and the Scissors Tool (C).
Step 11
We’re almost done learning how to draw a whale vector! Finish up with our cute blue whale by adding a small fountain on top. Use the Pen Tool (P) or the Line Segment Tool (\) to add those vertical strokes.

Woot! Our Cute Blue Whale is Finished!
Great job, my friends! You now know how to draw a whale vector. I hope you’ve enjoyed following this tutorial and discovered some new simple tips and tricks that will be useful in the future.
Have fun, and remember, don’t stop drawing!
Author: Yulia Sokolova
2D/3D artist and tutorial instructor, focusing on character creation, icons, lettering design, and illustrations.


