
 In today’s tutorial you will learn how to create a laurel wreath vector with the help of the Pathfinder panel, Blend Tool and Art Brush feature. The techniques described here will help you to easily create any shapes of wreaths, such as wheat, olive leaves and oak leaf wreath. So, let’s get started!
Tutorial Details: Laurel Wreath Vector
- Program: Adobe Illustrator CS5
- Difficulty: Beginner
- Topics Covered: Pathfinder panel, Blend Tool, Art Brush
- Estimated Completion Time: 30 minutes
Final Image: Laurel Wreath Vector

Step 1: Laurel Wreath Vector
To begin this laurel wreath tutorial open your Adobe Illustrator and create a new document (Cmd / Ctrl + N). Your artboard can be of any size. The laurel wreath that we’re creating will work equally well in the RGB and in the CMYK color modes.
Step 2
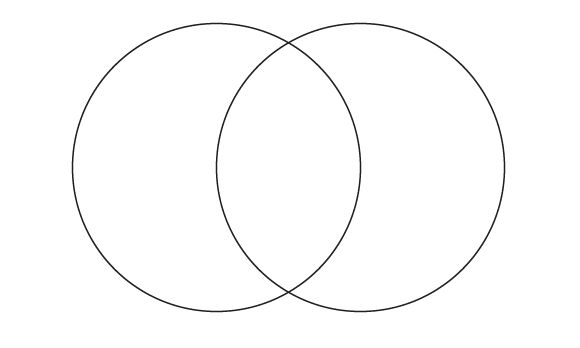
Create a circle using the Ellipse Tool (L), then move it to the side, holding the Shift and Option / Alt keys. This will result in a duplication of the circle. Objects should overlap each other as shown in the picture below.
Step 3
Select both circles, and then press the Intersect in the Pathfinder panel.
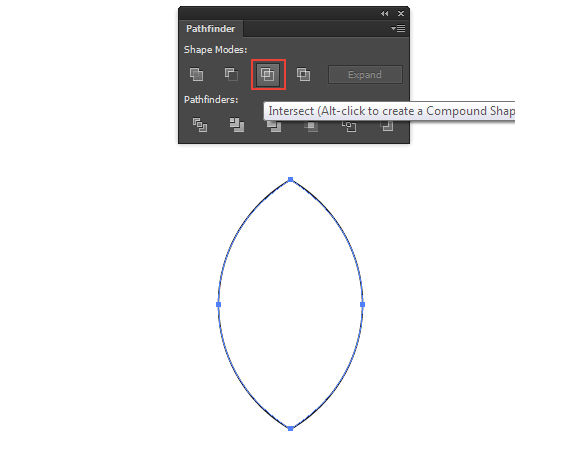
Change the position of the upper handle as shown in the picture below.
Step 4
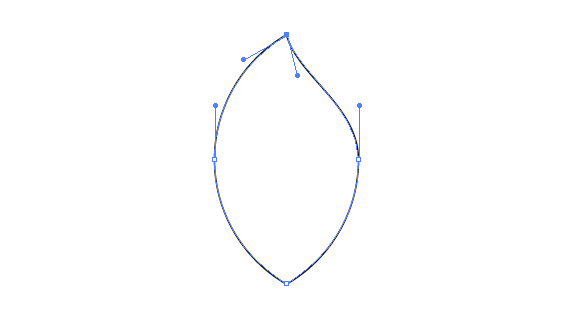
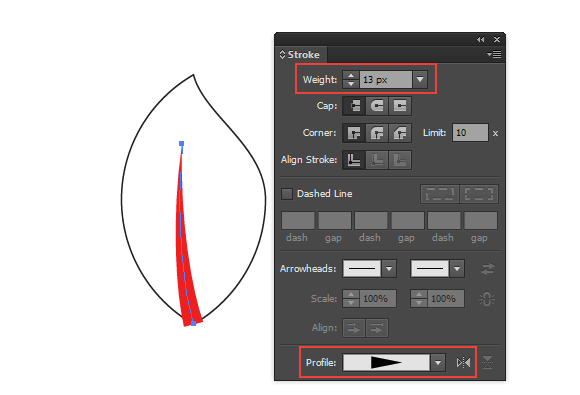
Using the Pen Tool (P) create a curved segment from the lower point of the leaf.
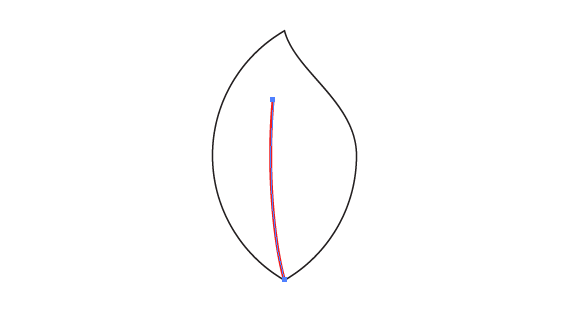
Apply a triangular profile to this path and increase the width of the path in the Stroke panel.
Step 5
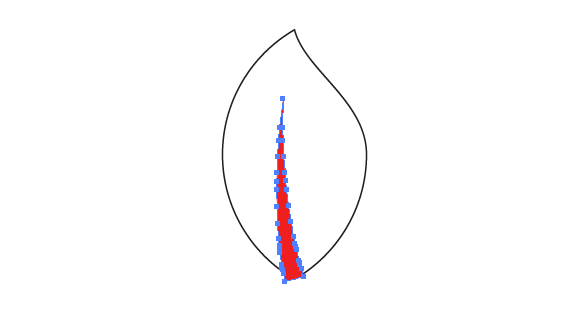
Keeping the curved segment selected, go to Object> Path> Outline Stroke.
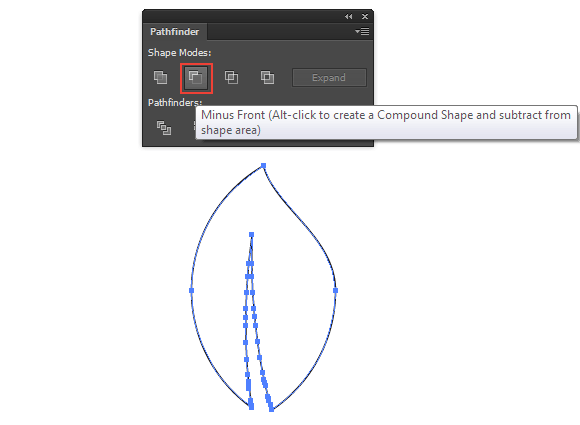
Select two objects, then press the Minus Front in the Pathfinder panel.
Step 6
Create a triangle stretched horizontally using the Pen Tool (P).

This is the basis for the laurel wreath branch.
Step 7
Fill the leaf with black color, rotate to any angle, and then place it near the beginning of the branch.

Duplicate the leaf, move the copy to the end of the branch and reduce its size.

Step 8
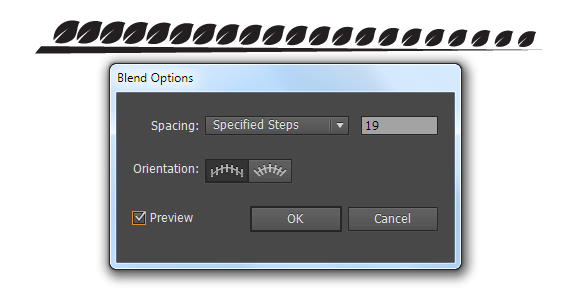
Select both leaves, then go to Object> Blend> Make (Option / Alt + Cmd / Ctrl + B). Now go to Object> Blend> Blend Options or double click on the Blend Tool (W) icon in the Tools panel and set the appropriate number of steps.
Go to Object> Blend> Expand, and then ungroup the objects (Cmd / Ctrl + Shift + G).
Step 9
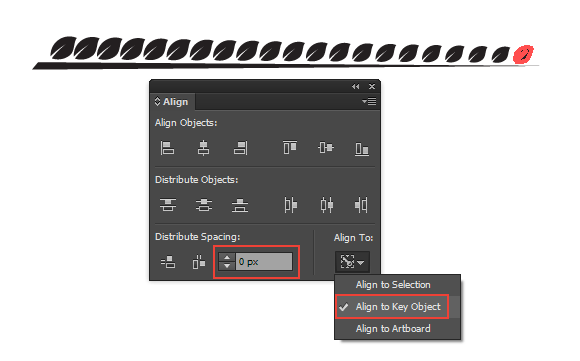
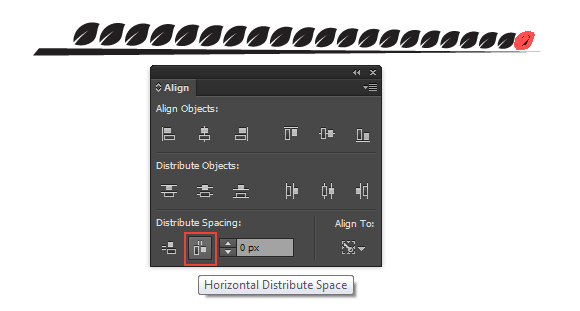
In the Align panel select the Align to Key Object option, set 0px in the numeric field, then press the Horizontal Distribute Space button.
Step 10
Duplicate and reflect the largest leaf using the Reflect Tool (O). Increase the size of the copy, then place it as shown in the following picture.

Using the technique, which has been described in steps 7-9, create leaves on the bottom of a laurel branch.

Step 11
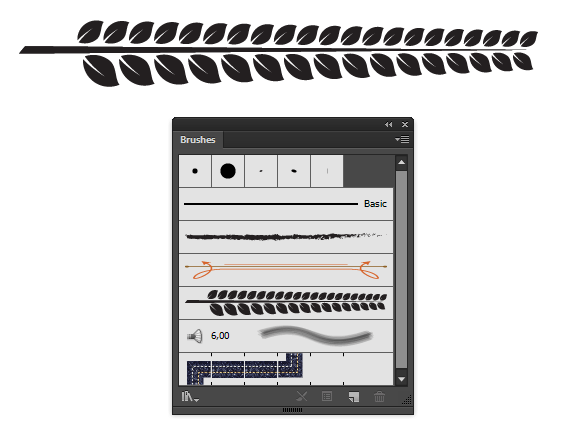
Select all the created objects and save them as Art Brush in the Brushes panel.
Step 12
With the help of the Pen Tool (P) create a curved path similar to the one shown in the following picture.

Step 13
Apply Art Brush to the selected path.

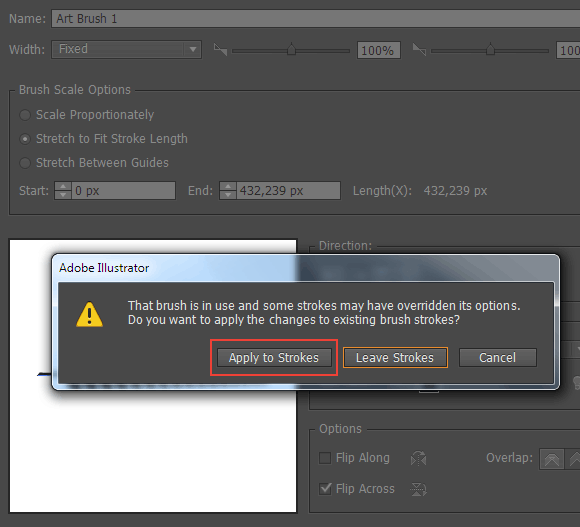
I want to locate larger leaves on the outside of the laurel wreath. Double-click on the Art Brush thumbnail in the Brushes panel. In the opened dialog box, select the Flip Across option.
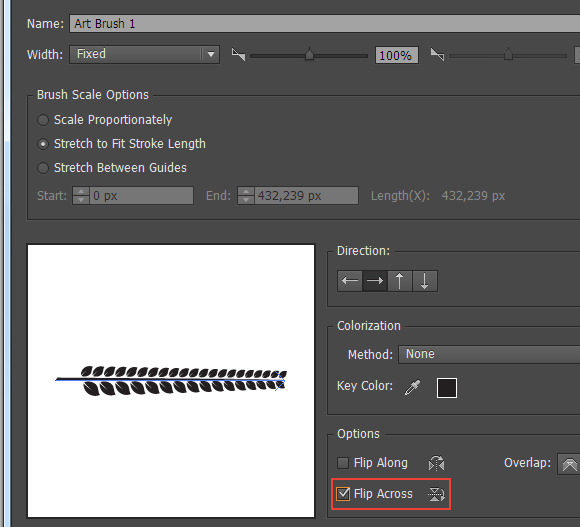
Press OK button, and then Apply to Stroke in the new dialog box.

Step 14
Keeping it selected, go to Object> Path> Expand Appearance.

Go to Object> Transform>Reflect …. In the dialog box, select the Vertical option, then press the Copy button.
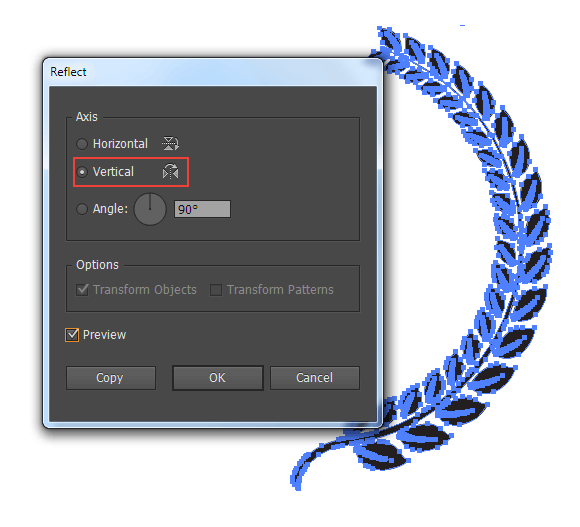
Move the copy a little bit to the right.

Step 15
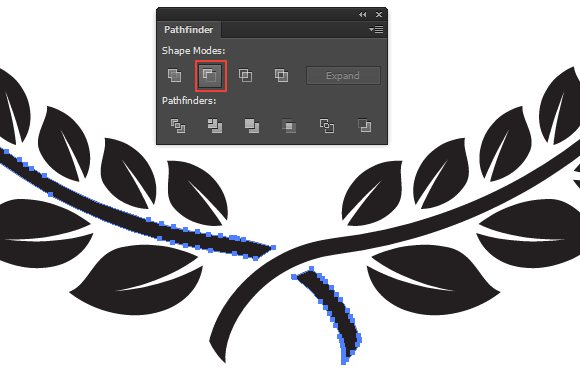
Select the stem of the right branch, then go to Object> Path> Offset Path …. In the opened dialog box set 3px.

Step 16
Select the new object (for visual purposes it is painted in orange), and the stem of the left branch.

Click Minus Front in the Pathfinder panel.
Step 17
Select the entire laurel wreath, go to Object> Compound Path> Make (Cmd / Ctrl + 8). Fill the resulting object with vertical linear gradient – mine consists of yellow and gold colors.

Step 18
Using the Rectangle Tool (M) create a rectangle filled with black color. Place this rectangle behind the laurel wreath.

Step 19
Take the Type Tool (T) and create necessary inscriptions. For these purposes, I used Aparajita and Arno Pro fonts.

Select the entire text, then go to Type> Create Outlines.
Step 20
Divide the text with two horizontal straight line segments using the Line Tool (\).

Select both segments, then go to Object> Path> Outline Stroke.
Step 21
Create a few stars using Star Tool and place them above the text. Select all objects within a laurel wreath, then go to Object> Compound Path> Make (Cmd / Ctrl + 8). Fill the resulting object with vertical linear gradient, which consists of yellow and brown.
Congratulations! Our laurel wreath is finished! Hope you can use this for logos, badges, and any project you can think of.

Author: Iaroslav Lazunov
My name is Iaroslav Lazunov, I am a graphic designer from Ukraine. I am glad that I finally found a job in my life that I can share my knowledge and experiments with you in my tutorials. Follow me on Twitter or visit my blog Vectorboom.com


Big thanks
Every time I get to the step to apply art brush it shows the leaves on the outside of the curved path but shading covers the right side from the top tip anchor point to the bottom anchor point…. its like the path is connected from the first anchor point to the last anchor point…ugghhh can’t figure that part out.
Excited to try and make a wreath as I am making some drop cloth “grain sack” chair covers and I want to put a wreath on one making a stencil. Thank you for the tutorial!
Great!!!
Awesome tutorial with me. Ease make this 🙂
i like your brush Thank you very much
Apply a triangular profile to this path and increase the width of the path in the Stroke panel.
i cant do this step with illus cs3. Cant find the way to Apply a triangular.
i Can add arrow or make brush style, but i cant stroke that path 🙁
For some reason, “align to object” is disabled (grayed), do I’m stuck in step 9 🙁
*do = so
Awesome tutorial!!! Thanks for sharing this!!!
Why didnt you use Object/Expand instead of? Can you show me the difference between Object/Expand & Object/Path/Outline?