
Fall is here! Along with all the warm fuzzies, pumpkin spices, and delicious drinks. Time to cuddle up in the best quilted blankets! For your designs, there’s no need to spend countless hours cutting fabric and sewing designs over and over again to get that amazing quilted text vector look. With a quick and easy technique mostly comprised of effects added in the Appearance panel, you’ll have quilted text vector designs done up in a snap!
Tutorial Details: Quilted Text Vector
- Program: Adobe Illustrator CC5-CC 2014
- Difficulty: Intermediate
- Topics Covered: Text Effects, Appearance Panel, Pathfinder Panel
- Estimated Completion Time: 25 Minutes
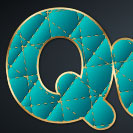
Final Image: Quilted Text Vector

Step 1: Quilted Text Vector
For this quilted text vector tutorial, start with the font of your choice. I like the roundness of Porky’s. Whatever sans-serif you choose, make sure to Expand under Object when satisfied with its look. Set the fill color of the text group to one of your choosing. I’ll be choosing teal.

Step 2
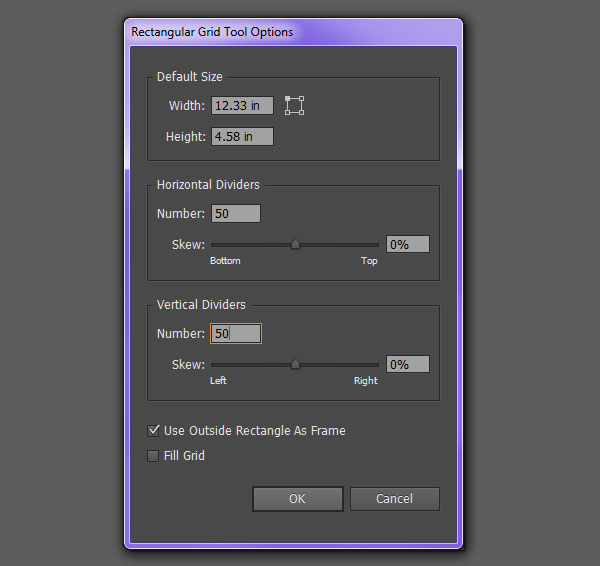
Grab the Rectangular Grid Tool (you’ll find it under the Line Segment tool (/) in the Toolbar. Set the number of dividers high, to about 50, or so, for both Vertical and Horizontal.
Step 3
- Hold down
Shift
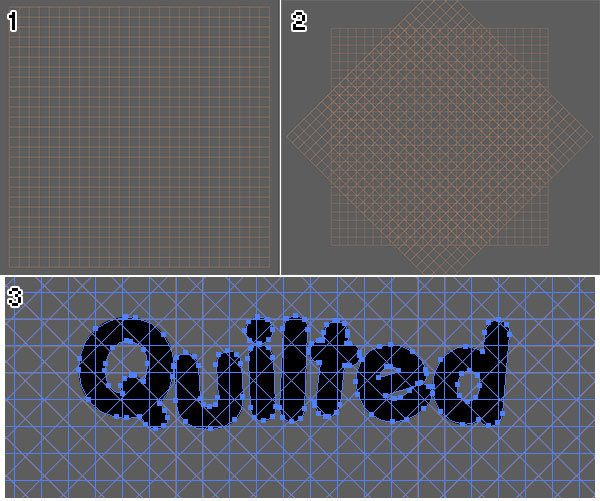
- to keep the grid square and draw it out so it’s larger than your text. Set the stroke color of the grids to something bright and easy to see. I’ve chosen orange. Make sure it does not match your text color.
Copy (Control-C) and Paste (Control-V) the grid and Rotate the copy 45° and Align their centers in the Align panel.
Copy and Paste the text group. Place the grids over your copied text group.
Step 4
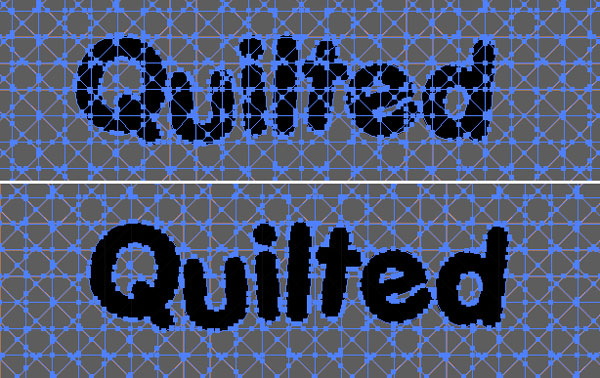
Select all three elements and hit Divide in the Pathfinder panel and Deselect. Using the Magic Wand Tool (Y), select the brightly colored grid.
Step 5
Delete the selected grid. You should be left with your text in many pieces. Group (Control-G) the text elements together. To see this better, set the fill color to something bright (I chose teal) and the stroke color to black.

Step 6
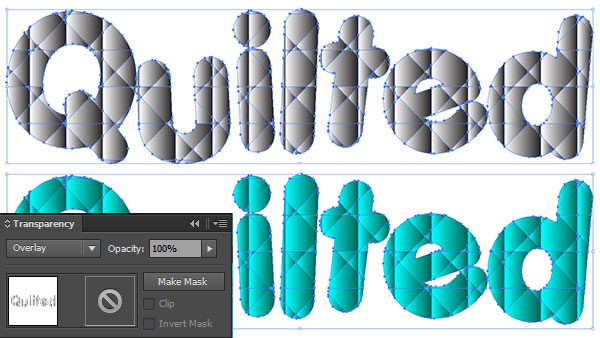
Next up on this quilted text vector tutorial, set the stroke color to Null. Hit the Gradient Tool (G) in the Toolbar. You’ll find it automatically applies a Linear black and white gradient to the pasted group. Align the copied group with the original text group and set the Blend Mode to Overlay. If you adjust the gradients, do so for each individual piece of the gradient in order to keep the dimensional look of each “quilted” piece.
Step 7
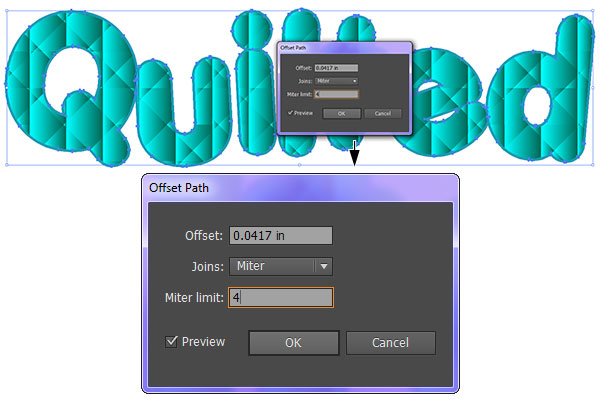
Select the original text group and go to Object > Offset > Offset Path and set the Offset to 2-4px.
Step 8
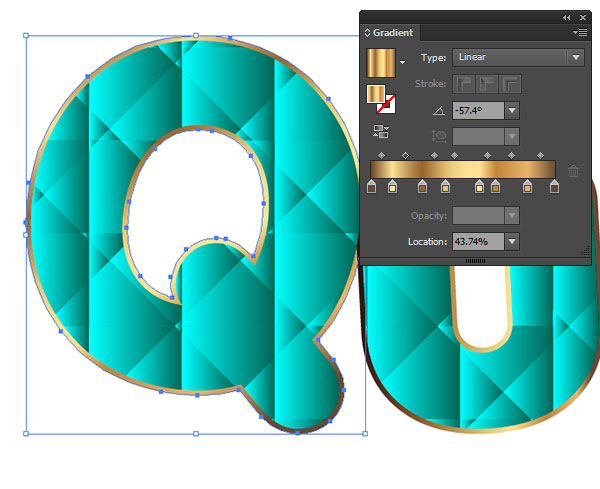
Apply the following gradient to the offset text group for a shiny gold look:
#704824#FFE296#97652E#E2C071#FFE296#C28439#E9B46B#684A32
Step 9
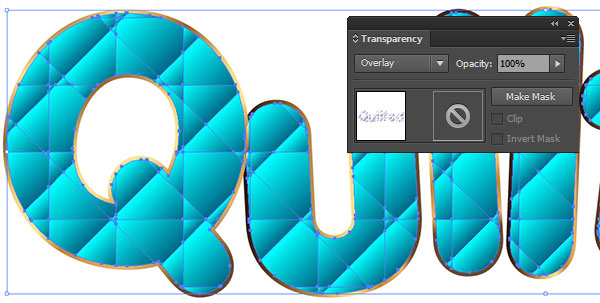
In the event you’d like the same color settings for the main text group and the gradient text group, set the fill color of the text group to #00A79D and the gradient to #262262 to #FFFFFF.
Step 10
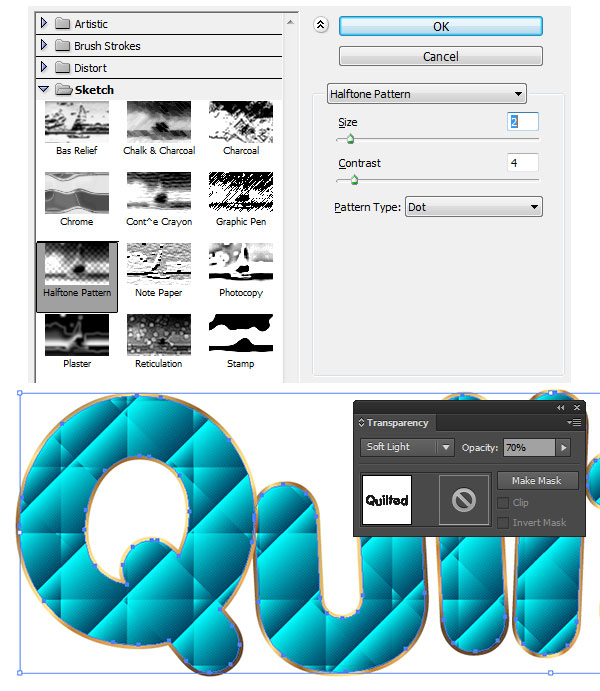
Copy and Paste the main text group and in the Appearance panel apply a Halftone Pattern effect with the following attributes:
Size:
- 2
Contrast:
- 4
Pattern Type:
- Dot
Set the Blend Mode of the fill effect to Soft Light and Opacity to 70%.
Step 11
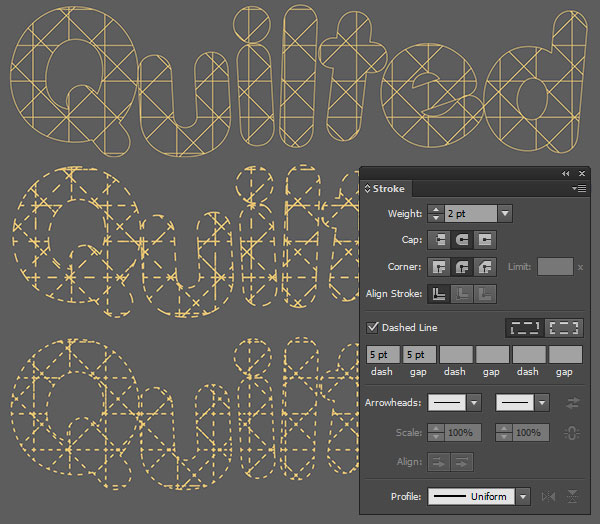
Copy and Paste the gradient text group. Set the fill color to null and the stroke color to #FFE296. In the Stroke panel apply the following attributes:
Weight:
- 2pt
Cap:
- Rounded
Corner:
- Rounded
Dash:
- 5pt
Gap:
- 5pt
Step 12
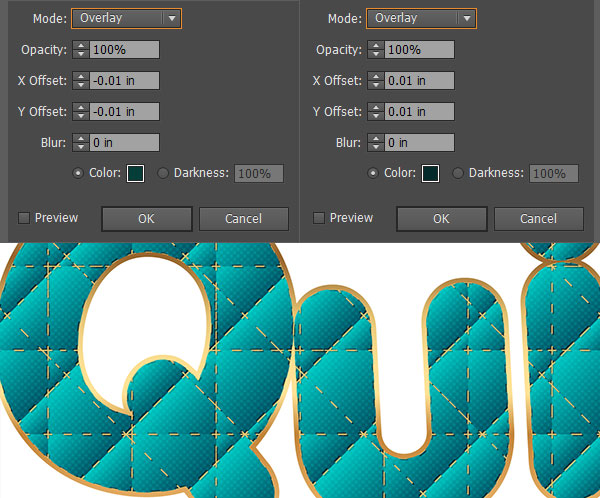
Align the dotted line group with the rest of the quilted text vector design (you should be working with five groups at this point). In the Appearance panel, apply two instances of a Drop Shadow effect (Effect > Stylize > Drop Shadow) to the dotted line group with the following attributes:
Mode:
- Overlay
Opacity:
- 100%
X Offset:
- -0.01 in
Y Offset:
- -0.01 in
Blur:
- 0 in
Color:#053D39
Apply the following attributes to the second Drop Shadow instance:
Mode:
- Overlay
Opacity:
- 100%
X Offset:
- 0.01 in
Y Offset:
- 0.01 in
Blur:
- 0 in
Color:#042B2B
Step 13
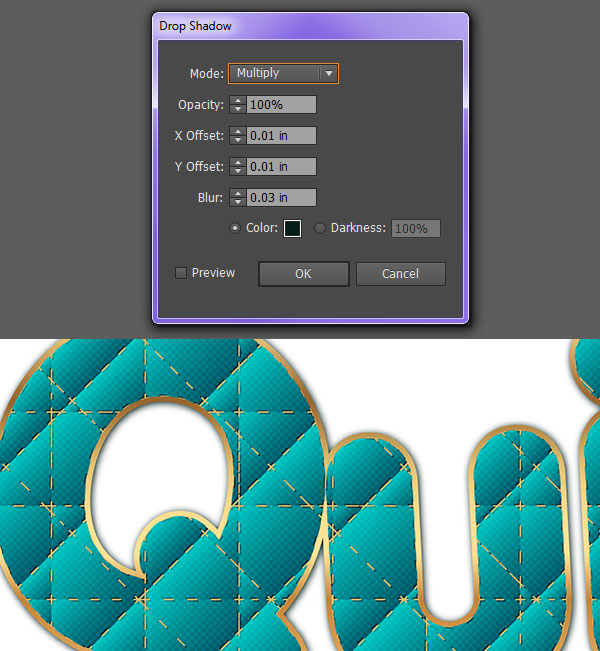
Group together all five text groups and apply a Drop Shadow to the new group with the following attributes:
Mode:
- Overlay
Opacity:
- 100%
X Offset:
- 0.01 in
Y Offset:
- 0.01 in
Blur:
- 0.03 in
Color:#042B2B
Step 14
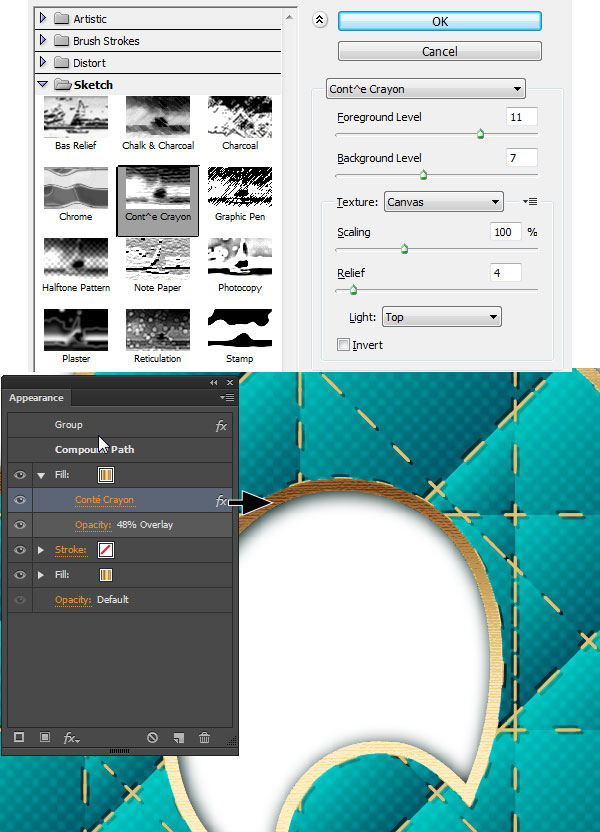
In the Layers panel, Select the offset gold gradient group. In the Appearance panel, add a New Fill and go to Effect > Sketch > Conté Crayon with the following attributes:
Foreground Level:
- 11
Background Level:
- 7
Texture:
- Canvas
Scaling:
- 100%
Relief:
- 4
Light:
- Top
In the Appearance panel, set the Opacity level to 48% and the Blend Mode to Overlay.
Conclusion: Quilted Text Vector
Add a background to your quilted text vector piece or create a whole poster design of quilted, sewn, or appliqued text with the fantastic technique you’ve learned in this tutorial. Share your results in the comment section below!
Author: Mary Winkler
Mary works under the brand Acrylicana® designing apparel, jewelry, and illustrating for companies like Disney, Jakks Pacific, Envato, and more. Check out Acrylicana.com for more artwork, tutorials, and more.


It’s just brilliantly simple.
Amazing work.
Thanks for post, it’s very inspiring for budding designer like me.
Keep posting.
its very nice to thanks je