
 Brighten up your day with this fantastic neon light vector text treatment! We’ll use custom brushes and the Appearance panel in order to turn any text into bright, neon light text!
Tutorial Details: Turn it On! Neon Light Vector Text Treatment
- Program: Adobe Illustrator CS6 – CC 2015
- Difficulty: Intermediate
- Topics Covered: Text Treatment, Custom Brushes, Vector Effects
- Estimated Completion Time: 35 Minutes
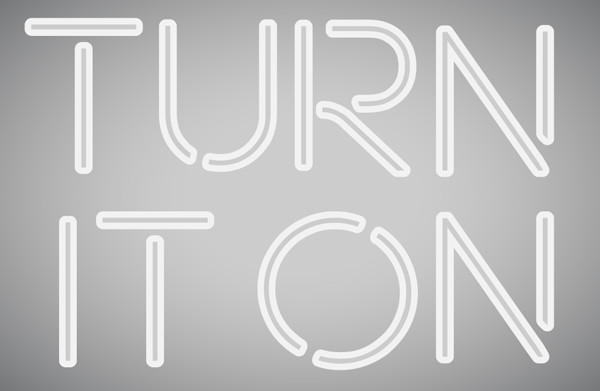
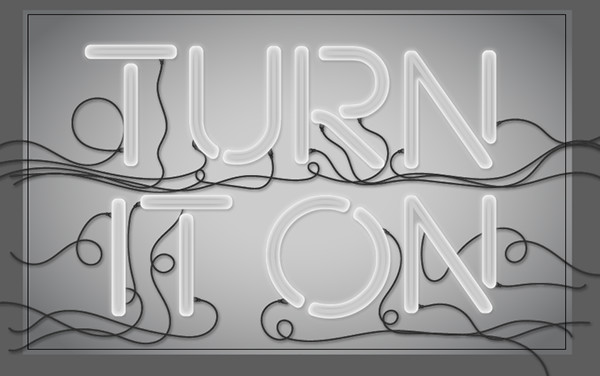
Final Image: Neon Light Vector Text Treatment
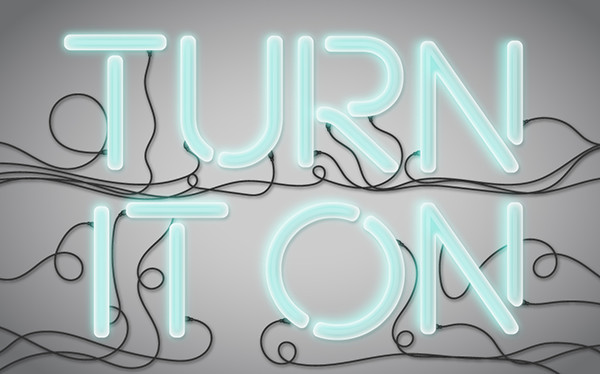
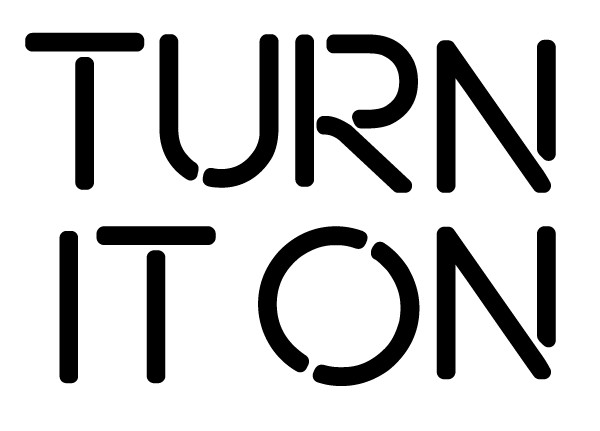
Step 1: Neon Light Vector Text Treatment
To start our neon light vector text tutorial, open a New Document in Adobe Illustrator, use the Type Tool to write out the text of your choice. I’m using the Neon Lights font found at that link. If you use that font, make sure to write in all caps. Right-Click and hit Create Outlines. Set the stroke weight to something thick that mimics what you see below (8-14 pt) and the caps and corners to Rounded in the Stroke panel. Expand under Object.
Step 2
Draw a rectangle with the Rectangle Tool beneath your text and apply a gradient going from light gray to dark gray. Set the Gradient type to Radial in the Gradient panel.

Step 3
Adjust the radius of the gradient with the Gradient Tool.

Step 4
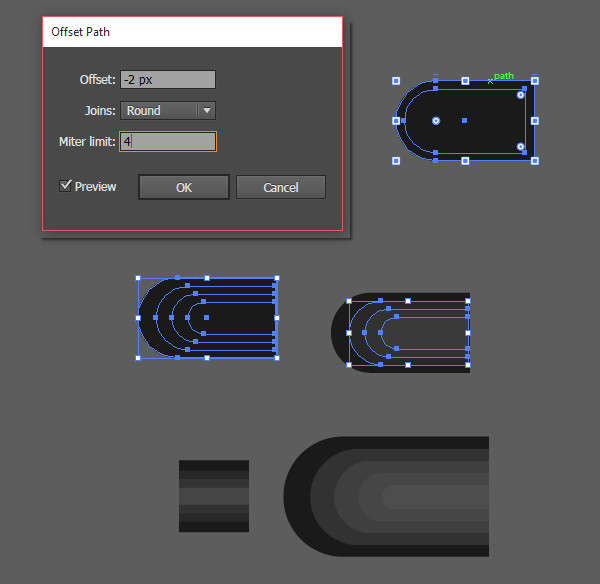
Select your letter objects and go to Object > Path > Offset Path and offset the path by -2 px or so (try to get a shape similar to what you see below — the amount of pixels will depend on the size of your object). Set the interior shape to medium gray and the outer shape to light gray.
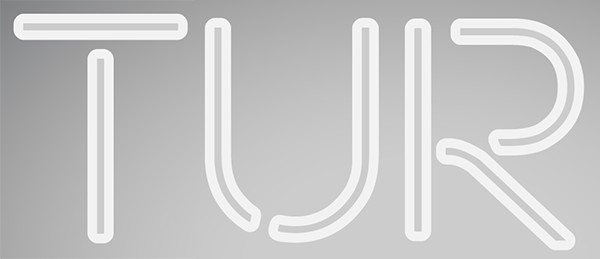
Step 5
Continue changing the object colors of your text design until you’ve completed your word.
Step 6
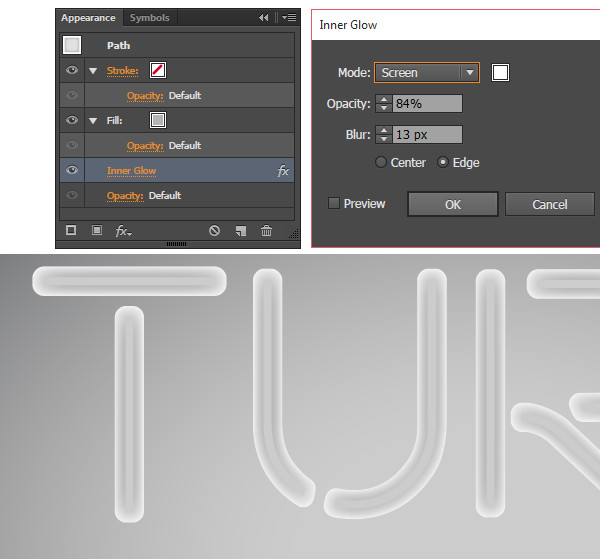
Select the outer shape of your first letter. In the Appearance panel, set the fill color to medium gray and apply an Inner Glow effect (Effect > Stylize > Inner Glow) with the following attributes:
Mode: Screen
Opacity: 84%
Blur: 13 px
Edge Repeat this step on the other outer shapes for each letter.
Step 7
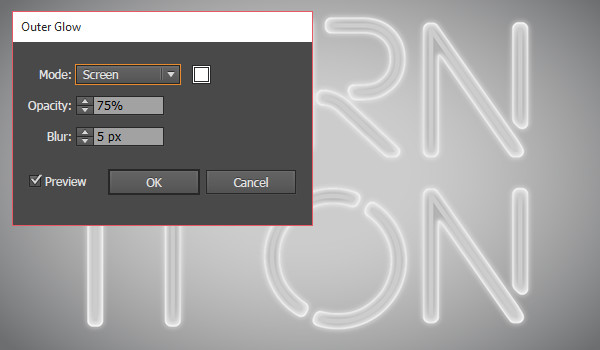
Next apply an Outer Glow to your letters (you can do so to them as a group) in the Appearance panel with the following attributes:
Mode: Screen
Opacity: 75%
Blur: 5 px
The size of the blur for any of the effects applied in this tutorial will depend on the size of your object, and yours may differ from mine. Adjust your settings as you see fit and use this as a guideline.
Step 8
Let’s work on the custom electrical plug brush. Draw a rectangle and round out the corners of the left side in the Transform panel. go to Object > Path > Offset Path and apply an Offset of -2 pixels or so (you’re creating a very small plug). Repeat the Offset three times. Align the four shapes to their right edge. Set the colors to black and varying shades of gray as seen below. Repeat with a small rectangle for the cord itself. Copy and Paste the plug shape and Reflect it over a vertical axis for the other side of the cord.
Step 9
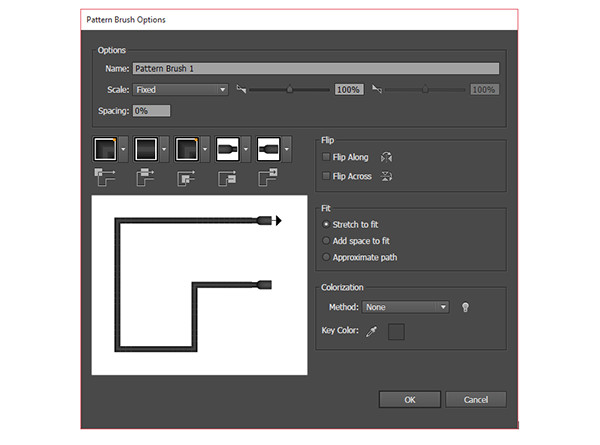
To set up the Pattern Brush, drag each cord end shape to the Swatches panel. you’ll need to name these new swatches endTile and startTile. Select the rectangular cord shape and in the Brushes panel create a New Pattern Brush. Set each corner to AutoCenter and choose the end or start shape of your choice. Ultimately I made four brushes for this neon light vector text treatment: one with both end shapes, one without any end shapes, one with one end shape, and one with the other end shape.
Step 10
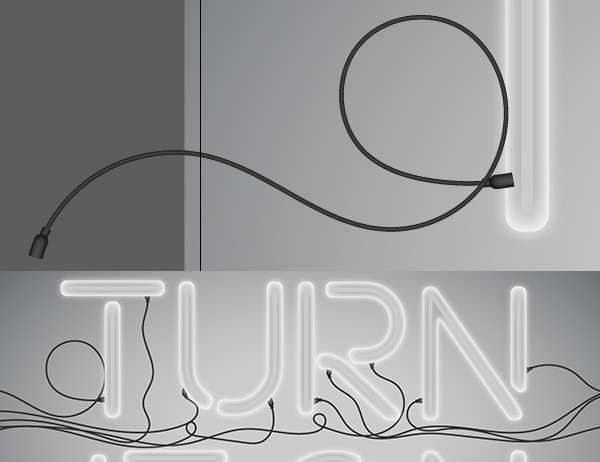
Using the Paintbrush Tool try our your new custom brushes. Draw wiggly and looping cords coming from each neon text piece. Group your brush paths together and repeat this step over the entire design.
Step 11
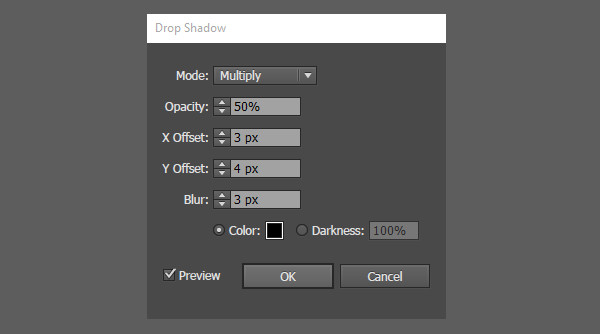
Select your brush path group and apply a Drop Shadow effect with the following attributes (you may need different settings for something similar to my final effect):
Mode: Multiply
Opacity: 50%
X Offset: 3px
Y Offset: 4px
Blur: 3px
Color: Black
Step 12
Check out the drop shadow added to the cord group below on this neon light vector text. Place your cord group beneath the text group in the Layers panel.
Step 13
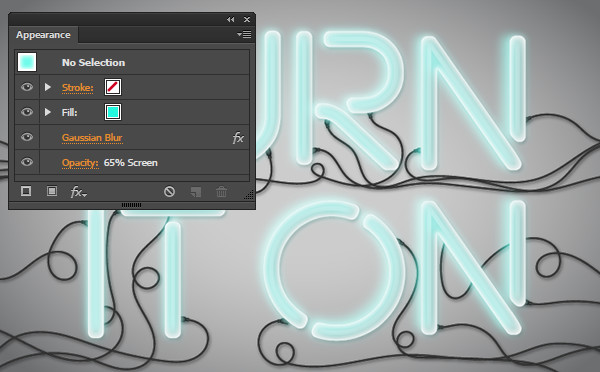
Copy and Paste the text group. Remove the various Appearance panel effects. Set the fill color to something fun and bright (like bright blue) and Unite the objects of the copied text group in the Pathfinder panel. In the Appearance panel apply a slight Gaussian Blur effect. Set the Opacity to 65% and the Blend Mode to Screen. Place this group over your text. Now you can easily change the neon light’s glow color.
Conclusion: Neon Light Vector Text Treatment
Turn your lights “on” and “off” by changing the Opacity of the final object in the Appearance panel. Share your neon light creations in the comment section below!
Author: Mary Winkler
Mary works under the brand Acrylicana® designing apparel, jewelry, and illustrating for companies like Disney, Jakks Pacific, Envato, and more. Check out Acrylicana.com for more artwork, tutorials, and more.


I don’t understand how to get the gradient option in step 2.
How did you make the outer glow change color along with the text
I find it hard to get the screen color blending right. What cmyks are used for light, medium and dark grey?
you lost me at step 4
: (
I’ll edit the post. Sorry about that. It should also include Offsetting the path. Thanks for letting me know!