
 Get luxurious with this gorgeous metallic text effect. Create something fit for a king with 3D effects, gradients, and a patterned background in well under an hour.
Tutorial Details: Gorgeous Metallic Text Effect
- Program: Adobe Illustrator CC
- Difficulty: Intermediate
- Topics Covered: Appearance Panel, Patterns, 3D Effects
- Estimated Completion Time: 45 Minutes
Final Image: Gorgeous Metallic Text Effect

Step 1: Gorgeous Metallic Text Effect
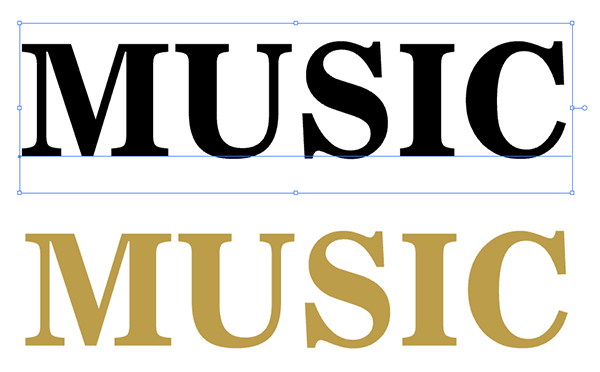
To being creating our beautiful metallic text effect tutorial, first create a New Document. Then, with the Type Tool, write out the word or words of your choice. Use an elegant but thick serif font. Expand the text and set the fill color to gold (#BC9D4A)
Step 2
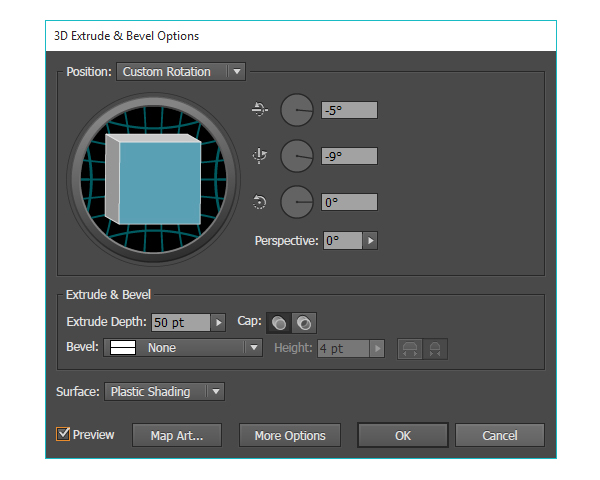
Ungroup the letters and focus on one at a time. I’ll be primarily working on the M. Go to Effect > 3D > Extrude & Bevel and enter in the following settings:
-
- X-Axis: -5°
-
- Y-Axis: -9°
-
- Z-Axis: 0°
-
- Extrude Depth: 50pts
-
- Surface: Plastic Shading
Step 3
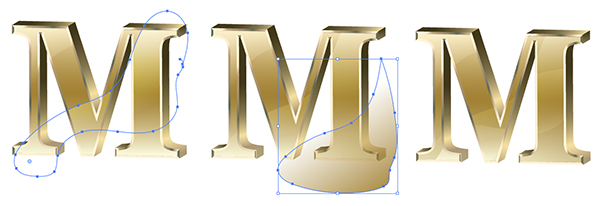
Expand the Appearance of the letter under Object. You can repeat the previous step on each of your letters. Note that to get the look of the lettrs below, you’ll have to carefully revolve the Y-Axis of the 3D effect so each letter is a bit different and looks like they’re curving to the sides.
Select the front face of each letter and apply a Linear Gradient of -90° of light yellow and gold tones (see below).

Step 4
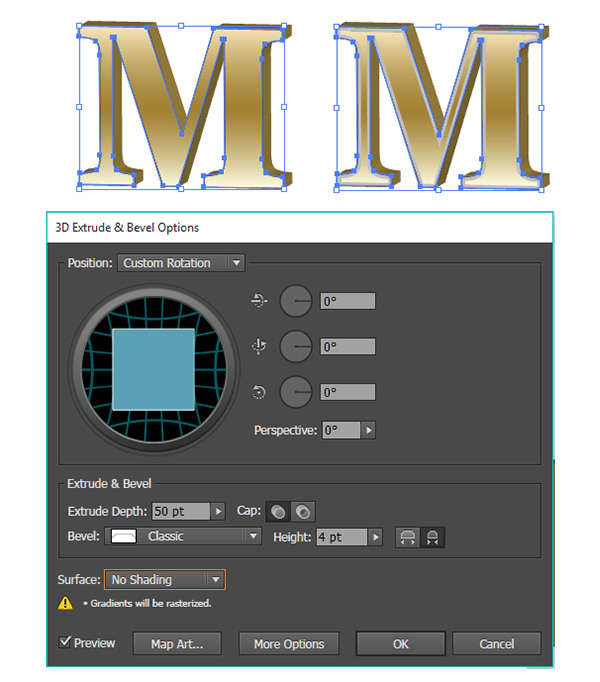
Focusing on the M, select the front face and once again go to Effect > 3D > Etrude & Bevel. Set all three axes to 0°, the Bevel to Clasic, and the Height of the Bevel to 4 pt. Hit OK and this will make a simple bevel on your letter face.
Step 5
Select each 3D shadow shape of the letter and apply a Linear Gradient going from dark taupe to yellow and back to tan tones (see below). Apply the gradient to each shadow shape and use the Gradient Tool to adjust its placement. Group together your shadow shapes.

Step 6
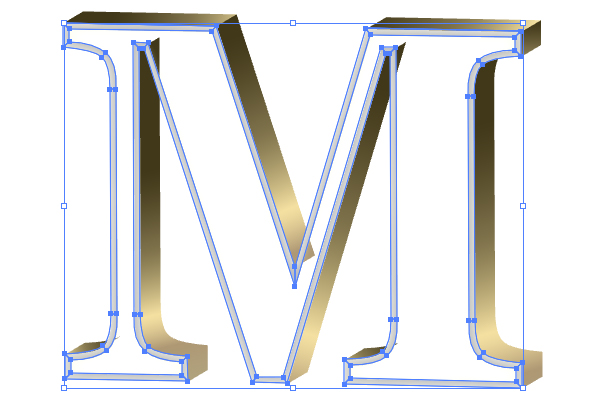
Expand the Appearance of the Bevel under Object. Select and Unite like sides with the Pathfinder panel. I have 13 sides total for this bevel. This makes applying gradients to it easier. Make sure your United shapes are Expanded.
Apply bright yellow and gold gradients to the Bevel shapes. Adjust the gradient angles with the Gradient Tool and Group together your bevel shapes.
Step 7
With the drawing tool of your choice, draw highlight and shadow shapes with radial gradients overlapping your letter faces. I set my Radial Gradients to light and dark golds, the same tones used in the highlight and shadow gradients throughout this design.
Group together your shadow and highlight shapes. Copy and Paste the letter face and Align it with the original letter face. Make sure the copy is above the shadow and highlight group. Select the group and the copies letter and Create a Clipping Mask (Control-7). Group your entire letter together.
Step 8
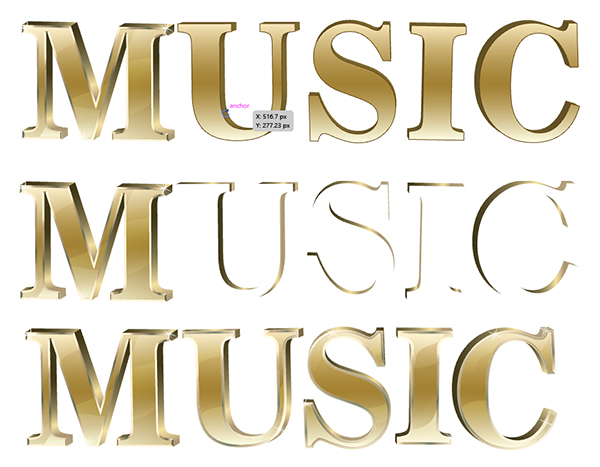
Repeat the previous steps on the other letters. I like to work on multiple letters at a time so the whole process goes a bit faster. When completed, Group the entire word together.
Step 9
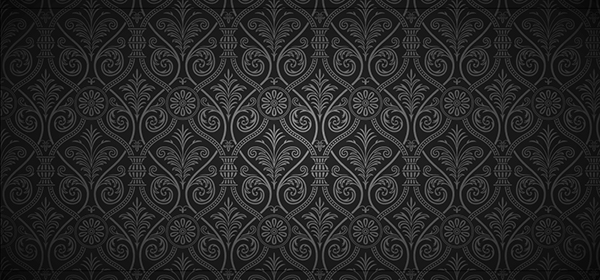
Draw a rectangle and fill it with the pattern of your choice.
Step 10
Draw another rectangle overlapping the pattern design and fill it with a Linear Gradient of magenta at 0% Opacity to 100% Opacity.

Step 11
Place your metallic text effect text in the center of the background.

Step 12
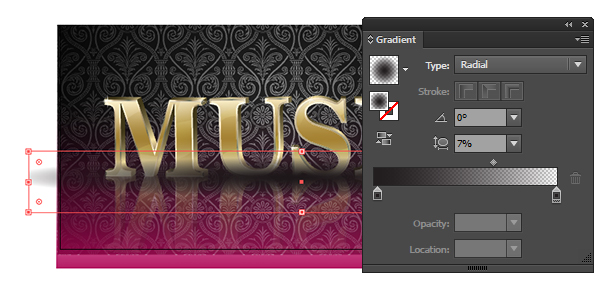
To create a shadow beneath the metallic text effect letters, draw a rectangle and apply a Radial Gradient to it going from black at 0% to 100% Opacity with the opaque color in the center. Adjust the radius so it’s an ellipse with the Gradient Tool.
Step 13
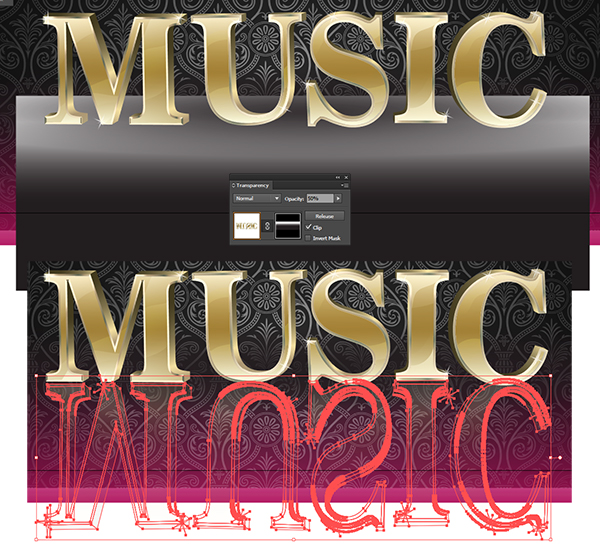
Copy and Paste your text. Flip it over a horizontal axis. Place it behind and beneath your metallic text effect letters and under the shadow shape drawn in the previous step.
Draw a rectangle filled with a Linear gradient going from white to black and place it over the copies text. Select both and hit Clip in the Transparency panel. Reduce the Opacity to 50% or so. Adjust the letters and gradient as you see fit so the text looks like a light reflection beneath the original text.
Conclusion: Gorgeous Metallic Text Effect
Complete your design with a few sparkles or try on some other metallic text to complement the piece. Share your finished result in the comment section below, and as always, let us know what sort of text treatments and tutorials you’d like to see next from us here on Vectips!
Author: Mary Winkler
Mary works under the brand Acrylicana® and has illustrated and designed for companies like Disney, Jakks Pacific, Jada Toys, Envato, and more. Check out Acrylicana.com for artwork, tutorials, and more. Follow Acrylicana on Instagram, Facebook, and Twitter!


I love it I will follow all your steps …..
I can only hope to do so well…..