In Illustrator, it’s easy to pick a complement color of the current Fill or Stroke in the Color Panel. From the Pop-Up Menu of the Color Panel select Complement. If you are keyboard shortcut freak, like me, you can change to the complement color by Command Shift-clicking (Mac) or Ctrl-Shift-clicking (Win) on the Color Ramp at the bottom of the Color panel.
Category Archives: Tips and Tricks
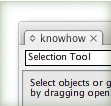
Illustrator Knowhow
I believe a great way to learn a program is to just play around with it. Illustrator is no exception, but sometimes you don’t know things exist or don’t know what certain tools can do. Vectips helps with some tips and tricks but sometimes you need answers quick or want to explore on your own. That is were the Illustrator Knowhow panel in Illustrator CS3 comes in handy!
New Resource Page
I finally added a resource page with a listing of blogs, tutorial aggregators, freebies, books, magazines and plug-ins that I find helpful. You can access the Resources from the top navigation bar. I know I have missed some, so if you have a suggestion for a resource, feel free to contact me. I will review the resource and see if it fits with the rest of the resources.
Four Ways to Convert to Grayscale Illustrator
Sometimes you need to convert an Illustrator file to grayscale. This could be for a print ad, logo option, or even just to try something different. In Illustrator CS3 you have several options to easily change and edit any artwork to grayscale. There are a couple of simple options and a couple of options that give you more control of how the artwork will look.
Cleaning Up Files
The other week, I had a file that kept getting corrupted when I would send it to a printer. I couldn’t figure out what was wrong and spent forever sending emails, zipping files, examining outlines and so on. I came to realize, it was an obscure brush I was experimenting with early along in the project. I didn’t even use it in the final version! After that fiasco, I will always clean up my files!
Easily Apply Shades of Color
Using shades of color are essential when I create glossy buttons and icons. In the Glossy Buttons and Web 2.0 Stickers tutorials, I used Cyan because it was easy to enter a percentage of Cyan, giving me quick shades. What if you need lighter and darker shades of a mixed color? An easy way is to hold down the Shift Key when you are dragging the sliders in the Color Panel!
Huge Layer Thumbnails
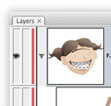
I use the Layers Panel all the time. The panel helps me navigate complicated illustrations and helps me find, select, and arrange objects. The Layers Panel is surprising customizable, adjusting to how you work. Creating large thumbnails adds to the functionality of the Layers Panel. Moreover, you can get rid of the thumbnails, or even keep thumbnails on the top layer only!