 In today’s tutorial, we’re going to tackle a new project, and learn how to create a nice little book stack icon, using some basic geometric shapes and tools found within Illustrator.
That being said, poor yourself a fresh cup of that magic bean juice and let’s get started!
Tutorial Details: Book Stack Icon
Program: Adobe Illustrator CS6 – CC 2017
Difficulty: Beginner
Topics Covered: Design Theory, Compositional Construction, Shape Alignment, Grid Positioning
Estimated Completion Time: 30 Minutes
Final Image: Book Stack Icon

Step 1
As always we’re going to kick things off by setting up a New Document by going over to File > New (or using the Control-N keyboard shortcut), which we will adjust as follows:
- Number of Artboards: 1
- Width: 128 px
- Height: 128 px
- Units: Pixels
And from the Advanced tab:
- Color Mode: RGB
- Raster Effects: Screen (72ppi)
- Preview Mode: Default
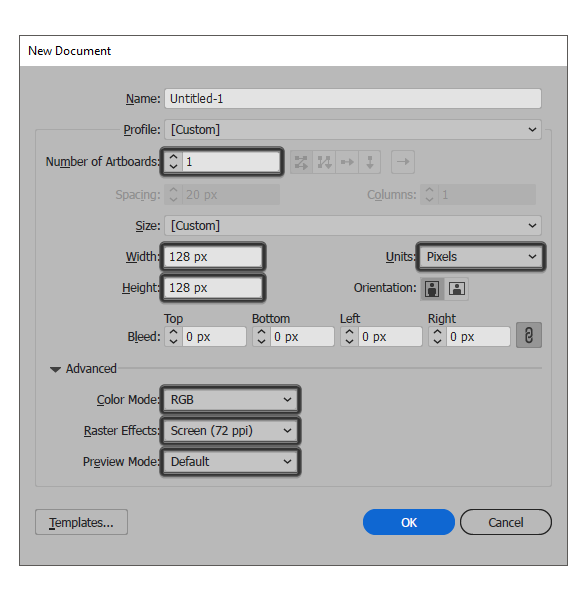
Quick tip: most of the indicated settings can be automatically triggered if you set the document’s Profile to Web, the only one that you’ll have to manually adjust being the Artboard’s Size (Width x Height).
Step 2
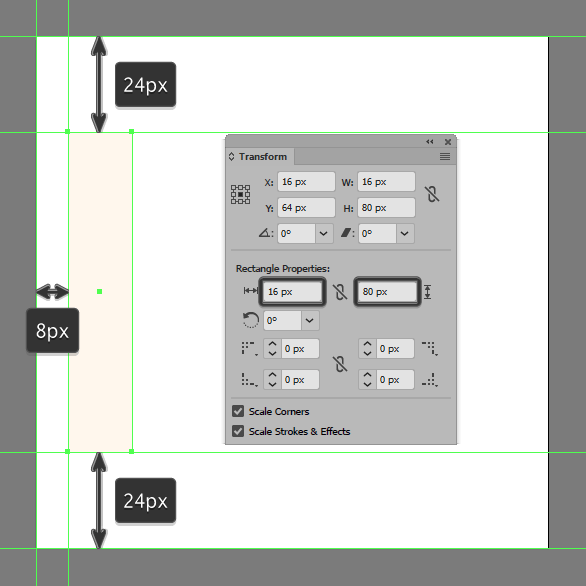
Start working on the first of the two vertical books, by creating its inner body using a 16 x 80 px rectangle, which we will color using #FFF7EE, and then position at a distance of 8 px from the center of the underlying Artboard’s left edge.
Step 3
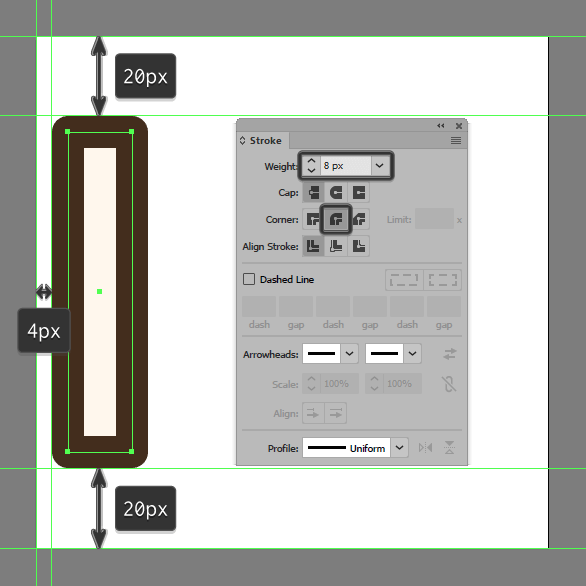
Give the shape that we’ve just created an outline using the Stroke method, by creating a copy of it (Control-C) which we will paste in front (Control-F) and then adjust by first changing its color to #3F2514, and then flipping its Fill with its Stroke (Shift-X) making sure to set its Weight to 8 px and its Cap to Round Join from within the Stroke panel.
Step 4
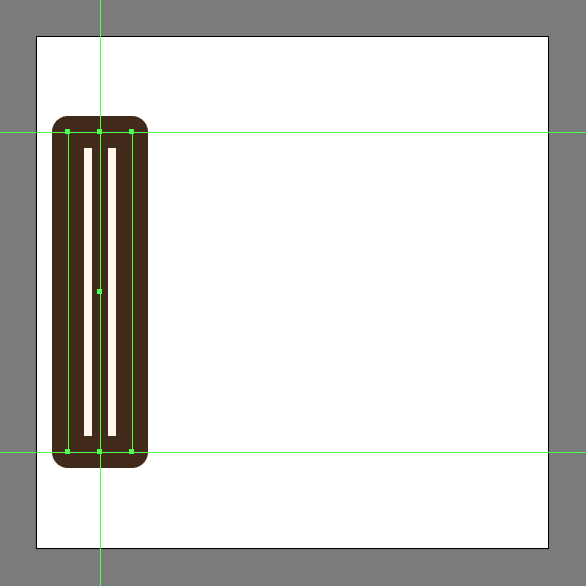
Add the vertical detail line using an 80 px tall 4 px thick Stroke (#3F2514), which we will position to the center of the book, making sure to select and group all of its composing shapes together afterwards using the Control-G keyboard shortcut.
Step 5
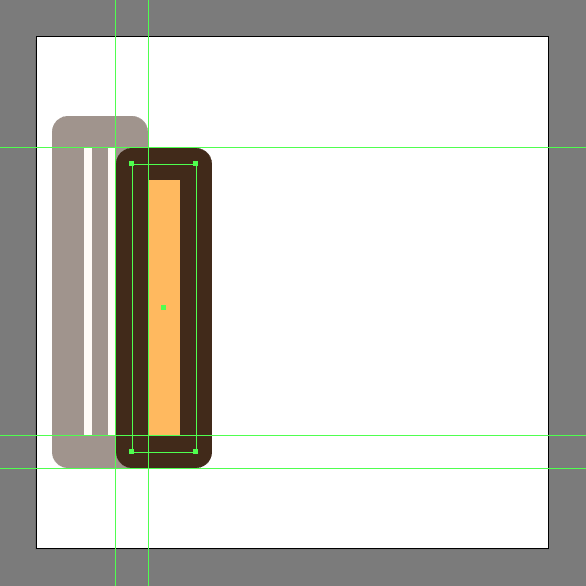
Create the second book’s outer body (or spine) using a 16 x 72 px rectangle (#FFBA5F) with an 8 px thick outline (#3F2514), which we will position onto the right side of the previous book as seen in the reference image.
Step 6
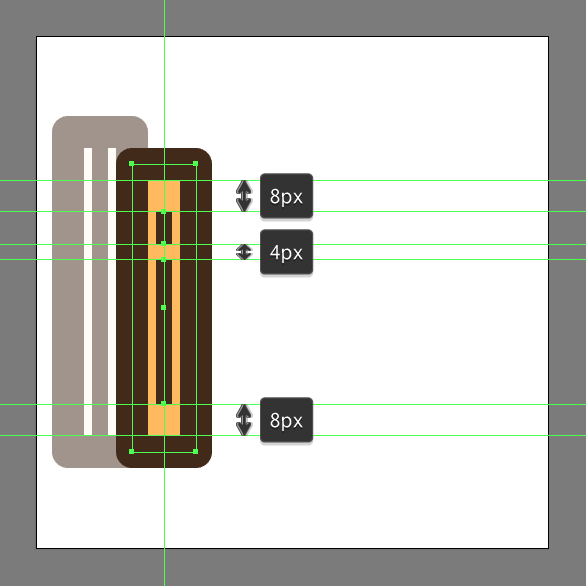
Add the dummy text lines using an 8 px tall 4 px thick Stroke (#3F2514) vertically distanced at 4 px from another taller 36 px one (#3F2514), which we will group (Control-G) and then center align to the previously created shapes. Once you have the lines in place, select and group (Control-G) all of the book’s composing sections before moving on to the next step.
Step 7
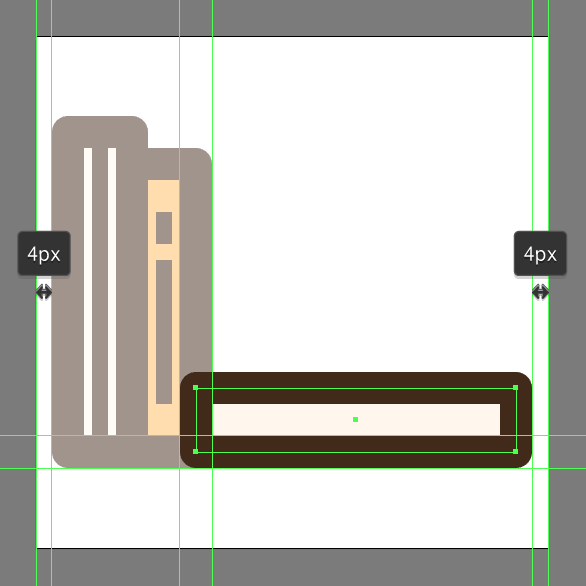
Create the main shapes for the bottom horizontal book using an 80 x 16 px rectangle (#FFF7EE) with an 8 px thick outline (#3F2514), which we will position to the right side of the vertical ones.
Step 8
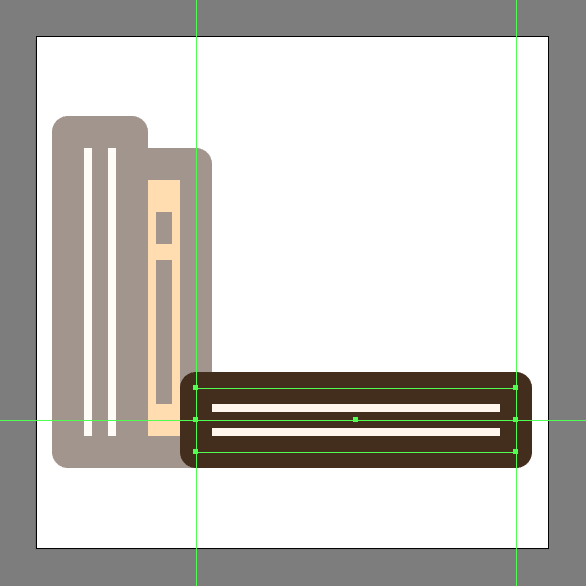
Add the horizontal detail line using an 80 px wide 4 px thick Stroke (#3F2514), which we will center align to the previously created shapes. Once you have the line in place, select all of the current book’s composing sections and group them together using the Control-G keyboard shortcut.
Step 9
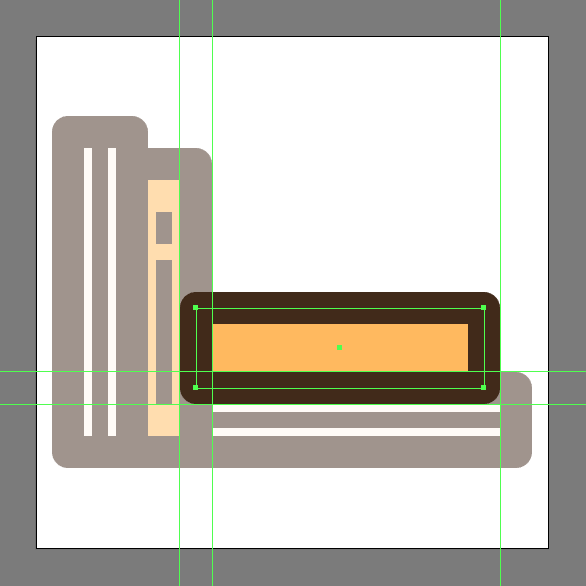
Start working on the second horizontal book by creating its main body using a 72 x 20 px rectangle (#FFBA5F) with an 8 px thick outline (#3F2514), which we will stack on top of the wider one that we’ve just finished working on.
Step 10
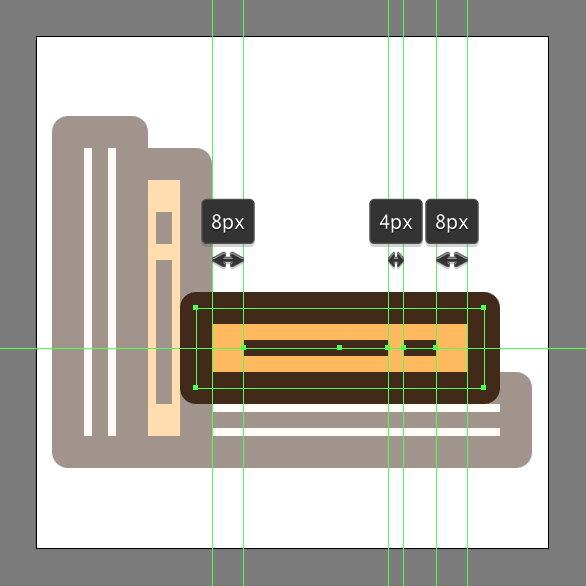
Add the dummy title using a 36 px wide 4 px thick Stroke line (#3F2514) horizontally distanced at 4 px from a smaller 8 px one (#3F2514), which we will group (Control-G) and then center align to the previously created shapes. Once you the title in place, select and group (Control-G) all of the book’s composing sections before moving on to the next step.
Step 11
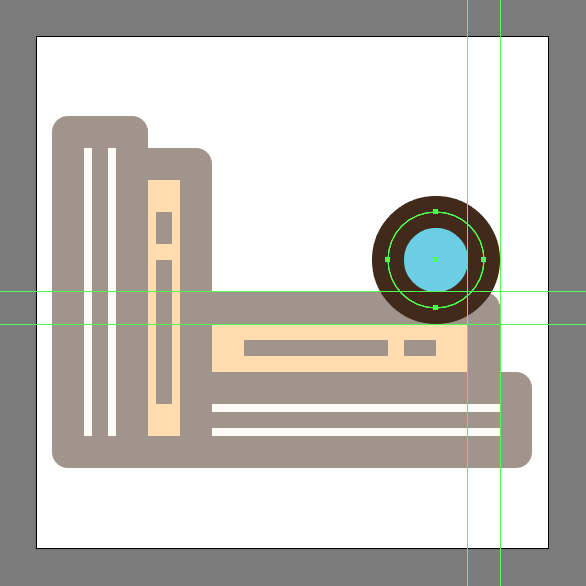
Since we’re pretty much done working on the books, we can shift our focus towards the glasses by creating the right lens using a 24 x 24 px circle (#6CCFE5) with an 8 px thick outline (#3F2514), which we will group (Control-G) and then position onto the top horizontal book as seen in the reference image.
Step 12
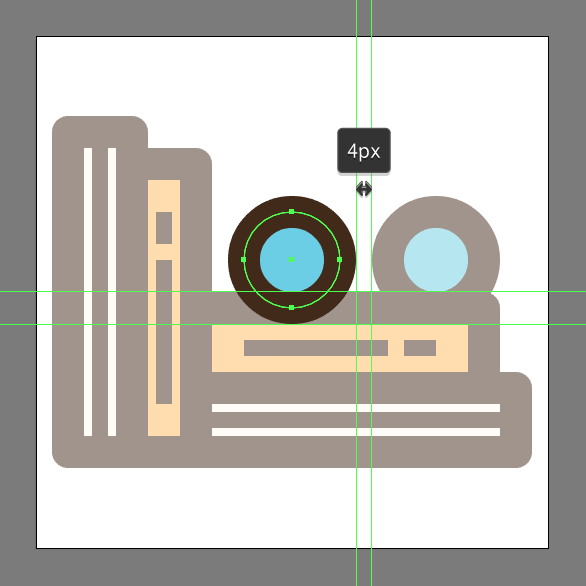
Add the left lens using a copy (Control-C > Control-F) of the one from the previous step, which we will position onto the left side of the original, at a distance of just 4 px.
Step 13
Create the bridge section connecting the two lenses using a 12 x 12 px circle with an 8 px thick Stroke (#3F2514), which we will position right between the two as seen in the reference image.

Step 14
Finish off the bridge and with it the icon itself, by selecting its bottom anchor point using the Direct Selection Tool (A), and then removing it by pressing Delete. Once you’re done, select and group (Control-G) all of the glasses’ composing sections, doing the same for the entire book stack icon afterwards.
![]()
Well Done!
There you have it fellow readers, a nice and easy tutorial on how to create your very own book stack icon. As always, I hope you’ve managed to follow each and every step, and most importantly learned something new and useful during the process.

Author: Andrei Ștefan
Just another coffee addict / pixel grinder, creating colorful projects one pixel at a time.


I am so grateful for your article post. Thanks Again. Really Great!.
I spent more than 2 hours working but not as beautiful as yours