 With Christmas just around the corner, I thought it would be nice to give you guys a little early present by showing you how to create a cute Christmas Globe Icon that you can use in any future projects. We’ll be using some of Illustrator’s basic shapes and tools that you probably already rely on a daily basis, so without wasting anymore time, pour yourself a fresh dose of coffee and let’s get started.
Tutorial Details: Christmas Globe Icon
- Program: Adobe Illustrator CS6 – CC 2016
- Difficulty: Beginner
- Topics Covered: Design Theory, Compositional Construction, Shape Alignment, Grid Positioning
- Estimated Completion Time: 25 Minutes
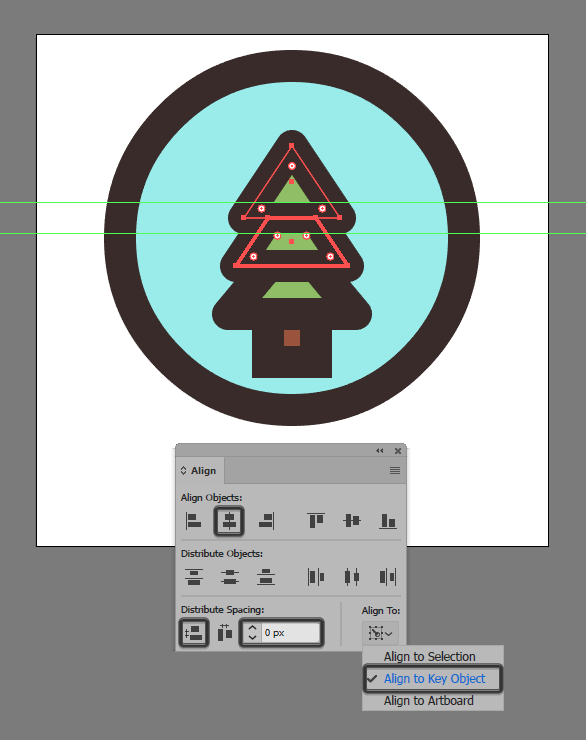
Final Image: Christmas Globe Icon

Step 1
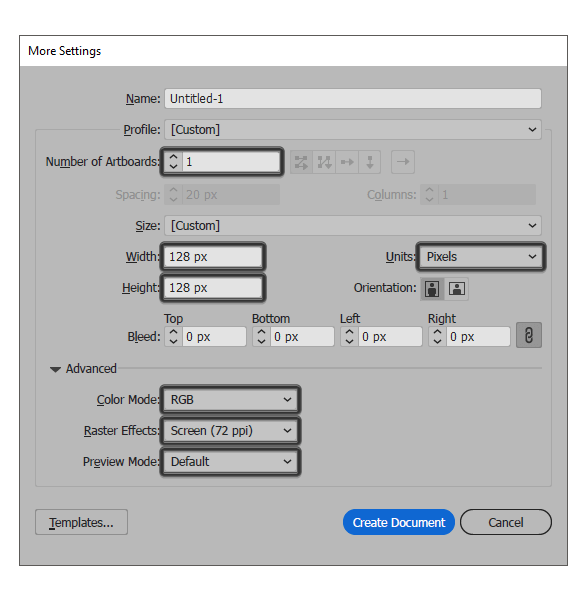
Kick off the project, by setting up a New Document by going over to File > New Document (or using the Control-N keyboard shortcut) which we will adjust using the following values:
- Number of Artboards: 1
- Width: 128 px
- Height: 128 px
- Units: Pixels
And from the Advanced tab:
- Color Mode: RGB
- Raster Effects: Screen (72ppi)
- Preview Mode: Default
Step 2
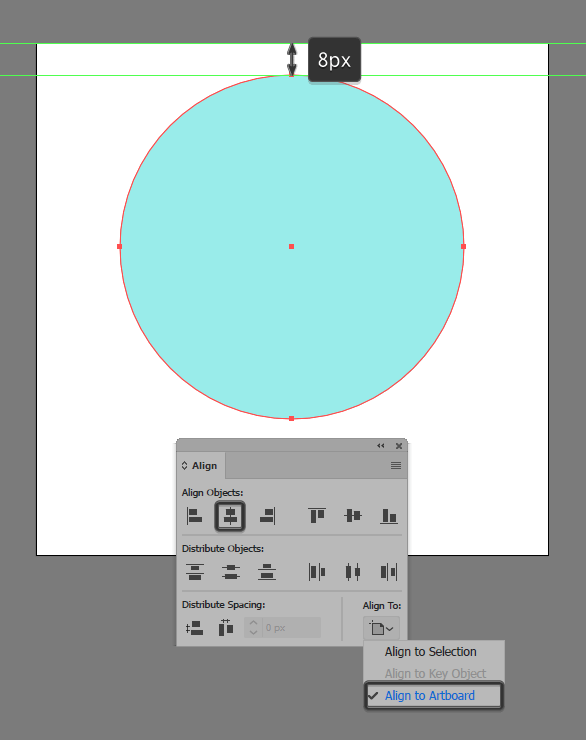
Once we’ve finished setting up our project file, we can start working on the actual icon, by creating the globe section using an 86 x 86 px circle, which we will color using # 9AEDEB and then center align to the underlying Artboard, at a distance of 8 px from its top edge.
Step 3
Give the shape that we’ve just created an outline using the Stroke method, by creating a copy of it (Control-C > Control-F) which we will color using #352724, and then adjust by flipping its Fill with its Stroke (Shift-X), making sure to set its Weight to 8 px afterwards.
Once you’re done, select and group the two shapes together (Control-G) so that they won’t get separated by accident.
![]()
Step 4
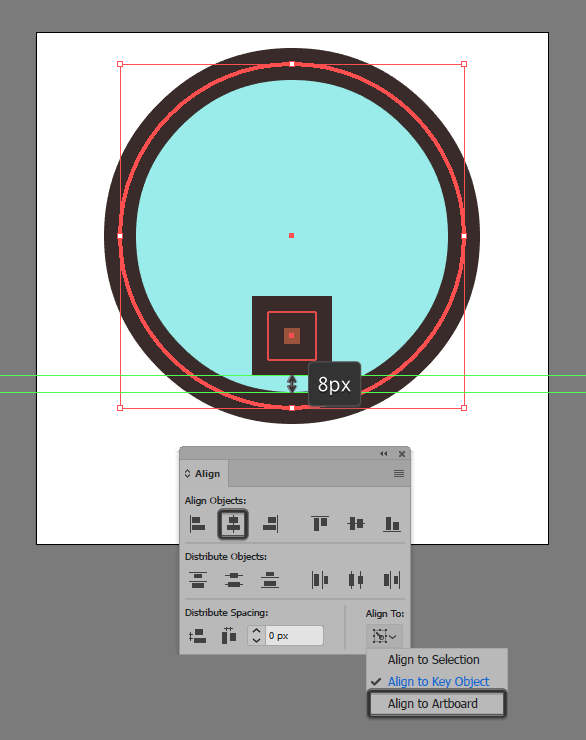
Start working on the tree, by creating its trunk using a 12 x 12 px rectangle (#9B533A) with an 8 px thick outline (#352724) which we will group (Control-G) and then center align to the underlying circle, at a distance of 4 px from the bottom edge of its visible surface.
Step 5
Create the bottom section of the Christmas tree, using a 32 x 12 px rectangle (#91BF66), which we will adjust by individually selecting and pushing its top Anchor Points to the inside by 8 px (right click > Transform > Move > + / – 8 px depending on which side you start with). Give the resulting shape an 8 px thick outline (#352724) with the Corner set to Round, and then group (Control-G) and center align the two to the tree’s trunk, making sure their outlines overlap.

Step 6
Create the tree’s center section, using a slightly smaller 28 x 12 px rectangle (#91BF66) which we will adjust following the exact same process that we’ve used in the previous step. Once you’re done, give the resulting shape an 8 px thick outline (#352724) and then group (Control-G) and position the two above the larger base.
Step 7
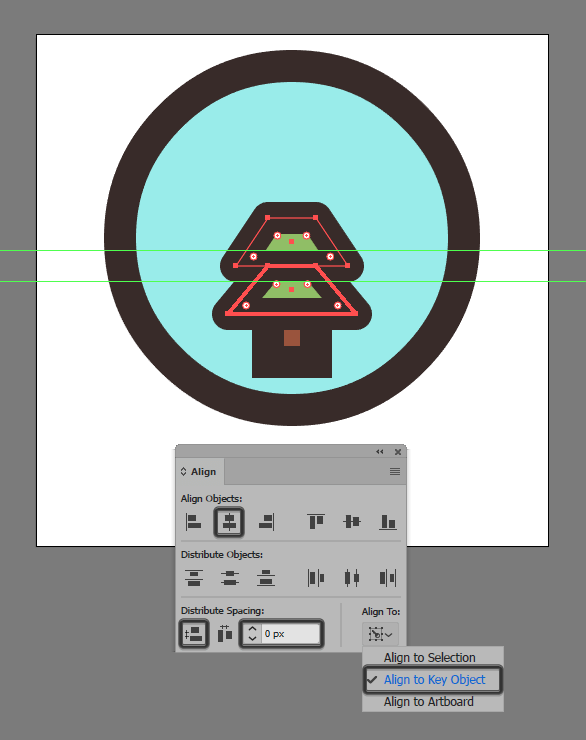
Finish off the tree, by creating its top section using a 24 x 18 px rectangle (#91BF66) which we will turn into a triangle by adding a new Anchor Point to the center of its top edge using the Add Anchor Point Tool (+), and then removing the side ones using the Delete Anchor Point Tool (-). Give the resulting shape an 8 px outline (#352724), and then group (Control-G) and position the two above the center section.
Once you’re done, you can select all the tree’s composing sections and group (Control-G) those as well.
Step 8
Take a couple of moments, and add in the little snowflakes using a bunch of 4 x 4 px circles, which we will color using white (#FFFFFF) and then group together (Control-G) so that they won’t get separated.
Once you’re done, select all the shapes that we’ve created so far and group (Control-G) those as well.
![]()
Step 9
Start working on the upper section of the icon’s wooden stand, by creating a 76 x 12 px rounded rectangle with a 6 px Corner Radius, which we will color using #C1714D, giving it an 8 px thick outline (#352724). Group (Control-G) the two shapes together and then center-bottom align them to the larger circle.
![]()
Step 10
Create the stand’s center section, using a 72 x 14 px rectangle (#9B533A) which we will adjust by individually selecting and pushing its top Anchor Points to the inside by 4 px (right click > Transform > Move > + / – 4 px depending on which side you start with). Give the resulting shape an 8 px thick outline (#352724), followed by a 2 px thick horizontal divider line (#352724), grouping (Control-G) and then positioning all three shapes underneath the stand’s top section.
![]()
Step 11
Create the stand’s bottom section using an 88 x 12 px rounded rectangle with a 6 px Corner Radius, which we will color using #C1714D, give an 8 px thick outline (#352724), grouping (Control-G) and then center aligning the two to the section from the previous step.
![]()
Step 12
Finish off the stand, and with it the icon itself, by creating the little centered golden plate using a 32 x 18 px rectangle (#E5A34C) with an 8 px outline (#352724) and a 4 px thick dummy text line, which we will draw in using the Pen Tool (P). Once you’re done, select and group (Control-G) all the plate’s shapes, doing the same for the stand’s composing sections and the entire icon afterwards.
![]()
Well Done!
Great work guys! I hope that you’ve found the steps easy to follow and most importantly learned a trick or two along the way. That being said, I wish you all a Merry Christmas, and I guess I’ll see you in the next one.

Author: Andrei Ștefan
Just another coffee addict / pixel grinder, creating colorful projects one pixel at a time.


Very fun to do ! 🙂