
In this tutorial we’ll be creating a simple paper-cut effect, using various stylizing effects, shadows, and simple shapes. Then we’ll learn to apply our paper-cut fill to letters, text or other shapes. Let’s get started!
Tutorial Details:
- Program: Adobe Illustrator CS6 – CC 2015
- Difficulty: Intermediate
- Topics Covered: Shape Building, Effects, Pathfinder panel, Blending Modes
- Estimated Completion Time: 15 Minutes
Final Image: Summer Paper-Cut Effect

Step 1
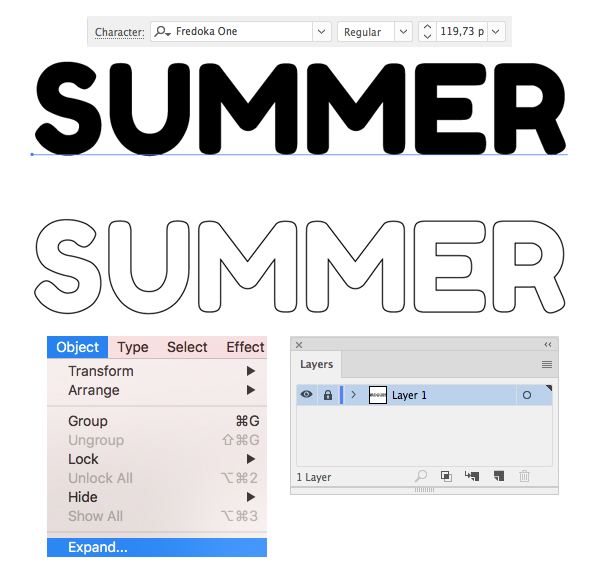
Let’s start by creating some text. I’m using the Fredoka One free rounded typeface to type “SUMMER” and making the size of the letters big enough.
Object > Expand the text, turning it into curves and Lock the layer containing the text in the Layers panel so that you won’t move it while working with the shapes.
Step 2
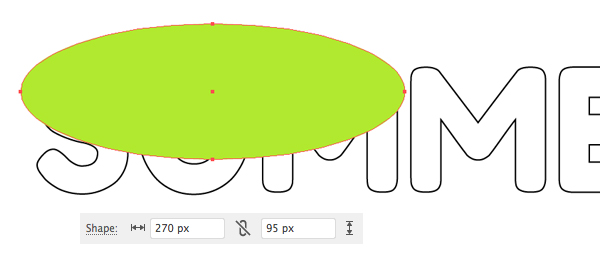
Create a New Layer above the previous one. Grab the Ellipse Tool (L) and let’s make a 270 x 95 px green oval, placing it over the first three letters, as shown in the image below.
The size and position of your objects may differ from mine and that’s totally fine as it helps to add diversity to our designs.
Step 3
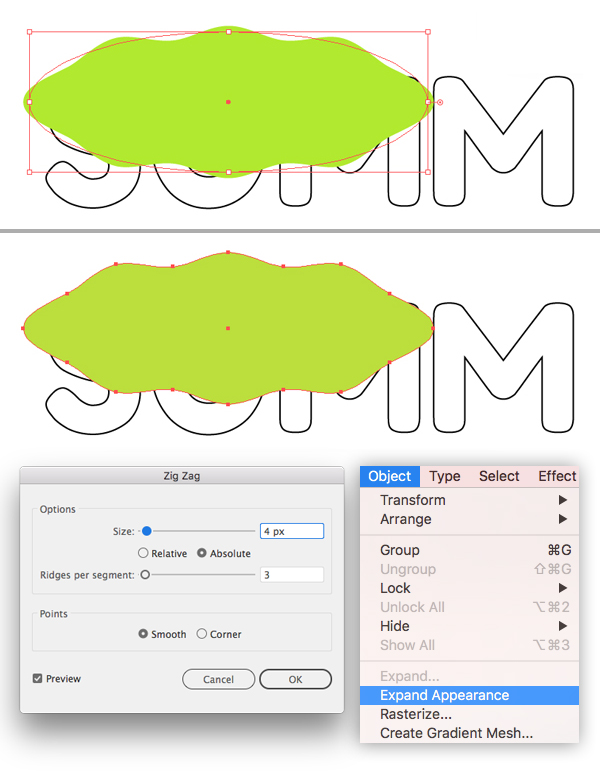
Keeping the ellipse selected, go to Effect > Distort & Transform > Zig Zag. From here, set the:
- Size to 4 px, Absolute,
- Ridges per Segment to 3,
- Points to Smooth.
Check the Preview box and, if everything looks nice and smooth, hit the OK button.
Object > Expand Appearance to apply the effect.
Copy (Control-C) the created shape and Paste in Back (Control-B).
Step 4
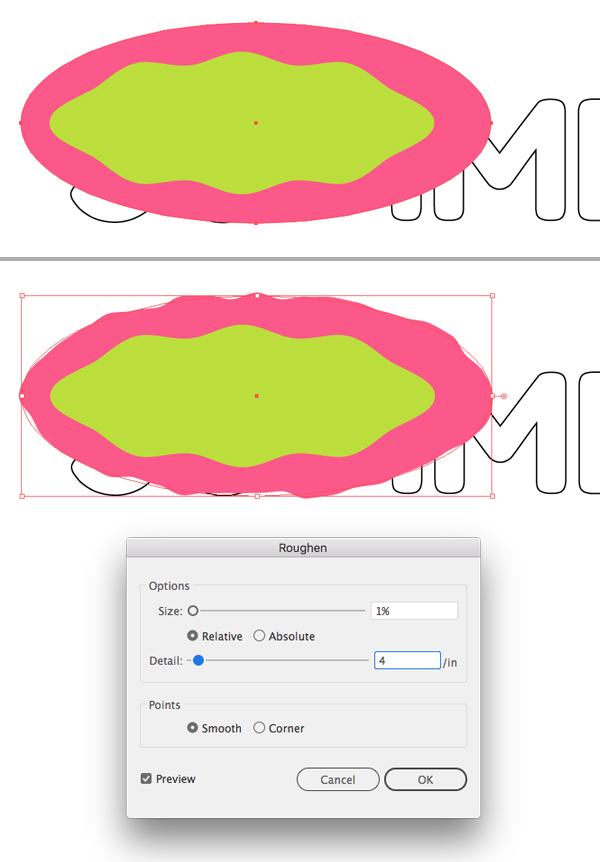
Create a bigger ellipse, fill it with pink or magenta color and Send Backward (Control-[), placing it between two green shapes.
This time we can apply the same Zig Zag effect or try something new. For example, let’s apply Effect > Distort & Transform > Roughen. In the pop-up options window, set the:
- Size to 1%,
- Detail to 4,
- Points to Smooth.
Click OK once you’re happy with the result and Object > Expand Appearance to apply the effect.
Step 5
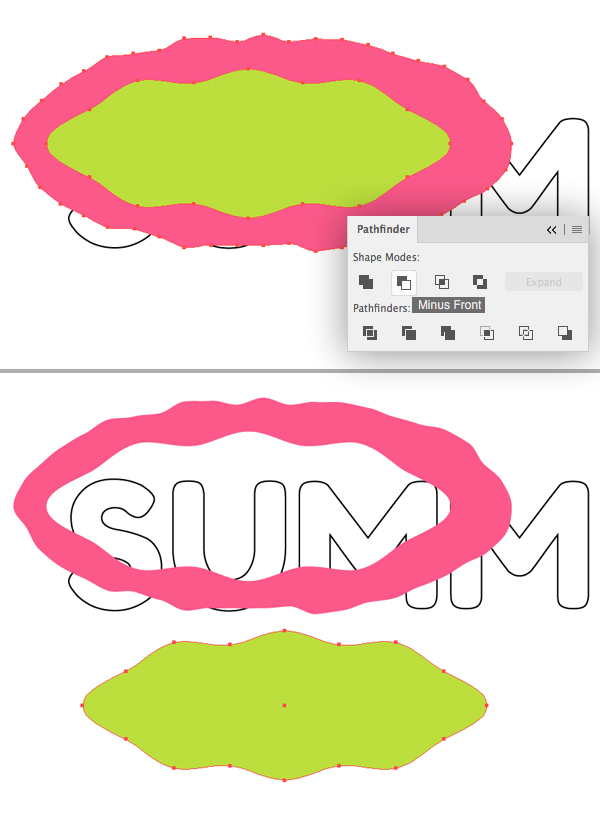
Now let’s cut out the top shape. Select both the green and pink shapes and click Minus Front in the Pathfinder panel.
Now we have a pink “ring” and a copy of the green shape right beneath it.
In the bottom part of the image, I’ve moved the green shape down just to demonstrate how it looks after applying Minus Front; you don’t need to move anything in your file.
Step 6
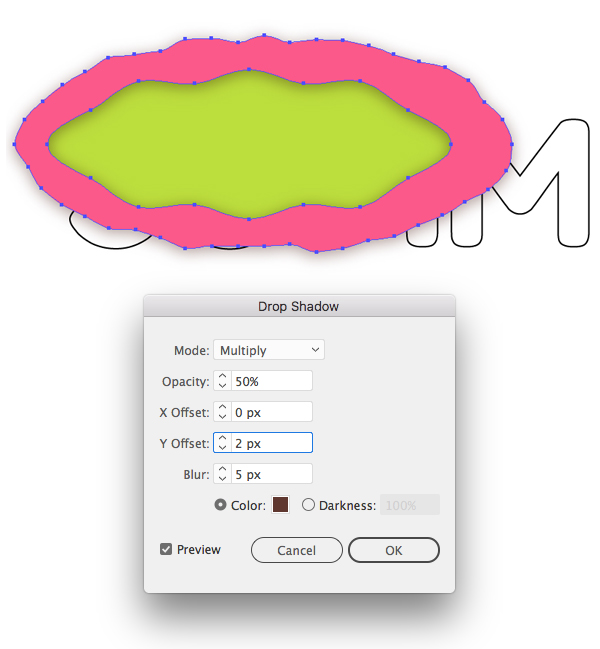
Let’s make the paper-cut effect more true-to-life by applying a subtle shadow. Select the pink shape and go to Effect >Stylize > Drop Shadow. From here, set the:
- Mode to Multiply,
- Opacity to 50%,
- X Offset to 0 px,
- Y Offset to 2 px,
- Blur to 5 px,
- Color to brown.
Click OK to apply the shadow.
Step 7
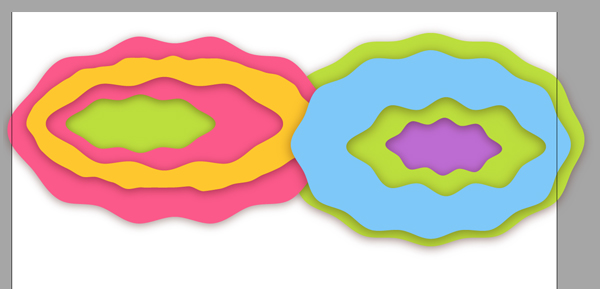
Add more shapes with shadows to cover all the letters.
Step 8
Now let’s Unlock the “SUMMER” layer and move it on top of the Layers panel. Select all the letters and go to Object > Compound Path > Make, turning separate shapes into one single object.
Duplicate (Control-C > Control-F) the word and make the top copy invisible by clicking the eye icon next to it in the Layers panel.

Step 9
Fill the second copy with white color and let’s add some volume here. Go to Effect > Stylize > Inner Glow. From here, set the:
- Mode to Multiply,
- Color to brown,
- Opacity to 50%,
- Blur to 5 px,
- Edge.
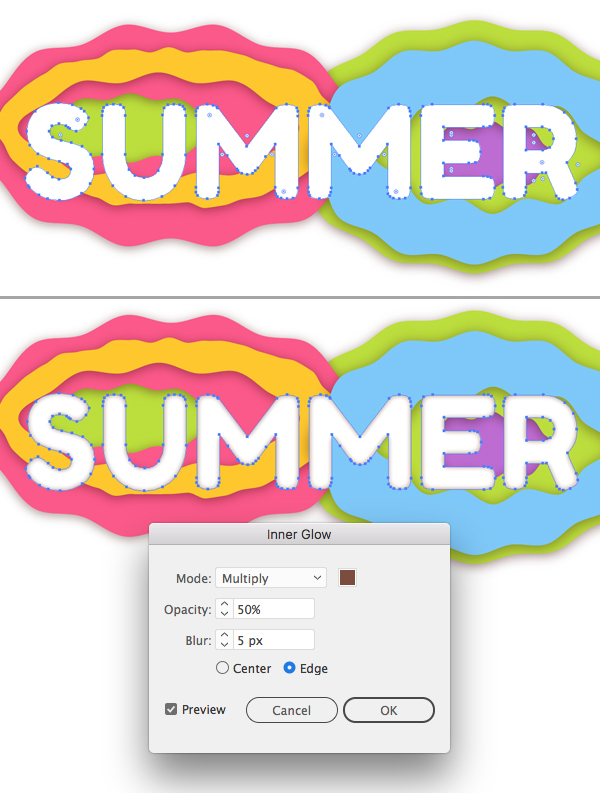
Step 10
Now open the Transparency panel and set the Blending Mode of the object to Multiply, thus making it semi-transparent.
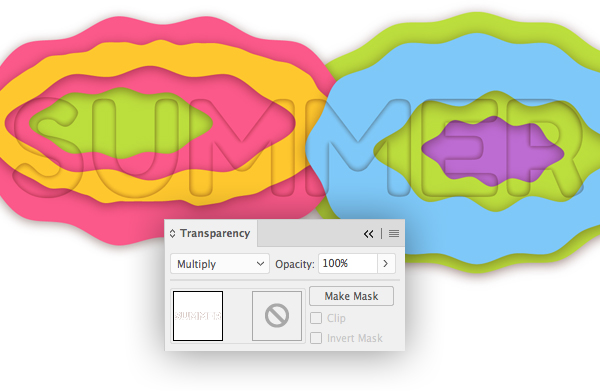
Step 11
Make the top copy of “SUMMER” visible again, select everything (Control-A), and click right mouse button > Make Clipping Mask. This way we’re hiding all the objects inside of the top shape like in a container. We can still move the objects inside the Clip Group if needed.

Summer Vibes!
And that’s all, guys! I hope you’ve enjoyed following this tutorial and discovered some new tips and tricks that can be useful for your future designs. What is more, you can apply this simple paper-cut fill effect not only to some text or letters but also to any other shape, whether it’s a flower of animal silhouette or anything else.
Have fun!


I could follow you only up until step 8. When I tried your duplicate Control C Control F, all I got was half of my first three letters. Perhaps you have not explained clearly enough?
Wow, amazing, Nice tutorial