

In today’s tutorial, we will find out how to create vector sunbursts by using Transform effect and stroked paths. The techniques described here allow you to edit previously-created sunbursts that can result in an infinite number of variations. Have fun learning in our vector tutorial!
Tutorial Details
- Program: Adobe Illustrator CS5 – CC
- Difficulty: Beginner
- Topics Covered: Stroke panel, Transform live effects
- Estimated Completion Time: 10 minutes
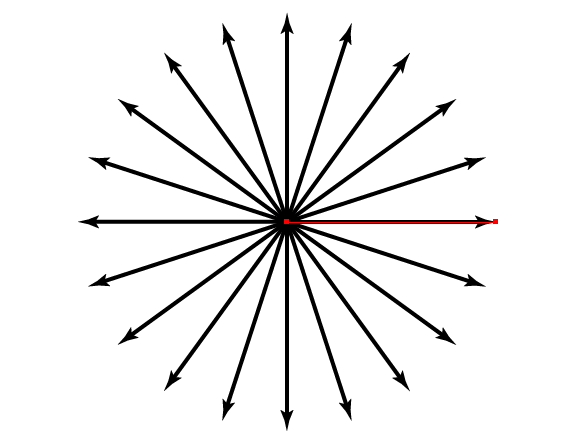
Final Image

Step 1
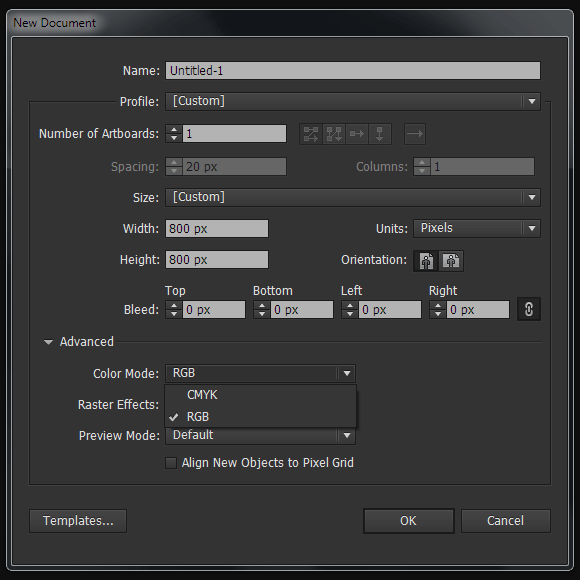
Open Adobe Illustrator and create a new document (Cmd/Ctrl + N). Your artboard can be any size. The sunbursts we’ll create will work equally well in the RGB and in the CMYK color modes.
Step 2
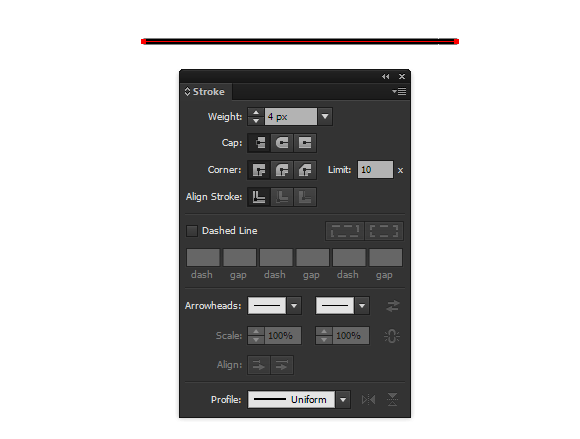
Take the Pen Tool (P) or the Line Tool (\) and draw a horizontal path by holding down Shift. This path has a stroke (of any color) and has no fill. Set the stroke width – 4px in the Stroke panel (Window > Stroke).
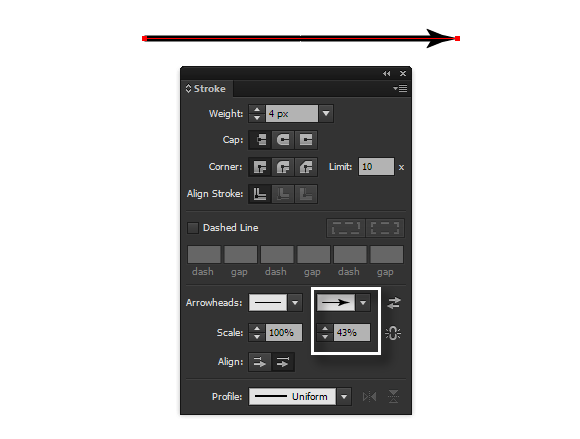
Still in the Stroke panel, choose the Arrowhead and reduce the scale to 43%.
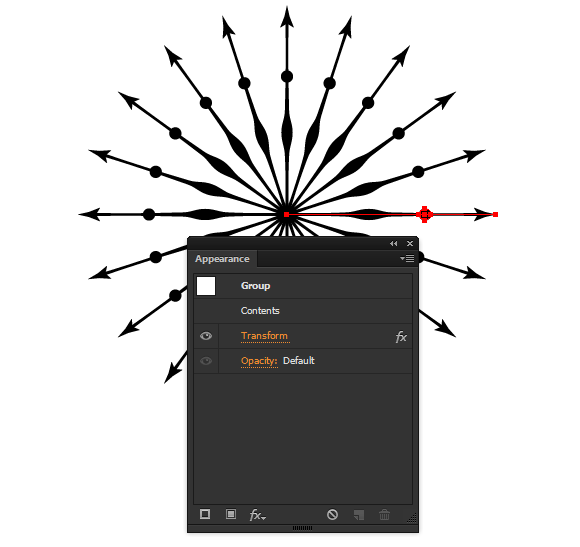
Step 3
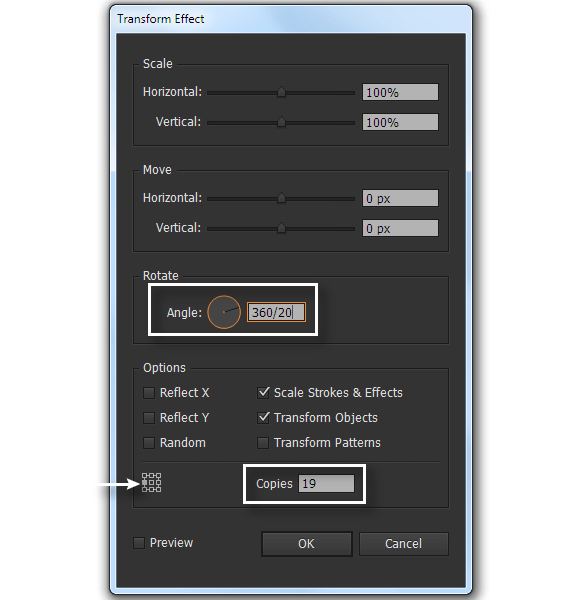
Group the created path (Cmd/Ctrl + G). Select the entire created group, then go to the Effect > Distort & Transform > Transform…. In the Transform Effect dialog box set an angle of 360/20, where 20 is a number of rays of which our sunburst will consist. Set the number of copies, which is 19. The number of copies is the total number of rays minus one ray. Choose the left central square in the reference point locator then click OK.
Step 4
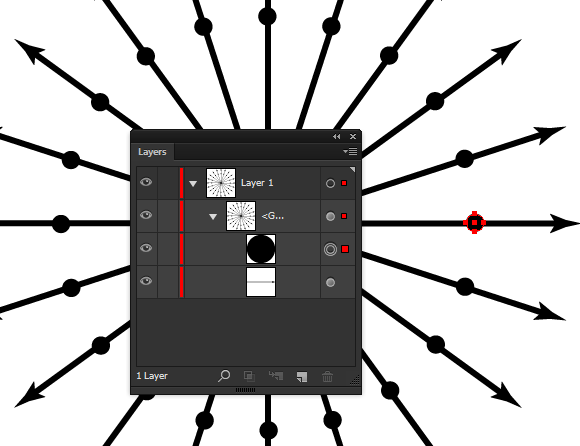
Draw a small circle with the help of the Ellipse Tool (L). The center of this circle lies on the horizontal path which was created in the step 2.
Drag the circle into the group to which the Transform effect was applied. This action should be performed in the Layers panel.
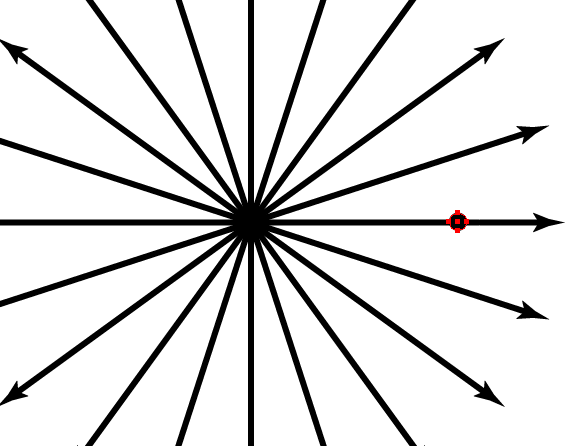
As you can see, the Transform effect was instantly applied to the new object. The effect application gives us opportunity to bring in quickly new objects into the sunburst without customizing the transformation parameters every time for these objects as indicated in the image below.

Step 5
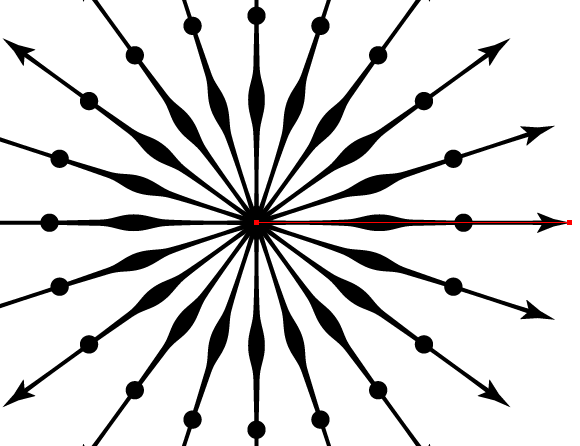
Change the local width of the path with the help of the Width Tool (Shift + W) as it is indicated on the figure below.
Step 6
Create one more beam of rays. Draw a horizontal path from the created sunburst. For clarity I used the red stroke. Apply to the path in the Stroke panel.

Step 7
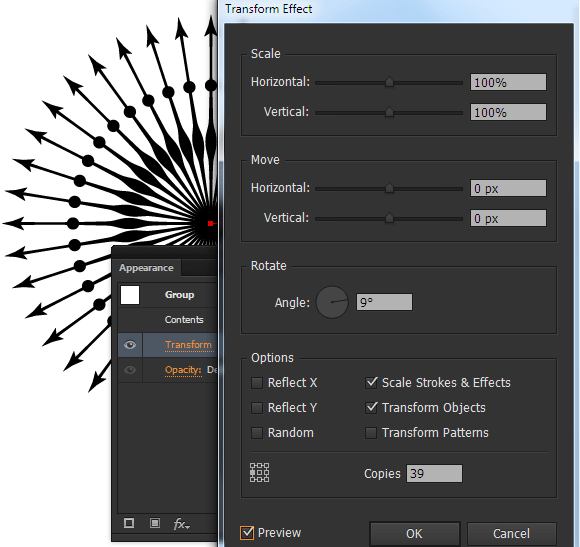
Select the entire red path, then go to the Effect > Distort & Transform > Transform… and set the parameters indicated on the figure below.

And now the red path can be re-colored into the color of the excising rays, i.e. black.

Sunburst in retro style is ready.
Step 8
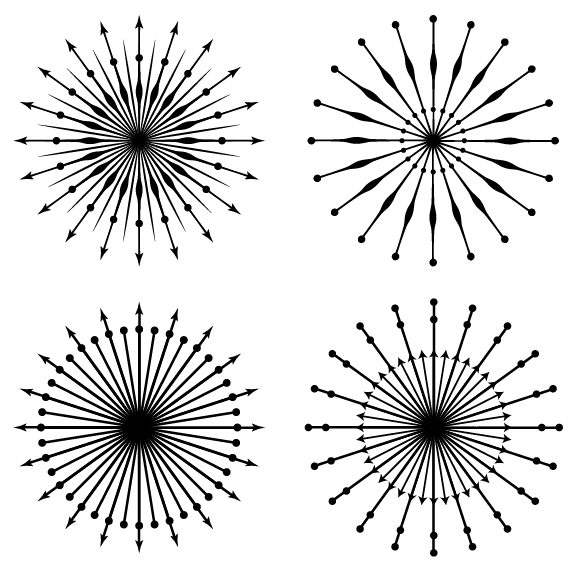
The techniques which were used in this tutorial allow for the quick creation of different new varieties of sunbursts from existing ones. For example, we can switch the Arrowhead and the Width Profile in the Stroke panel.

Or change the parameters of the Transform effect which changes the number of rays. Access to the transformation parameters can be found in the Appearance panel (Window > Appearance).
On the figure below, you can see the Sunburst set which I created in just a few minutes.
Step 9
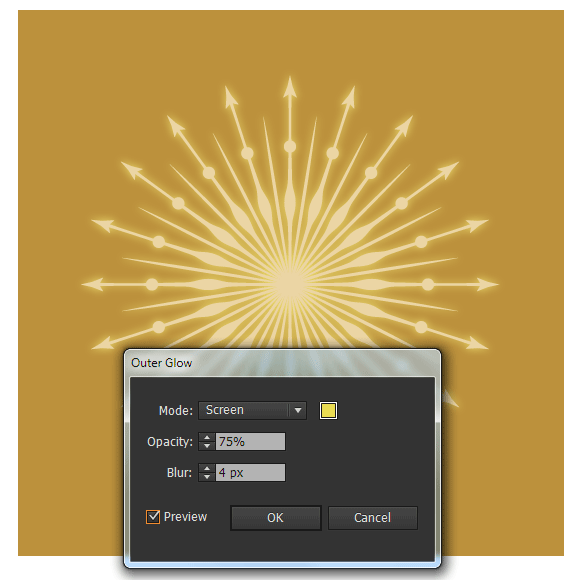
Let’s finalize the design of our retro sunburst. Create a rectangle with the help of the Rectangle Tool (M) with the brown fill which will serve as a background. Choose light-brown as the color of the ray’s stroke and circle’s fill.

Select all the elements of sunburst, then go to the Effect > Stylize > Outer Glow… and set parameters indicated on the figure below.
Step 10
Create two rectangles of the same height, but of different width and place them as it is indicated on the figure below. The lower rectangle is filled with darker shade of blue.

With the help of the Pen Tool (P), create a triangle corresponding to the curved part of the ribbon. The fill of this object has the darkest shade of blue.

Add a point on the left part of the lower rectangle with the help of the Pen Tool (P); then shift it to the right using the arrow keys on your keyboard.

Step 11
Select the lower rectangle and triangle, take the Reflect Tool (O) and click in the center of the big rectangle holding down Opt/Alt. In the opened dialog box, choose the Vertical axis, and then click on the Copy button.

With the help of the Type Tool (T), create the necessary inscription on the ribbon.

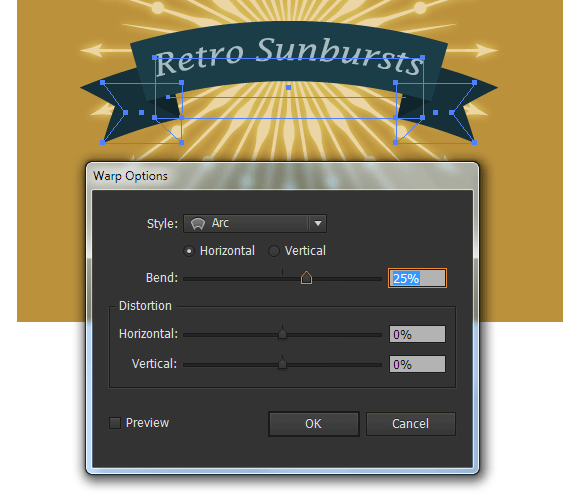
Step 12
Select and group all the elements; then go to the Effect > Warp > Arc… and set the parameters indicated lower.
Step 13
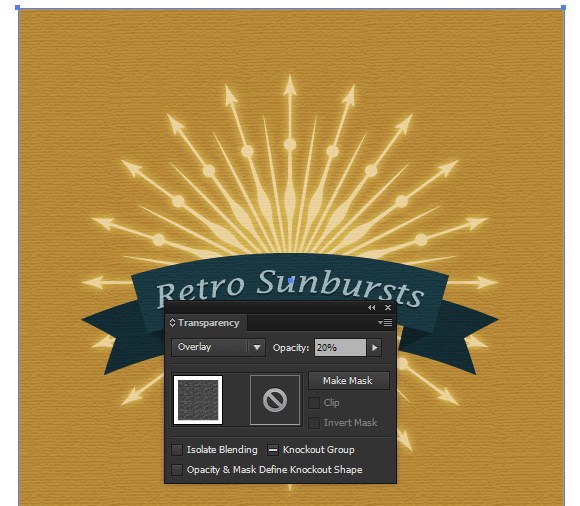
Let’s create texture. Draw a rectangle (U) with grey fill and place it above all created objects. The size of the rectangle corresponds to the size of the background.

Keep the rectangle selected, go to the Effect > Sketch > Conte Crayon… and set the parameters indicated on the figure below.

Set the Overlay blending mode for the rectangle and reduce Opacity to 20% in the Transparency panel.
Here is how it should look. I hope you’ve enjoyed this tutorial and can apply these techniques in your future projects.

Author: Iaroslav Lazunov
My name is Iaroslav Lazunov, I am a graphic designer from Ukraine. I am glad that I finally found the job in my life that I can share my knowledge and experiments with you in my tutorials. Follow me on Twitter or visit my blog Vectorboom.com


My wife and i got absolutely lucky when Chris managed to finish off his basic research through your ideas he acquired from your web pages. It is now and again perplexing to just possibly be giving freely key points some others may have been trying to sell. And we discover we’ve got the blog owner to be grateful to because of that. All of the explanations you made, the easy site menu, the relationships you help instill – it’s many sensational, and it is assisting our son in addition to us recognize that this subject is awesome, and that is particularly vital. Thank you for the whole thing!
Danke für das tolle Tutorial und fürs teilen.
Thanks for the tutorial. It is so must helpful and informative.
really helpful one
I still don’t get the width tool.
Loved this tutorial though.
Great tutorial ….Thanks
What if you want to just do half a circle?
This was really helpful for me. Thank you!
Awesome. ……
Thank you very much, this is an awesome tip!
simply super
Thank you- what a fabulous tutorial! So much good information:
• How to scale arrowheads without scaling the line
• How to easily create radial designs without the Rotate Tool
• How to easily apply a previous transformation to another element
• A primer on the awesome Width Tool (which is my new favorite Illustrator tool)!
• An easy way to make ribbon banners with the rectangle and pen tool
• An easy way to bend ribbons with Effect > Warp > Arc
Thanks again, this was great!
Thank you very mutch ,,
In CS6
I dont find Copies Box in Transform !!