 Hop onto trendy design with 5 quick steps to creating fantastic flat work space illustrations and icons!
Tutorial Details: 5 Steps for Easy Flat Work Icon Design
- Program: Adobe Illustrator CS6 – CC
- Difficulty: Intermediate
- Topics Covered: Design Theory, Shape Building
- Estimated Completion Time: 15 Minutes
Final Image: Flat Work Icon Designs

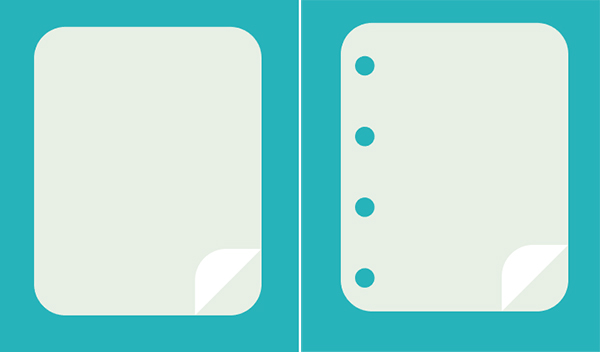
Step 1
Most work space icons deal with monitors, tablets, notebooks, and keyboards. Notice how most of these items are based on rectangles. For this tutorial we’ll draw a quick notebook and rectangle using the basic techniques employed in the vector illustration seen above.
Draw a rectangle with the Rectangle Tool. Round out the corners by pulling the Live Corners inward. Overlap the lower right corner with a triangle shape. Use the Shape Builder Tool to separate the corner from the main body of the rectangle.

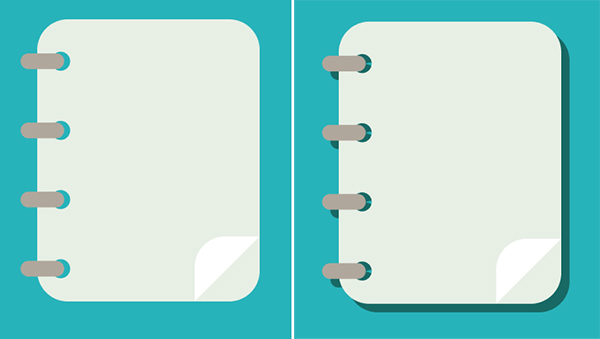
Step 2
Copy and Paste the lower corner of the rectangle and Rotate it so its straight edge aligns with its original shape. Set the fill colors of the paper to gray, light yellow, or light blue. Set the fill color of the turned page shape to white.
Draw a few circles with the Ellipse Tool. Match their fill color to the background and make sure they’re distributed evenly along the left side of the page.
Step 3
To draw the notebook’s spirals, draw a gray rounded rectangle in each hole. Group all of your elements together. Copy, Paste, and Unite the copy in the Pathfinder panel. Place this object behind the original notebook design and offset it slightly. Set the fill color to a darker shade of the background’s hue.
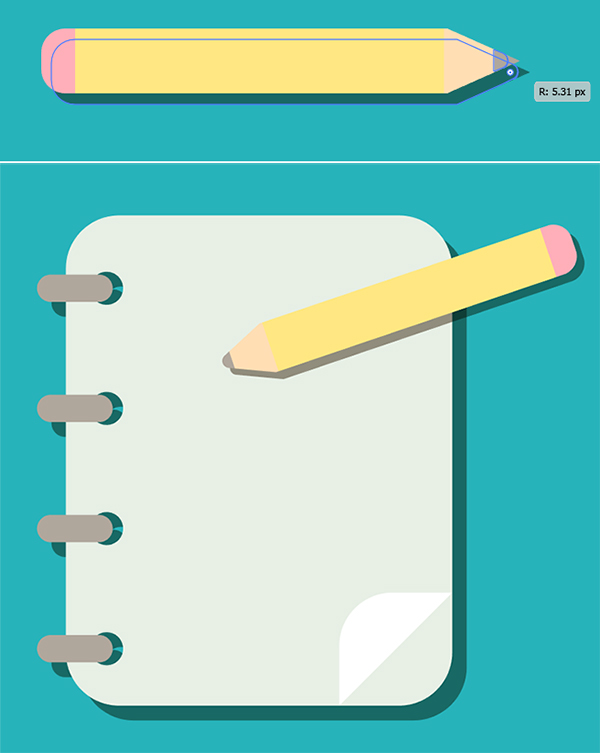
Notice how you quickly and easily built a notebook with rounded rectangles and a single triangle. Extrapolate this technique to be used in creating monitors, computer mice, tablets, phones, and more!
Step 4
Another quick technique involves the building of a pencil. Start with a rectangle. Add an Anchor Point to the right edge of the rectangle and pull it to the right with the Direct Selection Tool. This creates the pencil’s points. Select the two leftmost anchor points with the Direct Selection Tool and pull the Live Corners inward a bit in order to round them out slightly. This creates the rounded eraser end.
Use the Line Segment Tool in order to Divide (found in the Pathfinder panel) the pencil into four sections: eraser, wood, tip, and lead. You can add more detail to this design if you wish or change the colors of each section as you see fit. Delete any extraneous shapes and Group your pencil together.

Step 5
Place a shadow shape behind the pencil and, if you like, you can round out the point of the pencil for a rounded shape to match the design style of the other icons.
Overlap your two objects and create more to fill in an entire desk of items. With shape tools, drawing tools, and shape building tools you’ll be able to create most any item found on your desk or in your office easily and quickly.
Conclusion
Flat work station illustrations are on point, and creating them is easy. Ad highlights, unite the designs together with a limited color palette, and even consider creating simple shadow shapes behind them in order to add depth. What sort of fantastic themes can you create for your illustration desk scenes? Share with us in the comment section below!
Author: Mary Winkler
Mary works under the brand Acrylicana® and has illustrated and designed for companies like Disney, Jakks Pacific, Jada Toys, Envato, and more. Check out Acrylicana.com for artwork, tutorials, and more. Follow Acrylicana on Instagram, Facebook, and Twitter!


This is one awesome article post.Really looking forward to read more. Really Cool.
Very easy yet, stylish and tasteful.
Thanks for sharking this, it’s great.