
 In the following tutorial you will learn how to create a pretty detailed Bat Pattern Vector in Adobe Illustrator. For starters you will learn how to setup a simple grid and how to create the main shape using pixel perfect shapes, basic vector shape building techniques and the Live Corners feature. Moving on you will learn how to add subtle shading and highlights for your bat shape using basic blending techniques along with the brush tool. Finally, you will learn how to prepare, save and easily edit your pattern.
Tutorial Details: Bat Pattern Vector
- Program: Adobe Illustrator CC
- Difficulty: Beginner-Intermediate
- Topics Covered: Basic Tools and Effects, Appearance panel, Transform techniques, Patterns
- Estimated Completion Time: 45 minutes
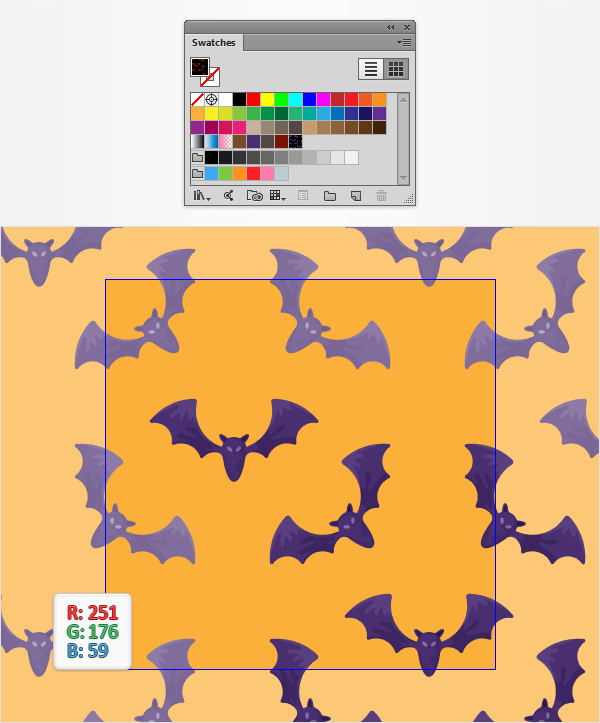
Final Image: Bat Pattern Vector
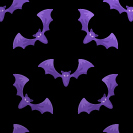
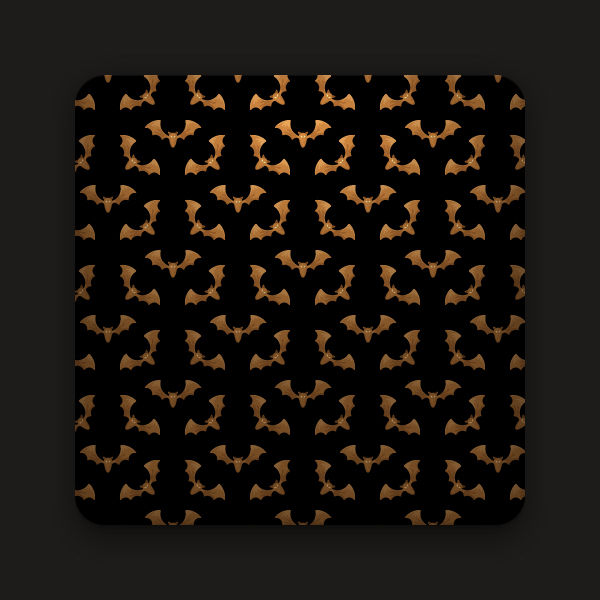
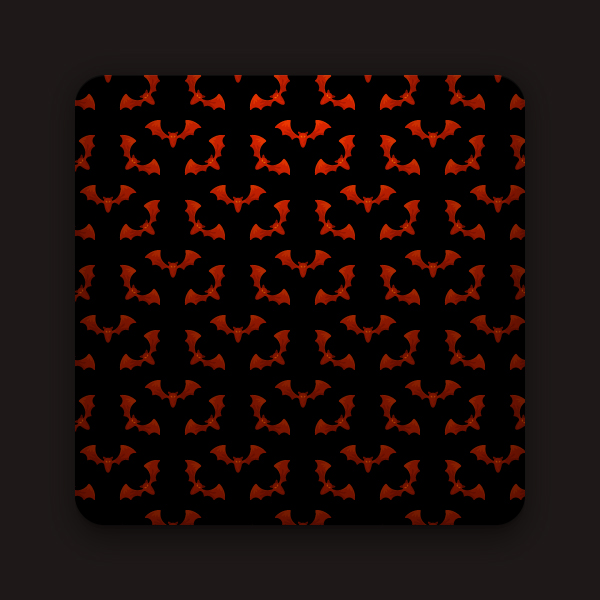
As always, this is the final seamless bat pattern vector that we’ll be creating:
Step 1: Bat Pattern Vector
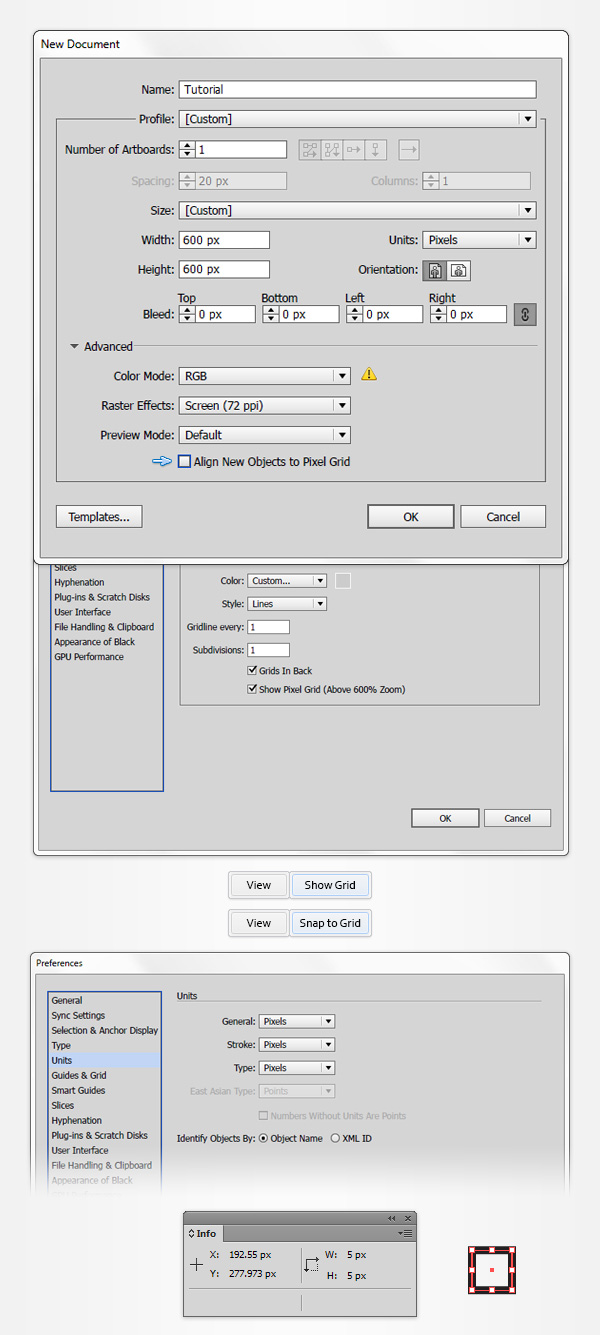
To begin your own bat pattern vector, hit Control + N to create a new document. Select Pixels from the Units drop-down menu, enter 600 in the width and height boxes and then click on the Advanced button. Select RGB, Screen (72ppi) and make sure that the Align New Objects to Pixel Grid box is unchecked before you click OK.
Enable the Grid (View > Show Grid) and the Snap to Grid (View > Snap to Grid). For starters you will need a grid every 1px, so simply go to Edit > Preferences > Guides > Grid, enter 1 in the Gridline every box and 1 in the Subdivisions box. Try not to get discouraged by all that grid, it will ease your work and keep in mind that you can easily enable or disable it using the Control + “ keyboard shortcut.
You should also open the Info panel (Window > Info) for a live preview with the size and position of your shapes. Do not forget to set the unit of measurement to pixels from Edit > Preferences > Units > General. All these options will significantly increase your work speed.
Step 2
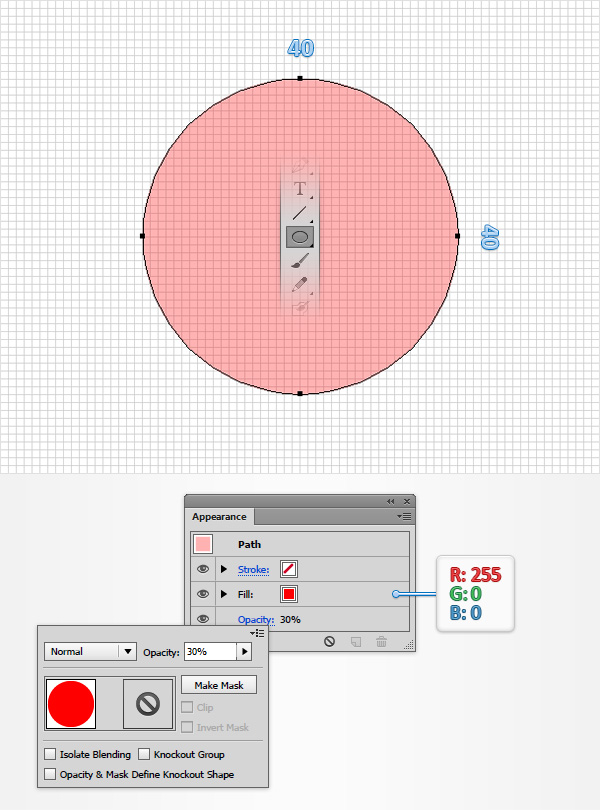
Pick the Ellipse Tool (L) and focus on your Toolbar. Remove the color from the stroke then select the fill and set its color at R=255 G=0 B=0. Move to your artboard and create a 40 px circle – the grid and the Snap to Grid feature will ease your work.
Make sure that your shape stays selected and focus on the Appearance panel (Window > Appearance). Simply click that “Opacity” piece of text to open the Transparency fly-out panel and lower the Opacity to 30%.
Step 3
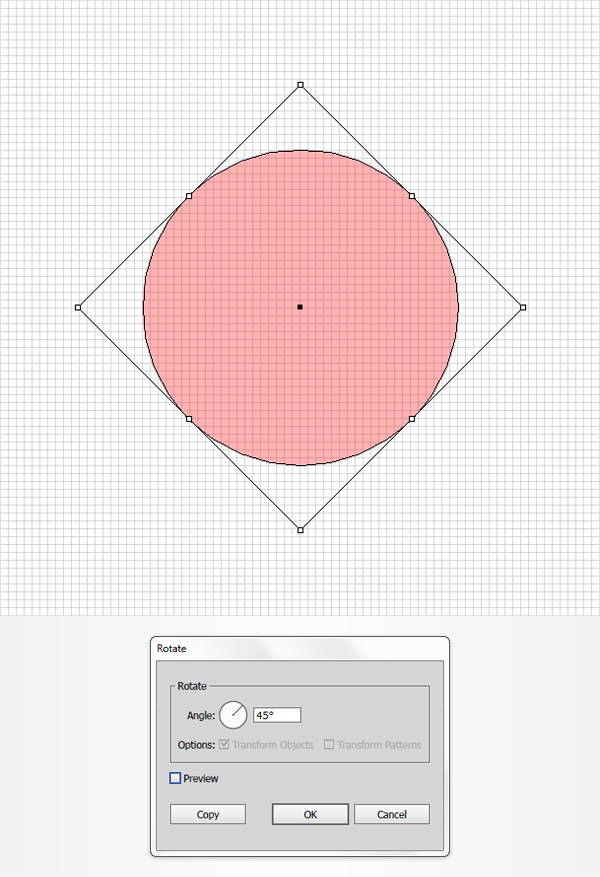
Make sure that your circle is still selected and rotate it 45 degrees. You can do this manually or by going to Object > Transform > Rotate. Set the Angle to 45 degrees and then click the OK button.
Step 4
Duplicate your red circle using the Control + C > Control + F keyboard shortcuts. Select this copy, drag it to the right and place it exactly as shown in the first image – once again, the grid and the Snap to Grid feature will come in handy.
Reselect both shapes made so far, open the Pathfinder panel (Window > Pathfinder) and click the Unite button.

Step 5
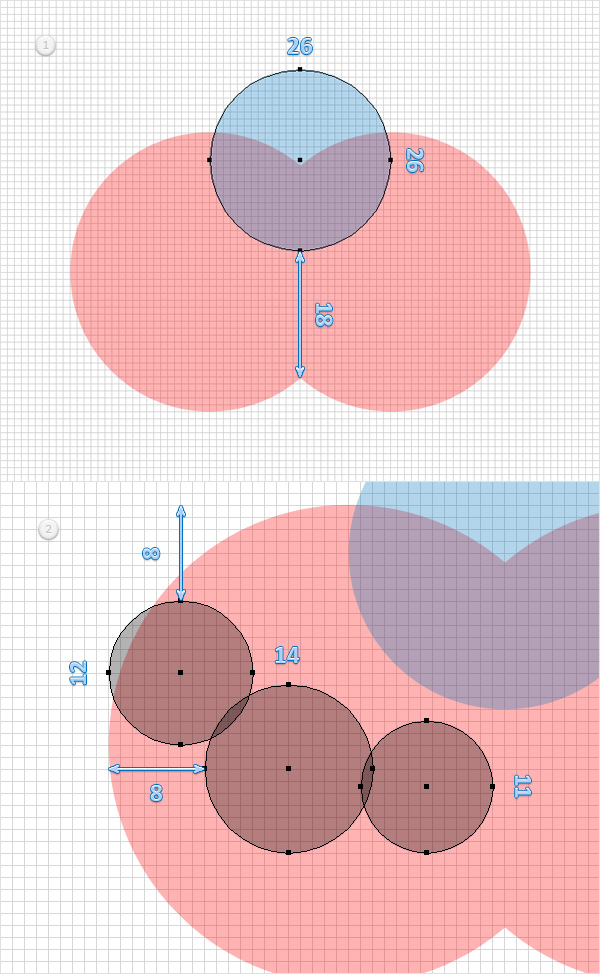
Using the Ellipse Tool (L), create a 26 px circle, pick a random blue for the fill color and lower its Opacity to around 30% so that you can see the grid that lies in the back and easily place your shape exactly as shown in the first image.
Using the same tool, create a 12 px, a 14 px and an 11 px circle. Fill all these shapes with black (R=0 G=0 B=0) and don’t forget to lower their Opacity to about 30%. Place these new circles exactly as shown in the second image.
Step 6
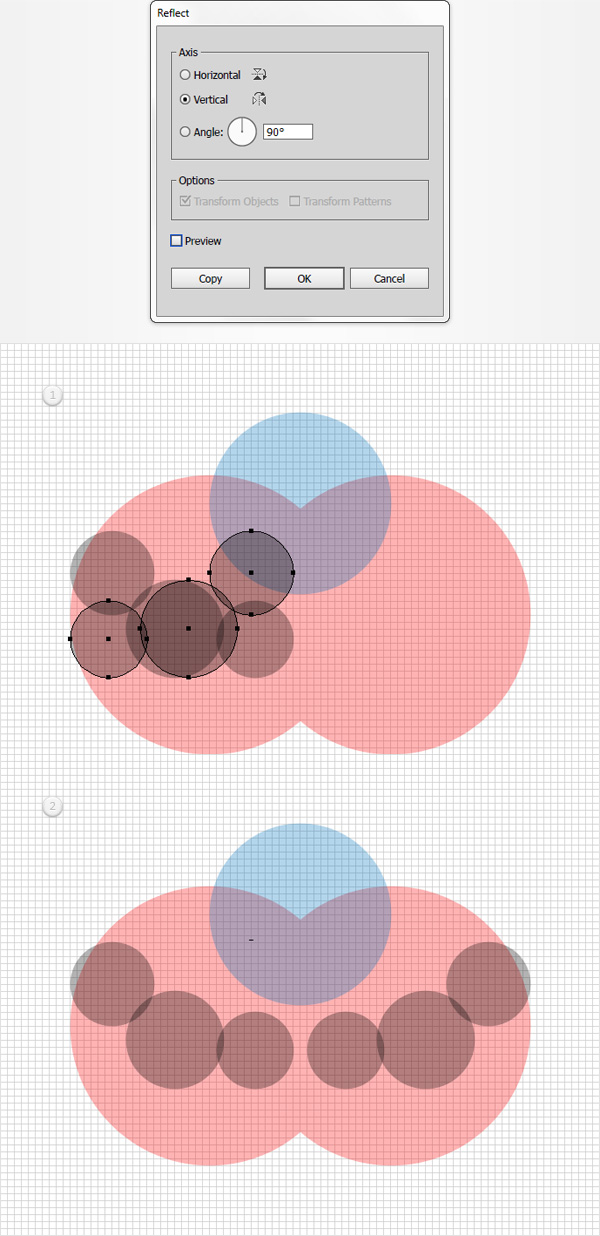
Make sure that your black circles are still selected and go to Object > Transform > Reflect. Check the Vertical box and then click the Copy button. Drag the newly made shapes to the right and place them exactly as shown in the second image.
Step 7
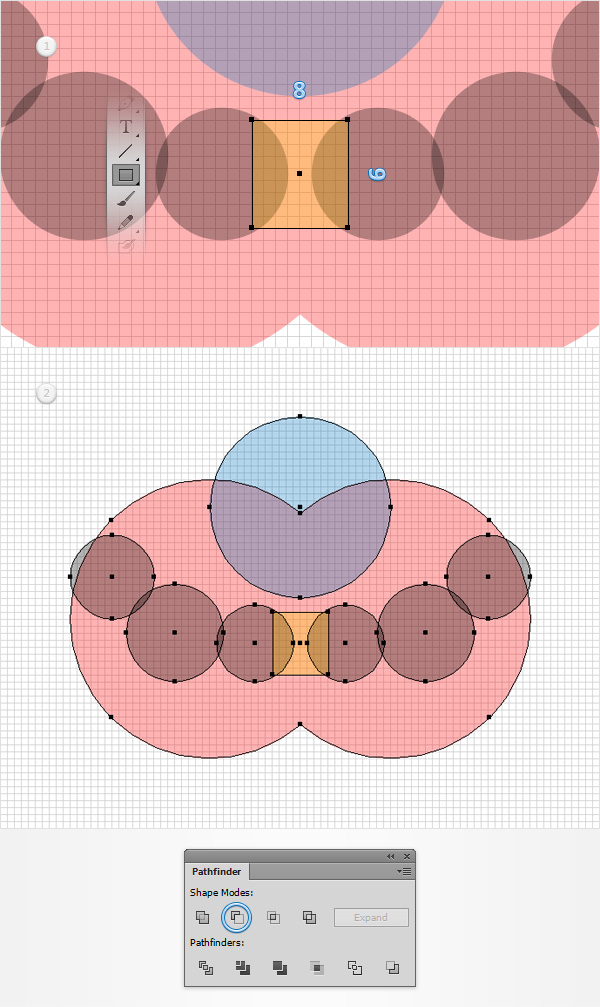
Using the Rectangle Tool (M), create an 8 x 9 px shape and place it exactly as shown in the first image. Select all the shapes made so far, move to the Pathfinder panel and click the Minus Front button.
Step 8
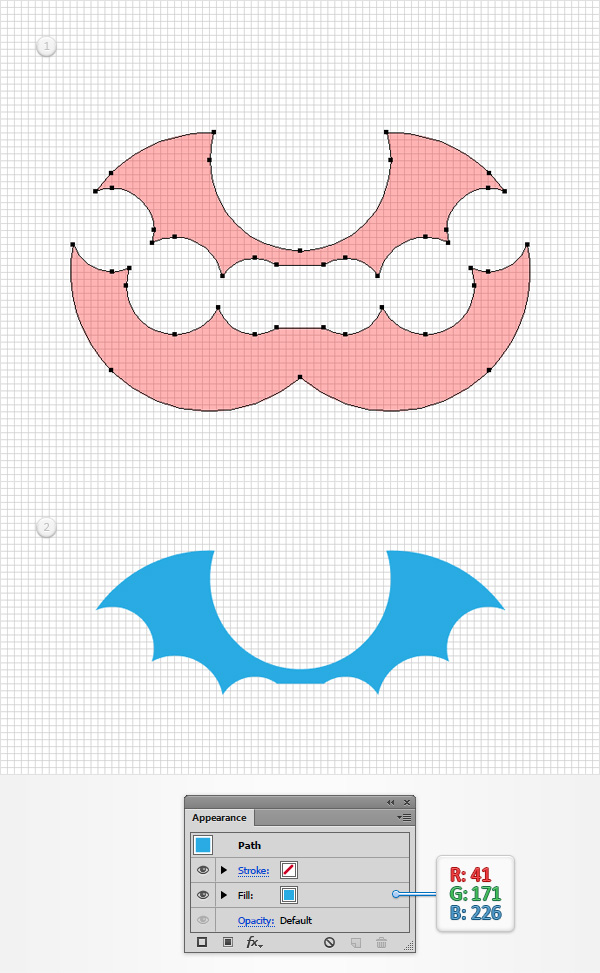
Make sure that your newly made group is selected and simply hit Shift + Control + G to Ungroup it. Get rid of the bottom shape, select the remaining one and focus on the Appearance panel. Increase the Opacity to 100% and replace the existing fill color with R=41 G=171 B=226. Now you can hopefully see the beginnings of your bat for this bat pattern vector.
Step 9
Using the Rectangle Tool (M), create an 8 x 10 px shape, place it as shown in the first image and pick a random yellow for the fill color.
Keep focusing on this new rectangle and switch to the Delete Anchor Point Tool (-). Simply click on the bottom, left anchor point to remove it and then pick the Direct Selection Tool (A). Select the remaining, bottom anchor point and drag it 4 px to the left. In the end your yellow rectangle should turn into a simple triangle as shown in the second image.
Make sure that this shape stays selected and grab the Anchor Point Tool (Shift + C). Click on that bottom anchor point and simply drag those handles roughly as shown in the third image.

Step 10
Using the Ellipse Tool (L), create an 8 x 7 px shape, place it as shown in the first image and pick a random green for the fill color.
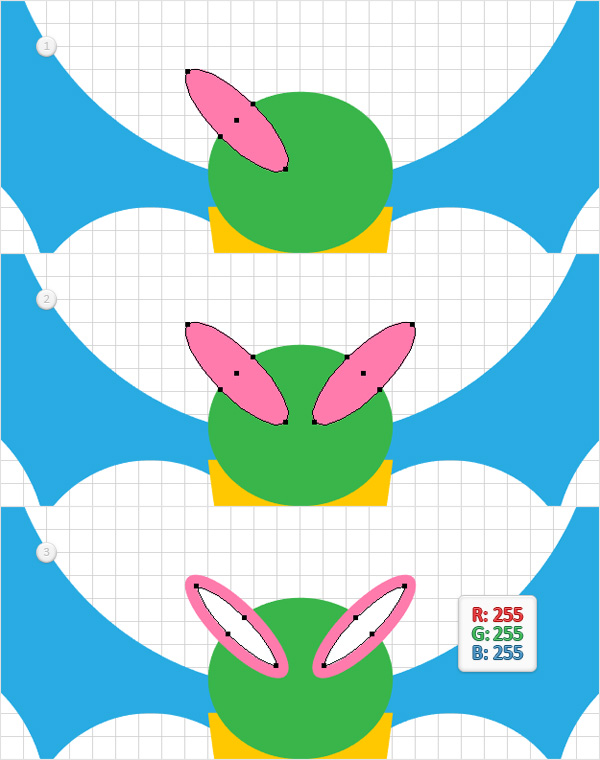
Using the same tool, create a 2 x 6 px shape and pick a random pink for the fill color. Once you’re done, rotate this squeezed circle 45 degrees as shown in the third image.

Step 11
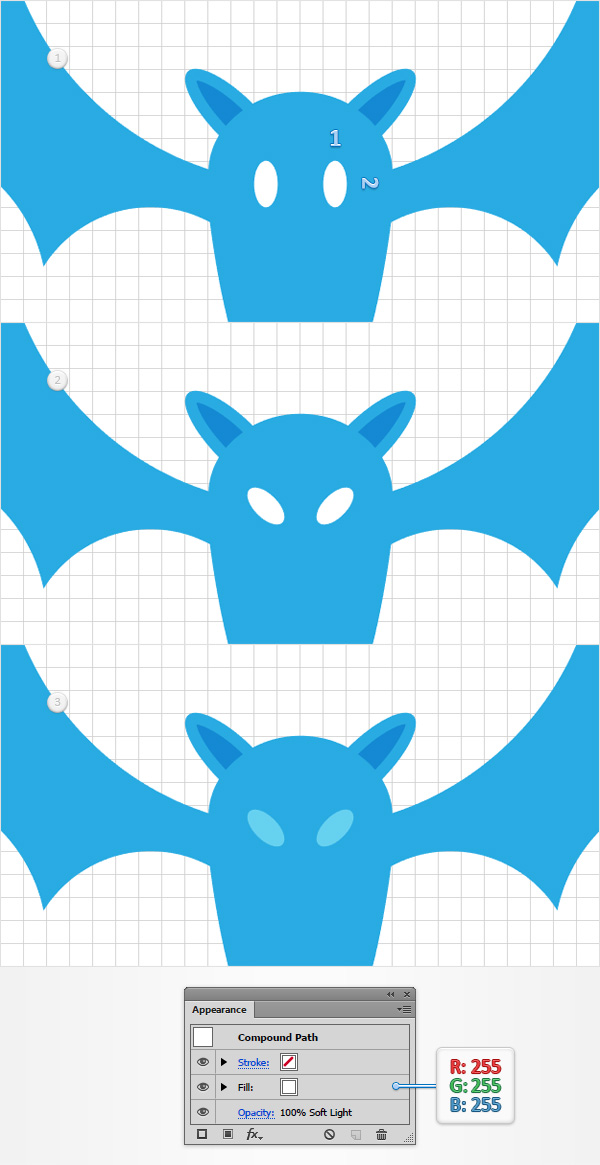
Make sure that your pink shape is still selected, place it as shown in the first image and then go to Object > Transform > Reflect. Check the Vertical box and then click the Copy button. Select the resulting shape and place it as shown in the second image.
Reselect both pink shapes and turn them into a simple compound path using the Control + 8 keyboard shortcut. Make sure this fresh compound path is selected and go to Object > Path > Offset Path. Enter a -0.5 px Offset and then click the OK button. Select the resulting compound path and replace the existing fill color with white (R=255 G=255 B=255).
Step 12
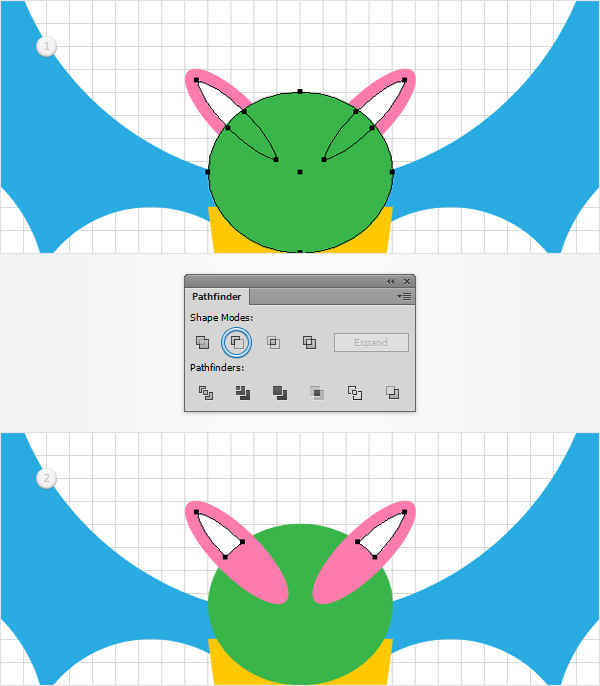
Make sure that your green shapes is selected, make a copy in front (Control + C > Control + F) and bring it to front using the Shift + Control + ] keyboard shortcut. Select this new shape along with your white compound path and click the Minus Front button from the Pathfinder panel. Select the remaining white shapes and turn them into a new compound path (Control + 8).
Step 13
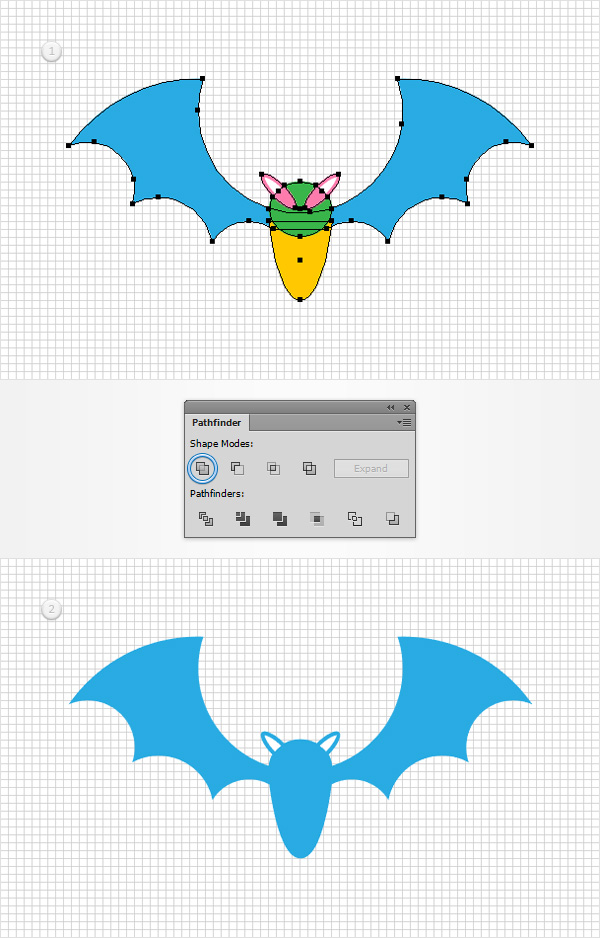
Reselect all your shapes but that white compound path, move to the Pathfinder panel and click the Unite button.
Step 14
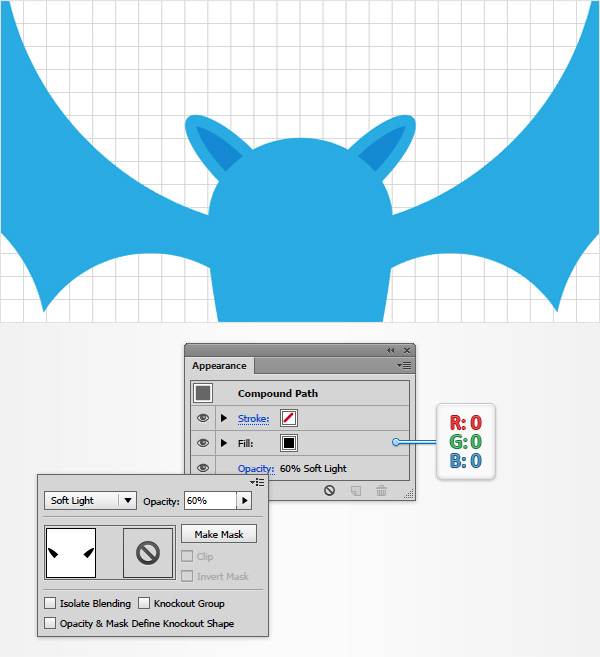
Reselect your white compound path and focus on the Appearance pane. First, replace the existing fill color with black and then open that Transparency fly-out panel. Lower the Opacity to 60% and change the Blending Mode to Soft Light.
Step 15
Using the Ellipse Tool (L), create two, 1 x 2 px shapes, set the fill color to white and place them as shown in the first image.
Keep focusing on these new shapes, select the left one and rotate it 45 degrees and then select the other one and rotate it -45 degrees. Reselect both shapes, turn them into a new compound path (Control + 8), focus on the Appearance panel and change the Blending Mode to Soft Light.
Step 16
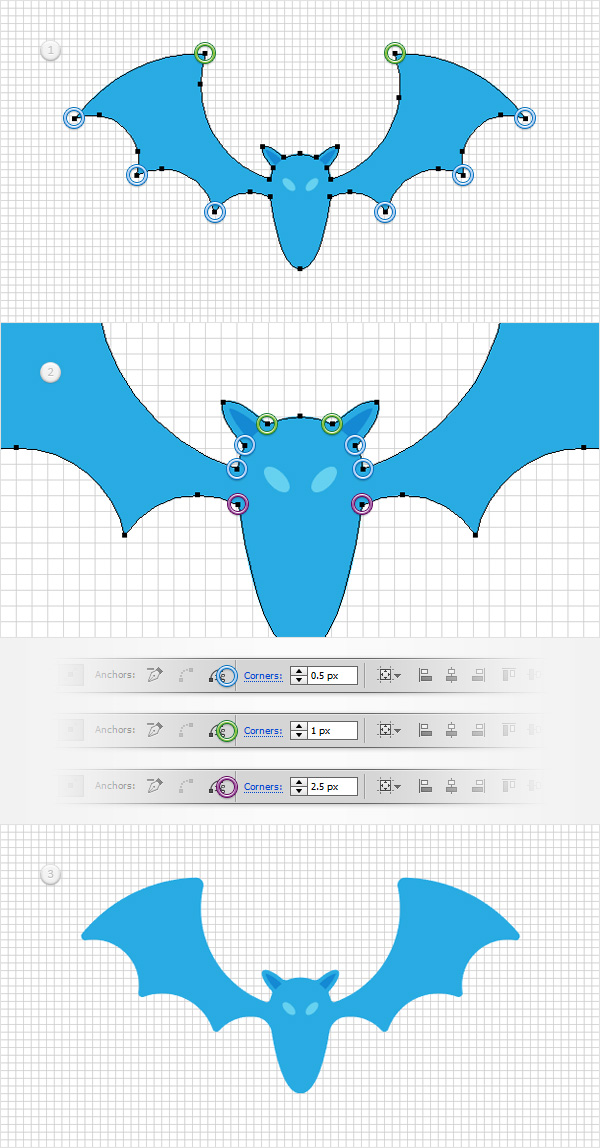
Now, focus on your blue shape and pick the Direct Selection Tool (A). First, select the ten anchor points highlighted by the blue circles in the following images, move to the options bar and simply enter 0.5 px in that Corners box.
This feature is only available for CC users. The best solution to replace this effect would be the Round Any Corner script that can found in this article: 20 Free and Useful Adobe Illustrator Scripts. Save it to your hard drive, return to Illustrator and grab the Direct Selection Tool (A). Select the same anchor points and go to File > Scripts > Other Script. Open the Round Any Corner Script, enter a 0. 5 px radius and click OK. The end result might look a bit different so feel free to try different values for the radius.
Keep focusing on your blue shape and make sure that the Direct Selection Tool (A) is still active. Select the four anchor points highlighted by the green circles in the following images, move to the options bar and this time enter 1 px in that Corners box.
Get back to your blue shape, select the two anchor points highlighted by the purple circles in the following images, return to the options bar and this time enter 2.5 px in that Corners box. In the end your blue shape should look like in the third image.
Step 17
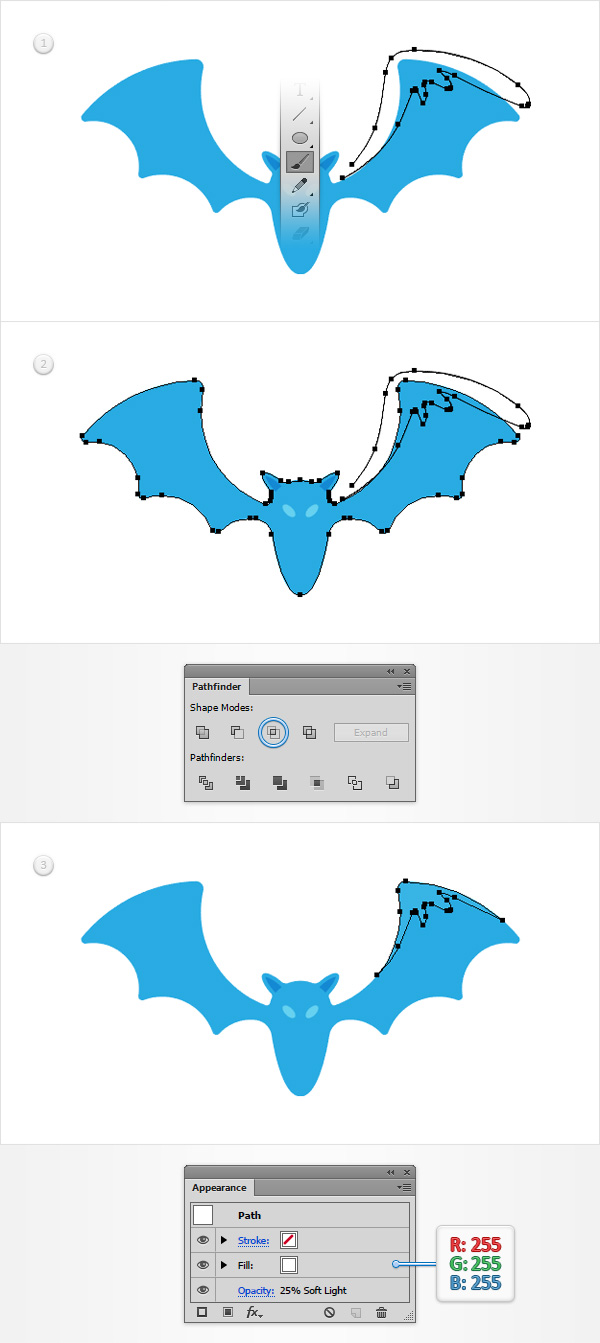
Make sure that your blue shape is still selected and make a copy in front (Control + C > Control + F).
Using the Brush Tool (B) (or the Pen Tool (P)), draw a sooth path roughly as shown in the first image. Select it along with the copy made a few moments ago and click the Intersect button from the Pathfinder panel. With this new shape selected focus on the Appearance panel. Make sure that there’s no color set for the stroke, make the fill white and then lower the Opacity to 25% and change the Blending Mode to Soft Light.
Step 18
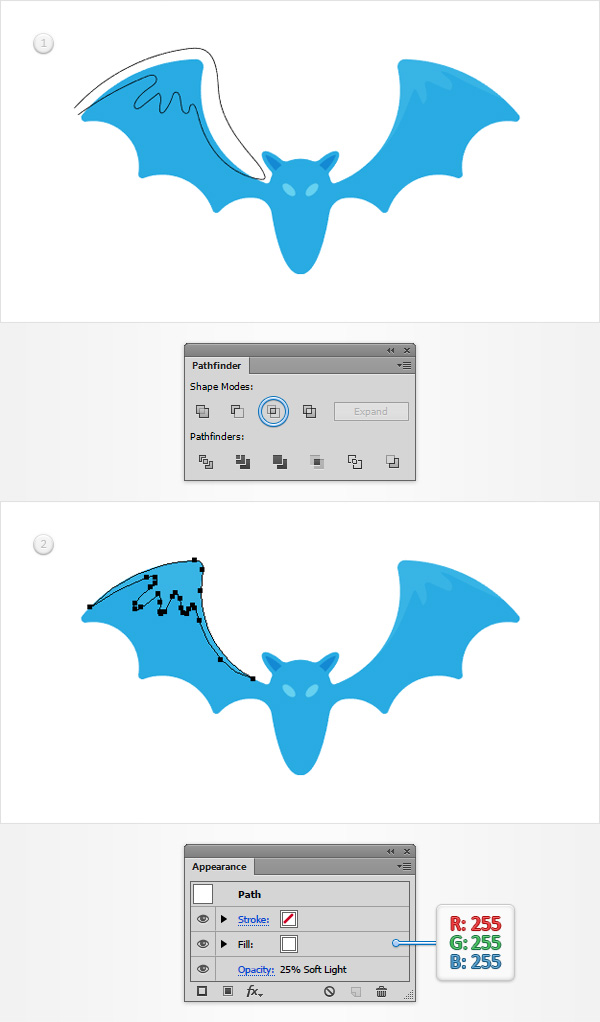
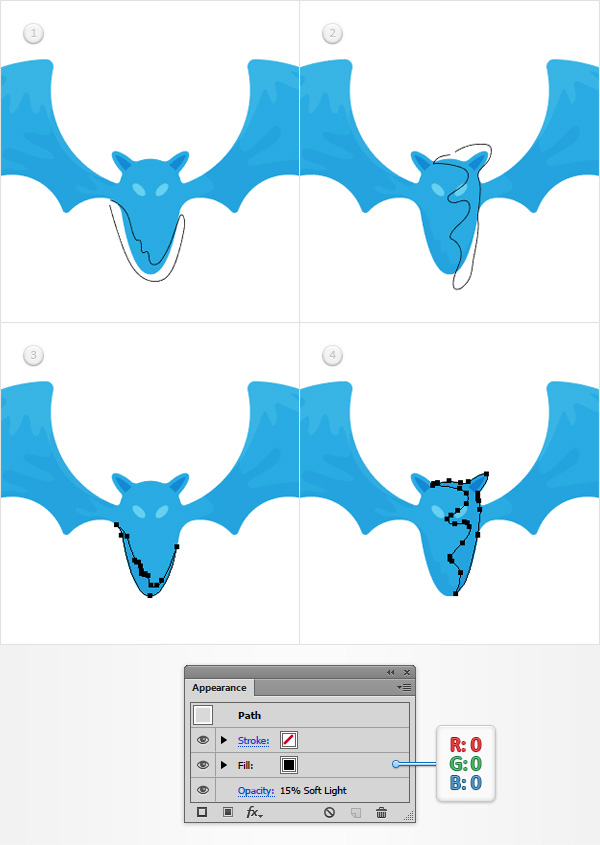
Make sure that your blue shape is selected and make a new copy in front (Control + C > Control + F).
Using the Brush Tool (B) (or the Pen Tool (P)), draw another smooth path roughly as shown in the first image. Select it along with the copy made a few moments ago and click the Intersect button from the Pathfinder panel. Fill the resulting shape with white, lower its Opacity to 25% and change the Blending Mode to Soft Light.
Step 19
Make sure that your blue shape is selected and make two copies in front (Control + C > Control + F). Using that same Brush Tool (B) (or the Pen Tool (P)), draw two, smooth paths roughly as shown in the first image.
Again, use the Intersect button from the Pathfinder panel and then fill the resulting shapes with black, lower their Opacity to 15% and change the Blending Mode to Soft Light.
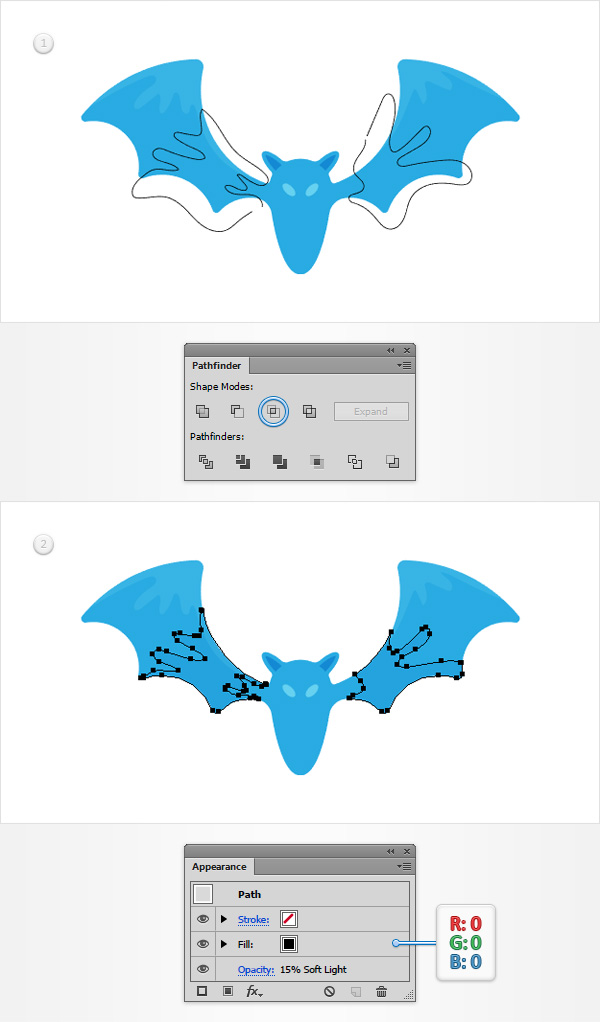
Step 20
Make sure that your blue shape is selected and make two copies in front (Control + C > Control + F). Using that same Brush Tool (B) (or the Pen Tool (P)), draw two, smooth paths roughly as shown in the first two images.
Again, use the Intersect button from the Pathfinder panel and then fill the resulting shapes with black, lower their Opacity to 15% and change the Blending Mode to Soft Light.
Step 21
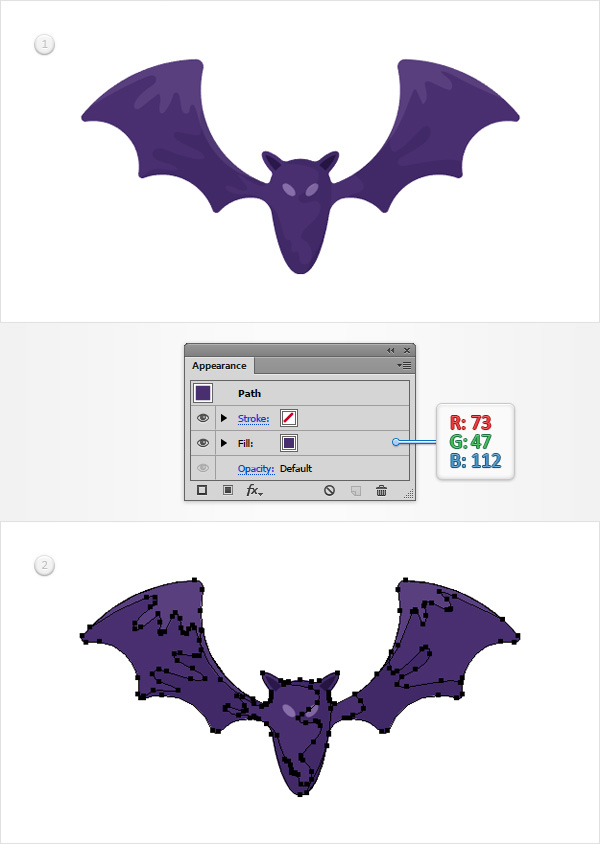
Reselect your blue shape and replace the existing fill color with R=73 G=47 B=112. Select all the shapes made so far and simply Group them using the Control + G keyboard shortcut.
Step 22
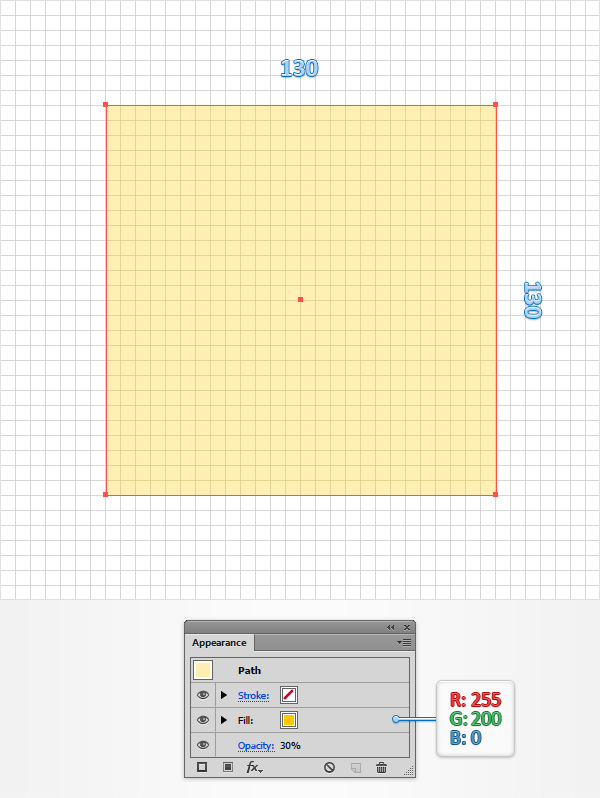
For this step you will need a grid every 5 px, so go to Edit > Preferences > Guides & Grid and enter 5 in the Gridline every box.
Using the Rectangle Tool (M), create a 130 px square, set the fill color to R=255 G=200 B=0 and lower its Opacity to 30%.
Step 23
Switch to gridline every 1 px, so go to Edit > Preferences > Guides & Grid and enter 1 in the Gridline every box.
Select the group that makes up your bat, bring it to front using that same Shift + Control + ] keyboard shortcut and then place it exactly as shown in the first image. Duplicate your group (Control + C > Control + F), select the copy and place it exactly as shown in the second image.
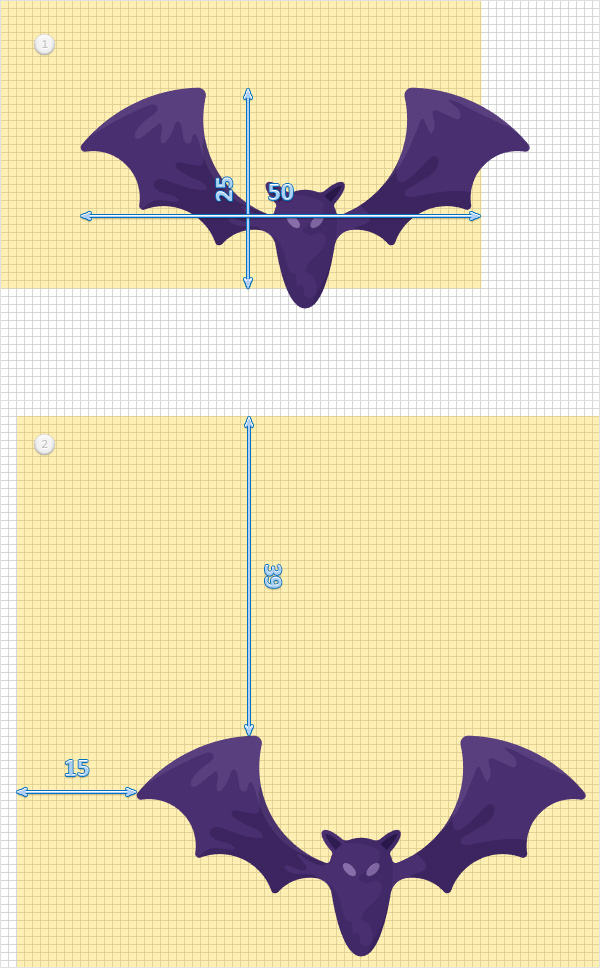
Step 24
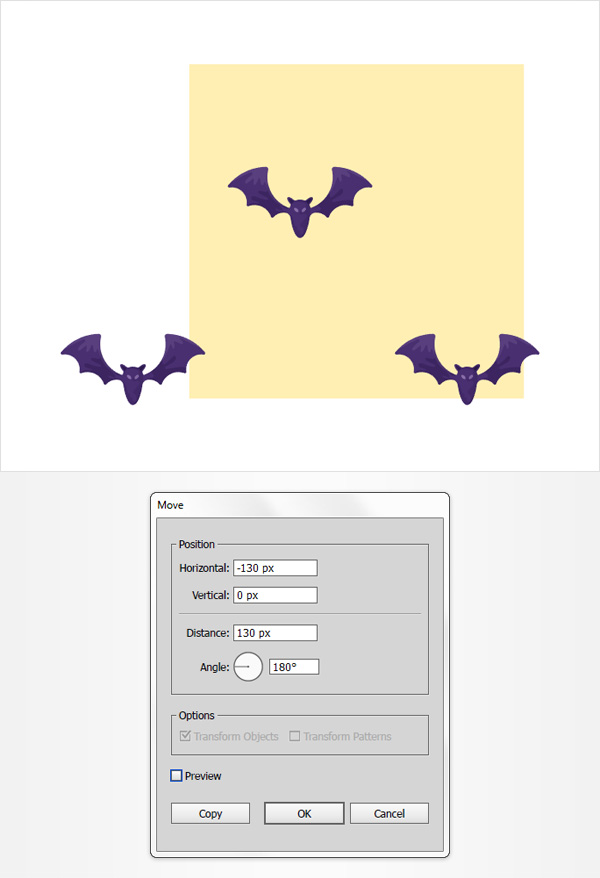
Reselect the bat group that’s placed in the bottom, right corner of your yellow square and go to Object > Transform > Move. Enter the attributes shown in the following image and then click the Copy button.
Step 25
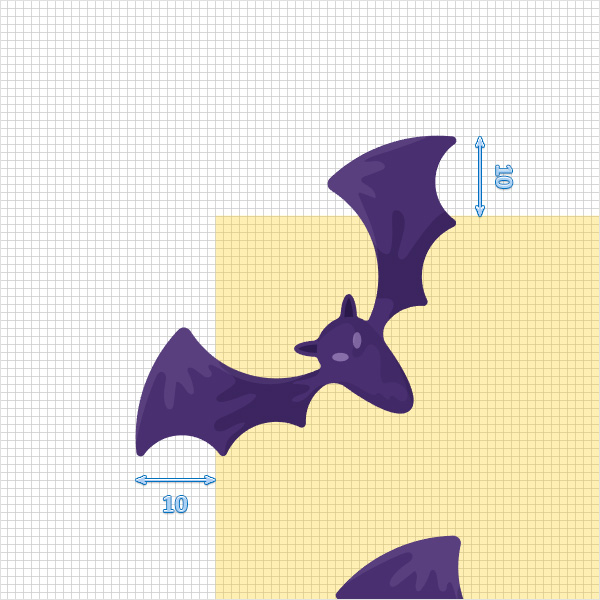
Make a new copy of your bat group, rotate it 45 degrees and then place it exactly as shown in the following image.
Step 26
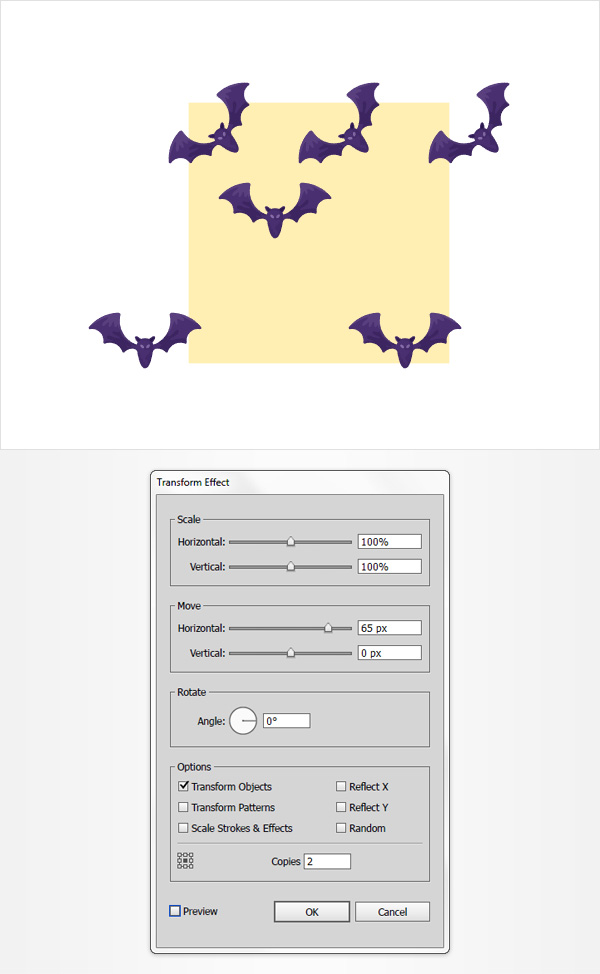
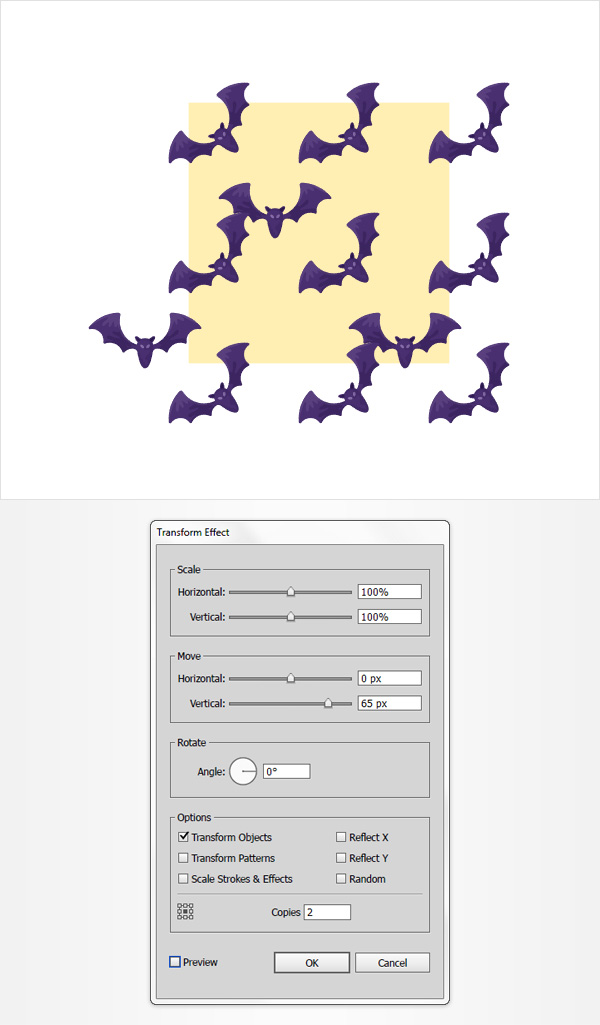
Make sure that your rotated, bat group is still selected and go to Effect > Distort & Transform > Transform. Drag the Move-Horizontal slider to 65 px, enter 2 in that Copies box and then click the OK button.
Step 27
Make sure that your rotated, bat group is still selected and go again to Effect > Distort & Transform > Transform. This time drag the Move-Vertical slider to 65 px, enter 2 in that Copies box and then click the OK button.
Step 28
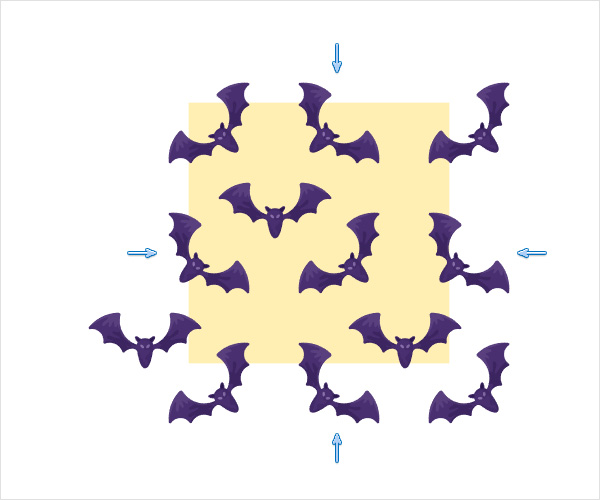
Make sure that your rotated bat group is still selected and go to Object > Expand Appearance. Select the four bat groups pointed in the following image and simply flip them horizontally as shown in the following image.
Step 29
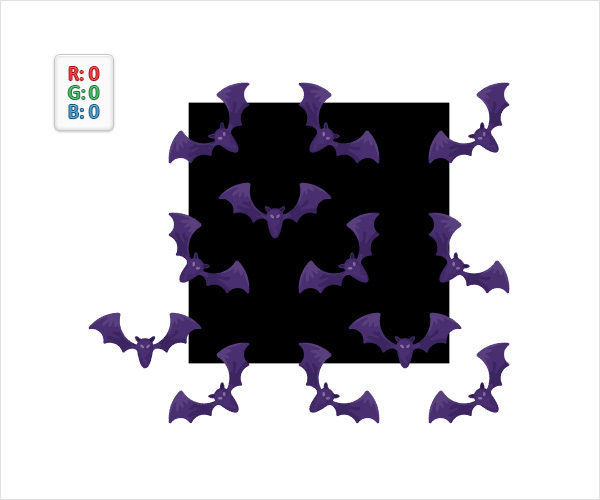
Reselect your yellow square and focus on the Appearance panel. Increase the Opacity to 100% and replace that yellow with a simple black.
Step 30
Reselect all the shapes made so far and go to Object > Pattern > Make.
Step 31
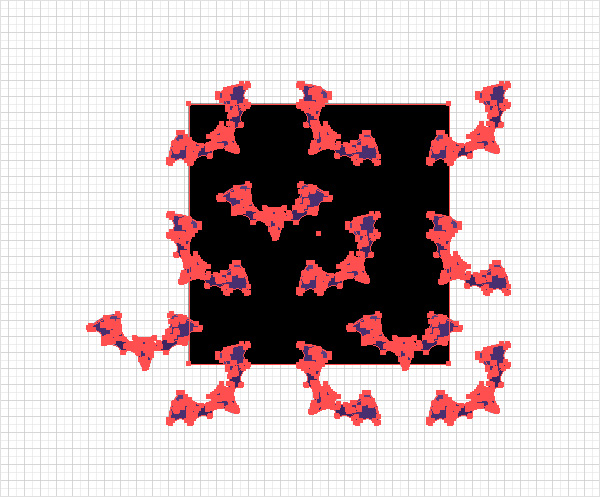
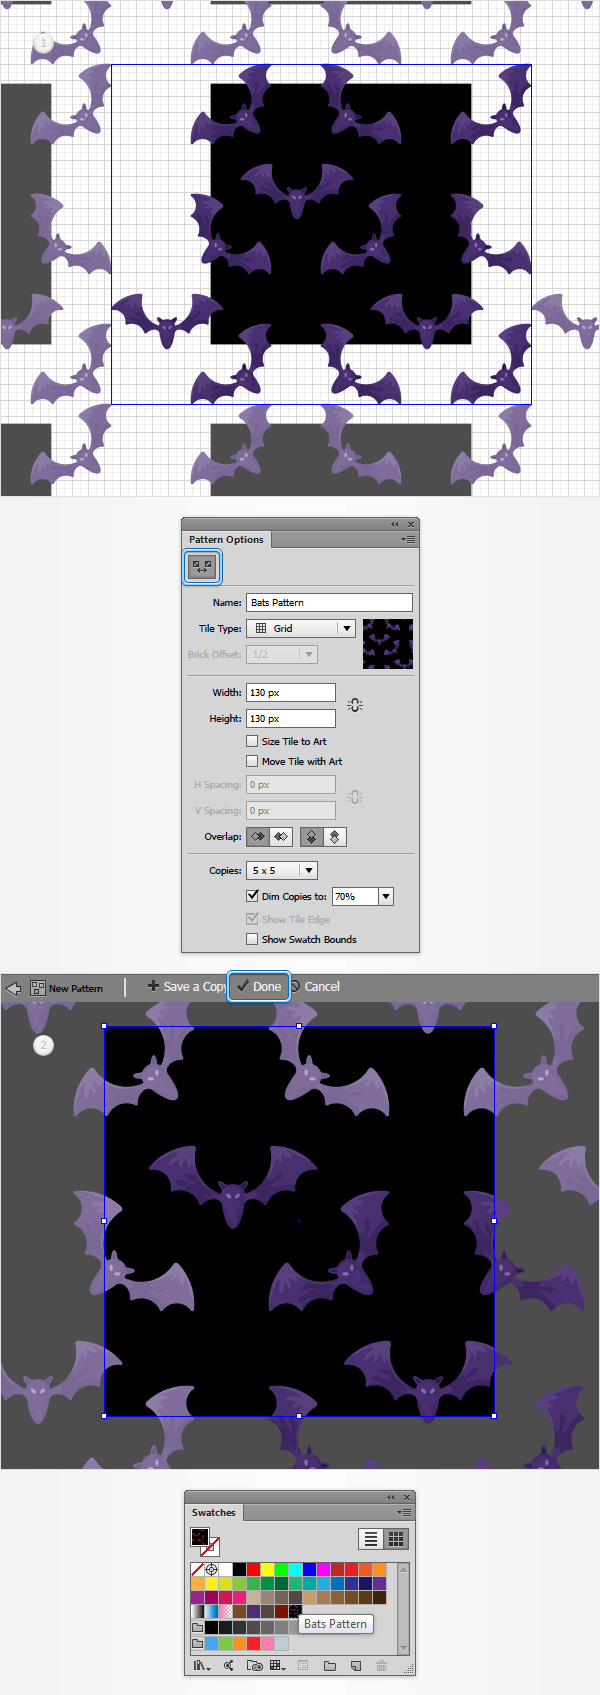
Focus on the Pattern Options window, pick a name for your pattern, make sure that the Tile Type is set to Grid, click that Pattern Tile Tool button and then focus on your artboard.
Simply resize that blue frame into a 130 px square and make sure that it perfectly covers your black square. Once you’re done hit the Done button, move to the Swatches panel (Window > Swatches) and you should find your pattern in that collection of colors.
Step 32
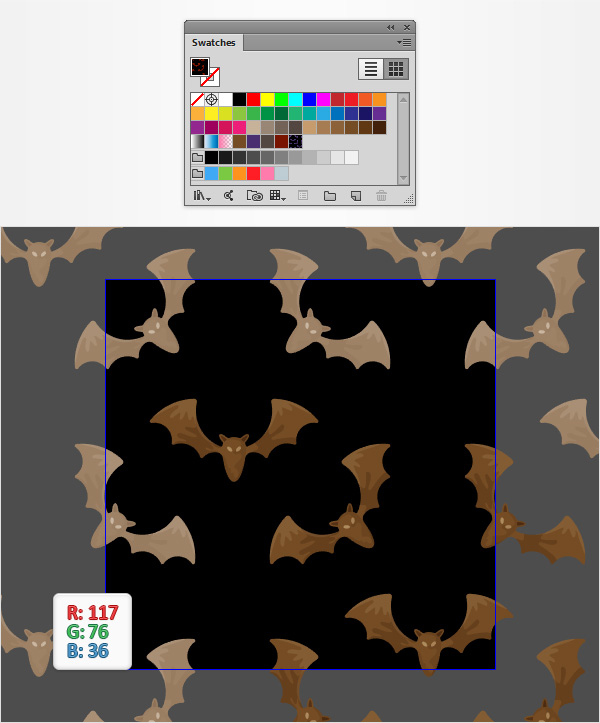
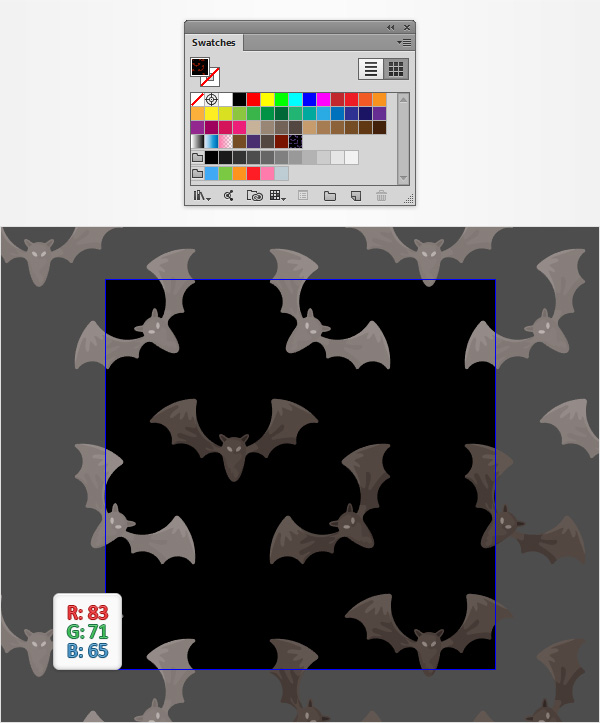
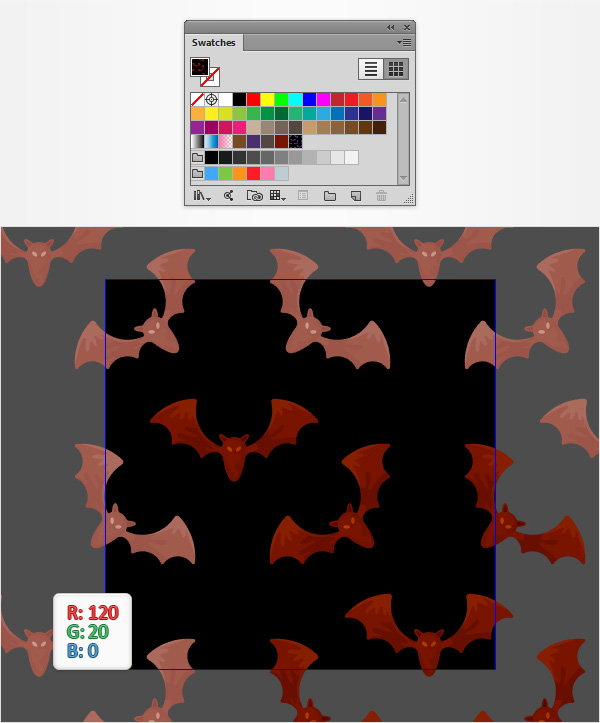
Finally, here’s how you can easily edit your bat pattern vector. First, go to the Swathes panel and double click on your pattern to activate the isolation mode.
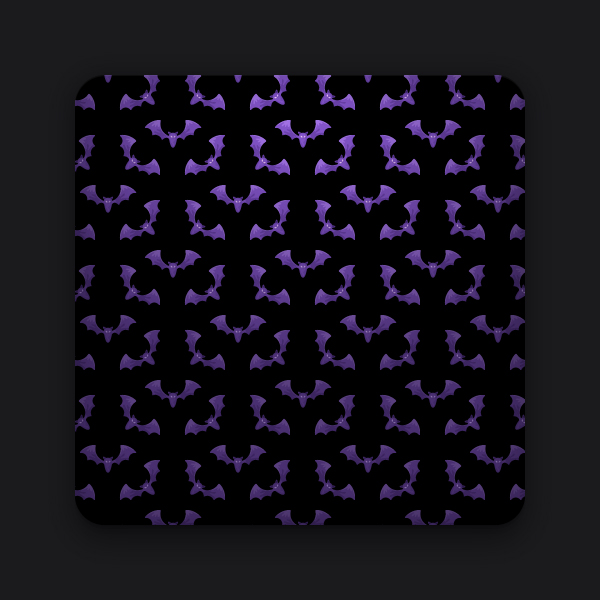
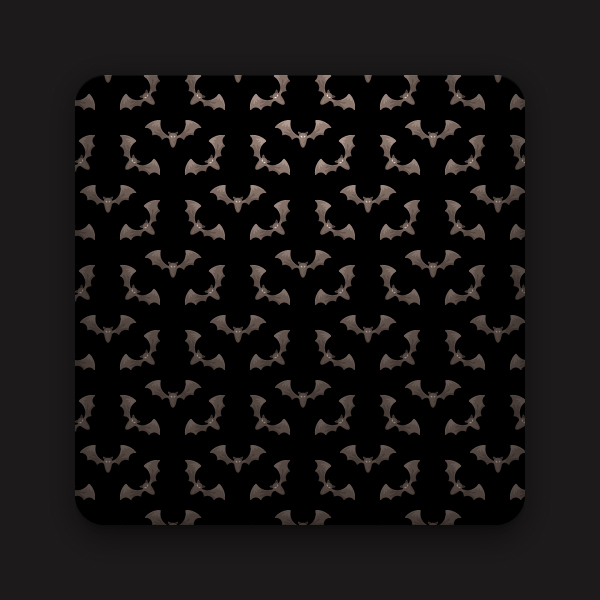
Simply select the shapes that you wish to edit, make those changes and then click the Done button. If you wish to recolor all your bats, select one of those purple shapes, go to Select > Same > Fill Color to quickly select the other purple shapes and then simply add the color that you prefer.
And We’re Done!
I hope you’ve enjoyed this Bat Pattern Vector tutorial and can apply these techniques in your future projects.

Author: Andrei Marius
Andrei Marius is a self taught vector artist who is trying to make a living doing something that he likes. He spends most of his time working in Adobe Illustrator, trying to avoid the Pen Tool. You can find most of his vector experiments at this little website dedicate to Illustrator VforVectors.


Great blog post. Really looking forward to read more. Great!.
This site was… how do you say it? Relevant!!
Finally I have found something which helped me. Thanks!
unfortunately my pattern show’s edges 🙁
Very very cool tutorial and very helpful. Amazing …