
 Today we will be creating a cartoon skull vector in Adobe Illustrator using various tools like the Shape tool, the Pen tool, and we’ll also get familiar with the pathfinder window. So let’s get started!
Difficulty: Beginner/Intermediate
Topics Covered: Shape Tools, Pen Tool, Pathfinder
Estimated Completion Time: 1.5 – 2 hours
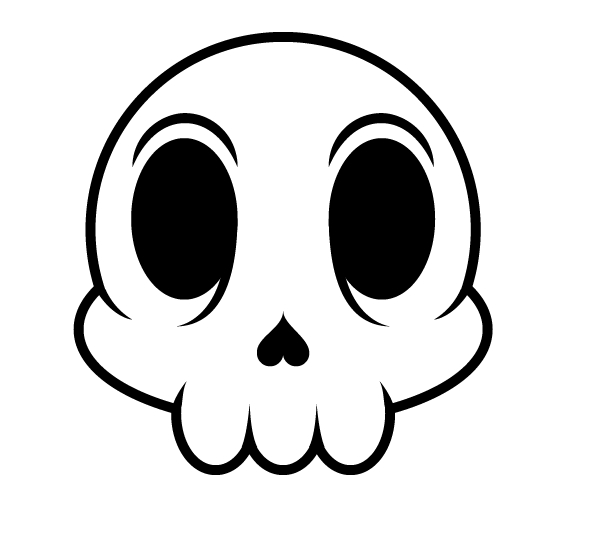
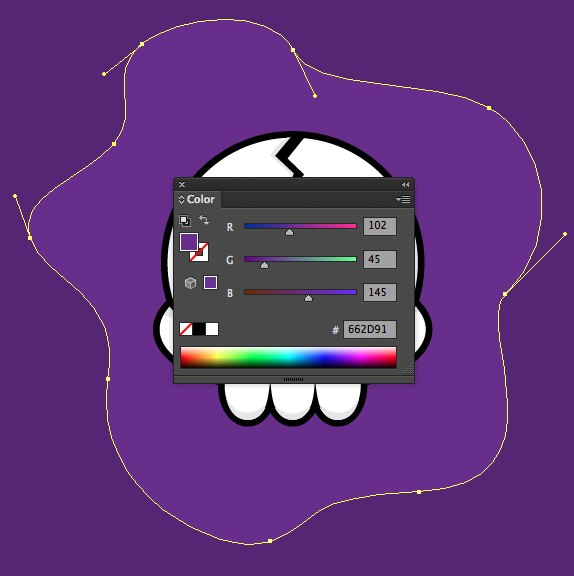
Final Image: Cartoon Skull Sticker Vector
Here’s what we’ll be making!

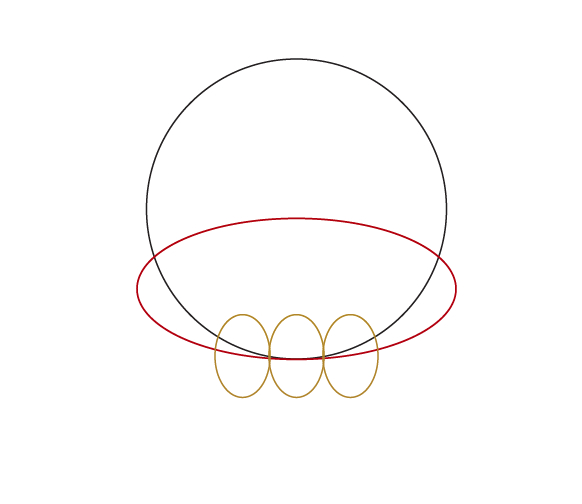
Step 1: Cartoon Skull Sticker Vector
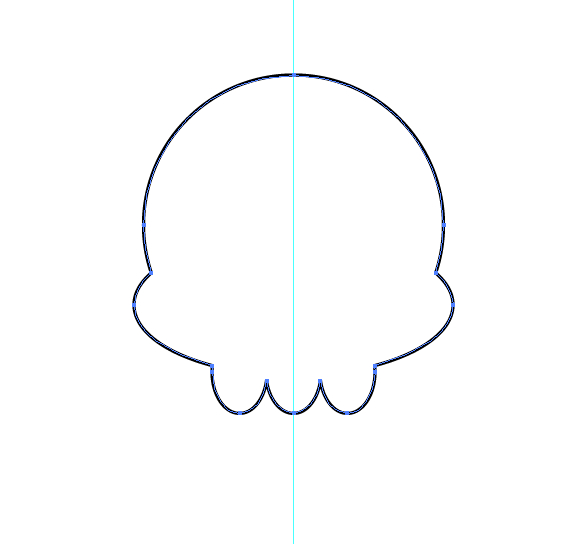
Create a new document. Using the Ellipse Tool (L) draw 5 intersecting circles as shown in the image to create the general shape of your cartoon skull vector. The black circle will be the head, the red one – cheek bones and the yellow – teeth.
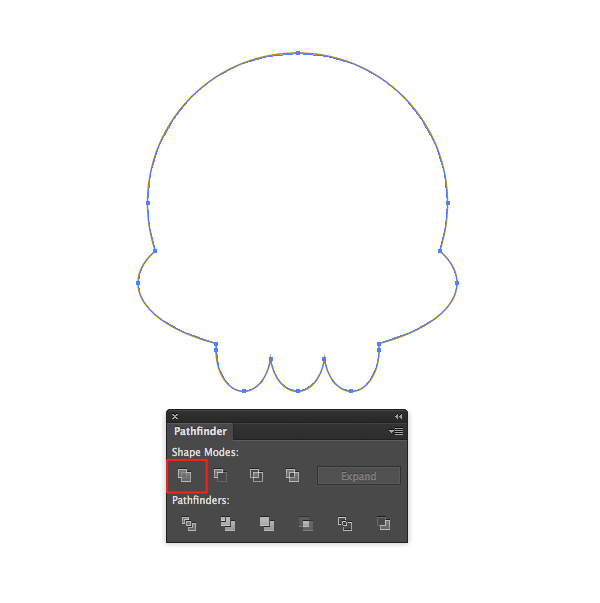
Step 2
Select all five shapes with the Selection Tool (V) and by using the Pathfinder panel (Window > Pathfinder) merge them all together by clicking on the Unite icon.
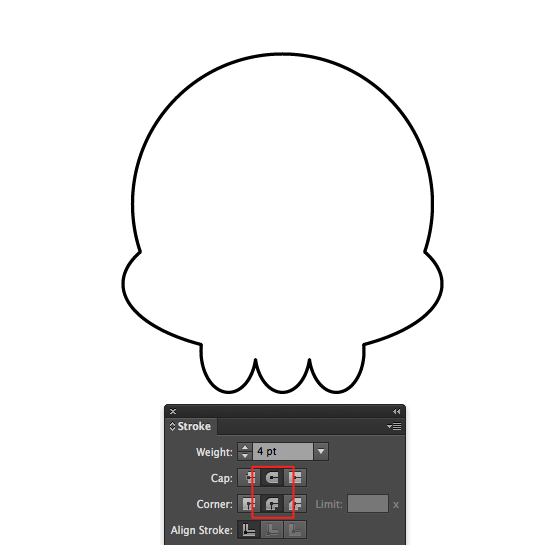
Step 3
Set your stroke to round caps and corners in the Stroke panel (Window > Stroke). I also set my stroke weight to 4pt.
Step 4
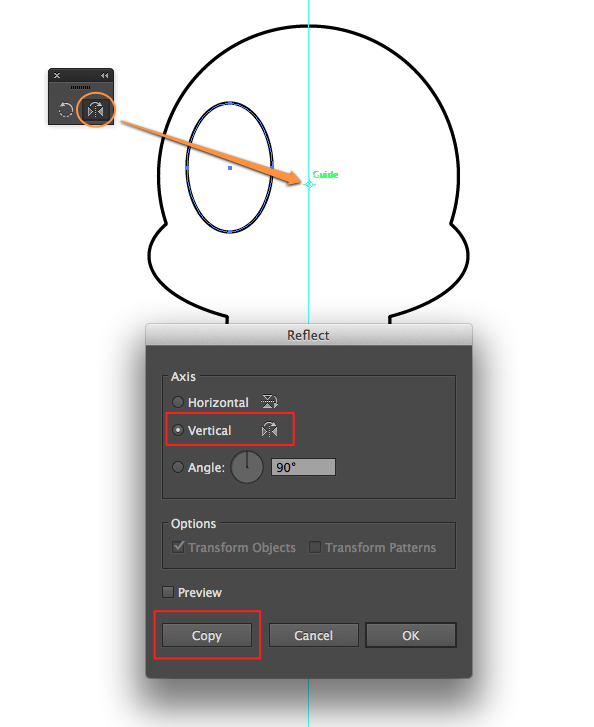
We need to find the exact center of the skull shape so that it would help us place other details of the illustration better.
To do this first enable your rulers by pressing the Command/Control + R or by going to View > Rulers > Show Rules.
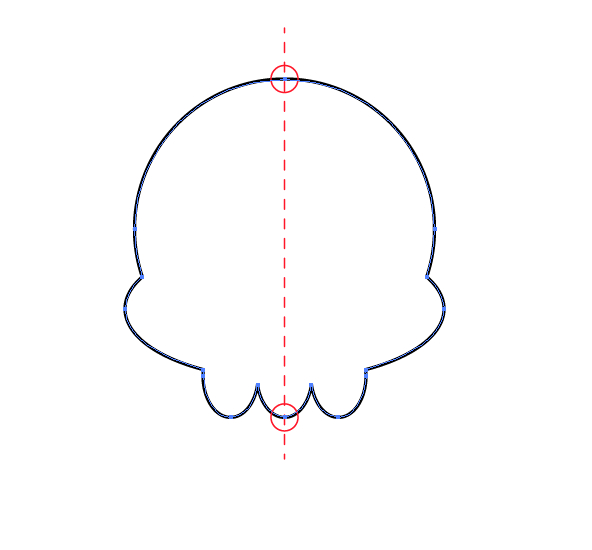
Select your cartoon skull sticker vector shape to see the top and bottom anchor points. Click and drag a rule from the vertical ruler and place it on top of these anchor points.
Now you can turn off the rulers again (Command/Control + R)
To switch on and off the guide remember the keyboard combination Command/Control + ;
Step 5
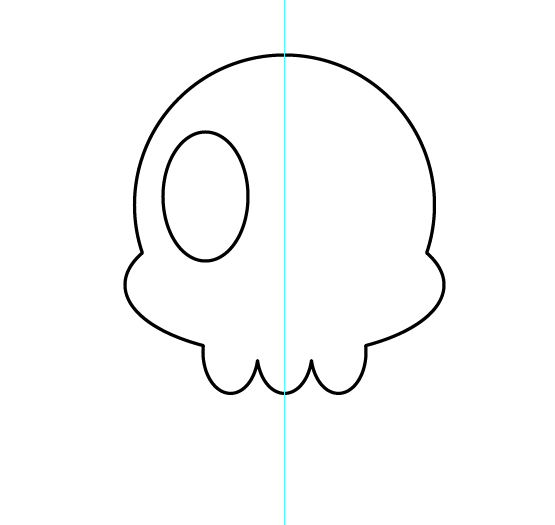
Let’s draw the eyes. Choose the Ellipse Tool (L) and draw an ellipse where one of the eyes will be.
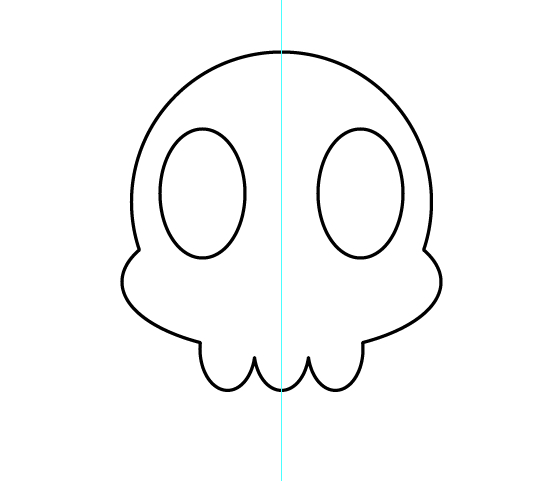
Keep the ellipse selected and choose the Reflect Tool (O). Now press down on the Option/Alt key and click with the reflection cursor directly on the guide we set up previously. A Reflect panel will appear. Set the axis to vertical and click the ‘Copy’ button to copy the eye on the other side of the skull.
Now we have two eye holes.
Step 6
Next – the nose. Create a new layer for the nose, just to keep it clean.
(1.) Draw a circle with the Ellipse Tool (L).
(2.) Copy this circle by pressing down on the Option/Alt key and dragging the circle with the Selection Tool (V) and place it next to the first circle.
(3.) Now select the Pen Tool (P ) and draw the shape as shown in the image below.
(4.) Like in the Step 2, use the Pathfinder panel to merge all three shapes together.
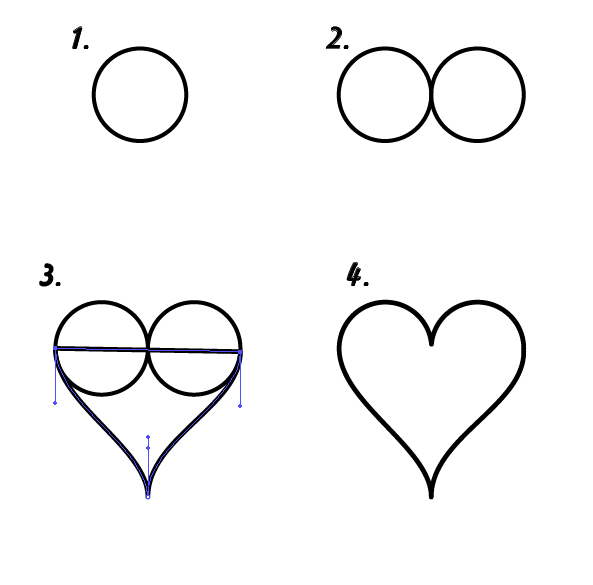
When you have the heart shape nose, rotate it “feet up”, scale it down (or up) and place it where it should be (use the guide to locate the center of the skull).

Step 7
Now in you layers panel locate the skull shape, select it, copy it (Command/Control + C) and then paste it in back (Command/Control + B).
Step 8
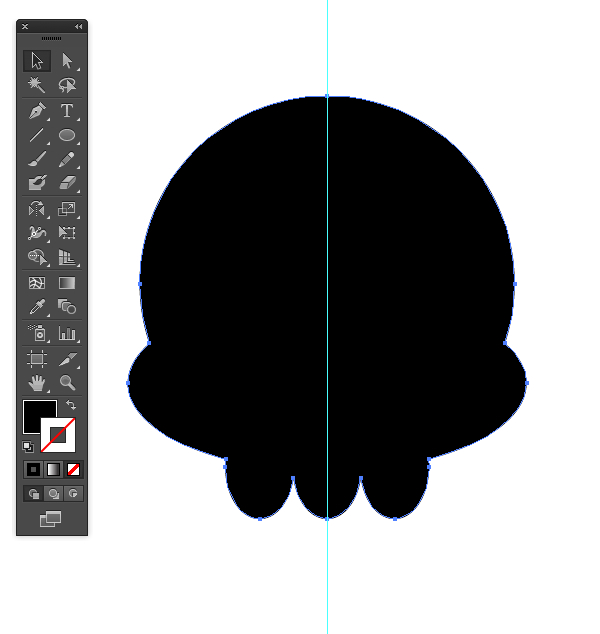
Next, turn off the front skull for a moment and set the back skull (the one we just pasted in back) and set the fill color to black and no stroke.
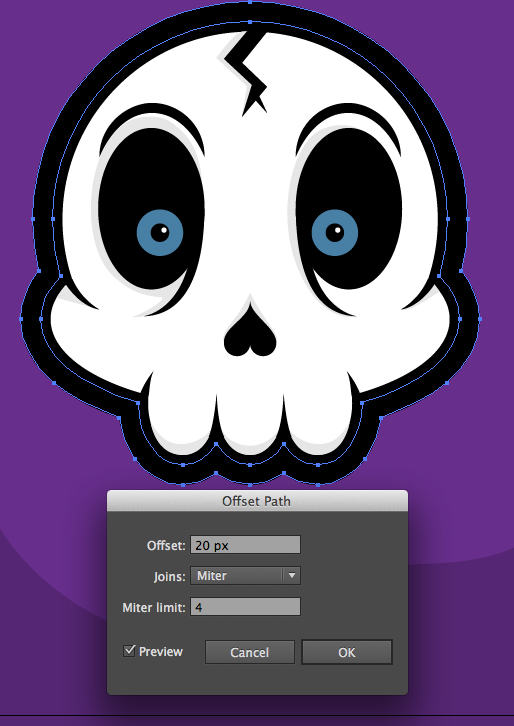
Step 9
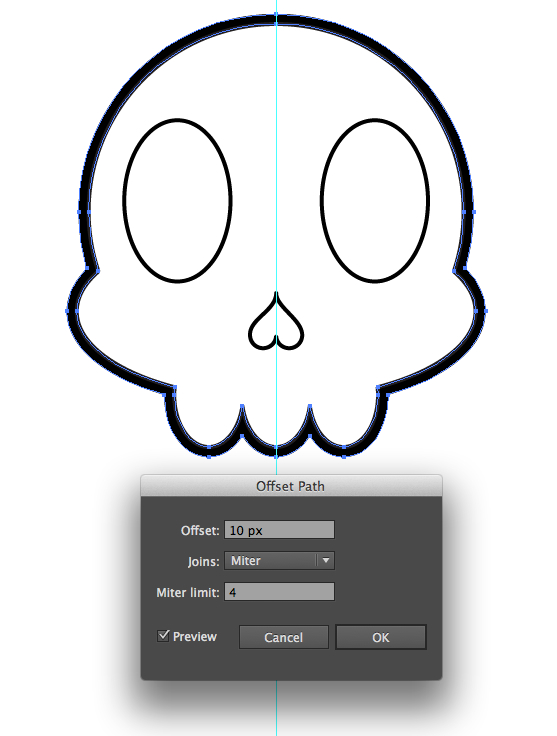
Turn back on the top skull with the white fill, but keep the black skull selected. Now go to Object > Path > Offset Path.
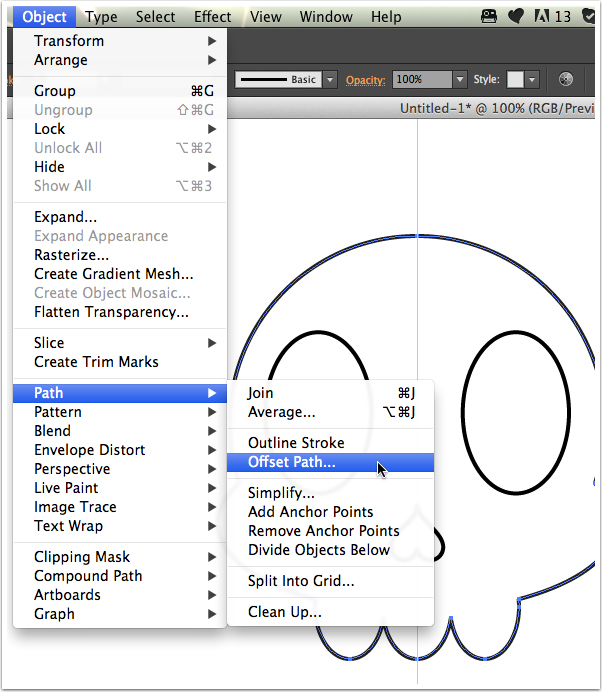
In my case 10px offset worked well. Then click ‘OK’.
Step 10
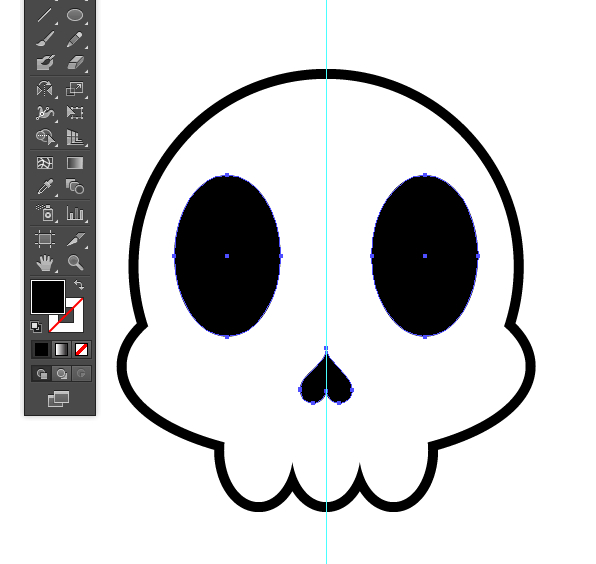
Now you have a thick black stroke around the cartoon skull sticker vector. Lock the black skull shape for now.
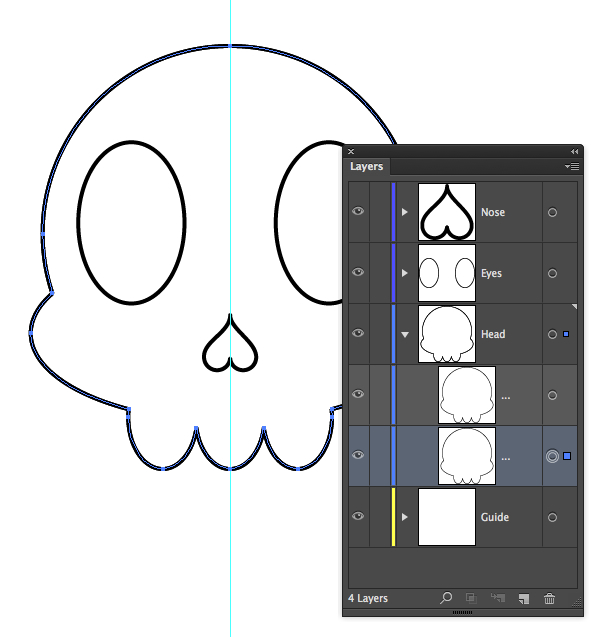
Select the eyes and nose and set the fill to black and no stroke.
Step 11
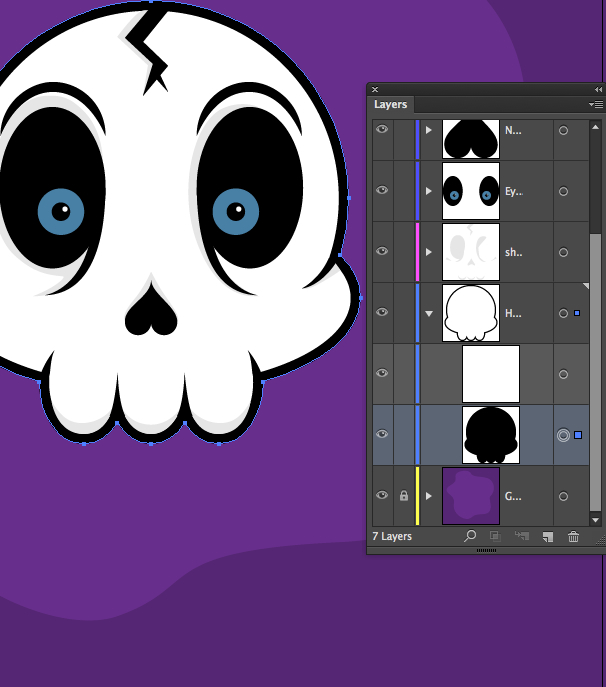
It’s time to add some details the the skull. Create a new layer on top of all other layers and by using the Pen Tool start drawing shapes to make the skull less flat and more detailed.
Since both sides of our skull are the same, save time by adding details only to one side of the skull. We will reflect them in the next step to the other side.

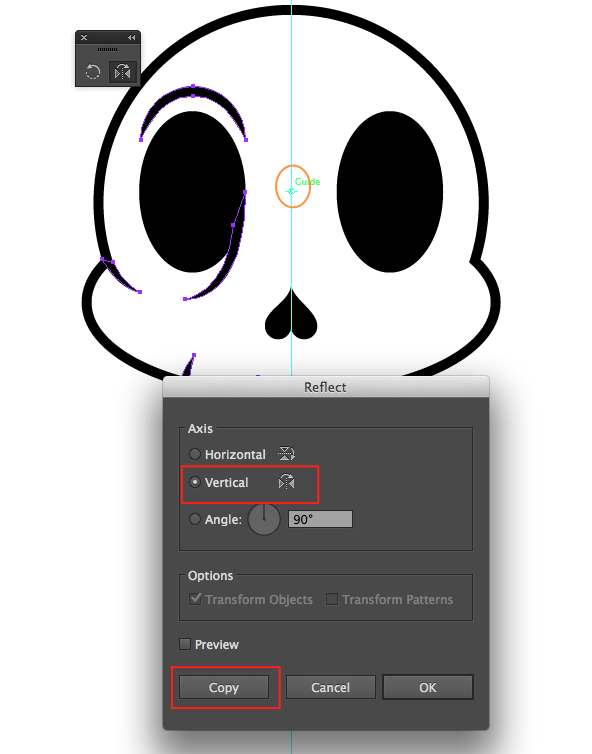
Step 12
Select all of the details you just made and again by using the Reflect Tool (O), hold down the Option/Alt key and click on the guide to plant the refection center. Click “Copy” to reflect the details to the other side. If they do not align for some reason, nudge them in place with the arrow keys.
This is how my skull ended up.
Step 13
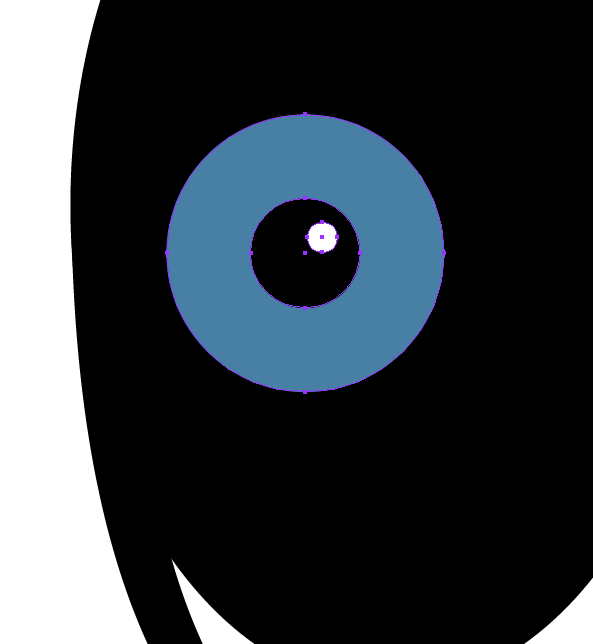
Since it’s a cartoon skull, it might as well have eye-balls so that it could see.
Zoom in on the eye holes and use the Ellipse Tool again to draw an eye-ball. Mine will be blue with a black pupil and a white spark.
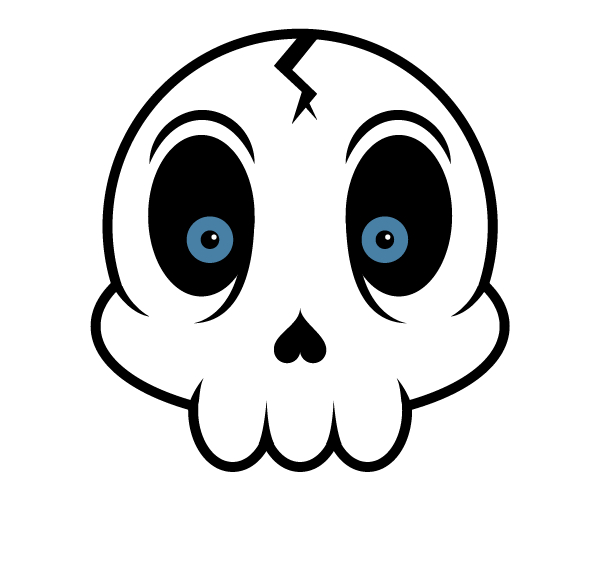
Step 14
Select the eyeball and Option/Alt drag it to the other side to copy it.
As you can see I drew a crack as well using the Pen Tool (P ).
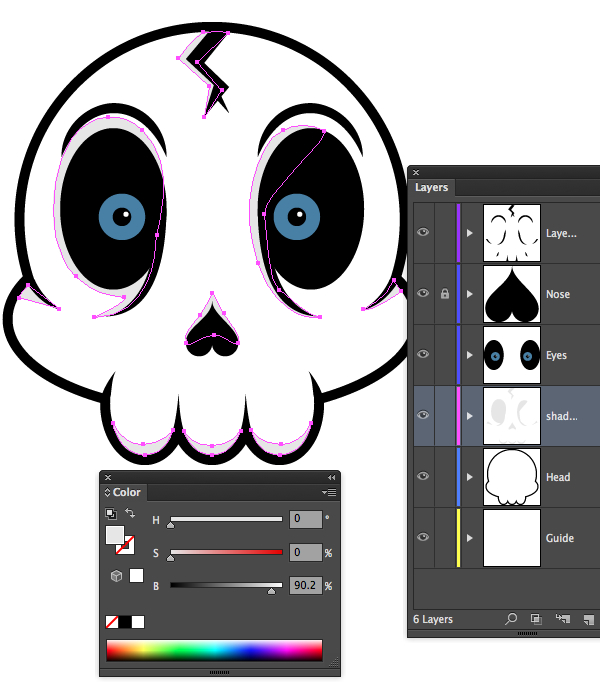
Step 15
I made a new layer, dragged it below the eye layer and by using the Pen Tool (P )and a light gray color added some dark areas to give the skull a bit more dimension.
Step 16
Our cartoon skull sticker vector is done! Now we need some background action!
Make a new layer, drag it to the bottom of your layers panel and with the Rectangle Tool (M), make a violet square for the background.

Now take the Pen Tool (P ) and create a blob shape in the middle of your violet rectangle just to add some interest to the final piece.
Step 17
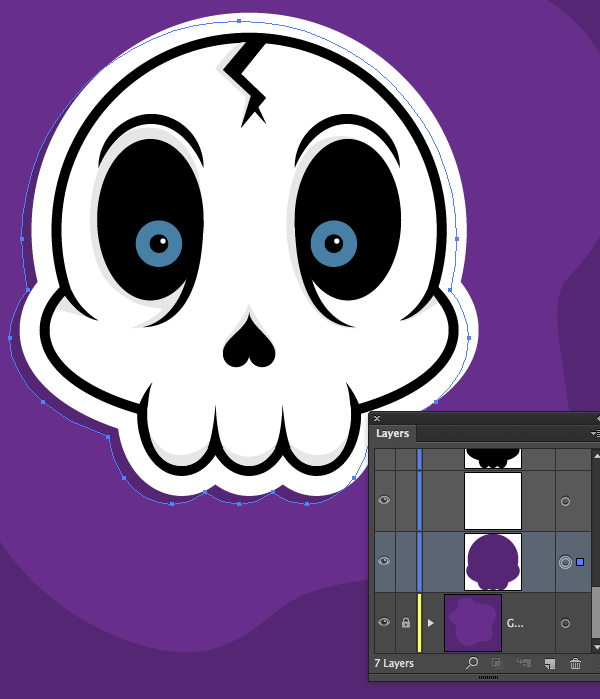
The only thing left to do is to make the skull into a sticker. Find and select the black skull shape.
We will again offset it. Go to Object > Path > Offset Path. Tick the ‘Preview’ to see the offset. For me 20px worked well. Click “OK” when done.
Change the color of this new shape to white fill, no stroke.

Final Step
I wanted to add a shadow effect to the sticker as if one side isn’t glued on the background yet. To do this simply select the white shape we create in the previous step, copy it (Command/Control + C) then paste it in back (Command/Control + B). Without deselection it, change the color of it to the same as the dark violet background and by using the arrow keys on your keyboard, nudge the shadow shape to the left and down a few clicks.
Result
We are all done and have created a little, cool skull sticker! Hope you liked it and see you next time!
Tutorial by Tanita Makena
Follow her on Dribbble: dribbble.com/tanita
Follow her on Twitter: @SilentTani


Excellent! Thanks for the useful tutorial!
Thank you <3
You actually make it seem so easy with your presentation but I find this
topic to be actually something which I think I would never
understand. It seems too complex and extremely broad for me.
I’m looking forward for your next post, I’ll try to
get the hang of it!
hello there! i just want to know if i can use this cool image as my youtube avatar.
In inclusion, you could expect enhancement tasks to price you even more for the extra preparing required.
This helped me get on with illustrations and logo designs. Great and proceedural guide
this is BAD ASS
awesome tutorial..
and thanks..
Great! Simple and effective! Thanks for sharing 🙂
Thanks for your contribution!
Hello, Thanks for sharing this awesome tutorial!
Nice. Thank you for the tut.