
In today’s tutorial we’ll learn how to create a seamless leather texture by using the Pencil Tool and Pattern Editing mode. Leather textures and patterns are often used in design, and that’s why creating your own leather texture will be super useful for you in future. I also want to let you know that the technique used in this tutorial would be perfect for creating other types of textures as well. So, let’s get started!
Tutorial Details
- Program: Adobe Illustrator CS6 – CC
- Difficulty: Intermediate
- Topics Covered: Pencil Tool and Pattern Editing mode
- Estimated Completion Time: 45 minutes
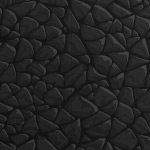
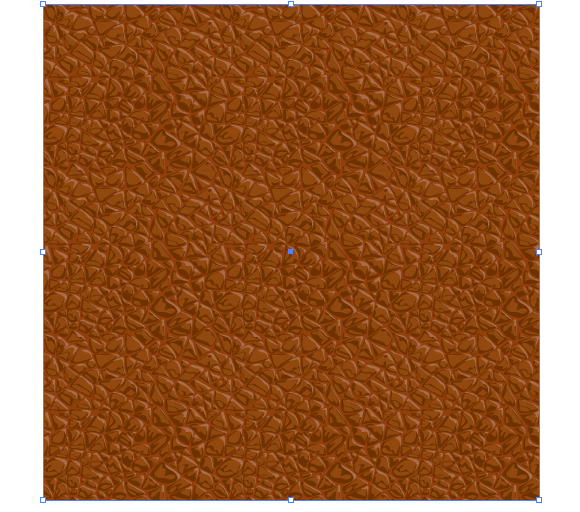
Final Image
Step 1
Open Adobe Illustrator and create a new document (Cmd/Ctrl + N). Your artboard can be any size. The leather texture we’ll create will work equally well in the RGB and in the CMYK color modes, even though I worked in the RGB mode.
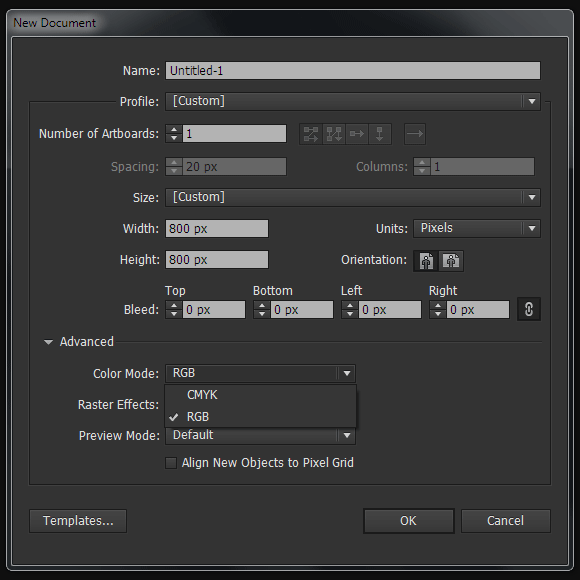
Step 2
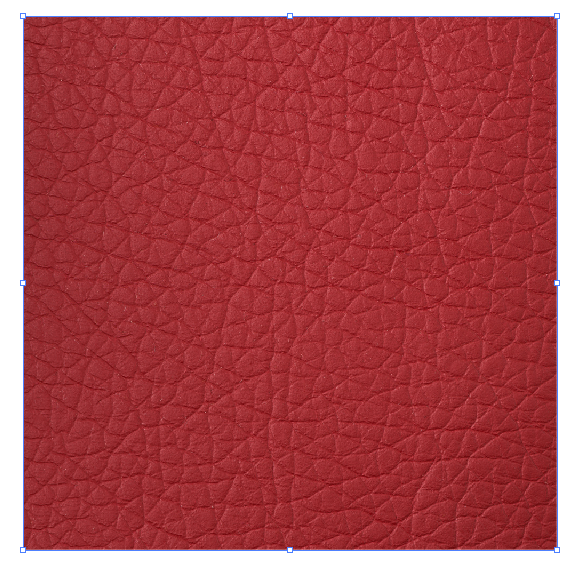
I used red leather texture from Shutterstock as our reference image. Place the image into current document (File > Place…)
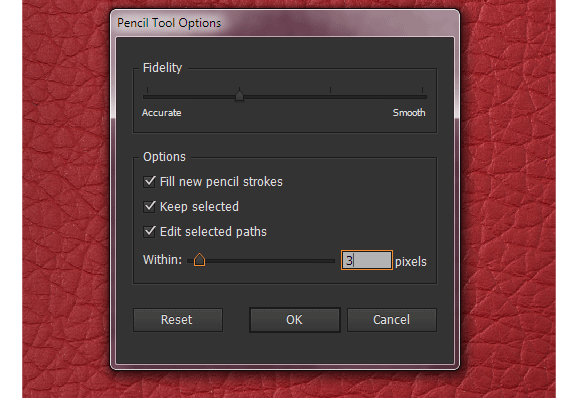
The elements of our leather texture will be created with the help of Pencil Tool (N). The settings of this tool are indicated on the figure below. To open the dialog box of the Pencil Tool Options, click twice on the Pencil Tool icon on the Tools panel.
Step 3
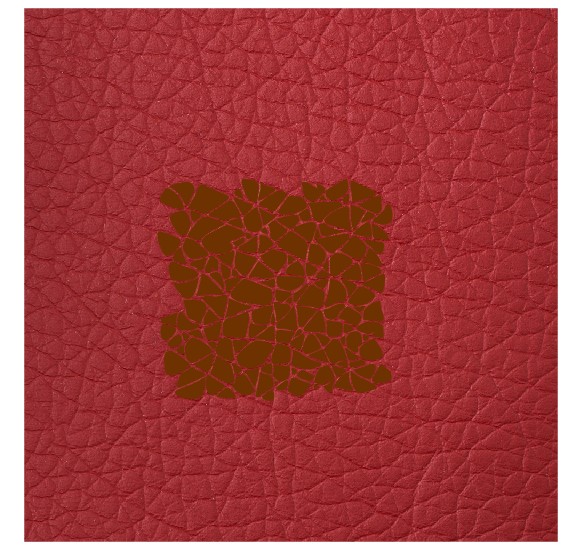
Based on the raster image, create patches of leather between folds with the help of the Pencil Tool (N). Choose brown (R= 110, G= 49, B= 0) as the color of background. To create such objects I used a graphic tablet, which speeds up the work process.

There is no need to create such elements above the entire raster texture. It is enough to recreate a small patch as it is indicated on the figure below.
And now raster texture of leather can be deleted.
Step 4
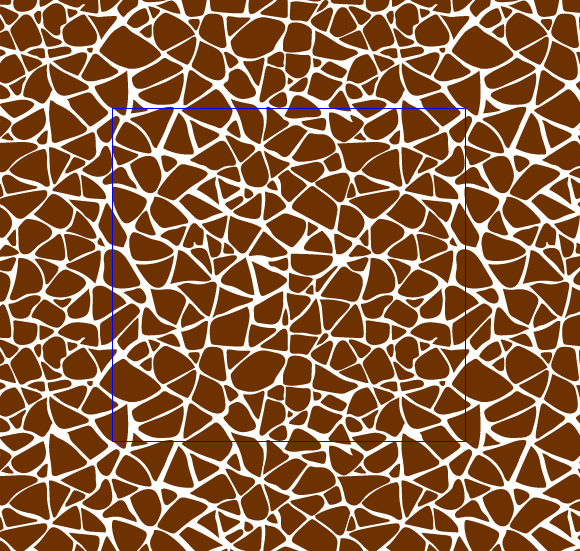
Select all the created objects, then go to the Object > Pattern > Make which switches to Pattern Editing mode.

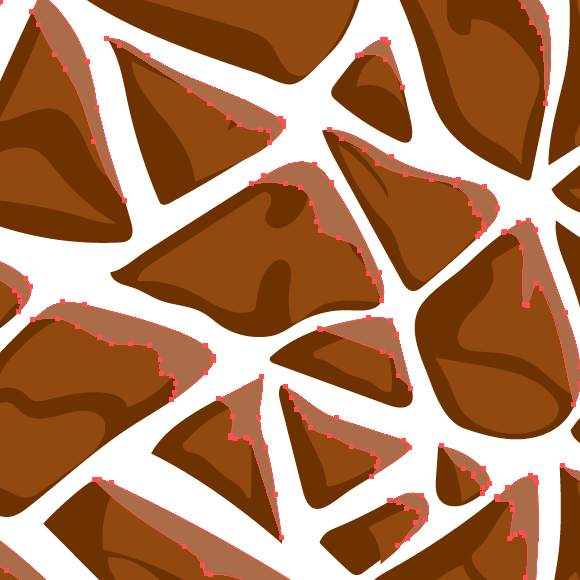
With the help of the Pencil Tool (N) fill empty spaces with new objects trying not to disturb the uniformity of texture.
Step 5
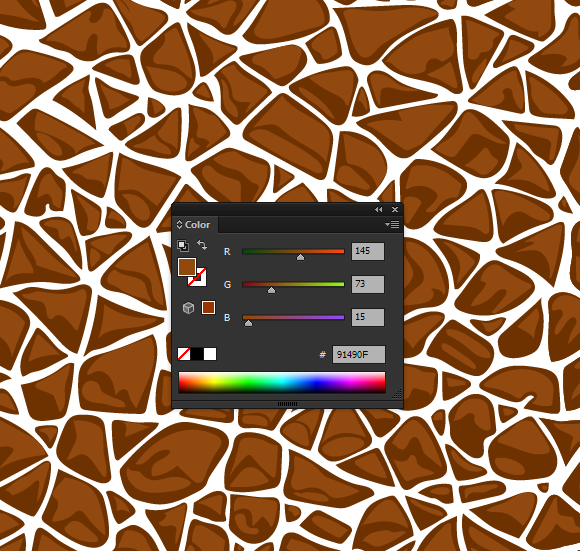
On each skin flake create objects of any form with a brown fill (R= 145, G= 73, B= 15). These objects are created with the help of the Pencil Tool (N) and cover most of the area of skin flakes.
Step 6
Now we’ll create highlight on skin flakes. Such objects can be created with the help of the Pencil Tool (N) and should be placed in the right upper corner of each flake. In this case we consider that the light source is located at the top right. Choose light-brown (R= 171, G= 108, B= 73) for the fill. Borders of highlight extend the borders of flakes. Extra parts of highlights will be deleted in the next step.


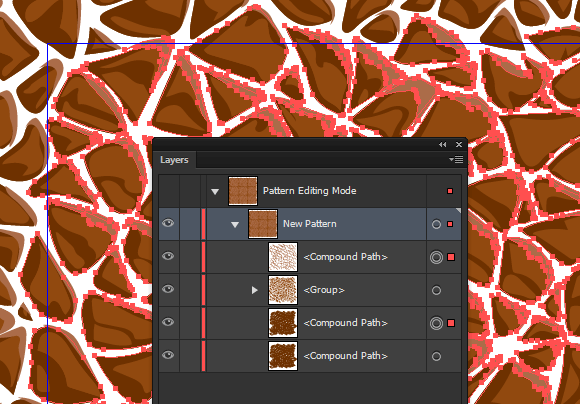
Step 7
Select one of the dark-brown object, then go the Select > Same > Fill Color. And now go to the Object > Compound Path > Make or use Cmd/Ctrl + 8. Double the received Compound Path (Cmd/Ctrl + C; Cmd/Ctrl + F). Select one of the light-brown objects then go to the Select > Same > Fill Color and after it go to the Object > Compound Path > Make. Select light-brown and dark-brown compound paths. It’s easily done in the Layers panel.
Click on the Intersect button in the Pathfinder panel.
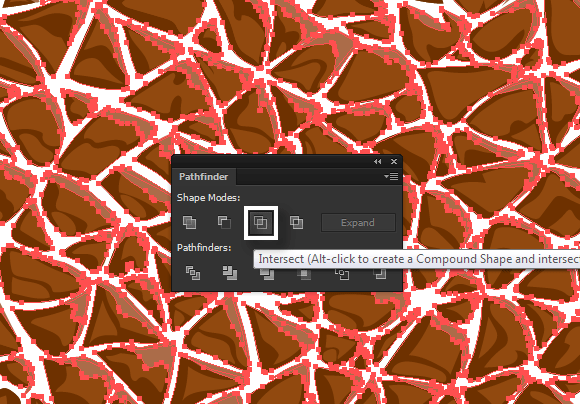
This will delete all extra parts of glares.
Step 8
Create a rectangle with the help of the Rectangle Tool (M); the size of the rectangle corresponds to the size of the pattern tile. Place the rectangle below all existing objects. This objects has a brown fill R= 145, G= 64, B= 11.
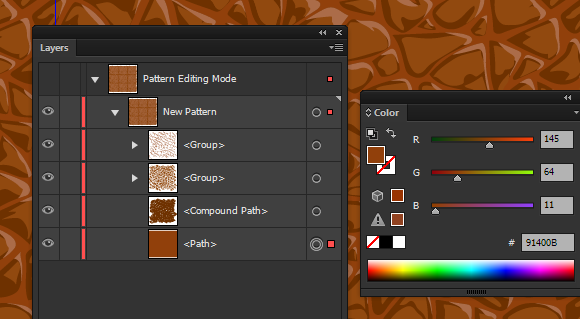
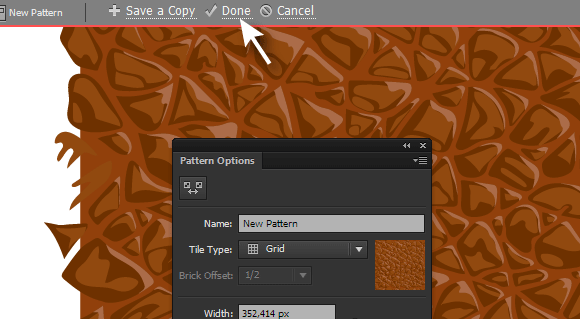
And now, when our seamless leather texture is completely ready click on Done.
Step 9
The new seamless leather texture was saved in the Swatches panel. This means that we can use it as a fill for any objects.
Step 10
If you need to change the color of the leather texture click twice on its thumbnail in the Swatches panel which will go to the Pattern Editing mode. And now switch the colors of its elements. Our texture has only four colors, and so changing the color won’t take much time.

I hope that you liked this tutorial and the knowledge received today will be useful in other vector textures creations as well.

Author: Iaroslav Lazunov
My name is Iaroslav Lazunov, I am a graphic designer from Ukraine. I am glad that I finally found a job in my life that I can share my knowledge and experiments with you in my tutorials. Follow me on Twitter or visit my blog Vectorboom.com


Very good tutorial. I will be using the same technique for creating stone and brick elements. Only varying the placement of the highlight based on direction of light source. Very concise, repeatable workflow. Thanks for sharing.
Useful and teached me use of various tool and techniques
Hey guys,I love this article but i got stuck at step 8.Please help me and explain it in a better way.Thanks
thanks and good job