
 Let’s play with texture in this wood cut text treatment tutorial! We’ll create a fantastic graphic style and apply it to simple text. Complex-looking illustrations are easy when you create your own graphic styles. Let’s do this!
Tutorial Details: Wood Cut Text Treatment
- Program: Adobe Illustrator C6 – CC 2015
- Difficulty: Intermediate
- Topics Covered: Graphic Styles, Appearance Panel, Text Treatment
- Estimated Completion Time: 20 Minutes
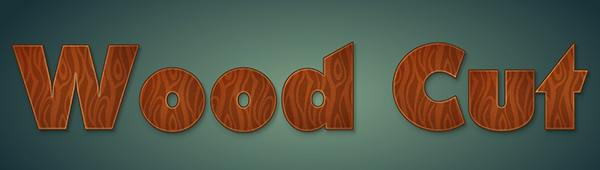
Final Image: Wood Cut Text Treatment
Step 1: Wood Cut Text Treatment
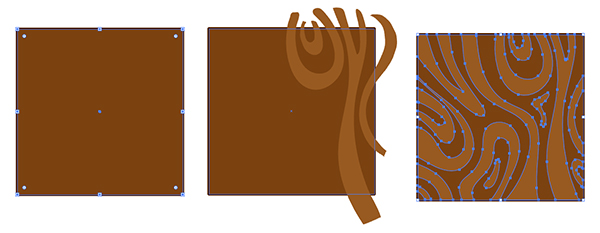
Let’s start out this wood cut text treatment by creating a simple pattern. There are a couple ways of doing so. If you want to work with a ready-made wood texture pattern, you can skip this and the next step. If you’d like to create your own I have two methods for you.
Firstly, draw a brown square with the Rectangle Tool. Then, use the drawing tool of your choice (I’ll be using the Pencil Tool) to draw wood grain shapes overlapping the square. Unite the wood grain shapes in the Pathfinder panel. Copy and Paste the square object so you can easily Intersect the two objects in the Pathfinder panel. Make sure to hit “Make a COmpound Shape” and “Expand” after each Pathfinder action within the Pathfinder panel itself.
From here you can create a pattern either by using this as your repeated tile, or theough copying, pasting, and reflecting the swatch in order to create a more seamless pattern.
Step 2
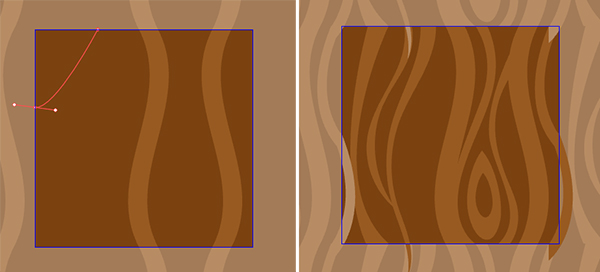
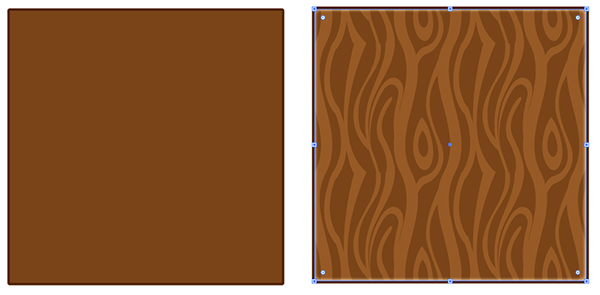
The second method I have for you is to draw a brown square with the Rectangle Tool and then create a New Pattern in the Pattern Options panel. Here you’ll draw the wood grain pieces within the active pattern itself. This gives you full control over the repeated pattern tile and allows you to see what each shape does when repeated in the pattern. When finished, hit “Done” and you’ll find your new pattern in the Swatches panel.
Step 3
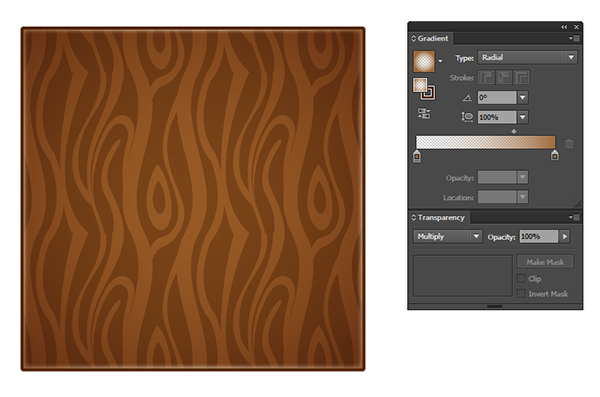
Now to create the Graphic Style used for the text treatment itself. Draw a brown square with the Rectangle Tool yet again. Set the stroke color to 1 pt or 2 pt weight with rounded caps and corners. In the Appearance panel, add a new fill and apply the newly made texture pattern to it.
Step 4
Add a third fill above the other two in the Appearance panel. Set it to a Radial Gradient in the Gradient Panel going from brown at 0% to 100% Opacity (the opaque color should be around the edge of the shape). In the Transparency panel set the Blending Mode to Multiply. Adjust the gradient with the Gradient Tool as you see fit.
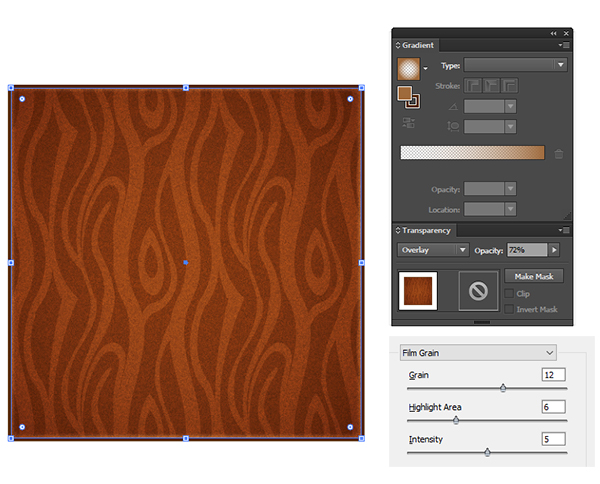
Step 5
The next fill will be a copy of the previous one with an additional effect: Film Grain. Go to Effect > Artistic > Film Grain and play with its attributes. The ones I chose as as follows:
-
- Grain: 12
-
- Highlight Area: 6
-
- Intensity: 5
Set the Blending Mode to Overlay and Opacity to 72% or whatever looks good to you.
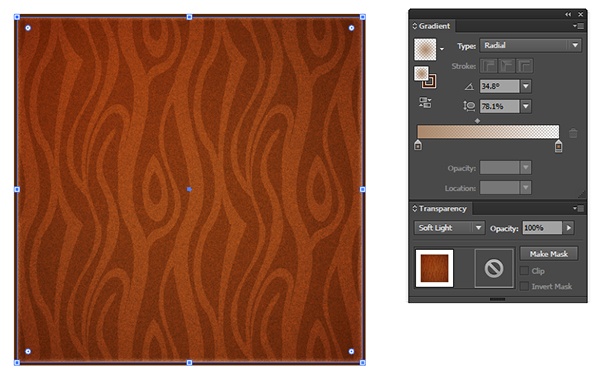
Step 6
Next, add another fill to the Appearance panel. This one is a lighter brown with a Radial Gradient whose opaque color is in the center of the gradient and Transparent color is around the edge. Set the Blending Mode to Soft Light. You can adjust where this highlight sits within the design with the Gradient Tool.
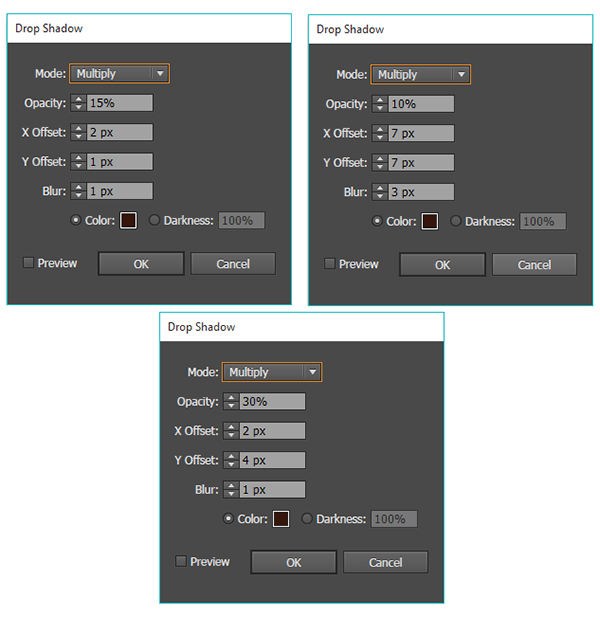
Step 7
Finally, select the first fill color (the dark brown) created in Step 3 in the Appearance panel. We’re going to add 3 Drop Shadows to it. See the image below for the details of each shadow, or check out the following breakdown:
-
- Mode: Multiply
-
- Opacity: 15%
-
- X Offset: 2 px
-
- Y Offset: 1 px
-
- Blur: 1 px
-
- Color: Dark Brown
-
- Mode: Multiply
-
- Opacity: 10%
-
- X Offset: 7 px
-
- Y Offset: 7 px
-
- Blur: 3 px
-
- Color: Dark Brown
-
- Mode: Multiply
-
- Opacity: 30%
-
- X Offset: 2 px
-
- Y Offset: 4 px
-
- Blur: 1 px
- Color: Dark Brown
Step 8
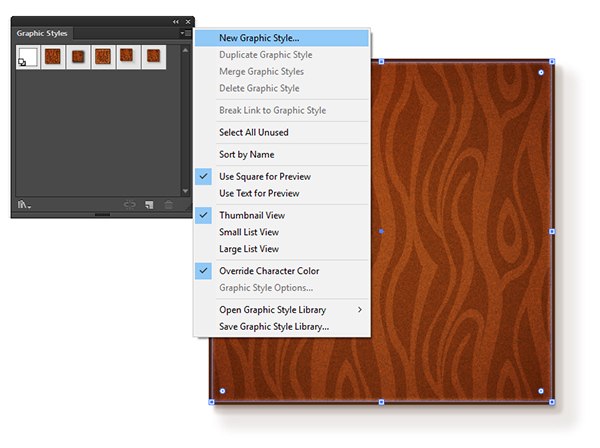
Select your square that you’ve applied all of the Appearance attributes to in the previous steps. In the Graphic Styles panel, create a New Graphic Style. You can create different ones with different attributes (drop shadows, outer or inner glows, different patterns, different colors, etc).
Use the Type Tool to write out your text in whatever font you think fits wooden letters best. Expand the text to Outlines and then apply the new Graphic Style to them to complete your design.
Conclusion: Wood Cut Text Treatment
Great work! Using graphic styles to mimic textures and create content makes icons and various graphics so much easier and keeps your file size small compared to creating a complex vector by hand. What other text treatments would you like to see from us? Drop us a comment below and don’t forget to share your own version of the wood cut text treatment from this tutorial!
Author: Mary Winkler
Mary works under the brand Acrylicana® designing apparel, jewelry, and illustrating for companies like Disney, Jakks Pacific, Envato, and more. Check out Acrylicana.com for more artwork, tutorials, and more.


