

October is well-known not only for its cozy autumn atmosphere and pumpkin season but also for Halloween! Let’s celebrate together by creating this cheerful Jack O’Lantern from a vector pumpkin. We’ll be using simple geometric shapes and drawing with vector brushes, adding a textured touch to our pumpkin illustration. Let’s begin!
Tutorial Details
• Program: Adobe Illustrator CS6 – CC
• Difficulty: Intermediate
• Topics Covered: Shape Building, Pathfinder Panel, Brushes
• Estimated Completion Time: 20 minutes
Final Image: Halloween Pumpkin

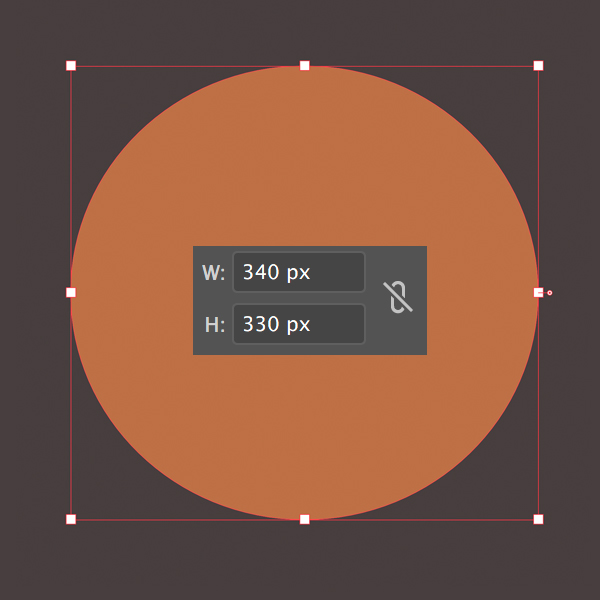
Step 1
Let’s start by making the pumpkin illustration from a circle. Take the Ellipse Tool (L) and create a 340 x 330 px orange circle.
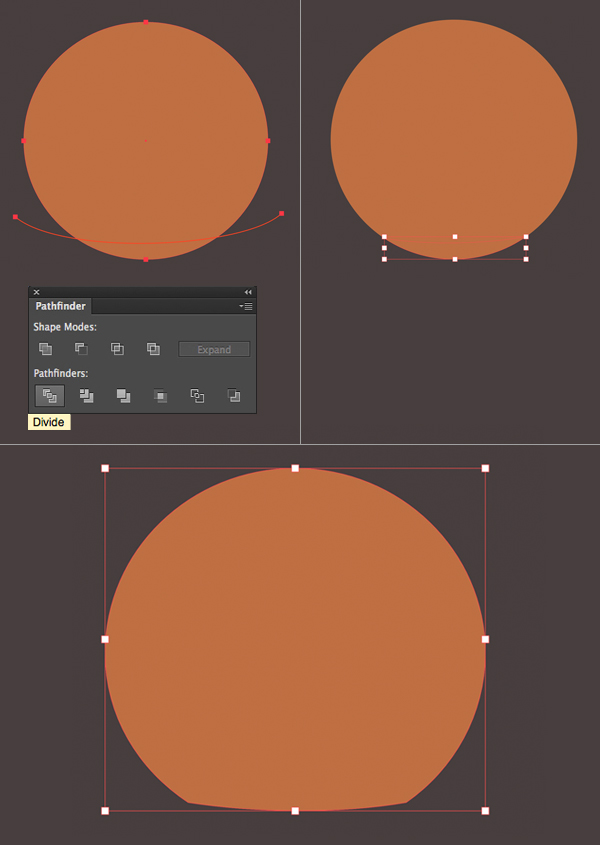
Step 2
Take the Pencil Tool (N) and draw an arched line crossing the bottom of the pumpkin (you can set the Fill color to None in the Color panel for more conveniency).
Select both the line and the circle and click Divide in the Pathfinder panel (Window > Pathfinder). This way we cut the pumpkin illustration into two parts. Delete the lower piece, making the bottom of the pumpkin flat.
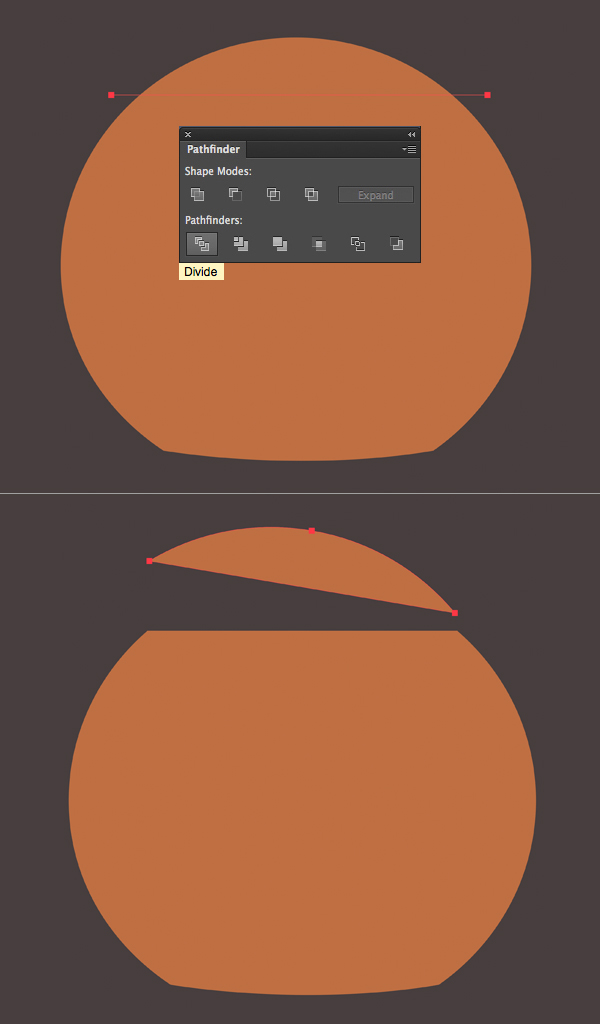
Step 3
Split the top part as well, but this time draw a straight line using the Line Segment Tool (\). Divide the top piece in the Pathfinder panel and move the cap up a bit. Rotate it slightly, giving our pumpkin a playful look.
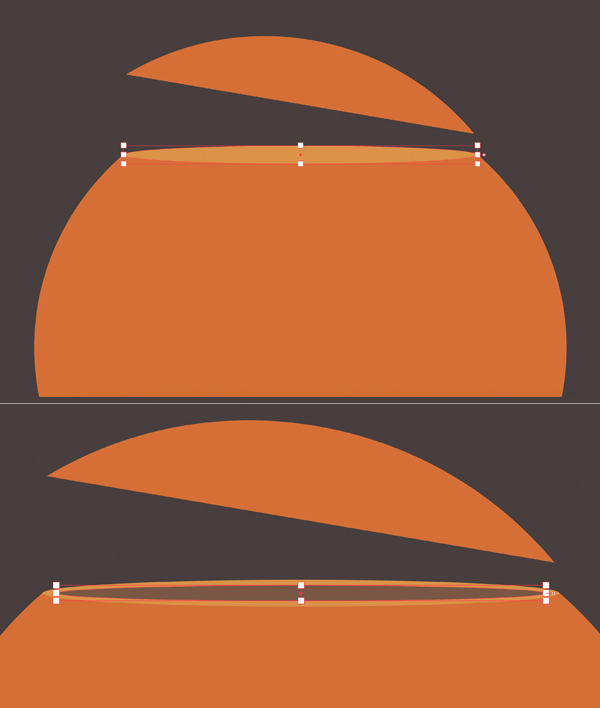
Step 4
Use the Ellipse Tool (L) to create an ellipse wide enough to fit the top part of the pumpkin, as shown in the image below.
Duplicate (Control-C > Control-F) the created ellipse and make the copy slightly smaller. Fill it with a dark color, depicting the inner part of the pumpkin.
Step 5
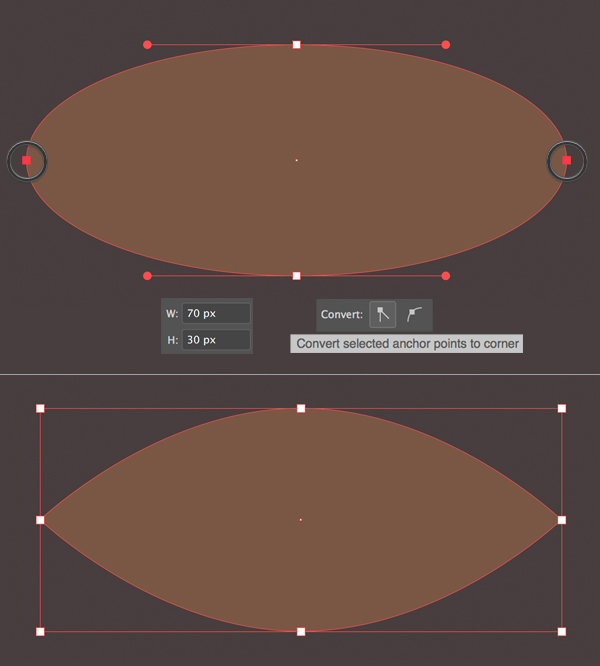
Now let’s create the eyes. Make a 70 x 30 px ellipse. Selects its left and right anchor points with the Direct Selection Tool (A) and click Convert selected anchor points to corner in the control panel on top. This way we’re making the points sharp.
Step 6
Select the created shape and go to Effect > Warp > Arc. Set the Horizontal Bend value to 65%.
Click OK and go to Object >Expand Appearance to apply the created effect.

Step 7
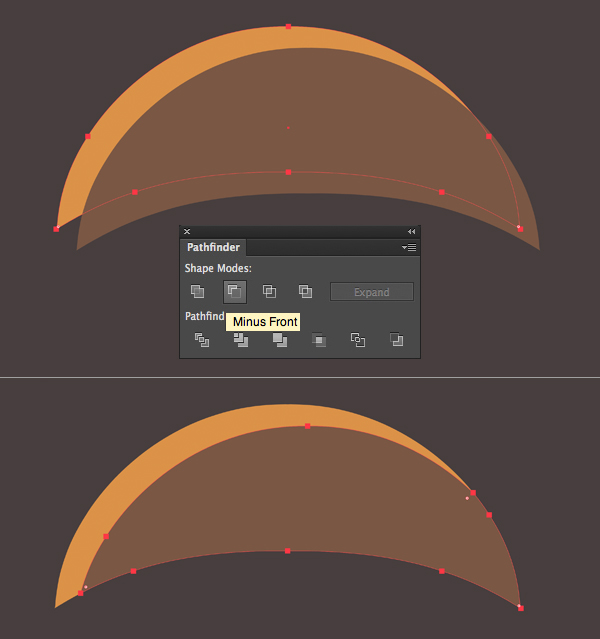
Duplicate the shape twice (Control-C > Control-F > Control>F) and move the front copy down and to the right a bit. Fill the back copy with light-orange color as shown in the image below.
Select two copies (one on the top and one beneath it) and click Minus Front in the Pathfinder panel. This way we cut the front copy to make it fit the eye shape.
Step 8
Group (Control-G) the parts of the eye and let’s make a mirrored copy for the second eye. Double-click the Reflect Tool (R) in the Tools panel, select the Vertical Axis and click the Copy button to flip the group. Move it to the opposite side of the face.
Duplicate the eye group and rotate it upside down. Make the copy much larger to create a smiling mouth.

Step 9
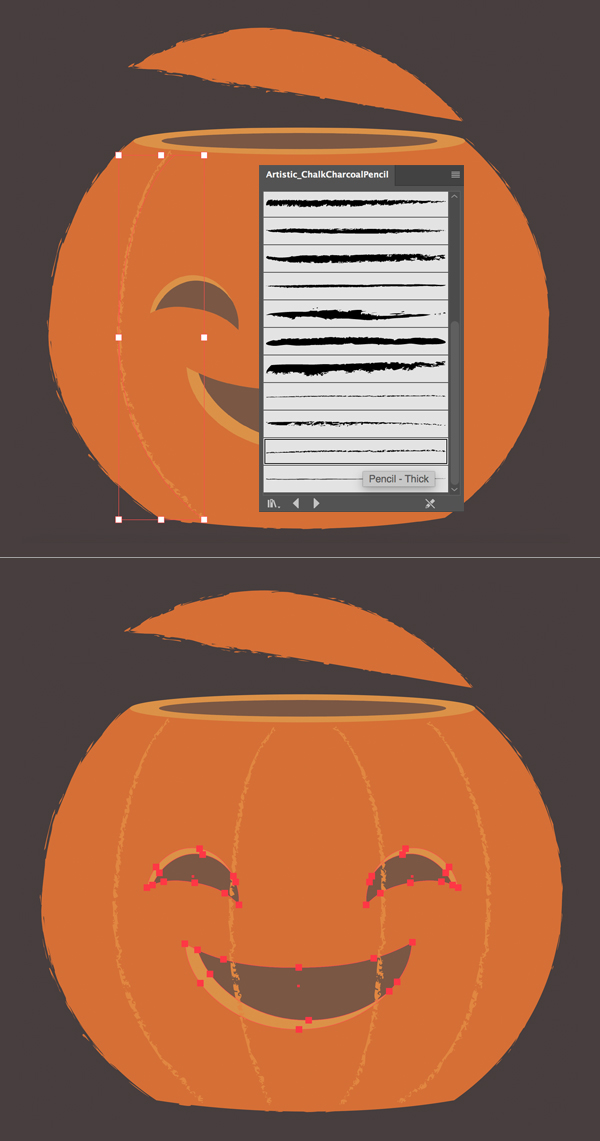
Let’s add a textured touch to our pumpkin illustration.
Select the pumpkin shape and apply the orange color to the Stroke in the Color panel.
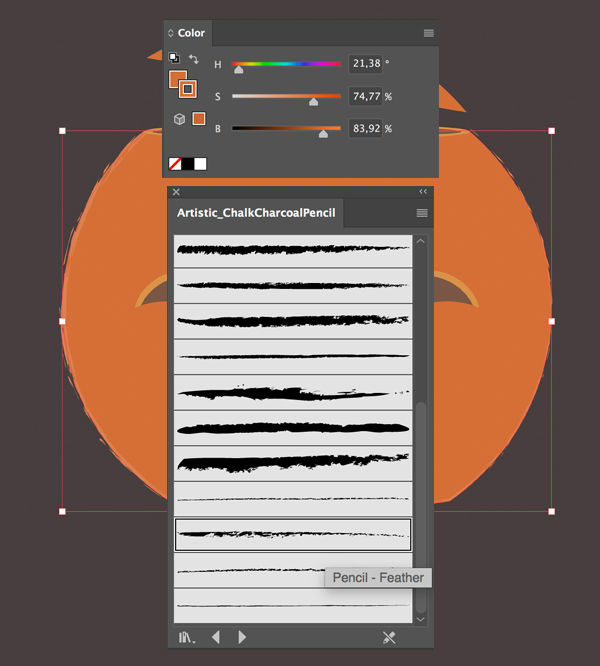
Open the Brushes panel (Window > Brushes) and go to Brush Libraries Menu (a small icon in the bottom left corner of the panel). Find Artistic > Artistic_ChalkCharcoalPencil default brush set. From here, select any textured brush to your liking. I’ll be using the Pencil – Feather brush. Adjust the Stroke color to make it fit the pumpkin’s color.
Step 10
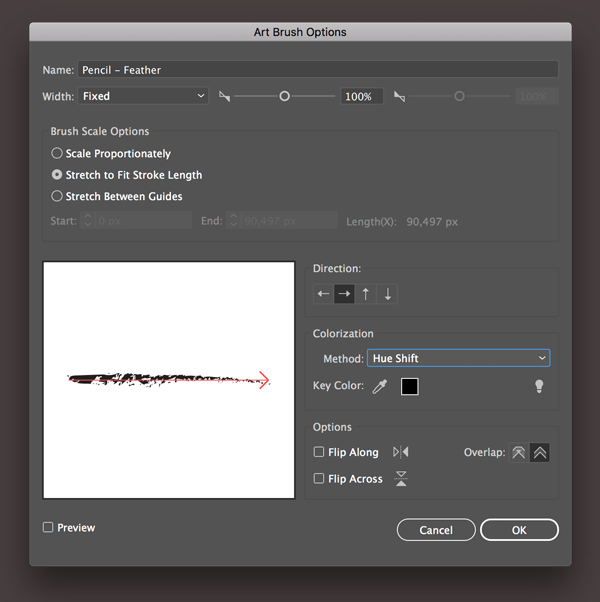
We can double-click the selected brush in the Brushes panel to open the Art Brush Options window and set the Colorization Method to Hue Shift. This way it will be easier to find the desired color. However, if you want the brush stroke to be exactly the same as the fill color of the object, you can go to Object > Expand Appearance and turn our outline into an object. Then we can use the Eyedropper Tool (I) to pick the color from the pumpkin illustration and apply it to the desired object.
Step 11
Now let’s take the Paintbrush Tool (B), select the Pencil – Thick brush and create a light-orange stroke across the pumpkin illustration. Add more strokes, making the pumpkin more detailed.
We can select the eyes and the mouth and press Shift-Control-] to move the objects to the top of the layer, above the lines.
Step 12
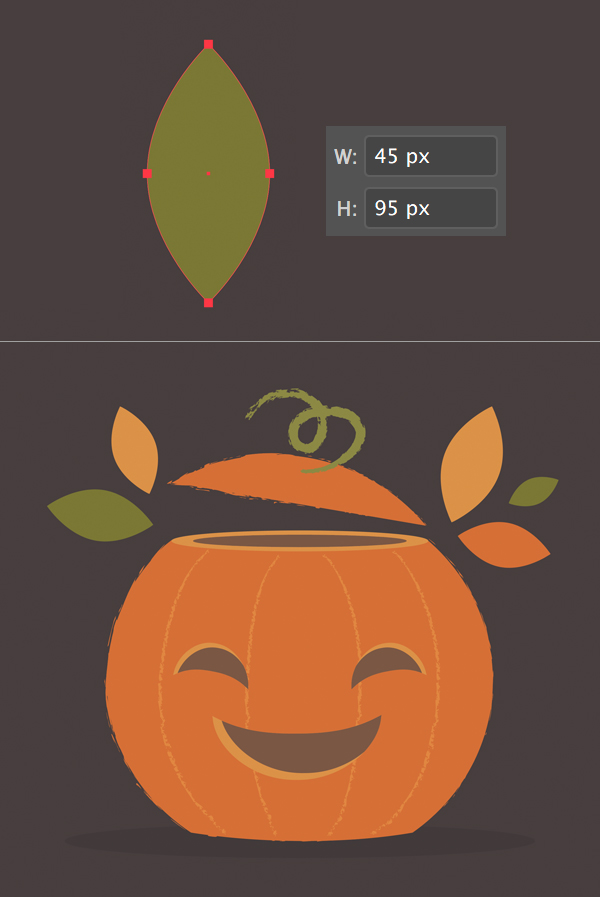
Now let’s add a funny curled stem to the cap. Use the Pencil Tool (N) or the Paintbrush Tool (B) to draw a curl. Apply a Charcoal – Thick brush to the stroke and make it dark-green.

Step 13
Use the Ellipse Tool (L) to create a leaf, using the same technique with the Convert function as we did for the eyes.
Duplicate the created leaf a few times. Rotate, resize and recolor the copies, adding variety to our image.
Step 14
Finish up with the pumpkin by placing an elliptical shadow beneath it. Use the Paintbrush Tool (B) to add some brush strokes above the pumpkin, making it more textured and detailed.
Boo! Our Cheerful Halloween Pumpkin Illustration is Finished!
Great job, guys and girls! I hope you’ve enjoyed following this tutorial and discovered some new tips and tricks that will be useful for your future illustrations!
Happy Halloween!
Author: Yulia Sokolova
2D/3D artist and tutorial instructor, focusing on character creation, icons, lettering design, and illustrations.


Enjoyed every bit of your blog post. Really thank you! Much obliged.
how you select shapes in step 7
Awesome! Thank you!