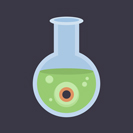
 Are you ready for Halloween? In this tutorial, we’ll be creating a creepy potion bottle with an eye floating inside! We’ll be transforming basic geometric shapes to create a simple yet balanced composition just in 10 steps. Let’s get started!
Tutorial Details:
- Program: Adobe Illustrator CS6-CC
- Difficulty: Beginner
- Topics Covered: Shape Building, Pathfinder Panel, Align Panel, Offset Path
- Estimated Completion Time: 15 Minutes
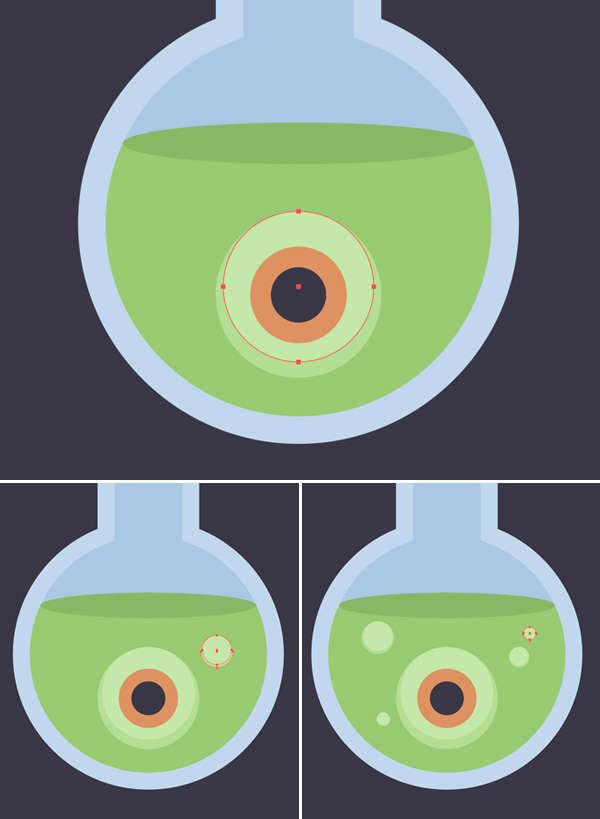
Final Image: Creepy Halloween Potion
Step 1
First of all, let’s take the Rectangle Tool (M) and make a 600 x 600 px dark-purple rectangle for the background.
Then lock the layer with the rectangle and create a New Layer for the potion.
Step 2
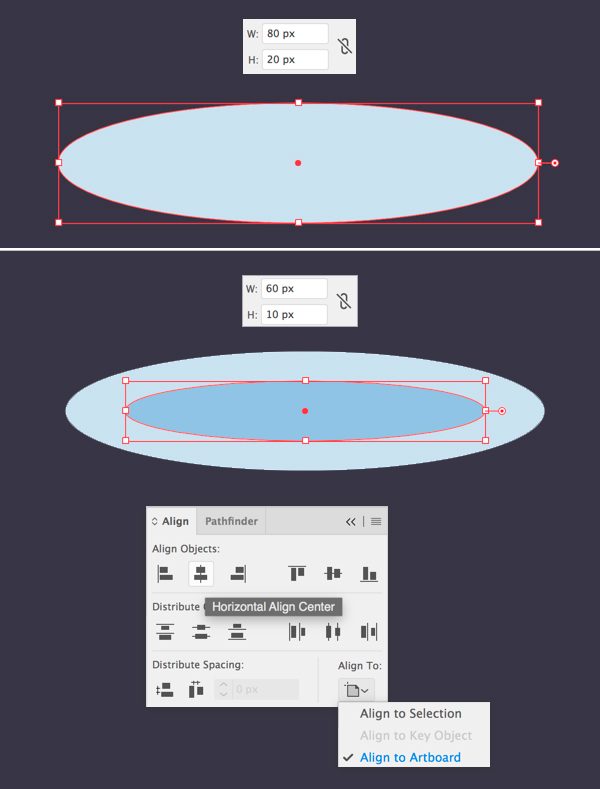
Now switch to the Ellipse Tool (L) and create a 80 x 20 px light-blue oval for the glass vial.
Copy (Control-C) the ellipse and Paste in Front (Control-F). Shrink the copy, making it smaller (60 x 10 px) and make its color darker.
Use the Horizontal Align Center function in the Align panel to center both shapes to the Artboard.
Step 3
Now take the Rectangle Tool (M) and let’s make the bottleneck from a 60 x 75 px rectangle. Use Horizontal Align Center to center all the shapes.
Select the created shape, right mouse click > Arrange > Send to Back or press the Shift-Control-[ keys combination to place the shape beneath the ellipses.

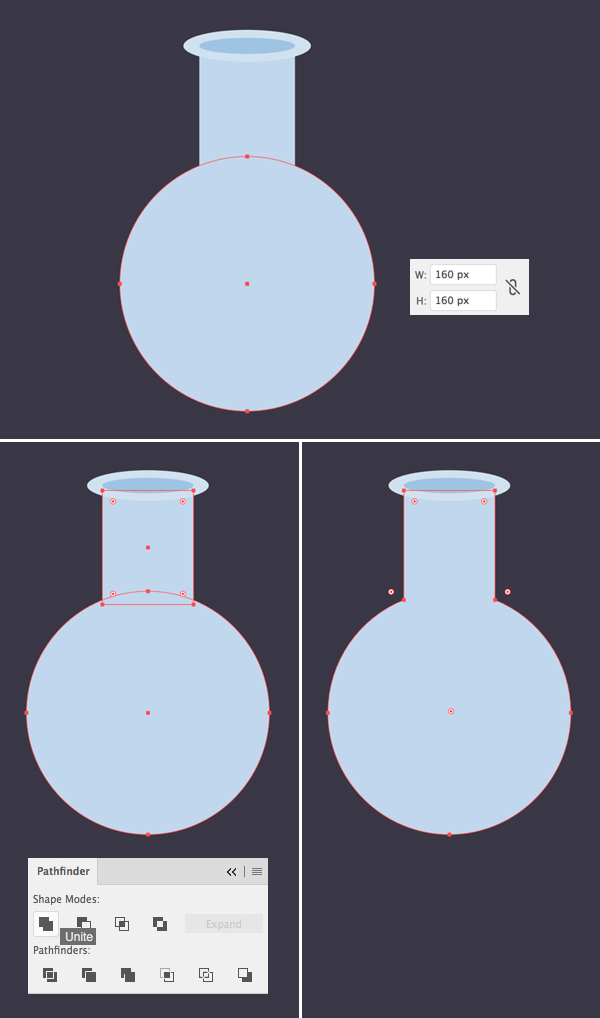
Step 4
Take the Ellipse Tool (L), hold down Shift and let’s make a 160 x 160 px even circle for the body of the vial. Align all the shapes to the center.
Select the circle and the bottleneck and use the Unite function of the Pathfinder to merge both shapes together.
Step 5
Select the shape and go to Object > Path > Offset Path. Set the Offset value to -10 px and leave all other options as default.

Step 6
Make the inner part of the bottle darker. Let’s select its top left and right anchor points with the Direct Selection Tool (A) and drag them up a bit to hide the top part of the shape behind the ovals.

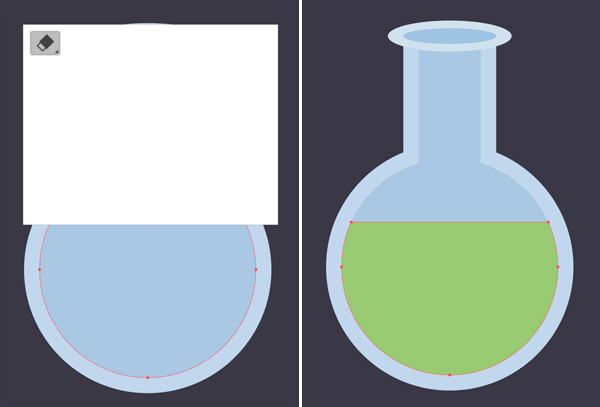
Step 7
Now let’s pour some liquid into the vial!
Copy (Control-C) the inner part of the vial and Paste in Front (Control-F). Take the Eraser Tool (Shift-E), hold down Alt and delete the top part of the copy by covering it with a white selection, as shown in the image below.
Fill the remaining part with green color to depict a gooey potion.
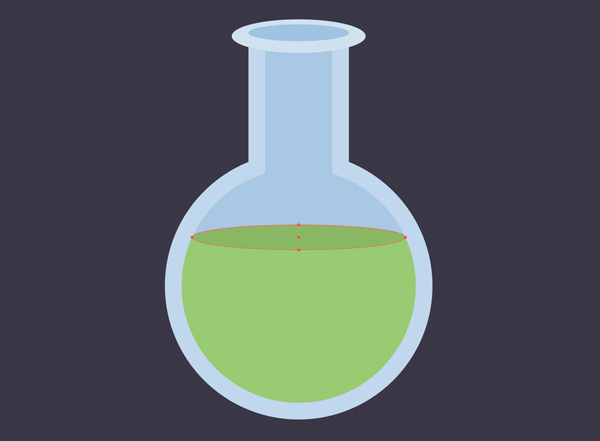
Step 8
Use the Ellipse Tool (L) to create a narrow oval on top of the green shape in order to make the shape look more dimensional. Try to fit the width of the ellipse into the inner part of the bottle, making it match with the green shape.
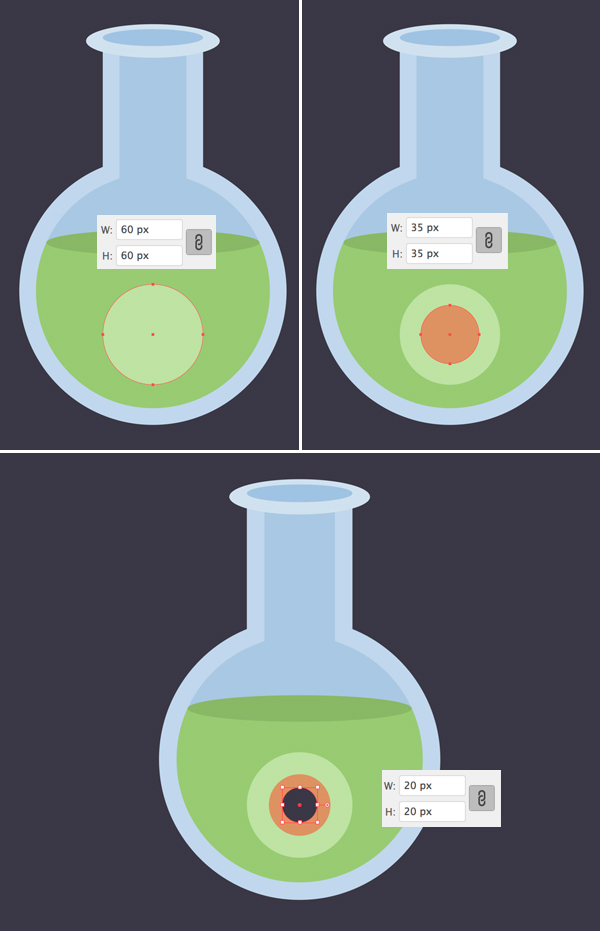
Step 9
Now let’s add a creepy element to our potion!
Hold down Shift and make a 60 x 60 px light-green circle for the eyeball. Duplicate (Control-C > Control-F) the eyeball and make the copy smaller (35 x 35 px). Fill the new shape with orange color for the iris.
Duplicate (Control-C > Control-F) the orange shape and reduce the size of the new copy to 20 x 20 px. Fill it with dark-purple color for the pupil.
Step 10
Let’s duplicate (Control-C > Control-F) the eyeball again and make the top copy somewhat smaller. Move the copy up and make the bottom shape a bit darker, thus forming a gentle shadow to make the eyeball more dimensional.
Now we can group (Control-G) the eyeball and its bottom shadow copy and use it to create some bubbles around the eye. Hold down Alt-Shift and drag the eyeball group to the side, creating a copy. Make more copies and speckle them around the eye, varying its sizes.
Boo! Our Creepy Potion is Finished!
There we have it, guys! I hope you’ve enjoyed following this simple tutorial and learned some new tips and tricks that will help you to create more flat Halloween icons.
Trick or treat! Have fun!


thanks a lot for the tutorial
thanks