
 Summer is here! Let’s enjoy the sunny days by drawing a paradise beach scene in Adobe Illustrator. We’ll be using basic geometric shapes and various tools and functions of the program to depict a seaside with a couple of beach umbrellas and striped towels on a summer card. Let’s get started!
Tutorial Details
- Program: Adobe Illustrator CS6 – CC
- Difficulty: Intermediate
- Topics Covered: Shape Building, Stroke Panel, Direct Selection Tool, Live Corners, Offset Path, Pencil Tool
- Estimated Completion Time: 20 minutes
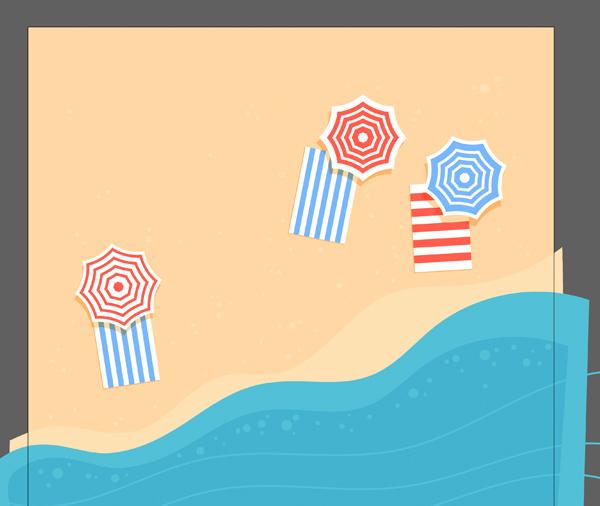
Final Image: Colourful Summer Card

Step 1
Take the Rectangle Tool (M) and let’s create a square, equal to the size of our Artboard (in my case it is 600 x 600 px). Set the Fill color to yellow in the Color panel. This is going to be a sandy beach.

Step 2
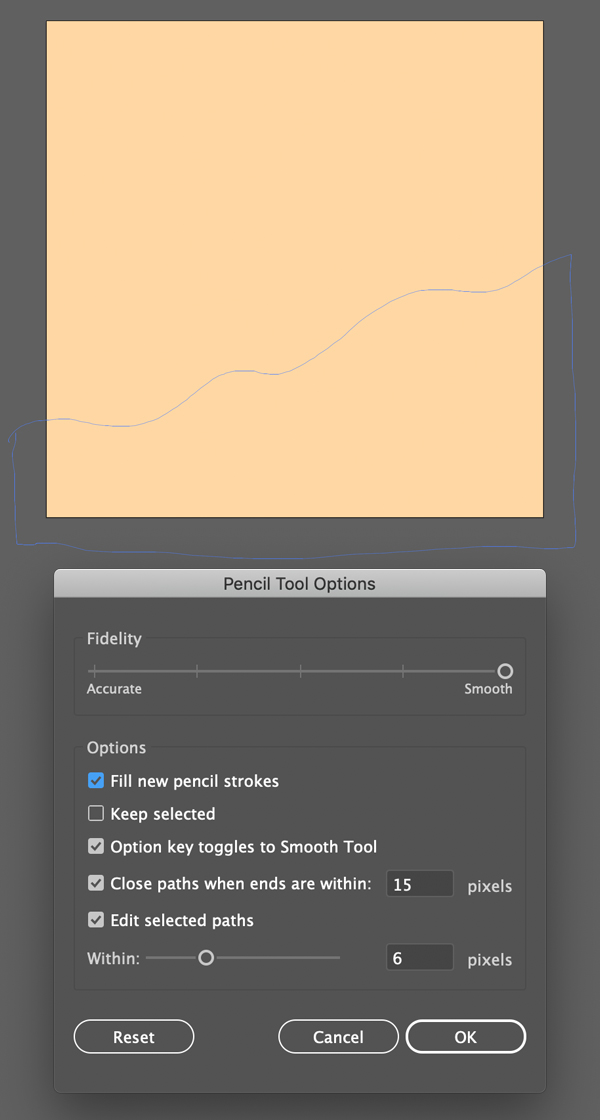
Now we’ll use the Pencil Tool (N) to draw the sea. First of all, let’s check the settings by double-clicking the Pencil Tool (N) icon in the Tools panel. Set the Fidelity to Smooth and check the Fill new pencil strokes option.
Draw a wavy silhouette across the square. Don’t worry if the bottom part doesn’t fit, make it larger than the Artboard. We’re going to fix it further.
If you want to smooth some parts out even more, reducing the quantity of the anchor points along your curve, hold down Alt while working with the Pencil Tool (N) and stroke across the line.
Step 3
Fill the background of the summer card with yellow color, making it slightly lighter than the background.
Then add a few more shapes with a similar silhouette, depicting the sea waves.

Step 4
Now let’s set the Fill color to None and the Stroke color to light-blue in the color panel and draw some more wavy lines across the seam using the Pencil Tool (N). We can adjust the Stroke settings either in the Stroke panel (Window > Stroke) or in the control panel on top. From here we can set the Stroke Weight to 2 or 3 pt and see how it looks.
Use the Ellipse Tool (L) while holding down Shift to create a tiny even circle for the bubble. Speckle more circles along the edge of the wave, creating a stylized sea foam.

Step 5
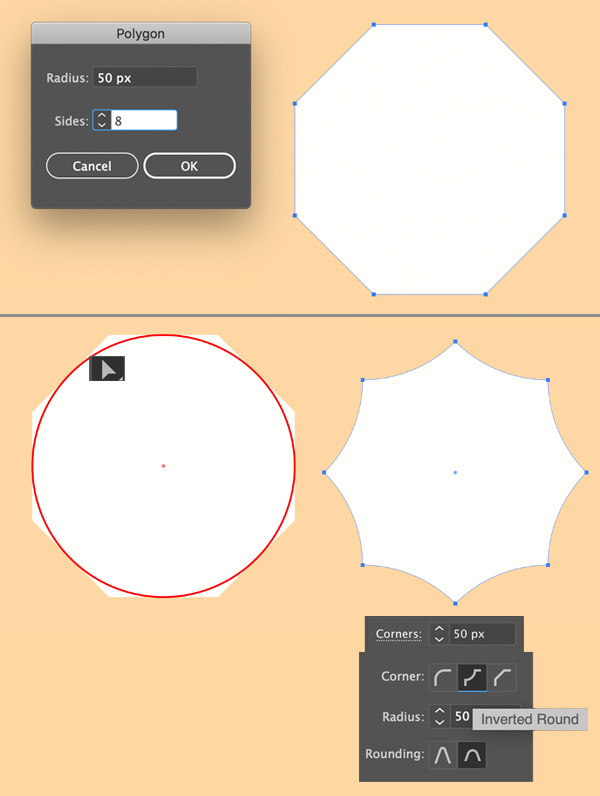
Now we’ll draw a beach umbrella. Go to the Tools panel and double-click the Polygon Tool icon (you can find it in the same drop-down menu as the Rectangle Top (M)). Set the Sides value to 8.
Take the Direct Selection Tool (A) and drag the circle marker of the Live Corners to make the shape fully rounded. Then head to the control panel on top and click the Corners function to open the options menu. Set the corner type to Inverted Round to get a desired umbrella shape.
Step 6
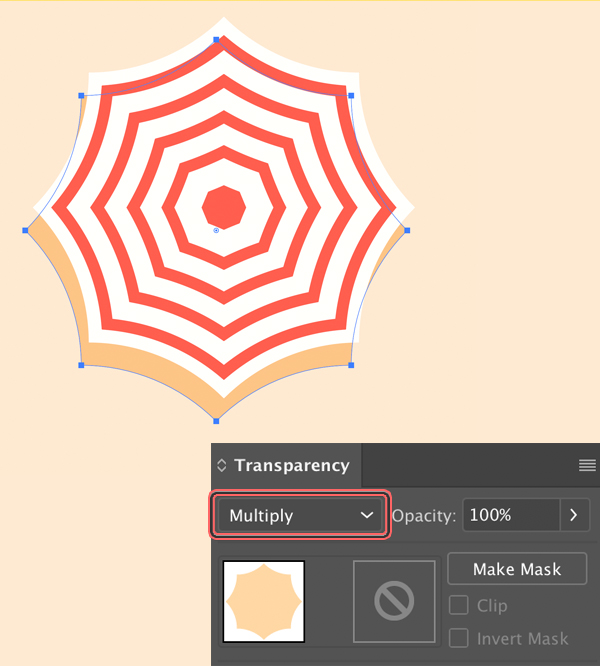
Now let’s add some vibrant stripes. Keeping the umbrella selected, go to top menu: Object > Path > Offset Path and set the Offset value to -5 px, leaving everything else as default. Set the stroke color of the new shape to red and make it thicker.
Create another Offset Path with -8 px Offset value, adding another red stripe. Keep adding more stripes, using the same technique, until you fill the center.

Step 7
Let’s create a semi-transparent shadow under the umbrella.
Copy (Control-C) the white shape and Paste in Back (Control-B). Use the arrow keys to move the copy down and to the side a bit. Fill it with the same yellow color as we have for the sand and set the Blending Mode of the shape to Multiply in the Transparency panel (Window > Transparency).
Group (Control-G) all the elements of the umbrella.
Step 8
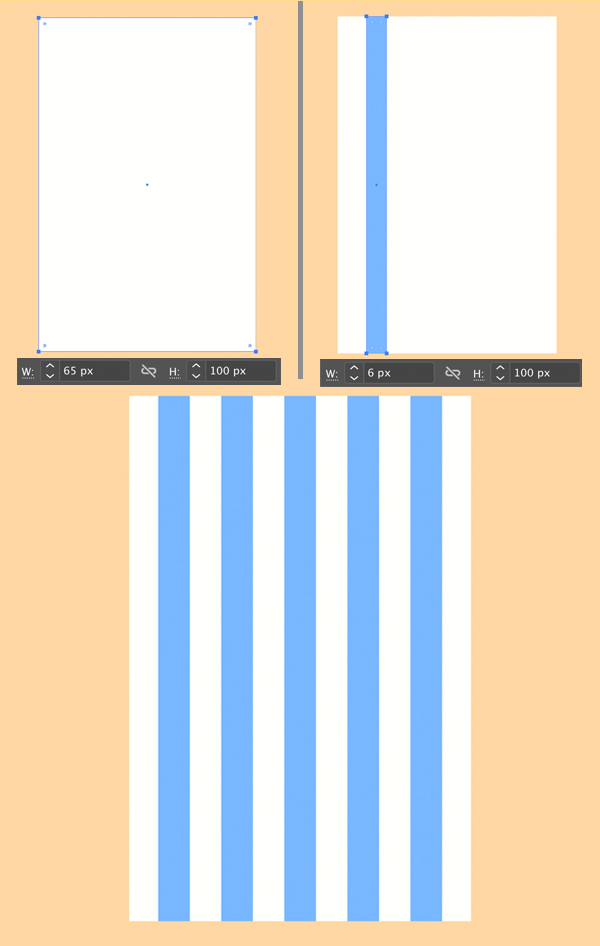
Now we’ll create a simple striped beach towel from a 65 x 100 px white rectangle. Copy (Control-C) the shape and Paste in Front (Control-F). Now shrink the copy from both sides, using the Selection Tool (V) and this way creating a narrow 6 x 100 px stripe. Set its Fill color to blue. Then keeping the stripe selected, hold Alt-Shift and drag it to the side, creating a copy. Press Control-D a few times, repeating the last action and adding more stripes. Group (Control-G) all the parts of the towel.
Step 9
Place the towel beneath the umbrella and add a couple more umbrellas and towels, varying the colours and the position of the stripes.
Step 10
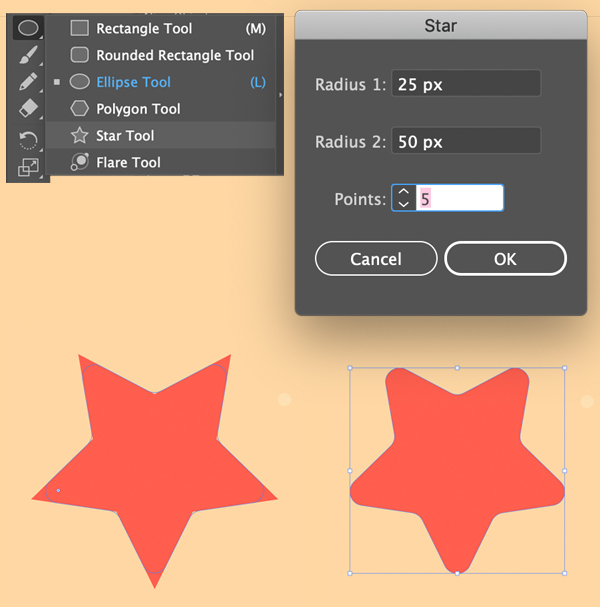
Now let’s create a simple starfish. Find the Star Tool in the Tools panel. Double-click it and set the number of Points to 5.
Draw a red star and use the Direct Selection Tool (A) to make the corners rounded with the help of the Live Corners function.
Step 11
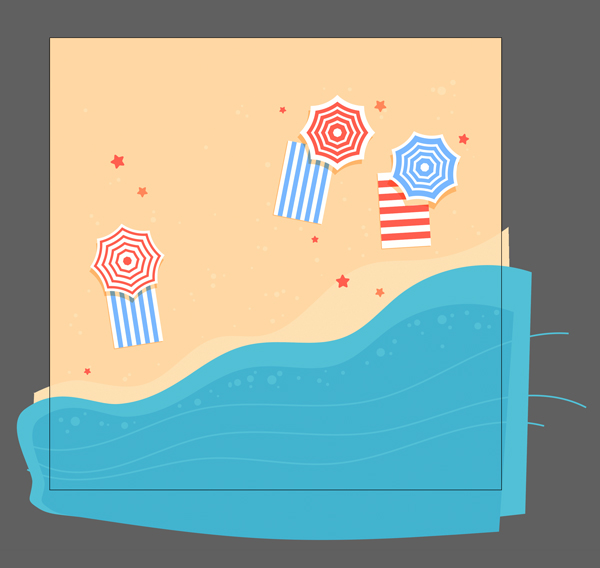
Speckle the stars over the sand, varying the size and color.
Step 12
Now let’s make our summer card perfectly square by hiding the unneeded parts of the objects.
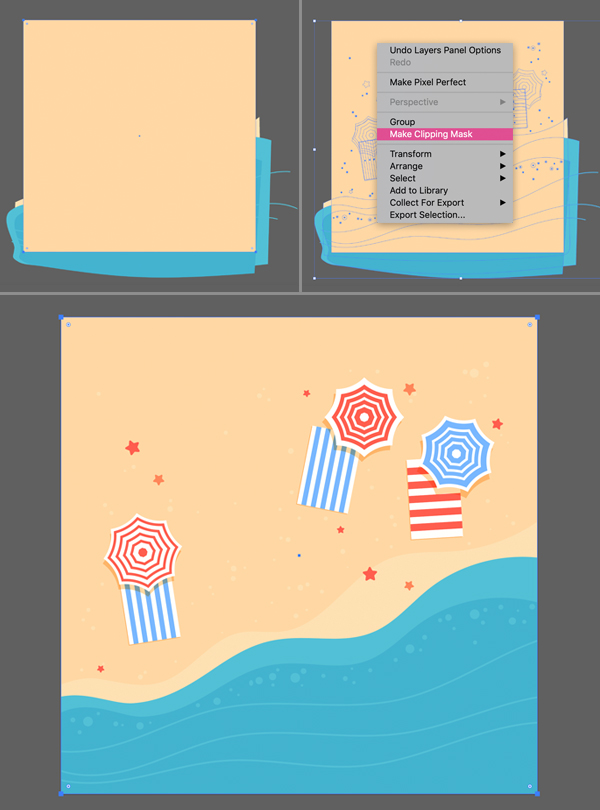
Select the large yellow square that we have in the background and Duplicate (Control-C > Control-F) it. Press Shift-Control-] to Bring to Front.
Select everything (Control-A) and right mouse click > Make Clipping Mask.
There we have it! Now everything that crosses the edges of the rectangle, is hidden inside the clipping mask.
Step 13
Let’s finish up with the summer card by adding some text in the empty place that we have on top. I’m using the Type Tool (T) and a free Peralta font to type some words that fit the composition. Press Control-T to open the Character panel if you want to change some of the settings.
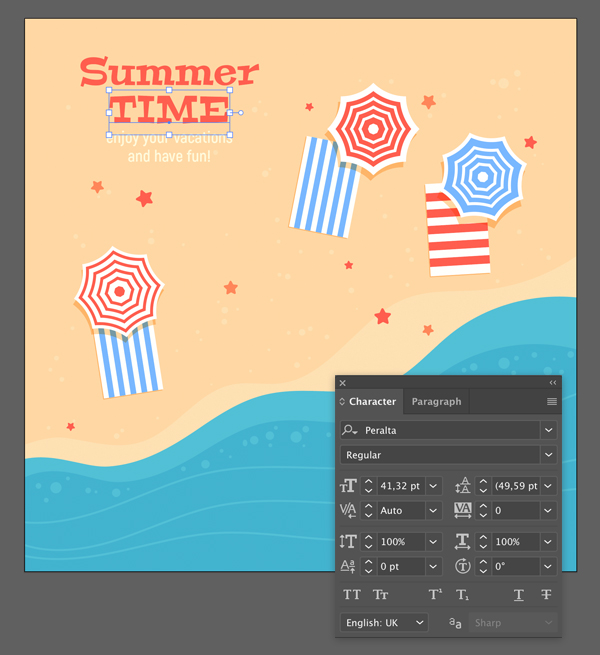
Yay! Our Colourful Summer card is Finished!
Great work! I hope you had fun while following this tutorial and learned some new tips and tricks that will be useful for your future works.
Enjoy the summer vibes!
Author: Yulia Sokolova
2D/3D artist and tutorial instructor, focusing on character creation, icons, lettering design, and illustrations.


Keep up the great work, I read a few content on this site and I believe that your site is very interesting and contains sets of fantastic information.