
 It’s almost Halloween, and to celebrate we’re gonna cook up a fantastically spooky and quite cute Halloween pattern vector made from basic shapes.
Tutorial Details: Cute Halloween Pattern Vector
- Program: Adobe Illustrator CS6 – CC 2015
- Difficulty: Beginner
- Topics Covered: Shape Tools, Pattern Options, Effects
- Estimated Completion Time: 25 Minutes
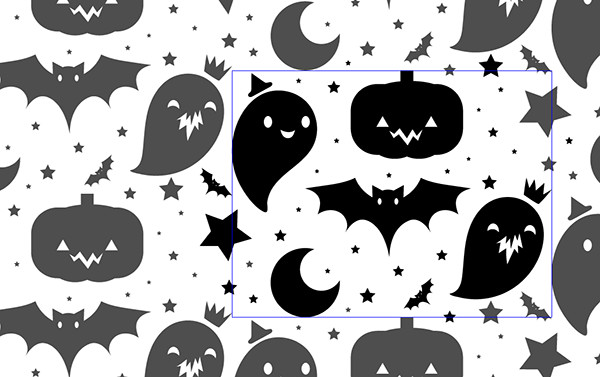
Final Image: Cute Halloween Pattern Vector

Step 1: Cute Halloween Pattern Vector
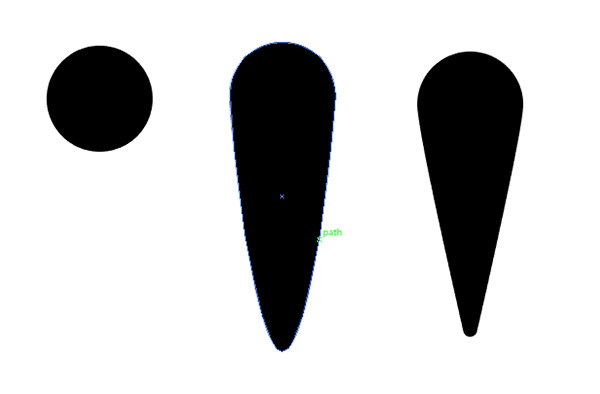
To begin spookifying your Halloween designs with this cute Halloween pattern vector, create a New Document in Adobe Illustrator. Let’s start with a bat. Draw a circle with the Ellipse Tool. Use the Direct Selection Tool to pull the bottom anchor point downward. Adjust the anchor point’s handles as you see fit (or use the Anchor Point Tool to convert it to a point).
Step 2
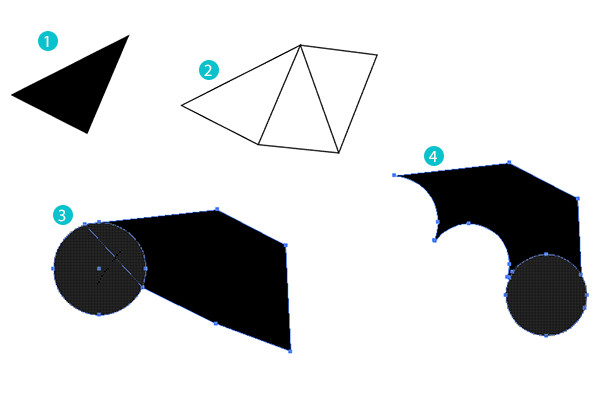
Use the Polygon Tool to draw a triangle. Scale it down it with the Selection Tool and Rotate it to the side. Copy and Paste the triangle and Reflect it over a Vertical Axis. Place each triangle on either side of the elongated circle to form the bats ears.

Step 3
Use the Pen Tool to draw triangles to form the wings. Note the placement of each triangle as you create the bat wing shape. Unite the triangles in the Pathfinder panel. Draw circles and place them on the bottom edge of the wing shape. Either use the Shape Builder Tool to delete the circles from the wing or hit Minus Front (in the Pathfinder panel) with the wing and each circle selected. Clean up any extraneous anchor points or shapes for a cleaner wing shape.
Step 4
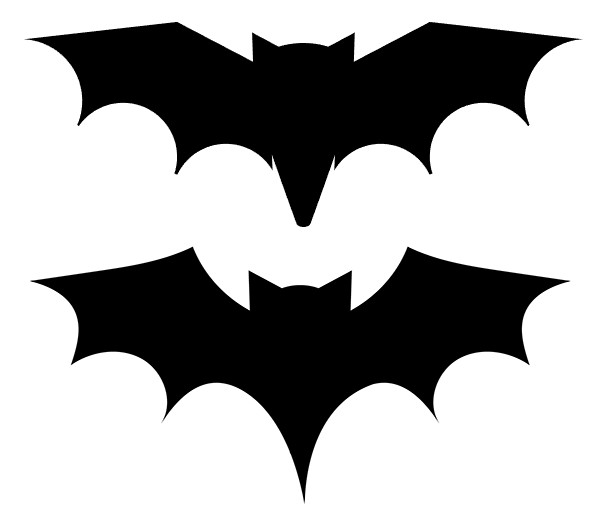
Copy, Paste, and Reflect the first wing to create the second. Place both on either side of your bat. Refine your wing shape with the Pen Tool. Unite your bat components together once you’re satisfied with its overall design.
Step 5
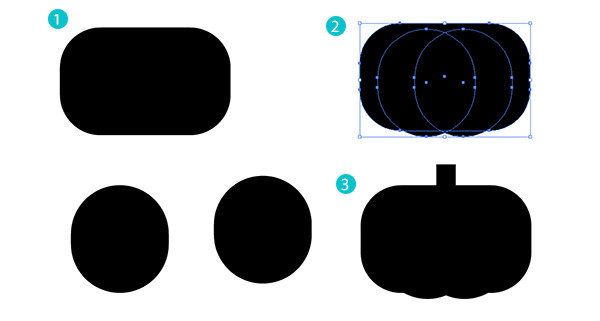
To create a quick and simple pumpkin for our cute Halloween pattern vector, draw a rounded rectangle with the Rounded Rectangle Tool. Adjust its Live Corners as you see fit. Draw two ellipses and place them on the bottom edge of the pumpkin. Unite all three objects together. Draw a small rectangle with the Rectangle Tool in the top center of the pumpkin. Unite it to the rest of the pumpkin.
Step 6
Draw two triangles for the eyes and use the Pen Tool to draw your jack-o-lantern’s spooky mouth. Select all of your components and hit Exclude in the Pathfinder panel to cut the face out from the pumpkin.

Step 7
Use the Pen or Pencil Tool to draw a cute ghost shape. Draw eyes with the Ellipse Tool and Exclude them from the rest of the ghost shape.
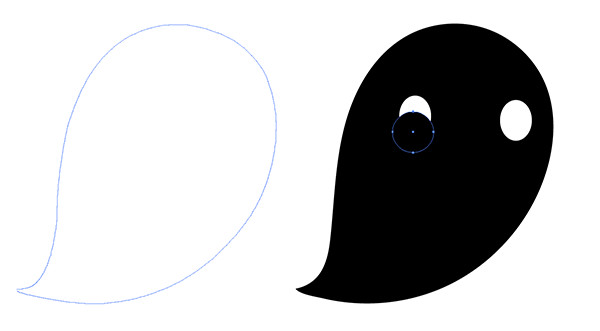
Step 8
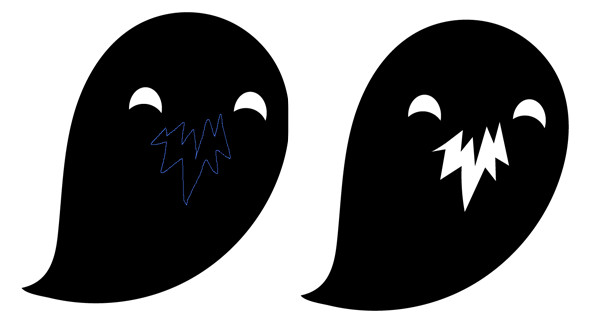
Overlap the lower part of the eyes with two more ellipses and Unite them to the ghost. Draw a fun and spooky mouth, like the pumpkin’s mouth, and Exclude it from the rest of the ghost pbject.
Step 9
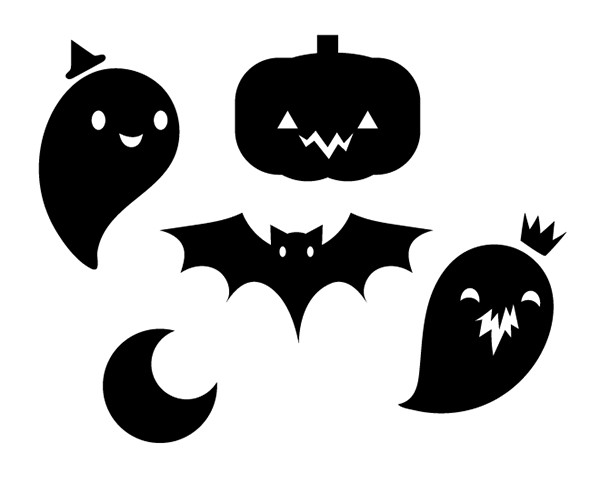
Overlap two circles and hit Minus Front to draw a quick and simple crescent moon. Draw other ghosts and give them fun crowns and hats with the Pen Tool. Scale and rearrange your components as you see fit. We’re going to assemble this into a pattern now.
Step 10
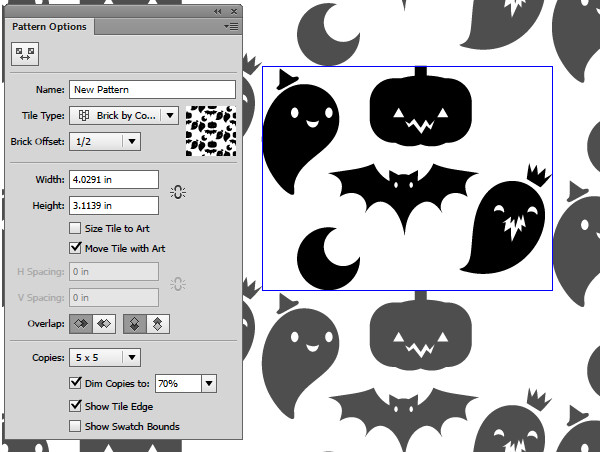
Select your design group and in the Pattern Options panel create a New Pattern. Select Brick by Column for Tile Type. Hit Done to save your swatch in the Swatches panel.
Step 11
Double-Click your newly made swatch and let’s modify it further (we’ll be saving this as a copy when we’re finished). Draw stars and little bats to fill up the space around your pattern components. Feel free to fill in space outside of the pattern’s boundaries so its repeated tiles aren’t so obvious. Save a Copy to your Swatches panel and then hit Cancel.
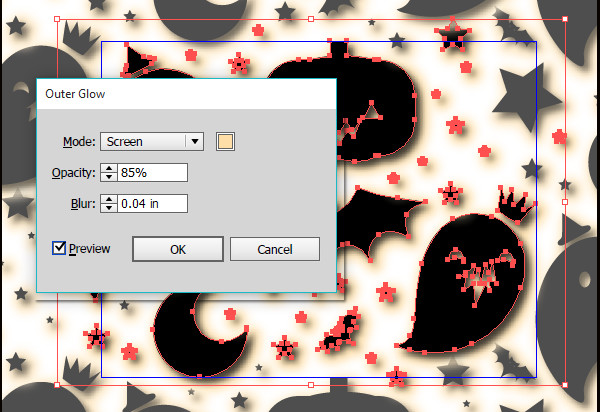
Step 12
Once again, Double-Click your newly made swatch to modify it further. Select every component of your pattern (Control-A) and in the Appearance panel, apply an Outer Glow (Effects > Stylize > Outer Glow) with the following attributes:
Mode: Screen
Color: Light Orange
Opacity: 85%
Blur: 0.04 in (change this as you see fit)
Hit OK and once again, save a copy of the pattern and hit Cancel so you don’t override a previous swatch save.
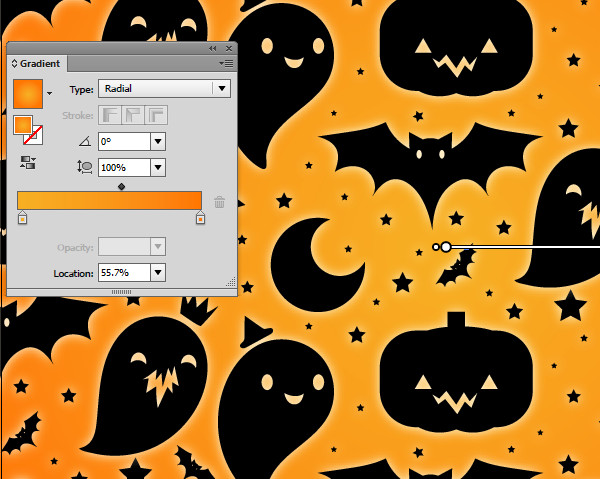
Step 13
Draw a large rectangle over your Artboard and apply your newly made pattern swatch to it. Then, draw another rectangle beneath it and apply a Radial Gradient from the Gradient panel going from light orange to dark orange. Use the Gradient Tool to adjust the gradient’s placement and radius.
Conclusion: Cute Halloween Pattern Vector
Adjust your pattern as you see fit! Creating a fun and cute Halloween pattern vector from basic shapes and tools is incredibly easy. Share your creations, comments, and questions in the comment section below and have a happy Halloween!
Author: Mary Winkler
Mary works under the brand Acrylicana® designing apparel, jewelry, and illustrating for companies like Disney, Jakks Pacific, Envato, and more. Check out Acrylicana.com for more artwork, tutorials, and more.


May I translate this tutorial and repost it?
If you credit it to Vectips and then link back to us, yes, that would be great!