
Since it’s now 2018, I thought it would be nice to kick things off by putting together a little Celebration Icon that you could use in any future projects. That being said, we’ll be using some of Illustrator’s most basic shapes and tools that you probably already work with on a daily basis, so it should be pretty easy to follow me along the process.
Tutorial Details: New Year’s Celebration Icon
- Program: Adobe Illustrator CS6 – CC
- Difficulty: Beginner
- Topics Covered: Compositional Construction, Shape Alignment and Positioning
- Estimated Completion Time: 30 Minutes
Final Image: New Year’s Celebration Icon

Step 1
Let’s start the project by setting up a New Web intended Document by going over to File > New Document (or using the Control-N keyboard shortcut) which we will adjust using the following values:
- Number of Artboards: 1
- Width: 128 px
- Height: 128 px
- Units: Pixels
And from the Advanced tab:
- Color Mode: RGB
- Raster Effects: Screen (72ppi)
- Preview Mode: Default

Step 2
Once we’ve finished setting up our project file, we can start working on the actual icon, by creating the circular background using a 98 x 98 px circle, which we will color using #4BB2B2 and then center align to the Artboard at a distance of 8 px from its bottom edge.
![]()
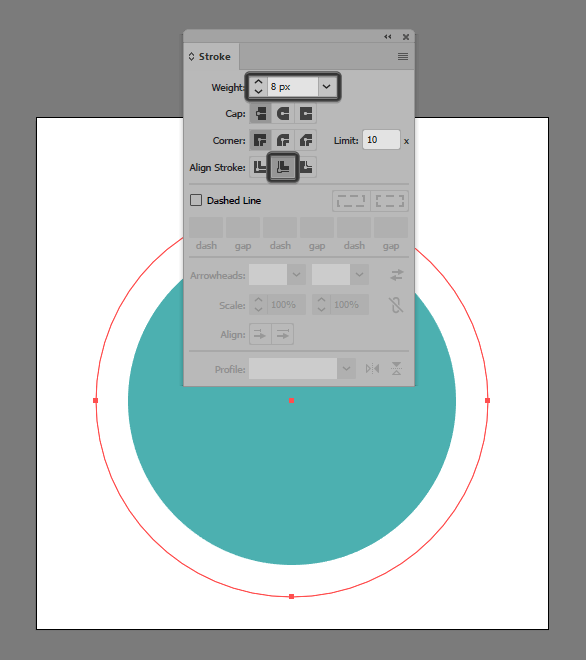
Step 3
Give the shape that we’ve just created an inner highlight using the Stroke method, by creating a copy of it (Control-C > Control-F), which we will color using white (#FFFFFF) and then adjust by flipping its Fill with its Stroke (Shift-X), making sure to align it to the inside, and set its Weight to 8 px afterwards.
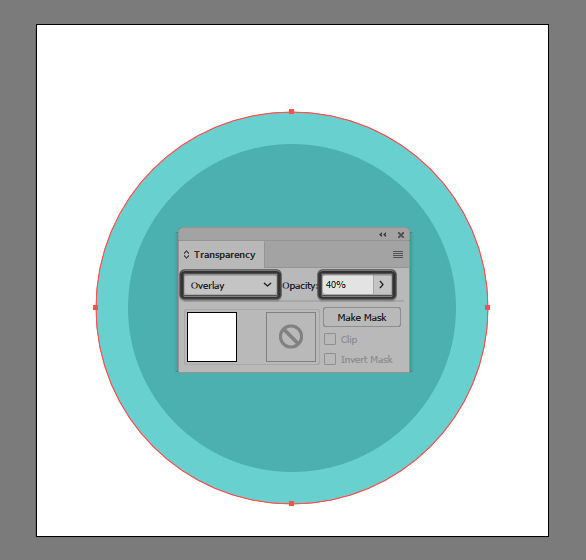
Step 4
Since we want the highlight to be transparent, we’ll have to make a few more adjustments to it, by going over to the Transparency panel and setting its Blending Mode to Overlay, and its Opacity to 40%.
Step 5
Give the circular background an outline using the Stroke method, by creating a copy (Control-C) of its main shape, which we will paste in front (Control-F) and then adjust by setting its color to #302726 and then flipping its Fill with an 8 px thick Stroke (Shift-X). Once you’re done, select and group (Control-G) all the shapes that we’ve created so far so that they won’t get separated by accident.

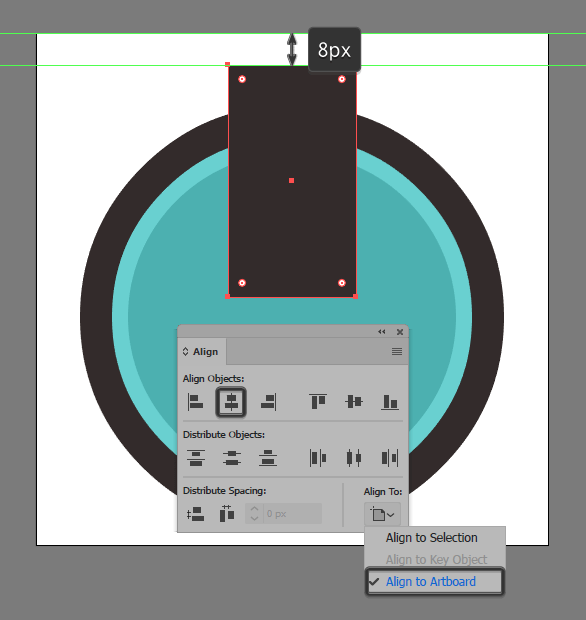
Step 6
Start working on the champagne flute, by creating a 32 x 58 px rectangle, which we will color using #302726 and then center align to the underlying Artboard, at a distance of 8 px from its top edge.
Step 7
Select the shape that we’ve just created, and add a new Anchor Point to the center of its bottom edge using the Add Anchor Point Tool (+), which we will then select, and push to the bottom by 14 px (right click > Transform > Move > Vertical > 14 px).

Step 8
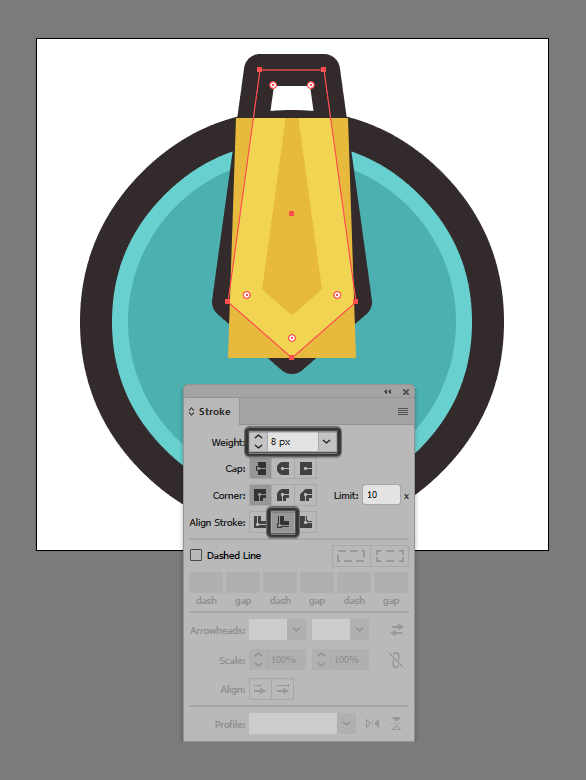
Continue adjusting the current shape, by individually selecting and pushing its top Anchor Points to the inside by 8 px (right click > Transform > Move > Horizontal > + / – 8 px depending on which anchor you start with). Once you’re done, turn the resulting shape into an outline, by flipping its Fill with its Stroke (Shift-X) making sure to set its Weight to 8 px and its Corner to Round Join afterwards.

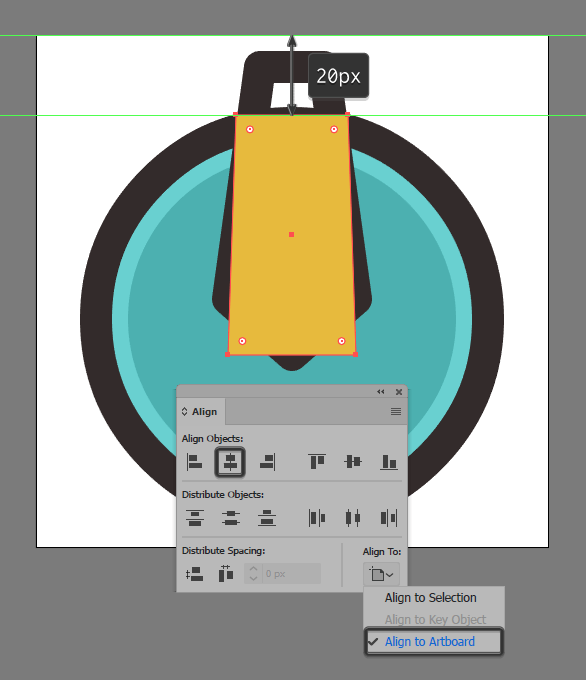
Step 9
Add the liquid section of the flute, by creating a 32 x 60 px rectangle, which we will color using #E8BB3A, and then center align to the Artboard at a distance of 20 px from its top edge.
Step 10
Add the subtle inner facing highlight using a copy (Control-C) of the flute’s main outline, which we will paste on top of the yellow rectangle (Control-F), and then adjust by setting its Stroke’s color to white (#FFFFFF) and aligning it to the inside.Also, since we don’t want the highlight to go outside of the yellow shape’s surface, we’ll have to mask it using a copy of it (select both shapes > right click > Make Clipping Mask).
Step 11
Add an outline to the yellow rectangle that we’ve just created, and then group (Control-G) and mask them using a copy of the flute’s main outline, making sure to position them underneath it afterwards.

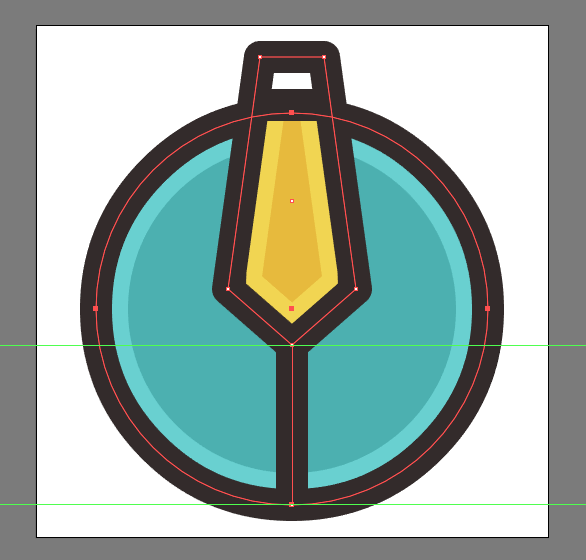
Step 12
Draw in the flute’s leg, using an 8 px thick Stroke with the color set to #302726. Since we’ve created all the outlines using strokes, make sure that you start from the center of the glass’s down facing tip, and end at the center of the background’s outline.Once you’re done, don’t forget to select all the flute’s composing sections and group them together using the Control-G keyboard shortcut.
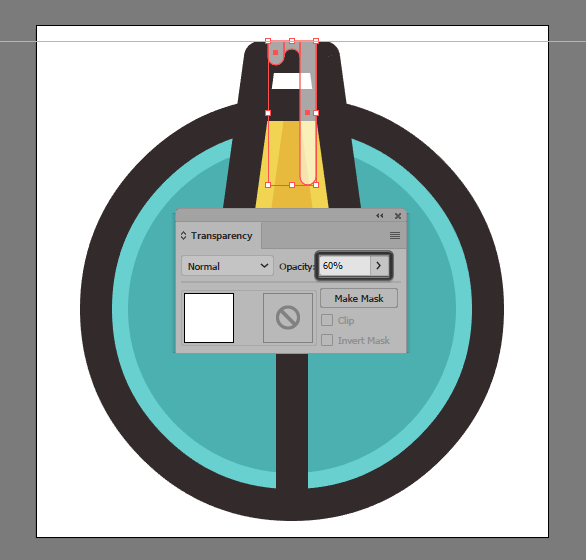
Step 13
Add the dripping champagne foam, using three 4 px wide rectangles (#FFFFFF), with different heights (6 px, 4 px, 36 px), which we will position next to one another, adjusting the roundness of the first and last shape by setting the Radius of their bottom corners to 2 px. Cut out a small 4 x 4 px circle from the center rectangle, and then group (Control-G) and center align the three shapes to the upper edge of the flute, lowering their Opacity to 60%.
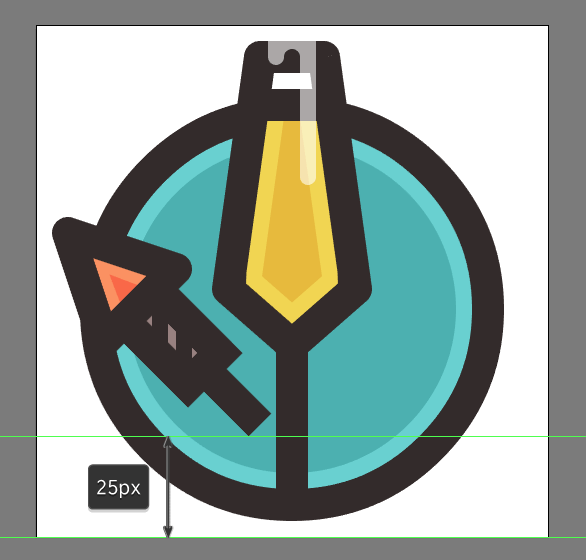
Step 14
Start working on the left firework rocket’s lower body, by creating a 12 x 24 px rectangle, which we will color using #998281, give a nice 8 px thick outline (#302726), two diagonal 4 px thick detail lines (#302726), grouping (Control-G) all its shapes together afterwards. Create the rocket’s tip, using a 26 x 26 px rectangle (#F96846) which we will adjust by adding a new Anchor Point to the center of its top edge, removing the sides ones afterwards. Give the resulting shape a 6 px thick inner highlight (color: white; Blending Mode: Overlay; Opacity: 40%), and an 8 px thick outline (#F96846), grouping (Control-G) and positioning all three shapes on top of the rocket’s body. Draw the little tail using an 8 px thick Stroke (#F96846) and then group (Control-G) and rotate them towards the left at a 45 angle (right click > Transform > Rotate > 45), positioning them onto the left side of the flute.
Step 15
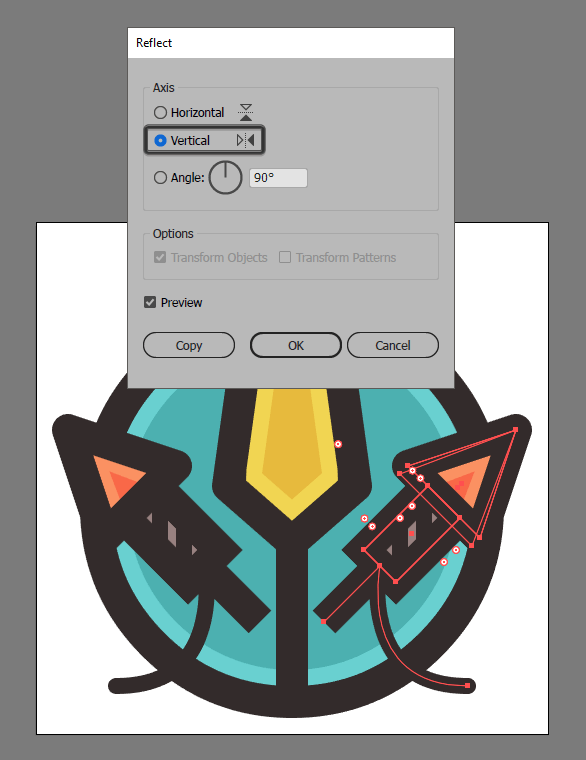
Finish off the rocket, by drawing in the little ignition string using a 4 px thick Stroke with the color set to #302726, and the Cap to Round. Once you’re done, group (Control-G) all of the rocket’s composing sections together, and then create a copy which we will position onto the right side of the flute, making sure to flip it vertically (right click > Transform > Reflect > Vertical) afterwards.
Step 16
Finish off the icon, by adding the little confetti strings, which we will draw in using a 4 px thick diagonal Stroke (#302726) with a Round Cap. Once you have the first line adjust it by going to Effect > Distort and Transform > Zig Zag where you’ll enter 4 px for the Size, and 4 for the number of Ridges per segment, making sure that your Points are set to Smooth.
Expand the resulting shape (Object > Expand Appearance) and then create a copy (Control-C > Control-F) which we will position onto the right side of the flute making sure to flip it vertically (right click > Transform > Reflect > Vertical).
Once you’re done, don’t forget to select all of the icon’s composing sections and group them together using the Control-G keyboard shortcut.
![]()
Happy New Year Everybody!
Nicely done guys! I really hope that you’ve managed to follow each and every step and create your very own New Year’s icon. That being said I hope that 2017 ends up being one of the best for each and every one of you!
Author: Andrei Ștefan
Just another coffee addict / pixel grinder, creating colorful projects one pixel at a time.


