
In today’s tutorial, we’re going to take a quick look behind the process of creating a security icon, and see how we can take some simple shapes and turn them into a finished usable product. So, assuming you already have Figma running in the background, let’s jump straight into it!
Tutorial Details: Security Icon
- Program: Figma
- Difficulty: Beginner
- Topics Covered: Compositional Construction, Shape Alignment, Shape Adjustment
- Estimated Completion Time: 10 Minutes
Final Image: Security Icon

Step 1
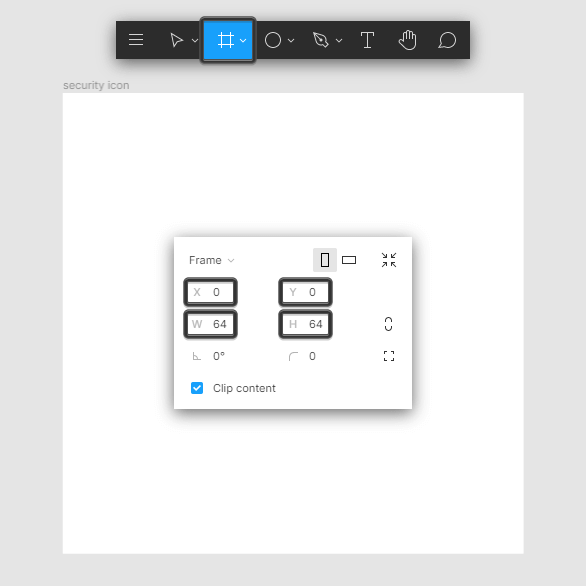
As with every new project, we’re going to kick things off by creating a new Draft, and then setting up a 64 x 64 px frame using the Frame tool (F), naming both the draft and frame in order to have a clear, steady workflow.
Step 2
Start working on the actual icon by creating the main shape for the background, using a 56 x 56 px circle, which we will color using black (#000000), and then position to the center of the frame using the Align horizontal centers (Alt-H) and Align vertical centers (Alt-V) options.

Step 3
We’re going to turn the circle that we’ve just created into a squircle, by first hitting Enter in order to go into vector edit mode, and then individually select its top and bottom anchor points, and reposition their handle’s end points so that you have a distance of 6 px between them and the outer edges of the shape. Take your time, and once you’re done hit Enter again in order to exit vector edit mode.
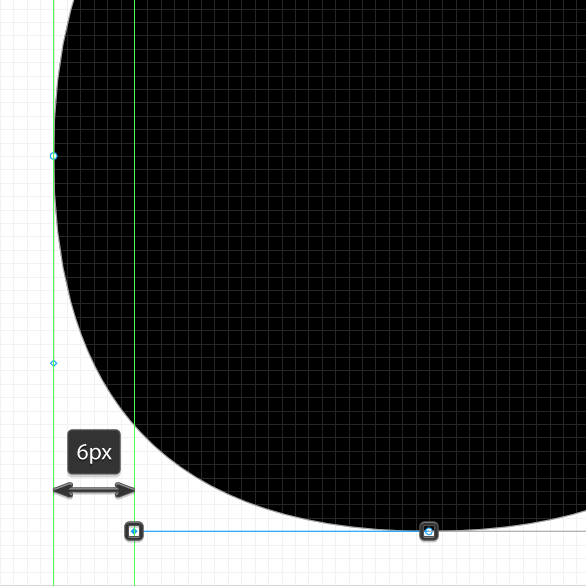
Quick tip: as you can see, if you zoom in close enough, you’ll be able to take advantage of Figma’s pixel grid, which allows you to make fine adjustments as the ones above.
Step 4
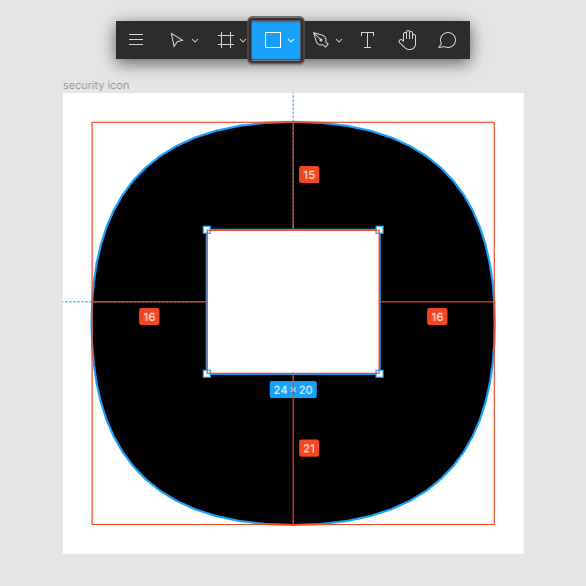
As soon as we have our squircle, we can create the main shape for the shield using a 24 x 20 px rectangle which we will color using white (#FFFFFF), and then horizontally align to the frame (Alt-H), positioning it at a distance of 15 px from the background’s top anchor.
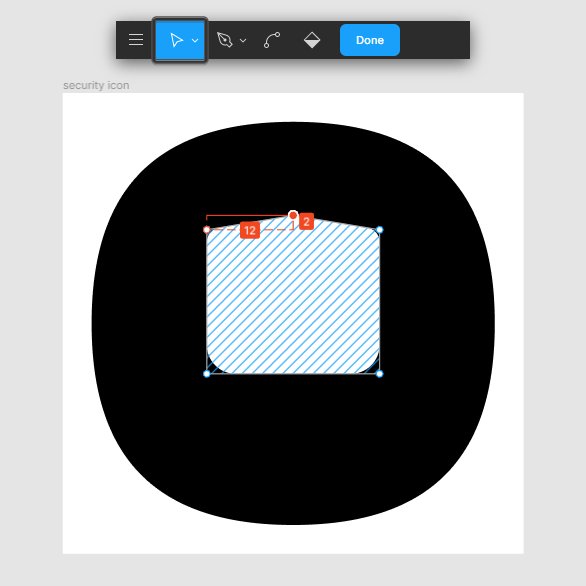
Step 5
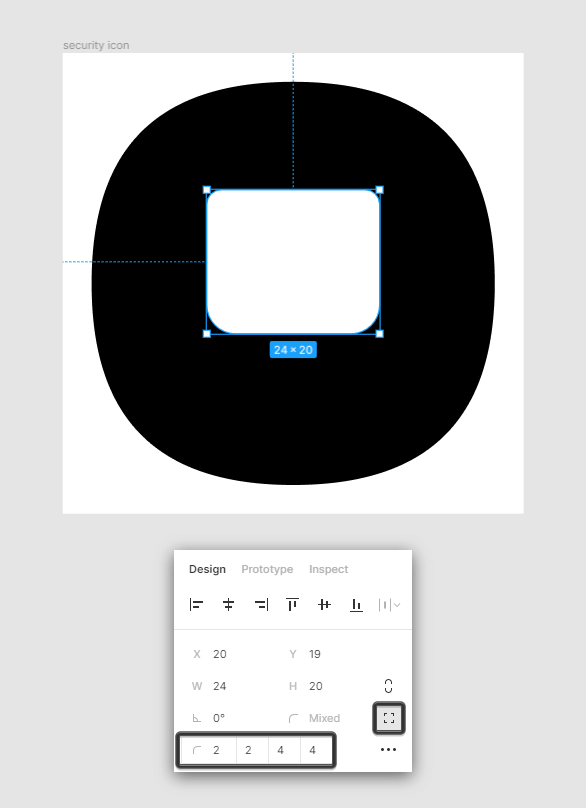
Adjust the shape that we’ve just created by setting the Corner Radius of its top corners to 2 px and its bottom ones to 4 px by first clicking on the Independent corners option from within the right panel, and then entering the specified values.
Step 6
Continue adjusting the shape by going into vector edit mode again using the Enter key, and then clicking on its top path in order to add a new anchor point, which we will then push to the top by a distance of 2 px using the directional arrow keys.
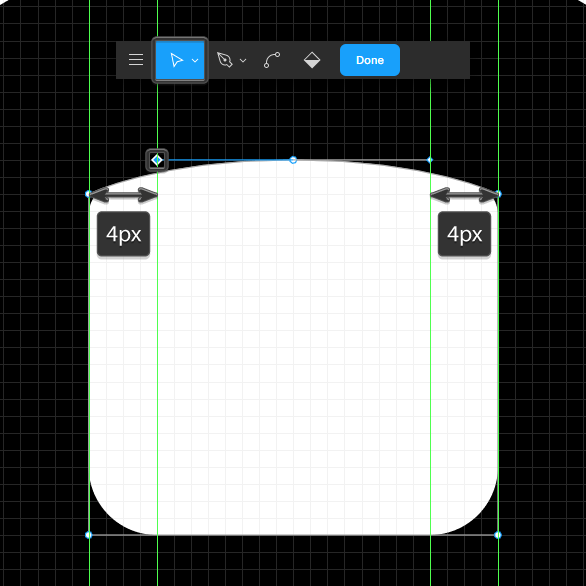
Step 7
Control-left click on the newly created anchor to give a set of handles, and then adjust them position, by dragging and positioning their handles at a distance of 4 px from the shape’s sides.
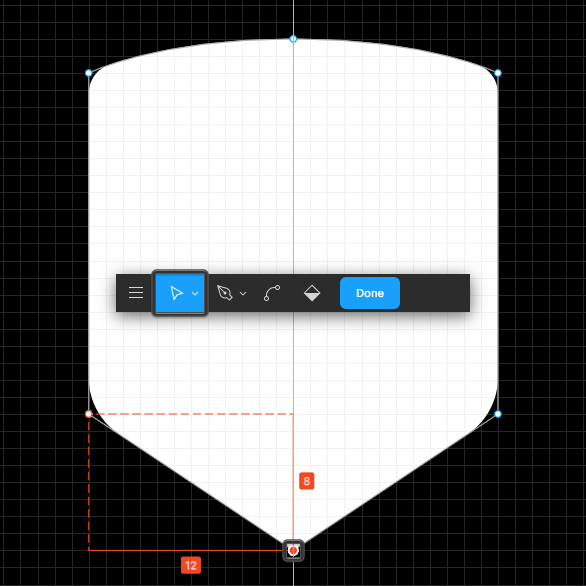
Step 8
Add a new anchor point to the resulting shape’s bottom edge, using the exact some method, making sure to push it to the bottom afterwards by a distance of 8 px.
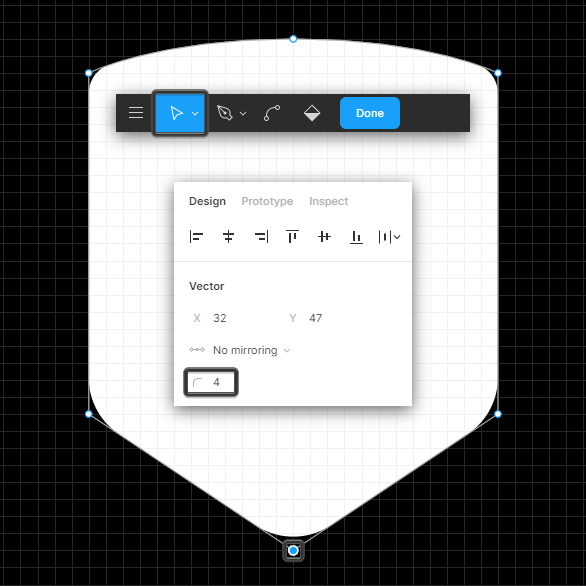
Step 9
Finish off the current shape by setting the Corner Radius for the bottom anchor to 4 px, hitting either Done or Enter in order to exit vector edit mode.
Step 10
Finish off the icon and with it the project itself, by grabbing the Pen (P) and then using it to draw the little checkmark, using a 4 px thick Stroke (#000000) with a Round Cap and Join following the reference image as your main guide. Take your time, and once you’re done, don’t forget to select and group all of the icon’s composing shapes using the Control-G keyboard shortcut.
Great Job!
As always, I hope you had fun working on the project, and managed to learn something new and useful during the process.
That being said, we’re going to continue our Figma series with new projects, so stick around since things are about to get interesting!