 In today’s tutorial we’re going to tackle a somewhat different subject, one that involves health tracking, more precisely we’re going to create a generic Fitness Tracking Smartwatch, using some basic geometric shapes and tools that you already work with on a daily basis.
So, without wasting anymore time, let’s get started!
Tutorial Details: Fitness Tracking Smartwatch Icon
- Program: Adobe Illustrator CS6 – CC
- Difficulty: Beginner
- Topics Covered: Design Theory, Compositional Construction, Shape Alignment, Grid Positioning
- Estimated Completion Time: 25 Minutes
Final Image: Fitness Tracking Smartwatch Icon

Step 1
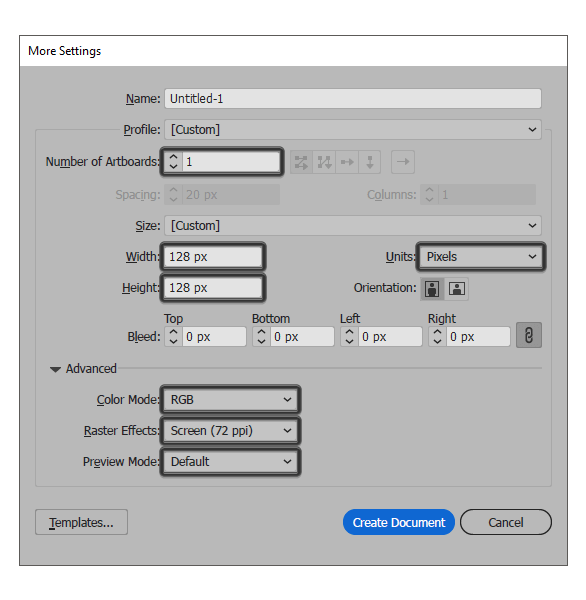
As always, we’re going to kick off the project by setting up a New Document by going over to File > New (or using the Control-N keyboard shortcut) which we will adjust using the following values:
- Number of Artboards: 1
- Width: 128 px
- Height: 128 px
- Units: Pixels
And from the Advanced tab:
- Color Mode: RGB
- Raster Effects: Screen (72ppi)
- Preview Mode: Default
Step 2
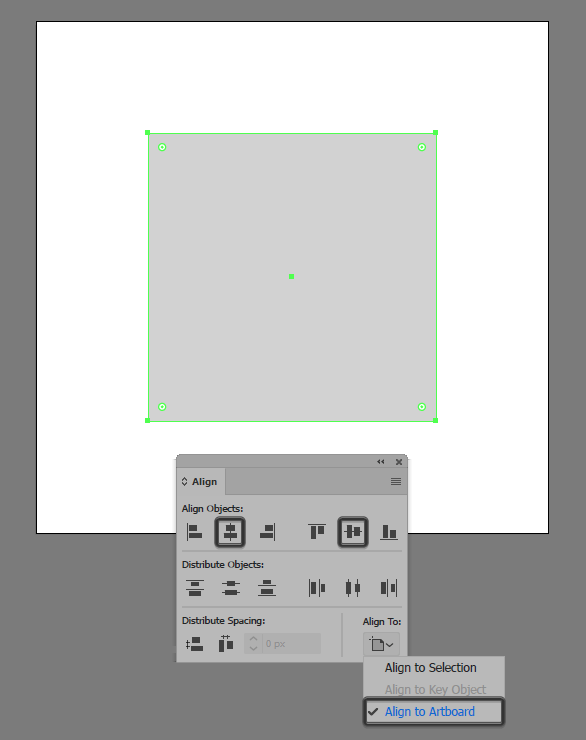
Once we’ve finished setting up our project file, we can start working on the actual icon, by creating the watch’s main shape using a 72 x 72 px rectangle which we will color using #D3D3D3, and then center align to the underlying Artboard using the Align panel’s Horizontal and Vertical Align Center options.
Step 3
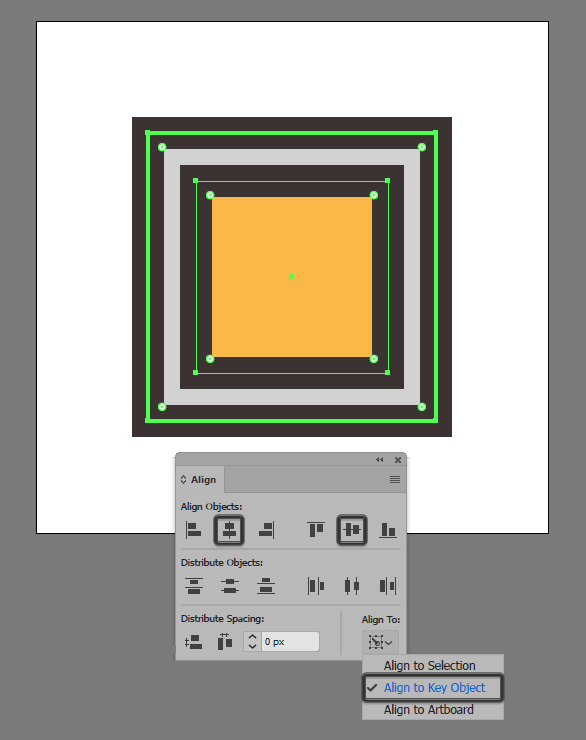
Give the shape that we’ve just created an outline using the Stroke method, by creating a copy of it (Control-C) which we will paste in front (Control-F) and then adjust by first changing its color to #382E2E, and then flipping its Fill with its Stroke (Shift-X) making sure to set its Weight to 8 px afterwards.
Once you’re done, select both shapes and group them together using the Control-G keyboard shortcut.

Step 4
Create the watch’s display using a 48 x 48 px square, which we will color using #F9B946, give an 8 px thick outline (#382E2E) and then group (Control-G) and center align to the larger body.
Step 5
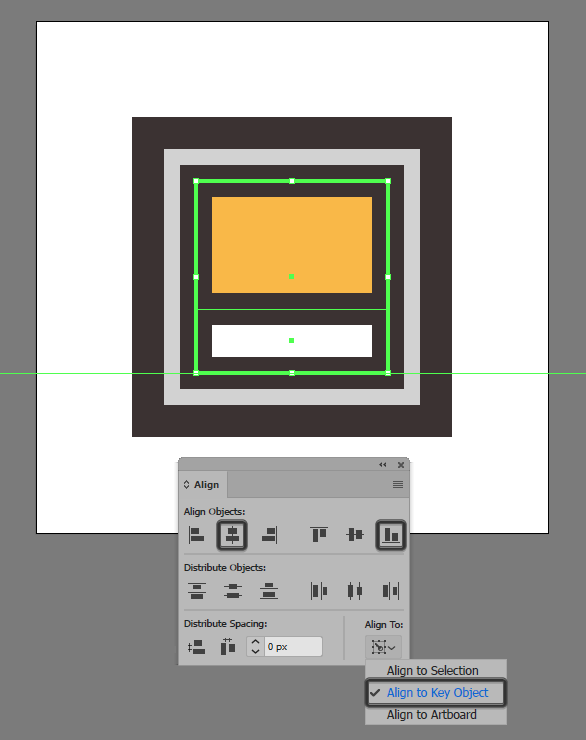
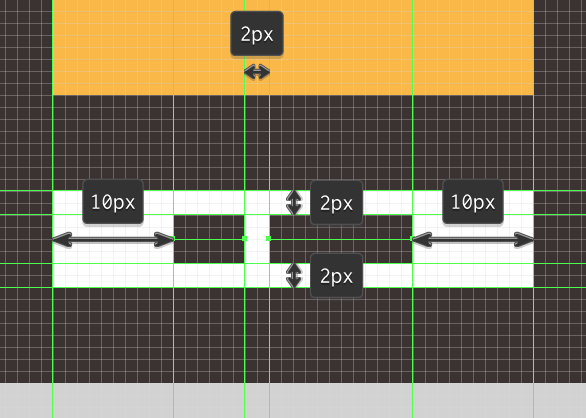
Create the display’s little info card using a 48 x 16 px rectangle (#FFFFFF) with an 8 px thick outline (#382E2E) which we will group (Control-G) and then center align to the yellow square’s bottom edge.
Step 6
Start adding details to the watch’s info card, by drawing in the two little horizontal line segments using a 4 px thick Stroke (#382E2E), which we will then distance at 2 px from one another, grouping (Control-G) and then center aligning them to the underlying white rectangle afterwards.
Quick tip: for this step I recommend you turn on the Pixel Preview mode (Alt-Control-Y) so that you can have full control over the overall length and position of your strokes.
Step 7
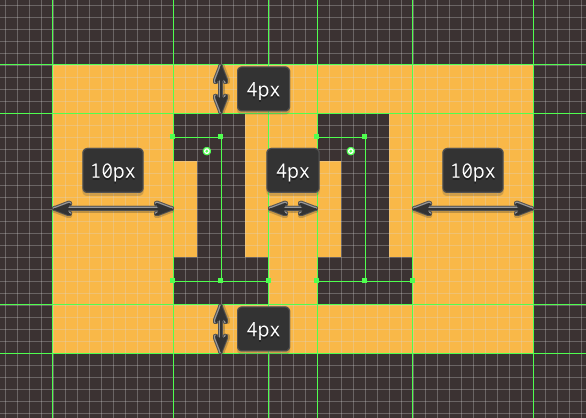
Move a few pixels towards the top, and then start drawing in the first number by creating its base using an 8 px wide 4 px thick Stroke (#382E2E) on top of which we will center align another 12 px tall 4 px thick Stroke (#382E2E) with a 4 px wide extension going outside to its left.
Once you’re done, select and group (Control-G) all three shapes together and then create a copy (Control-C > Control-F) which we will position onto its right side, at a distance of 4 px, grouping (Control-G) and then center aligning both numbers to visible area of the yellow rectangle.
Step 8
Finish off the display by adding a 4 x 4 px square (#382E2E) to the upper right corner of the last number, positioning it so that you end up with a 4 px gap between it and the display’s outline.
Once you’re done, select both the display and its inner elements and group them together using the Control-G keyboard shortcut.

Step 9
Move to the watch’s right side, and add its main button using a 4 x 16 px rectangle, which we will color using #382E2E and then center align to the larger outline’s right edge at a distance of 4 px, selecting and grouping (Control-G) all of the watch’s composing sections afterwards.
Step 10
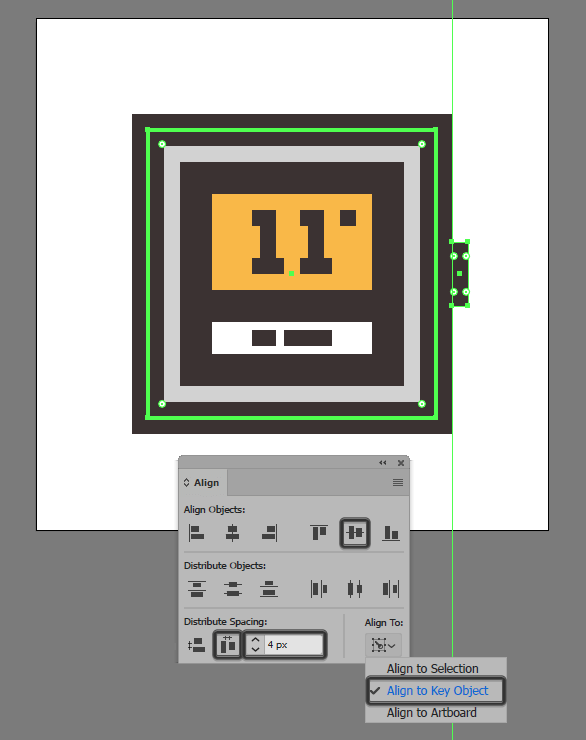
Create the top section of the watch’s band using a 40 x 20 px rectangle (#9B9B9B) with an 8 px thick outline (#382E2E) and a 40 px wide 4 px thick horizontal divider line (#382E2E) positioned to its center, which we will group (Control-G) and then position above the watch’s main body so that their outlines overlap.
Step 11
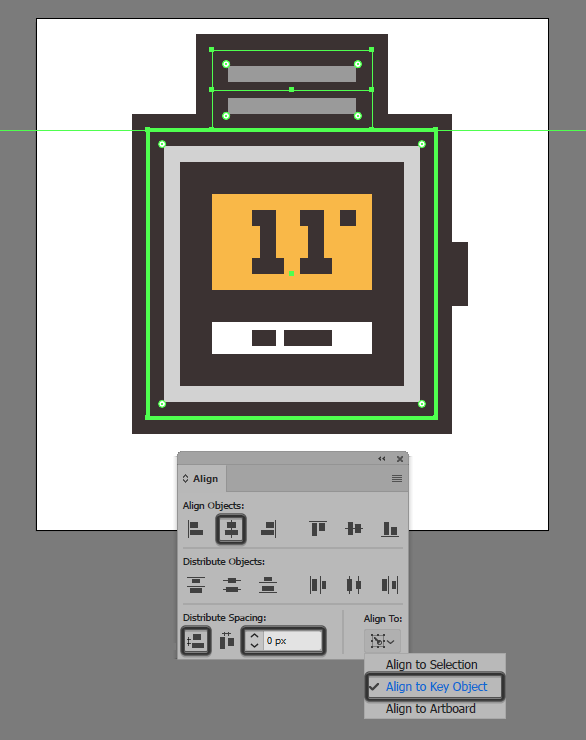
Create a copy (Control-C > Control-F) of the band’s upper section, which we will position underneath the watch’s main body, making sure to remove the little horizontal divider line afterwards.
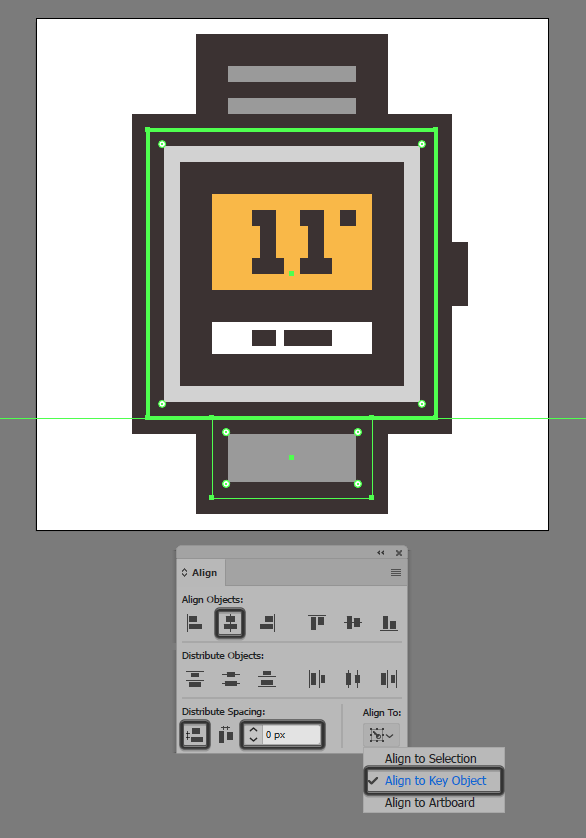
Step 12
Finish off the icon, by adding the little shadow to the bottom section of the watch’s band, which we will create using a 40 x 12 px rectangle (#382E2E) that we will center align to the top edge of the grey fill shape.
Once you’re done, don’t forget to select all of the icon’s composing shapes and then group them together using the Control-G keyboard shortcut.
![]()
Great Job!
Well done guys! As always, I hope that you’ve found the steps easy to follow and most importantly learned something new along the way.
Author: Andrei Ștefan
Just another coffee addict / pixel grinder, creating colorful projects one pixel at a time.


