
In this tutorial we’ll be making a nautical scene with underwater elements. We’ll be using basic geometric shapes as well as creating our own brushes and doing some freehand drawing to create a unique ocean design. Let’s get started!
Tutorial Details
- Program: Adobe Illustrator CS6 – CC
- Difficulty: Intermediate
- Topics Covered: Shape Building, Paintbrush Tool, Blob Brush Tool, Pencil Tool
- Estimated Completion Time: 20 minutes
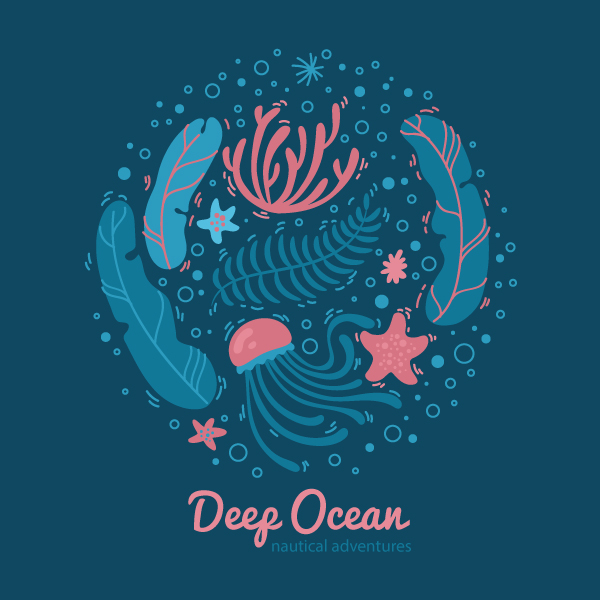
Final Image: Ocean Design
Step 1
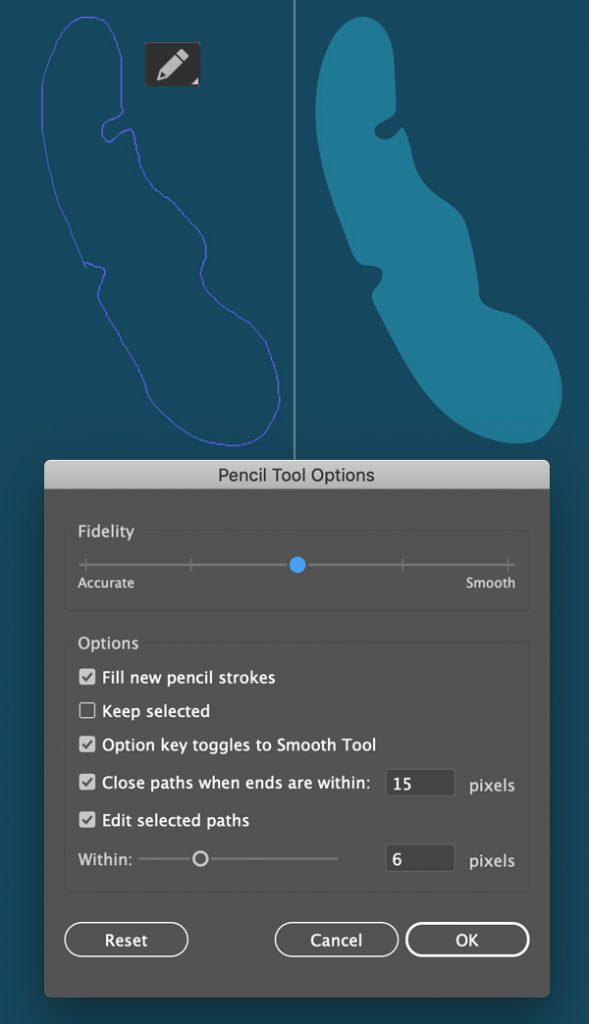
Let’s start with the first element of our ocean design- a seaweed leaf. First of all, let’s adjust the settings of the Pencil Tool (N) that we’ll be using to draw the leaf. Double-click the tool icon in the Tools panel and set the Fidelity slider to about 50%. If you want your lines to be smoother, then move the slider more to the Smooth side. You can see my settings of the Pencil Tool (N) in the image below.
Now draw the desired shape of your leaf. Don’t make it symmetrical, try to make it look more organic. Find some photos of seaweed or tropical leaves if you need visual references.
Step 2
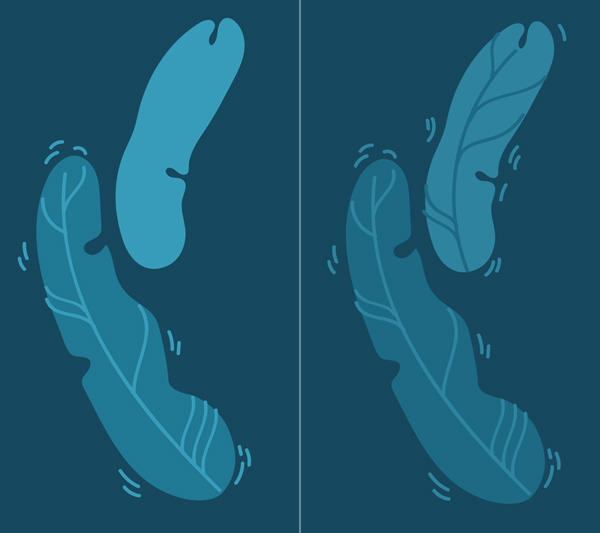
Now we’ll add some details. This time we’ll be using the Blob Brush Tool (Shift-B), so let’s adjust it’s settings as well by double-clicking it’s icon in the Tools panel. Set the Fidelity slider closer to Smooth and set the brush Size to about 2 pt to make thin lines.
Make a stroke to draw a midriff in the middle of the leaf and add some veins as well. Finish up with the leaf by adding small strokes around it.

Step 3
Use the Pencil Tool (N) and the Blob Brush Tool (Shift-B) to draw another leaf next to the fist one. Notice how I’m making the silhouette of the second leaf fit the curved edge of the first leaf. Try to make your elements fit each other as well and fill the empty spaces of the canvas with matching shapes.
Step 4
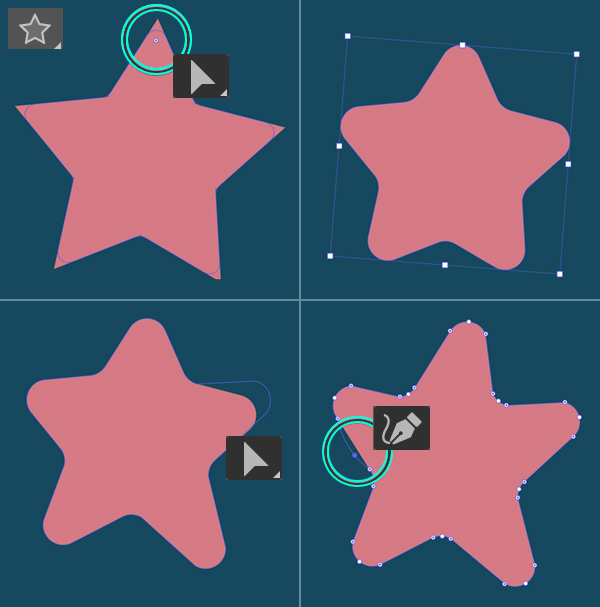
Let’s create a simple starfish from a basic shape. Find the Star Tool in the Tools panel (in the same menu as the Rectangle Tool (M)) and double-click the Star Tool icon to set the number of Points to 5.
Draw a star. You can hold down the Control key while creating the shape to set the length of the beams.
Select the star and switch to the Direct Selection Tool (A). Drag the circle marker of the Live Corners closer to the center to make the corners slightly rounded.
Let’s break the symmetry by varying the length of the star beams. Use the Direct Selection Tool (A) to select the anchor points and drag the beams to make them longer or shorter.
Finally, let’s make the beams look more organic by making them more arched. Use the Curvature Tool (Shift-`) to click and bend the edges.
Step 5
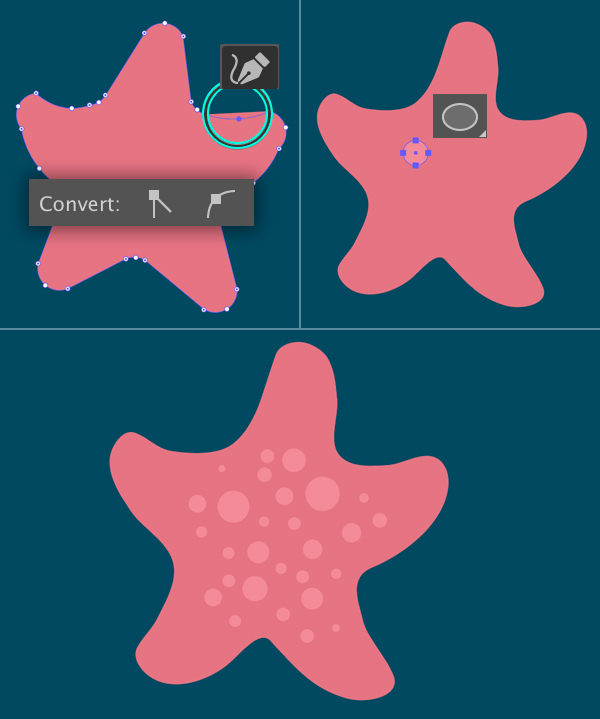
Keep making the beams arched with the Curvature Tool (Shift-`). If some parts of the lines look broken, fix the anchor points by clicking the Convert selected anchor points to smooth in the control panel on top.
Decorate the starfish with circles of different sizes using the Ellipse Tool (L) while holding down the Shift key.
Step 6
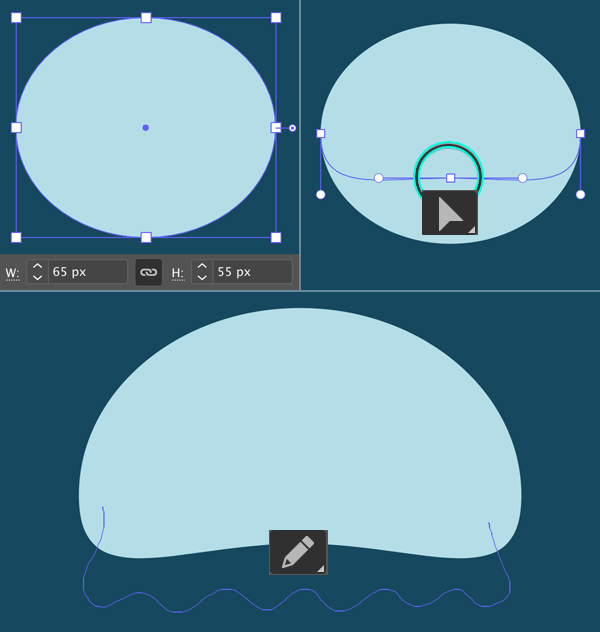
Now let’s depict a jellyfish. Use the Ellipse Tool (L) to make a 65 x 55 px light-blue ellipse. Select its bottom anchor point with the Direct Selection Tool (A) and move it up to make the shape squashed from the bottom.
Use the Pencil Tool (N) to draw a wavy skirt under the shape. Select the created shape and press Shift-Control-[ to Send to Back, beneath the body of the jellyfish.
Step 7
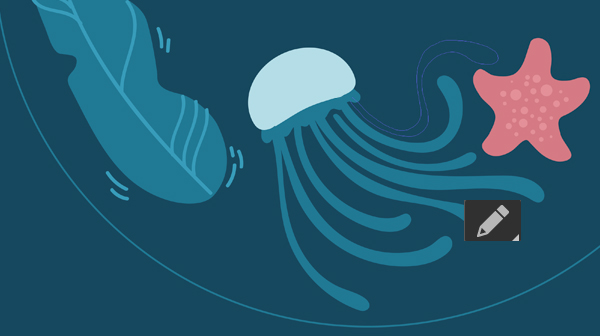
Continue using the Pencil Tool (N) to draw the tentacles. Vary the length of the shapes, make them curved and flowing.
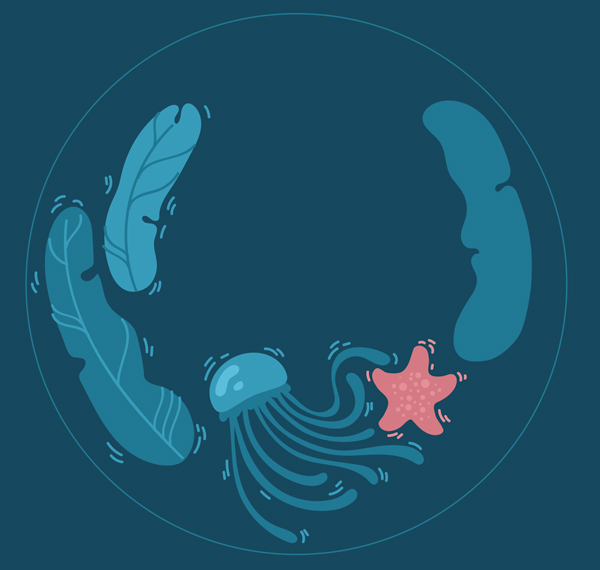
I’ve created a large circle on the canvas to keep all the elements inside of it and to make them fit the overall circular shape. This is why I’m making the tentacles of the jellyfish arched and bent to the side.
Step 8
This is how the whole ocean design composition looks like at this step. I’ve started filling the opposite side with seaweed, making the leaf fit the circular edge.
Step 9
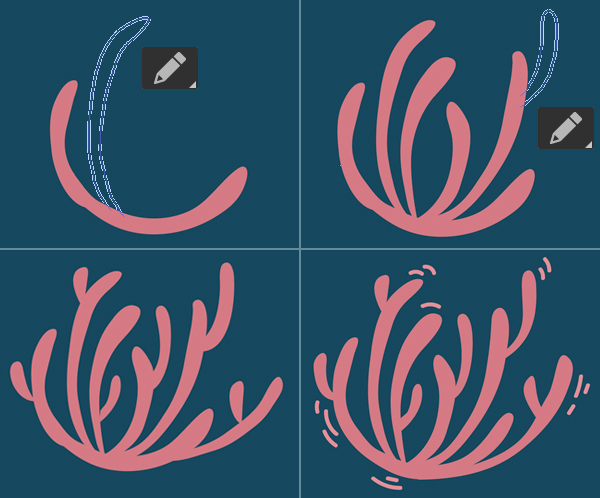
Use the Pencil Tool (N) to draw a stylized coral. Start with the bottom shape by drawing an arched piece and then just keep adding separate «twigs» from big to small. When you’re happy with the overall shape, you can merge everything together by selecting the elements and using Unite in the Pathfinder panel (Window > Pathfinder).
Step 10
Let’s create our custom Paintbrush to draw another piece of seaweed. Start by making a 30 x 11 px ellipse and drag and drop it to the Brushes panel (Window > Brushes). Select Art Brush in the pop-up New Brush window and click OK.
Leave all the settings in the Art Brush Options as default. You can always adjust them later if needed by double-clicking your newly created brush in the Brushes panel.
Now we have a new Paintbrush! Let’s try it out!

Step 11
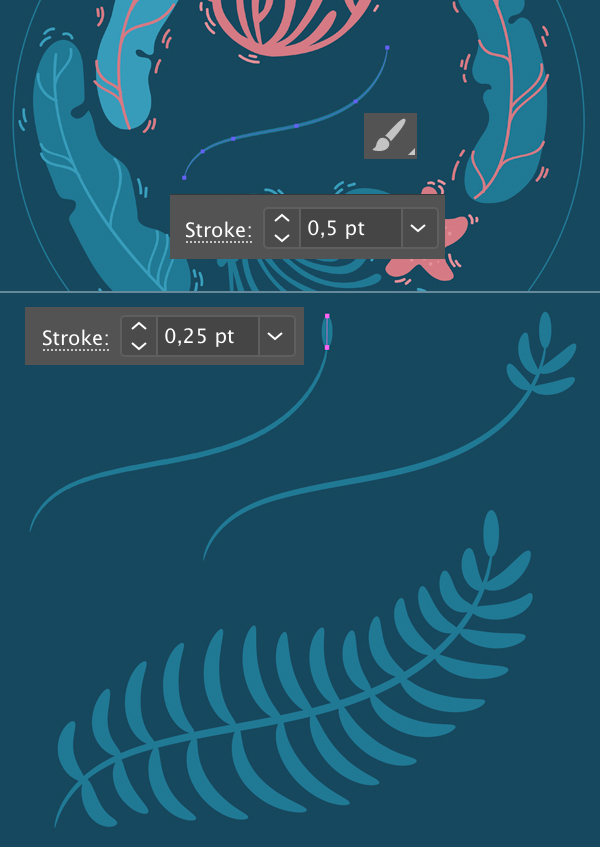
Take the Paintbrush Tool (B) and draw a wavy stem in the center of our composition. Vary the Stroke width to make it look thick enough. You can set this value either in the control panel on top or in the Stroke panel (Window > Stroke). I set it to 0,5 pt for the stem and to 0,25 pt for the leaves.
I also used some photo references of the fern plant to replicate the shape of the leaves for my seaweed.
Step 12
Our ocean design composition is almost finished but we still have some empty spots here and there. Let’s fill them with small elements!
Use the Pencil Tool (N) and the Blob Brush Tool (Shift-B) to draw some underwater plants that look like flowers. And create a couple more star fish with the help of the Pencil Tool (N) and the Ellipse Tool (L). Add any other elements to your taste if you have more empty spots on the canvas.

Step 13
Place the newly created elements inside the circle and fill other empty areas with smaller things like strokes, spots or bubbles. This will make the ocean design composition look balanced and detailed.
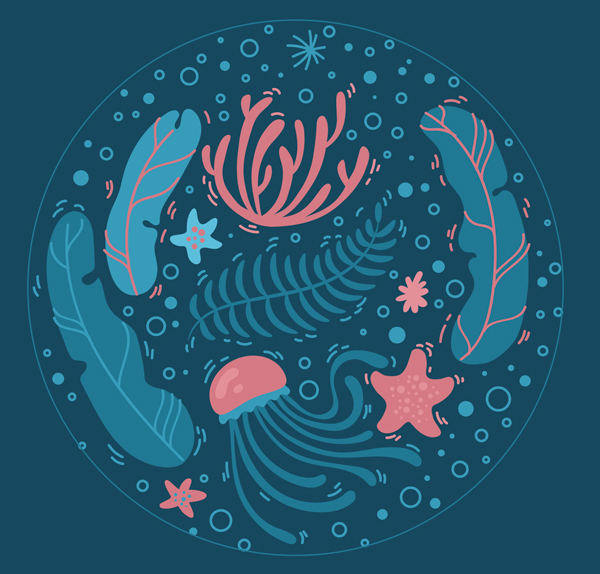
Congratulations! Our Underwater Ocean Design is Finished!
Great work! The ocean design is ready! You can make more circular compositions using similar techniques and create prints for t-shirts, mugs or various apparel.
I hope you’ve enjoyed following this tutorial and learned some new tips and tricks that will be useful for your future projects!
Happy designing!
Author: Yulia Sokolova
2D/3D artist and tutorial instructor, focusing on character creation, icons, lettering design, and illustrations.


