
 Use simple shapes and lines to create a delightful tiny city illustration!
Tutorial Details: Little City Illustration
- Program: Adobe Illustrator CC
- Difficulty: Beginner
- Topics Covered: Basic Shapes, Custom Brushes, Pathfinder Panel
- Estimated Completion Time: 25 Minutes
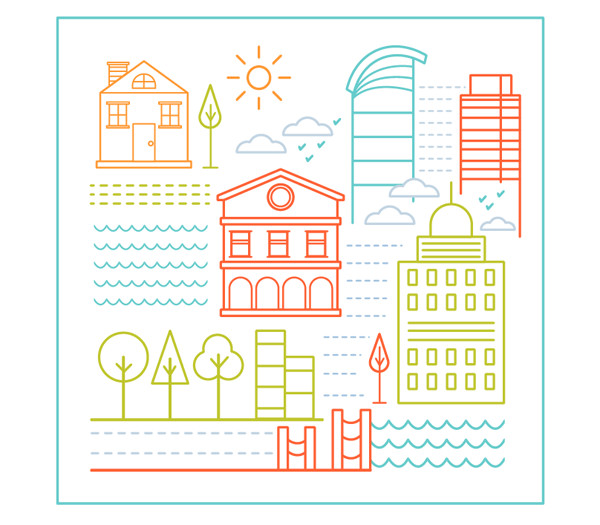
Final Image: Little City Illustration
Step 1: Little City Illustration
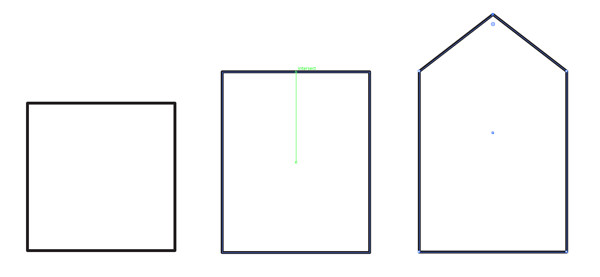
Let’s start this new city illustration with a New Document in Adobe Illustrator. Using the Rectangle Tool, draw a rectangle. I’ve set the fill color to white, stroke color to black, and stroke weight to 4 pts for now. Use the Pen Tool to place an anchor point in the center of the top edge of the rectangle. Then, use the Direct Selection Tool to select the anchor point and pull it upward to create a tiny building with a roof.
Step 2
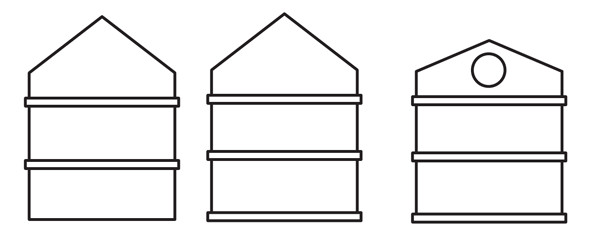
Adjust your building’s shape as you see fit. Draw multiple narrow rectangles and place them over the original building shape in order to give your building a foundation and separate levels. Draw a circle with the Ellipse Tool to add a giant clock or circular window.
Step 3
You can use Object > Path > Offset in order to offset shapes quickly and easily, or simply draw a smaller circle in the first, larger one. For windows and doors, use rectangles, lines, and rounded rectangles. Use Live Corners in order to round out the top edge of each doorway. Group together all of your components once you’re satisfied with your building design.

Step 4
For other building styles, play with rows of small rectangles for windows, sill up space with line segments, or draw half-circles with the Ellipse Tool and Pathfinder panel or round out the top edge of a small rectangle with its Live Corners.

Step 5
A small sun is simple with a circle and eight small line segments placed around the circle Rotated at even increments.

Step 6
to draw little clouds, create three circles with the ellipse tool and Unite them in the Pathfinder panel. Then, overlap a rectangle to cut off the bottom edge of the cloud shape by hitting Minus Front in the Pathfinder panel.

Step 7
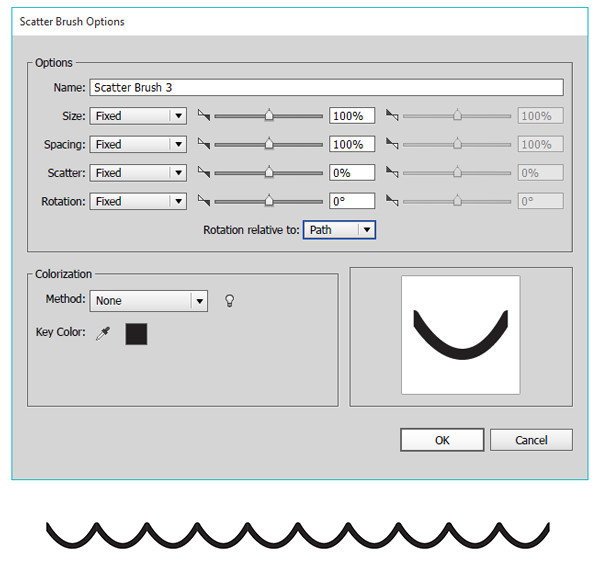
Let’s make a custom scallop brush! Draw a small line segment with the Pen Tool. Make sure the handles are curved and not pointed while you hold down Shift and curve the line segment’s path. Expand the path to an outline (Object > Expand) and use a couple rectangles and the Pathfinder panel to cut off the sides of the scallop (hit Minus Front each time, like we did with the cloud).

Step 8
Select your scallop shape and create a New Brush in the Brushes panel. Choose Scatter brush as the type and make sure its rotation stays Relative to the Path. Apply the brush to line segments and various line paths in order to create tiny oceans or bits of water to fill up space within your composition.
Step 9
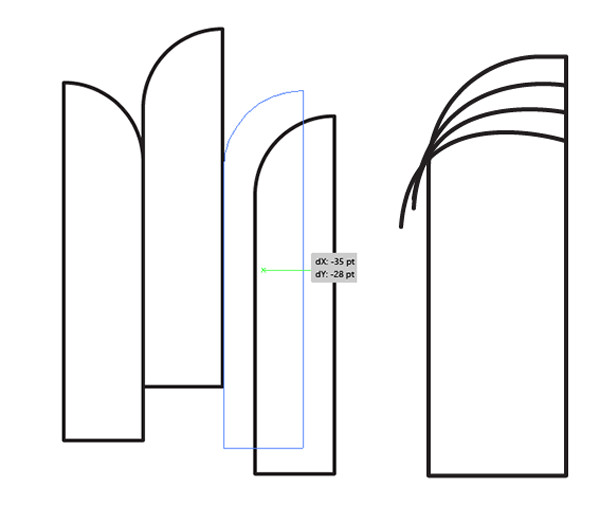
Experiment with other building types and various skyscraper designs for this city illustration. Use curving lines and paths in order to create modern building designs versus everything being made from rectangles.
Step 10
Start to build your composition with buildings, line segments, clouds, and ocean elements. Build your city collage piece into a square formation.

Step 11
You can also set the outlines to the colors of your choice. Use the Recolor Artwork panel (Edit > Edit Color > Recolor Artwork) in order to quickly change the colors of several objects at once. Draw houses, buildings, skyscrapers, and more into your design!

Step 12
Create trees from ovals, circles, triangles, and teardrop shapes. Use line segments in order to draw a trunk and branches for each.

Step 13
Fill up your little city’s space with dashed lines, scallops, trees, buildings, and tiny bridges. Limit your color choices to 3-5 at most for a simple design.

Conclusion: Little City Illustration
Share your completed little city design in the comment section below! What sort of fantastic cities can you create? Consider recreating famous cityscapes or your own city, showcasing a variety of details and landmarks.
Author: Mary Winkler
Mary works under the brand Acrylicana® designing apparel, jewelry, and illustrating for companies like Disney, Jakks Pacific, Envato, and more. Check out Acrylicana.com for more artwork, tutorials, and more.


Pretty! This was an incredibly wonderful post.