
In this tutorial you will learn how to create a semi-realistic Plexiglas® Plate Vector in Adobe Illustrator. You will find out how to add shadows and highlights to your Plexiglas® Plate using different Blending Modes and finally how to create a conical gradient using the Envelope Distort technique. Let’s begin!
Tutorial Details: Plexiglas® Plate Vector
- Program: Adobe Illustrator CS5 – CC
- Difficulty: Beginner-Intermediate
- Topics Covered: Gradient Tool, Basic Tools and Effects, Transform techniques and the Appearance panel
- Estimated Completion Time: 45 minutes
Final Image: Plexiglas® Plate Vector
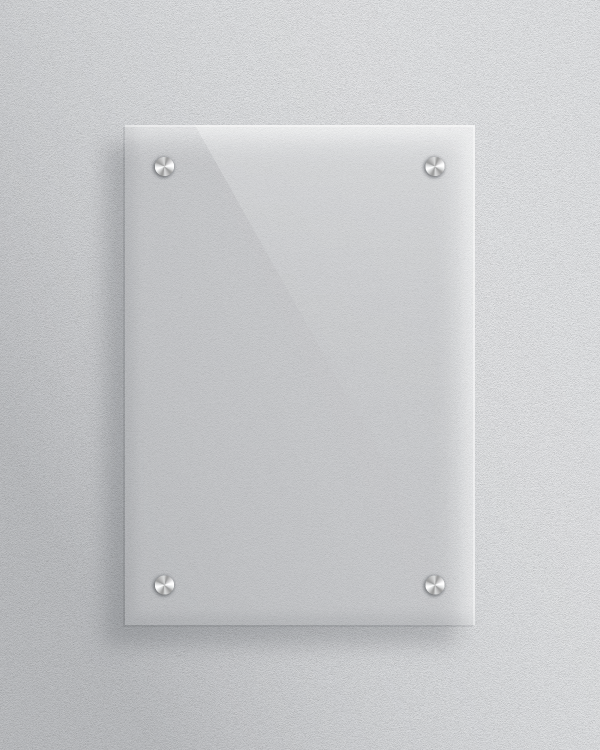
As always, this is the final Plexiglas® Plate Vector that we’ll be creating:
Create a Plexiglas® Plate Vector
Step 1
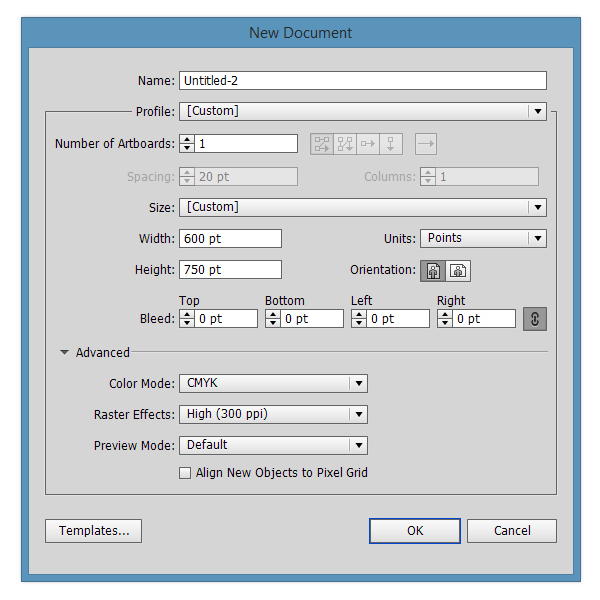
Open Adobe Illustrator and create a new document (Ctrl + N). Select CMYK Color Mode, 300 DPI Raster Effects and make sure that Align New Objects to Pixel Grid is unchecked.
Next, go to Edit > Preferences > General and set the Keyboard Increment to 1px.
Step 2
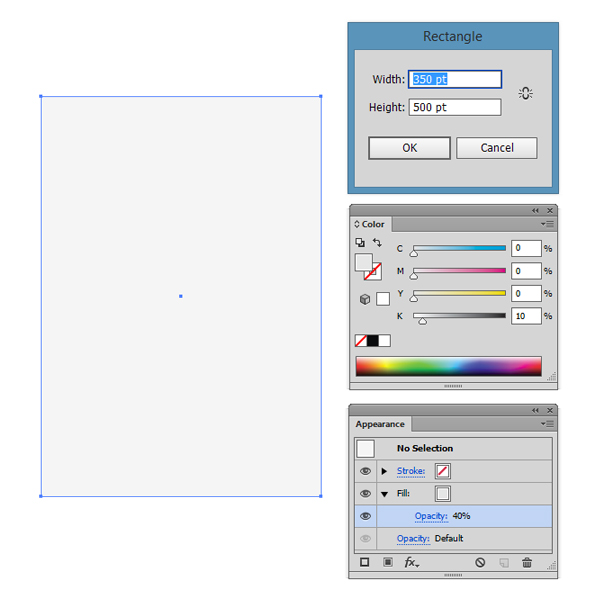
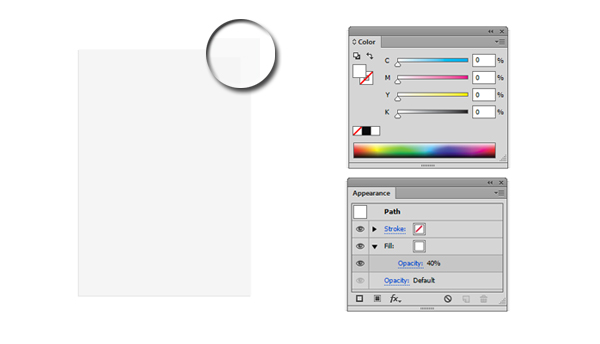
Pick the Rectangle Tool (M) and draw a 350 x 500 rectangle. Fill it with C=0 M=0 Y=0 K=10. Focus on the Appearance Panel, select the Fill and set the Opacity to 40%.
Step 3
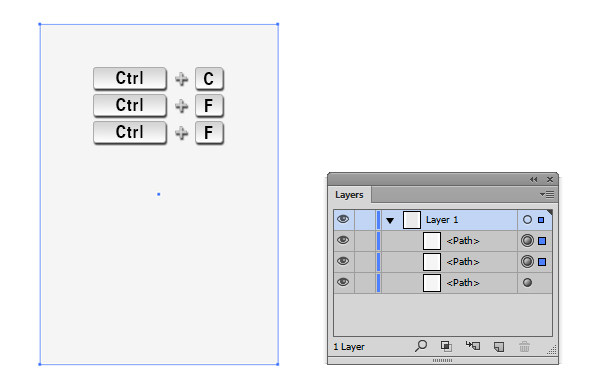
Select the rectangle we’ve previously created and make two copies in front of it (Ctrl + C > Ctrl + F > Ctrl + F).
Step 4
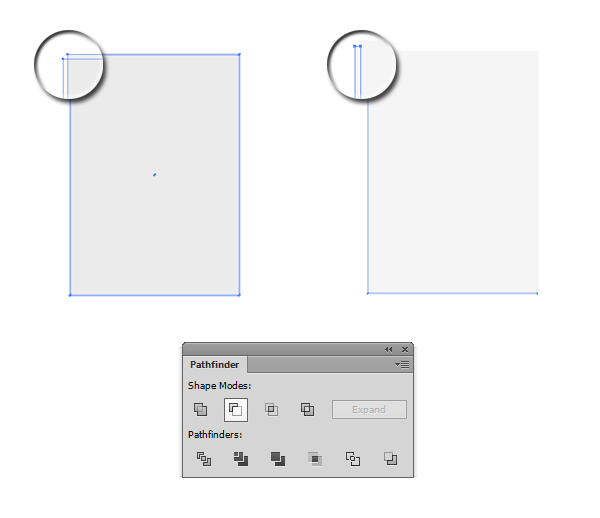
Select the first copy (the one in the middle) of the rectangle, and with your keyboard arrows, move it 2 points to the left and 2 points down. Select both copies and click the Minus Front button from the Pathfinder Panel.
Step 5
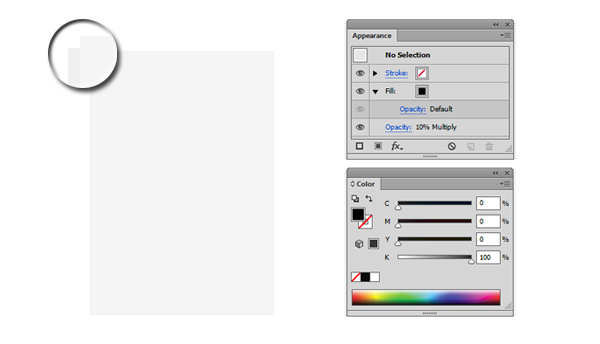
Fill the resulted shape with Black (C=0 M=0 Y=0 K=100). From the Appearance Panel set the Fill opacity to Default (100%) and then lower the Opacity of the shape to 10% with Blending Mode set to Multiply.
Step 6
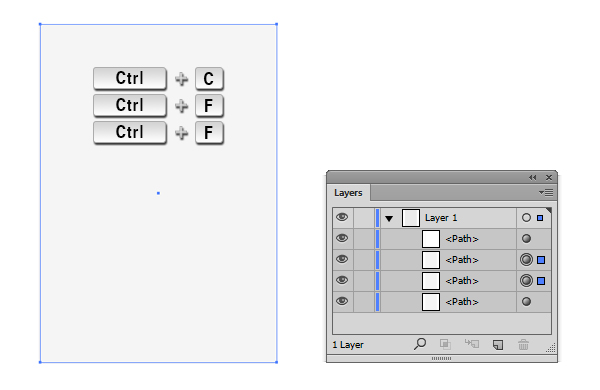
Now select the initial rectangle of the plexiglass® plate vector and again make two copies in front of it (Ctrl + C > Ctrl + F > Ctrl + F).
Step 7
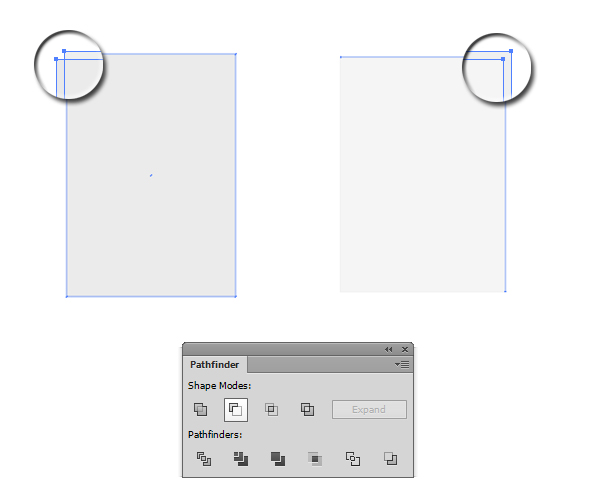
Select the copy that is on top of the others and move it 2 points to the left and 2 points down. Then select both copies and hit the Minus Front button from the Pathfinder Panel.
Step 8
Fill the resulted shape with White (C=0 M=0 Y=0 K=0).
Step 9
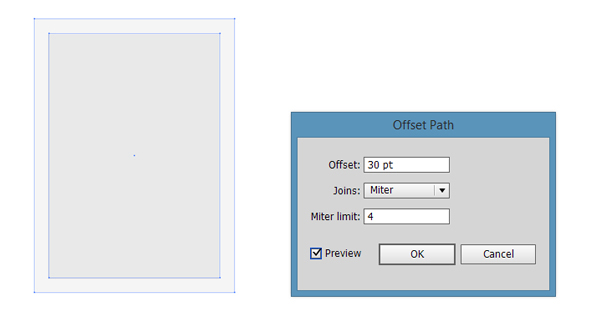
Select again the original Rectangle of the plexiglass® plate vector and go to Object > Path > Offset Path. Enter a value of 30 points, then press OK.
Step 10
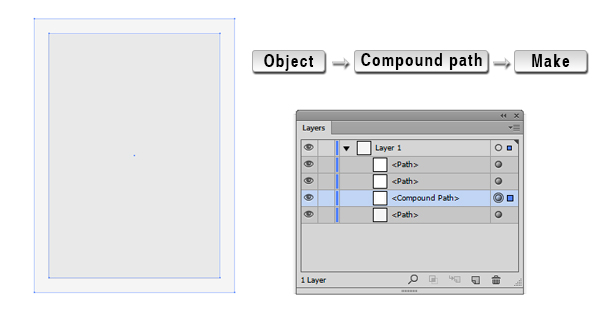
Select the initial rectangle of the plexiglass® plate vector, make a copy of it (Ctrl + C > Ctrl + F). Select the copy and the previously created rectangle with 30 points Offset and go to Object > Compound Path > Make (Ctrl +8).
Step 11
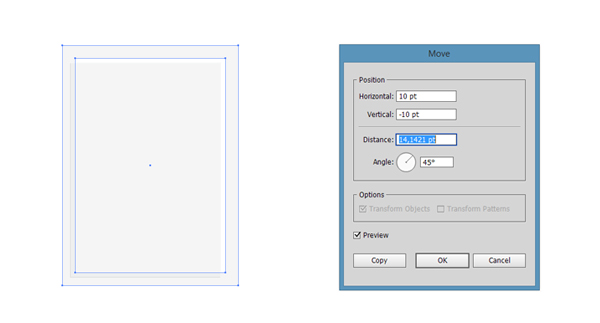
Select the resulted Compound Path and double-click on the Selection Tool (Black Arrow Tool). The Move Panel will appear. Enter a value of 10 points for Horizontal and a value of -10 points for Vertical Position, then hit the OK button.
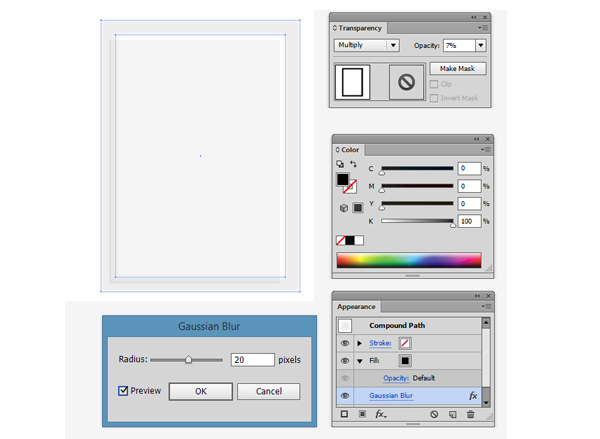
Step 12
Fill the Compound path with Black (C=0 M=0 Y=0 K=100). Set the Fill Opacity to Default (100%), the Shape Opacity to 7% and the Blending Mode to Multiply. Go to Effects > Blur > Gaussian Blur and enter a value of 20 pixels.
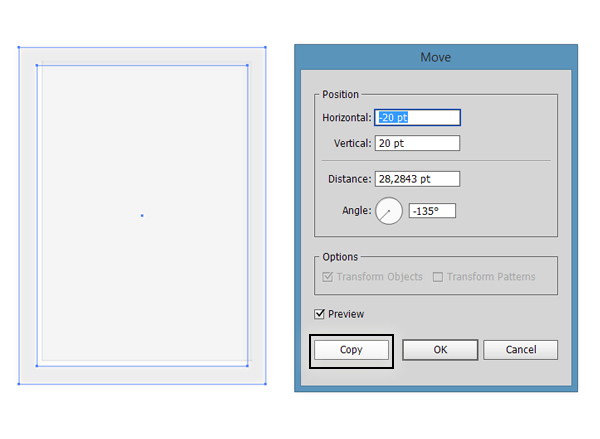
Step 13
Select the Compound Path again and double-click on the Selection Tool (Black Arrow Tool). The Move Panel will appear. Enter a value of -20 points for Horizontal and a value of 20 points for Vertical Position, then hit the Copy button instead of OK.
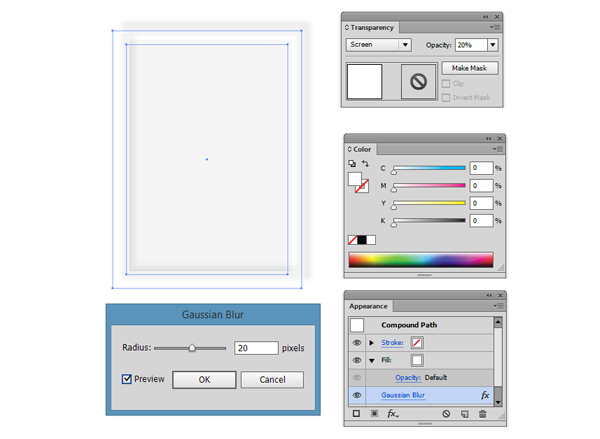
Step 14
Fill the Compound path with White (C=0 M=0 Y=0 K=0). Set the Fill Opacity to Default (100%), the Shape Opacity to 20% and the Blending Mode to Screen. Go to Effects > Blur > Gaussian Blur and enter a value of 20 pixels.
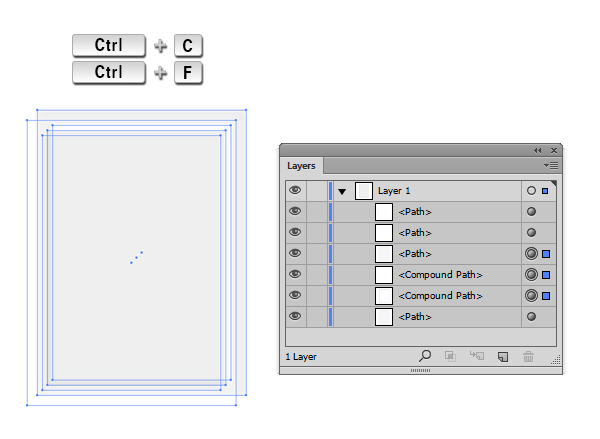
Step 15
Make a copy of the initial Rectangle (Ctrl + C > Ctrl + F), move it on top of the two Compound Paths, then select all of them.
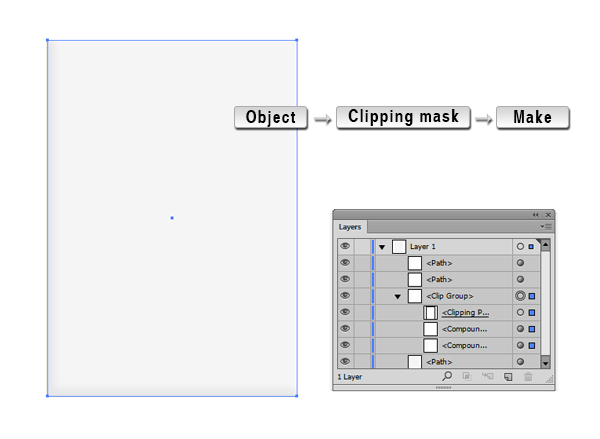
Step 16
With the three shapes selected, go to Object > Clipping Mask > Make (Ctrl + 7). Now the shades are clipped into a mask.
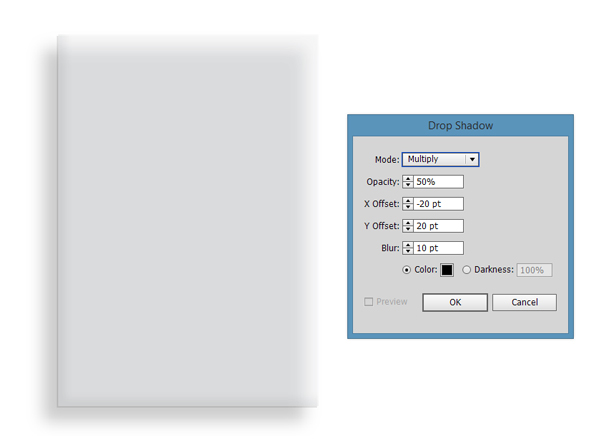
Step 17
It’s time to draw the shadow of the plexiglass® plate vector. Go to Effects > Stylize > Drop Shadow. Set the Mode to Multiply, lower the opacity to 50%, enter a X Offset value of -20 points and a Y Offset value of 20 points. Increase the Blur to 10 points and pick Black (C=0 M=0 Y=0 K=100) as the color for the shadow. Hit Ok.
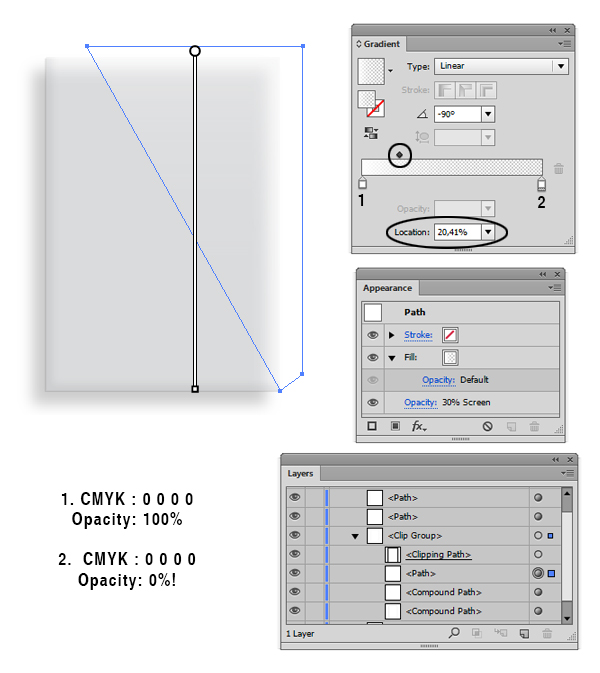
Step 18
Now let’s draw the highlight of the plexiglass® plate vector. Draw with the Pen Tool (P) a shape similar to the one in the screenshot below. Focus on the Layers Panel, select the shape you created and move (drag and drop) the shape into the Clip Group. Make sure that the shape stays selected, open the Gradient panel (Window > Gradient) and simply click on the gradient thumbnail to add the linear gradient. The Right Slider is filled with White (C=0 M=0 K=0 Y=0) and has the Opacity 0%. The Left Slider is filled with White (C=0 M=0 K=0 Y=0) and has the Opacity 100%. From the Appearance Panel change the Opacity to 30% and the Blending Mode to Screen.
Step 19
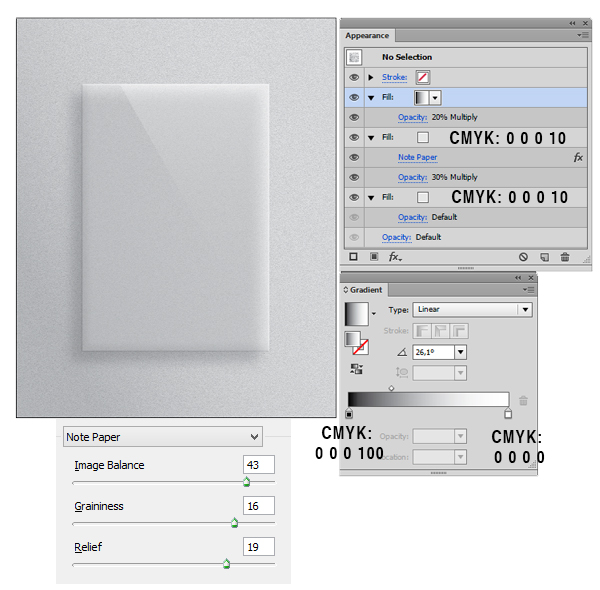
It’s time to create the Background for our plexiglass® plate vector. Draw a Rectangle (M) that fits the artboard (600 x 750 points). Fill it with C=0 M=0 Y=0 K=10. Now add a new fill from the Appearance Panel (Click the Black Square from the bottom of the panel), lower the Opacity to 30% and set the Blending Mode to Multiply. Then fill the shape with C=0 M=0 Y=0 K=10. With the second fill still selected, go to Effects >Sketch > Note Paper and enter the values from the screenshot. Now add a new fill (Click the Black Square from the bottom of the panel), set the Opacity to 20% and the Blending Mode to Multiply. Make sure that the fill stays selected, open the Gradient panel (Window > Gradient) and simply click on the gradient thumbnail to add the default black to white linear gradient; then make sure that the angle is set to 26.1 grades.
Step 20
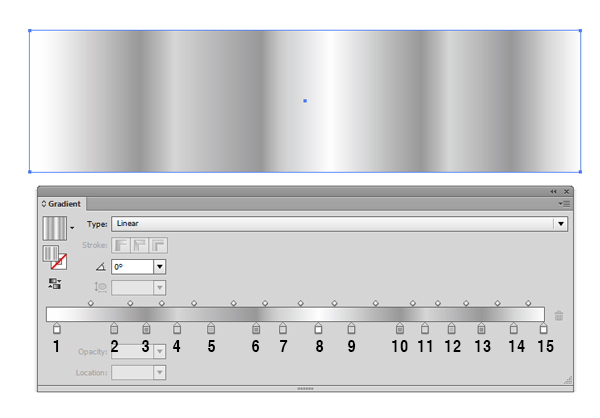
Now we are going to finish our illustration by learning how to make the screws using a Conical Gradient. Create a Rectangle (M), then add a multicolor gradient (Window > Gradient):
1. C=0 M=0 Y=0 K=0
2. C=22 M=18 Y=18 K=0
3. C=42 M=34 Y=34 K=0
4. C=14 M=11 Y=11 K=0
5. C=26 M=20 Y=21 K=0
6. C=42 M=34 Y=34 K=0
7. C=14 M=11 Y=11 K=0
8. C=0 M=0 Y=0 K=0
9. C=14 M=11 Y=11 K=0
10. C=42 M=34 Y=34 K=0
11. C=14 M=11 Y=11 K=0
12. C=26 M=20 Y=21 K=0
13. C=42 M=34 Y=34 K=0
14. C=14 M=11 Y=11 K=0
15. C=0 M=0 Y=0 K=0
Step 21
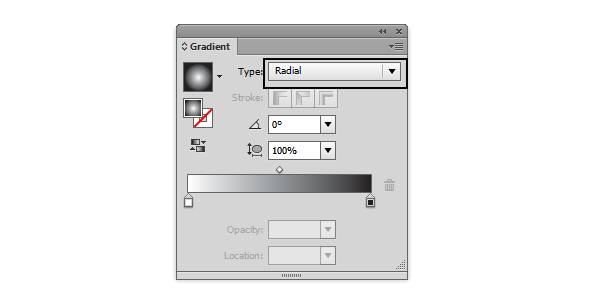
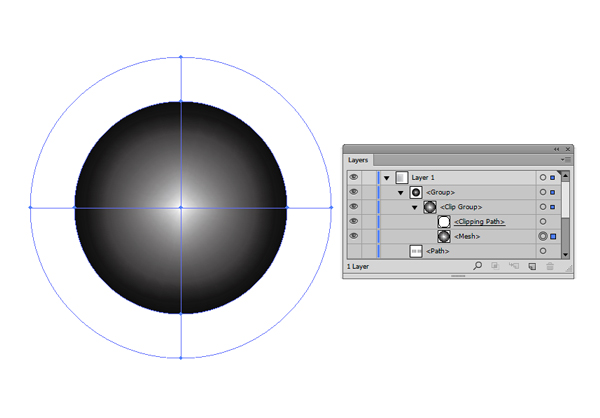
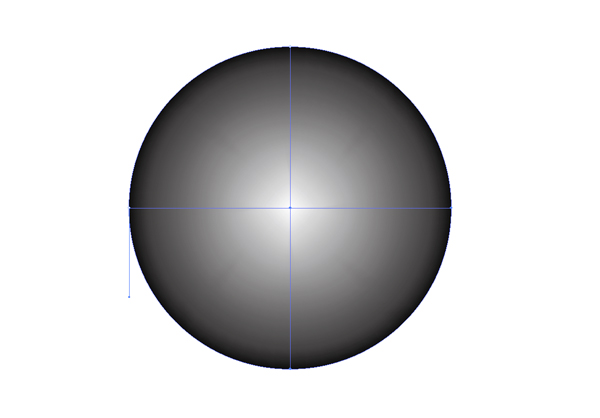
Draw an Ellipse (E) and fill it with a two color radial Gradient (Click Window > Gradient and simply click on the gradient thumbnail to add the linear gradient then change the type of gradient from Linear to Radial, like in the image below). It doesn’t matter what colors you use. With the Ellipse selected, go to Object > Expand and be sure you check Expand Gradient to Gradient Mesh. Then hit OK.

Step 22
Now we have a Clip Group. Delete the Clipping Path from the Layers panel.
Step 23
With the Direct Selection Tool (A) select the right point on the Inner Circle and delete it (del).
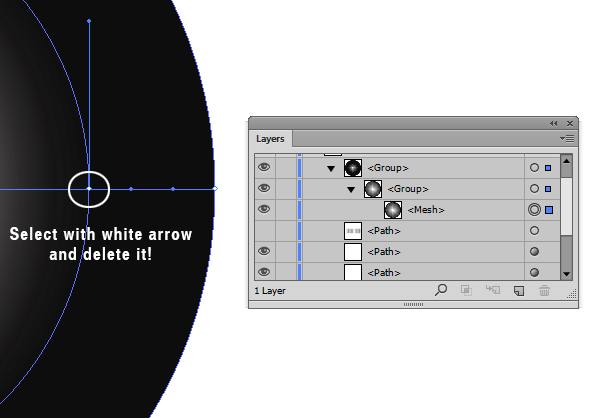
This is the shape that will remain: a Gradient Mesh with 4 points
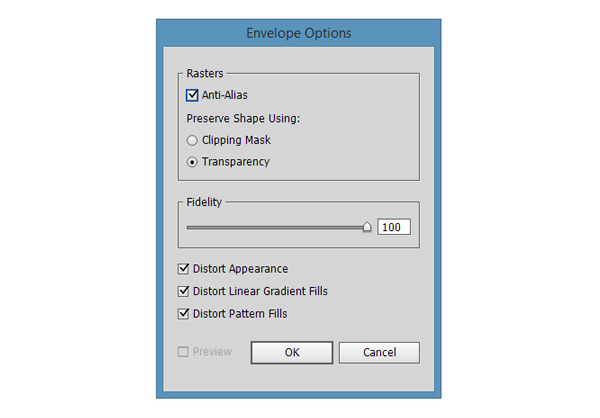
Step 24
Go to Object > Envelope Distort > Envelope Options and be sure you have the same properties just like in the image below.
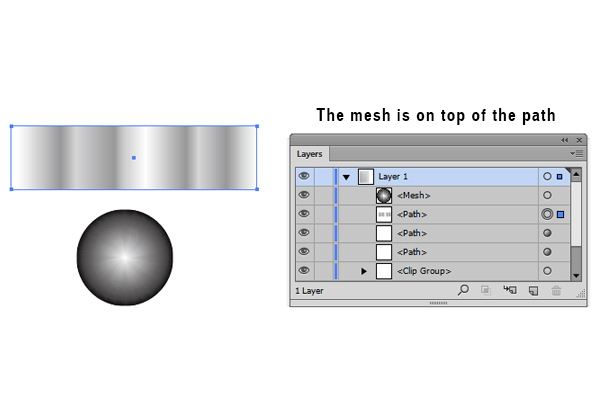
Step 25
Select both the Gradient Mesh and the Rectangle, make sure that the Mesh is on top by checking the Layers Panel, then go to Object > Envelope Distort > Make with Top Object.
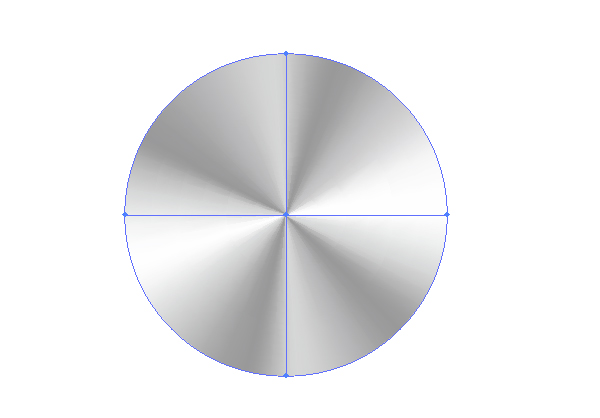
And this is our Ellipse with a Conical gradient that will serve at the screw for our Plexiglas® plate!
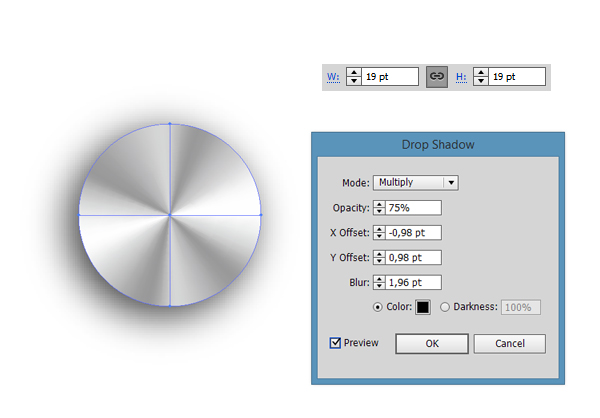
Step 26
It’s time to add a Drop Shadow to our screw for the plexiglass® plate vector. Firstly, make sure that your screw is 19 points wide and 19 points high. Then go to Effects > Stylize > Drop Shadow and enter the same values as in the screenshot below.
Copy the screw three times (Ctrl + C > Ctrl + F > Ctrl + F > Ctrl + F) and arrange them like the screenshot below.
And we’re done!
![]()
Author: Andrei Urse
My name is Andrei Urse. I’m a graphic designer from Romania. I love creating logos and complex vector art using Illustrator, but I also use Photoshop and InDesign on a daily basis. You can find all of my work on Behance.


I found your weblog web site on google and verify a few of your early posts. Continue to keep up the very good operate. I simply further up your RSS feed to my MSN News Reader. Looking for ahead to studying extra from you afterward!?
thank you for this tutor . 🙂
Great tip for the conical gradients, thanks!