
Embossed text has an uncanny way of being classic and modern at the same time. Creating embossed vector text styling is easy to do in Photoshop, but in Illustrator, it is super simple to create letterpress styled text while keeping the text editable. Utilizing the Appearance panel and Graphic Styles, you can quickly and consistently apply this embossed vector text style to any editable text and other vector objects.
Final Image: Embossed Vector Text
Below is the final embossed vector text treatment we will be working towards.

Tutorial Details: Embossed Vector Text
- Program: Adobe Illustrator CS4
- Difficulty: Beginner
- Estimated Completion Time: 5-10 minutes
Step 1
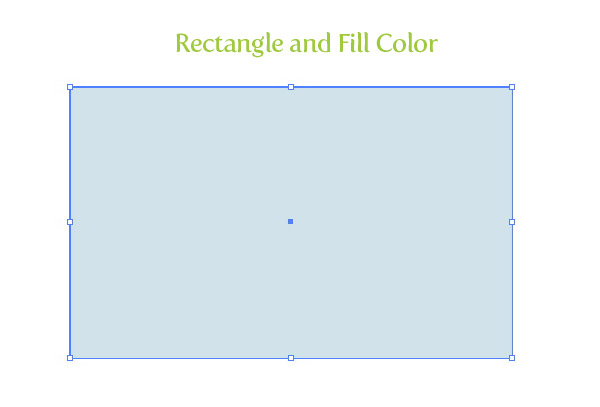
Create a rectangle with the Rectangle tool (M) and fill it with a color of your choosing to start out this embossed vector text tutorial. I filled mine with a light blue color. I like having a background color on which the text can be placed to really see the highlights of the letterpress embossed vector text. Still, you can create this tutorial on a white background.
Step 2
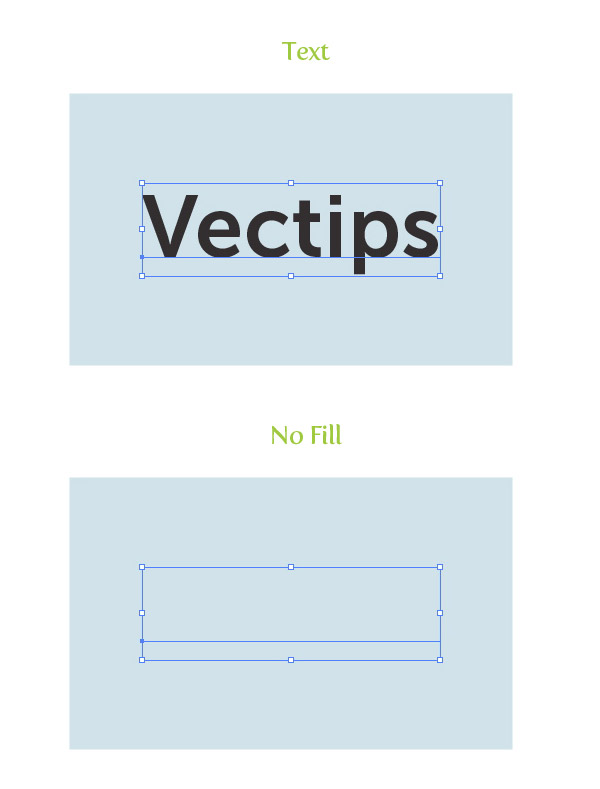
Type out some text with the Text tool (T) and chose whatever font you want. I am using the awesome Museo Sans 700 font. With the text still selected, take off any fill or stroke.
Step 3
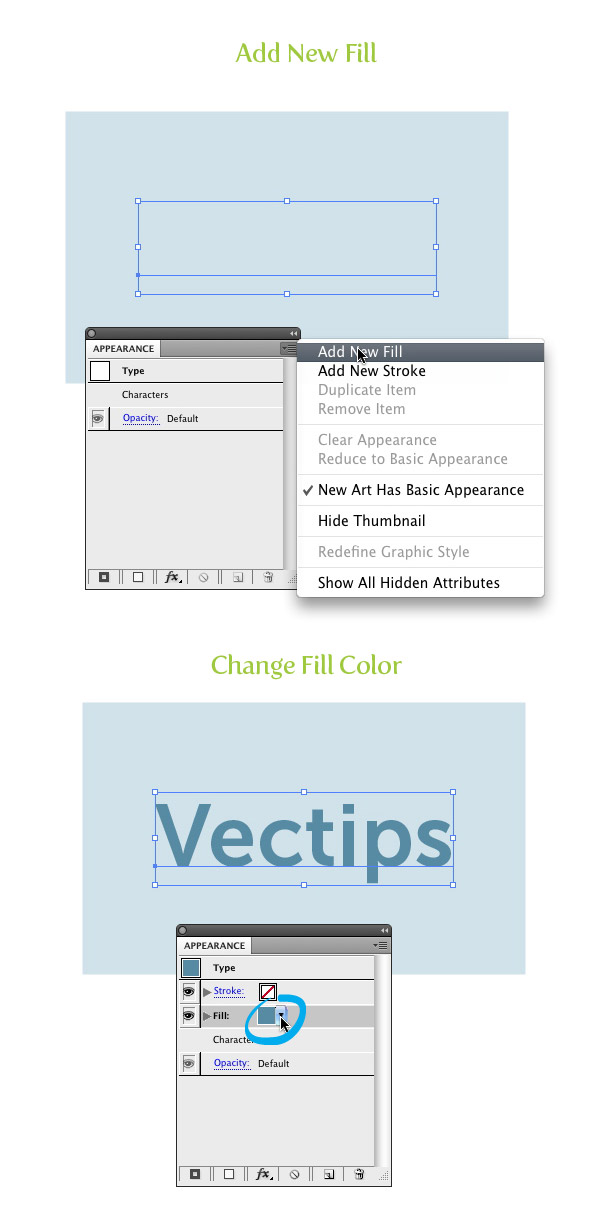
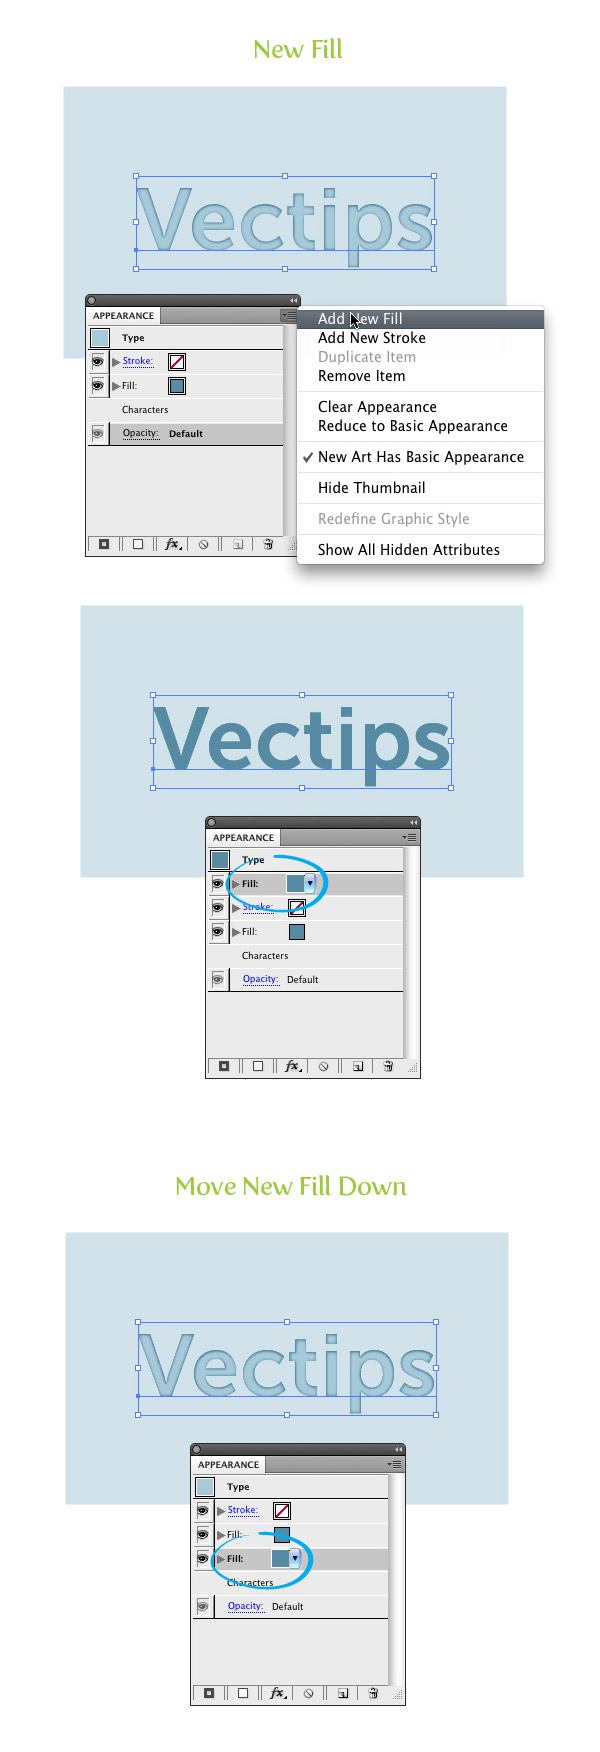
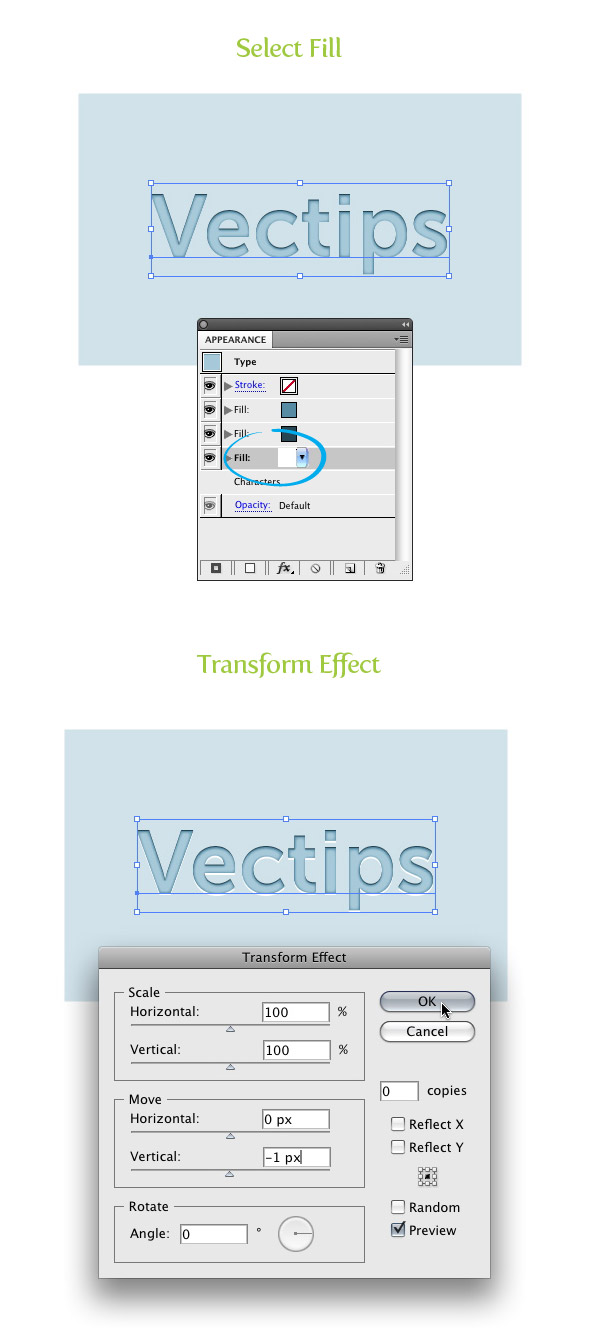
From the pop-up menu of the Appearance panel, choose New Fill. Next, press the swatch thumbnail in the Appearance panel of the new fill and change the color to a darker shade of your background color.
Step 4
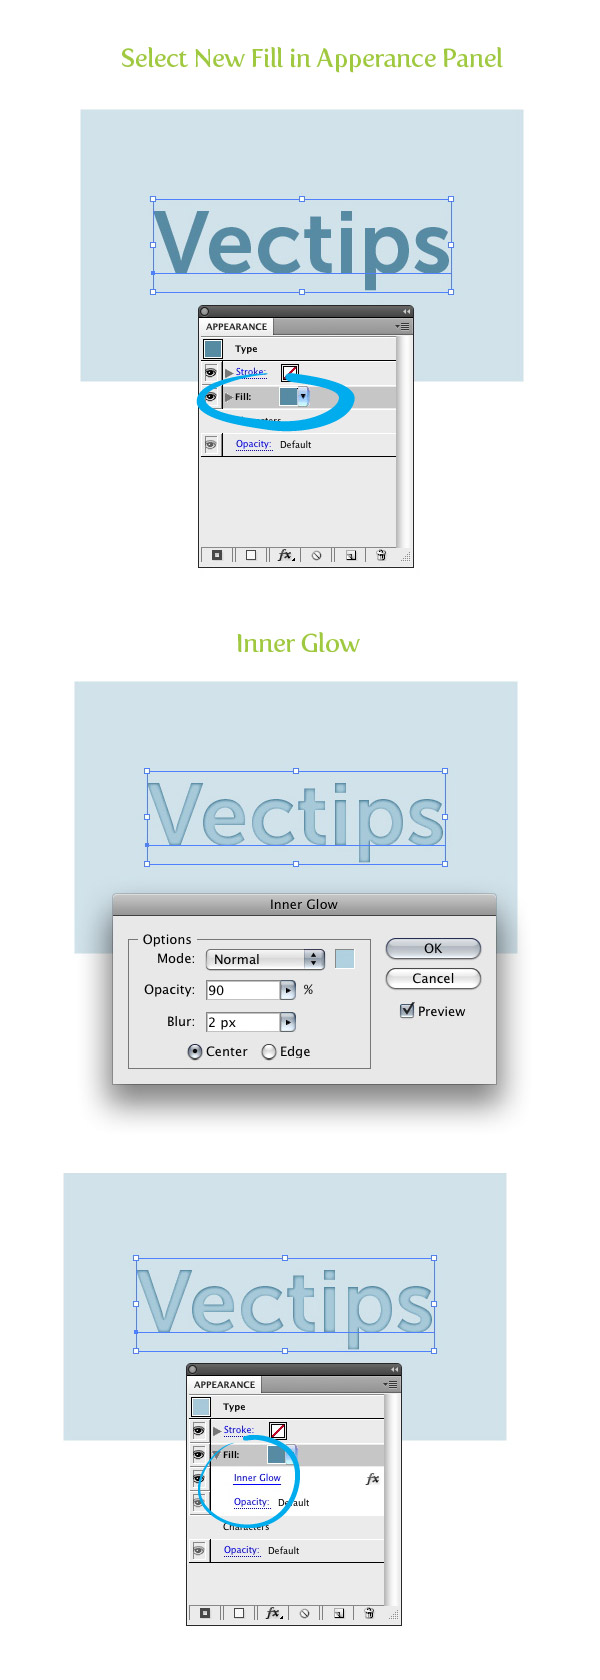
With the new fill selected in the Appearance panel, go Effect > Stylize > Inner Glow. In the Inner Glow dialog, change the Mode to Normal, the fill color (the swatch thumbnail to the direct right of the Mode drop-down menu) to a color slightly darker than your background color, the Opacity to 90 and the Blur to 2 px. You might have to play around with the Blur value depending on how big your embossed vector text is. Now when you press the drop-down arrow of the new fill in the Appearance panel you can see the Inner Glow effect listed under it.
Step 5
With the text still selected create a new fill from the Appearance panel like you did before. After you created the new fill it will look like the Inner Glow effect you applied was lost, but it wasn’t. In the Appearance panel we have to be aware of hierarchy. When we created the latest new fill it was placed on top of the first fill. Rearrange the fills by dragging the newest fill below the first one in the Appearance panel.
Step 6
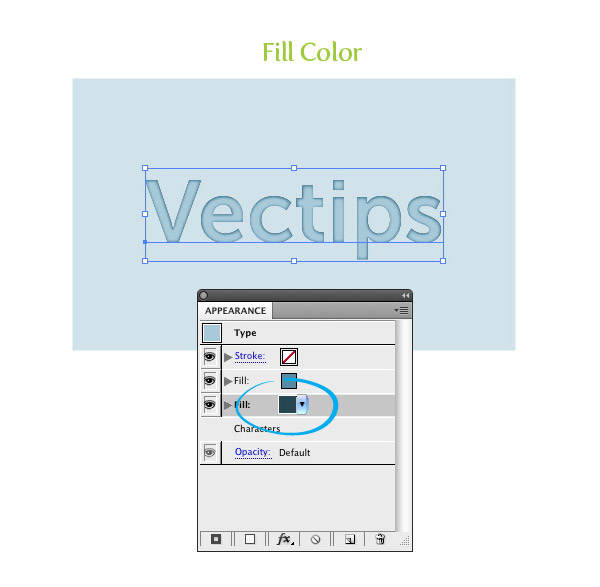
Select the latest new fill in the Apperance panel and change the fill to a darker color than your original text fill color. You won’t be able to see any change because the new fill is behind the first one.
Step 7
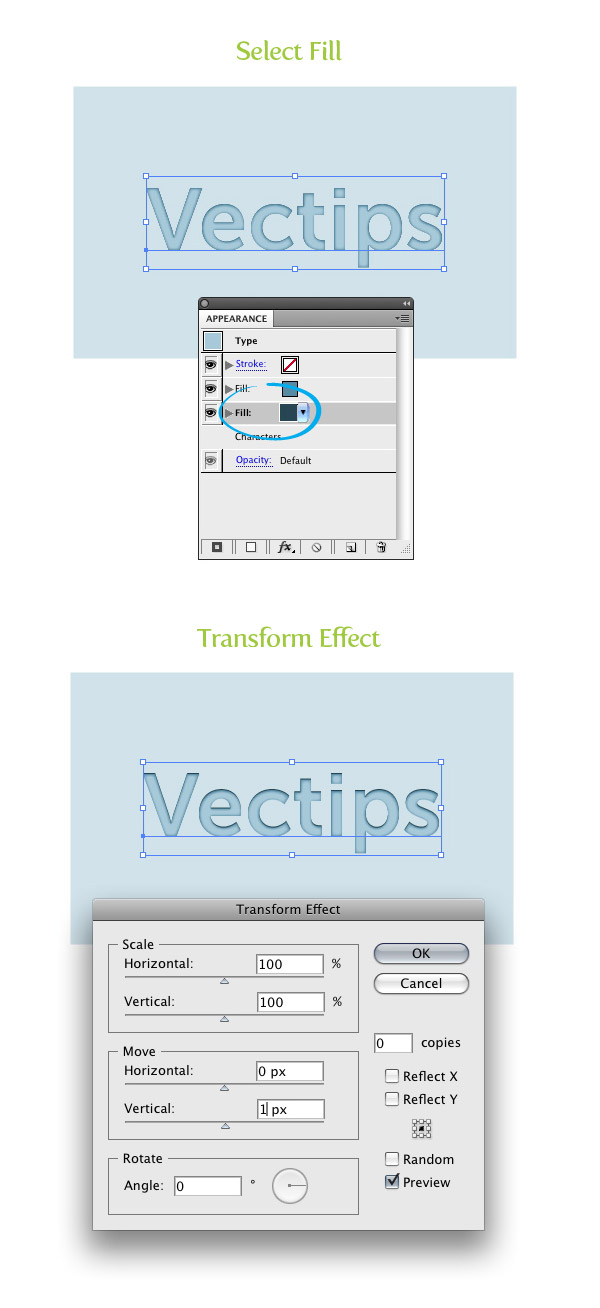
With the latest new fill selected, go Effect > Distort & Transform > Transform. In the Transform Effect dialog, change the Vertical Move to 1 px. This might need to be increase depending on the size of your embossed vector text.
Step 8
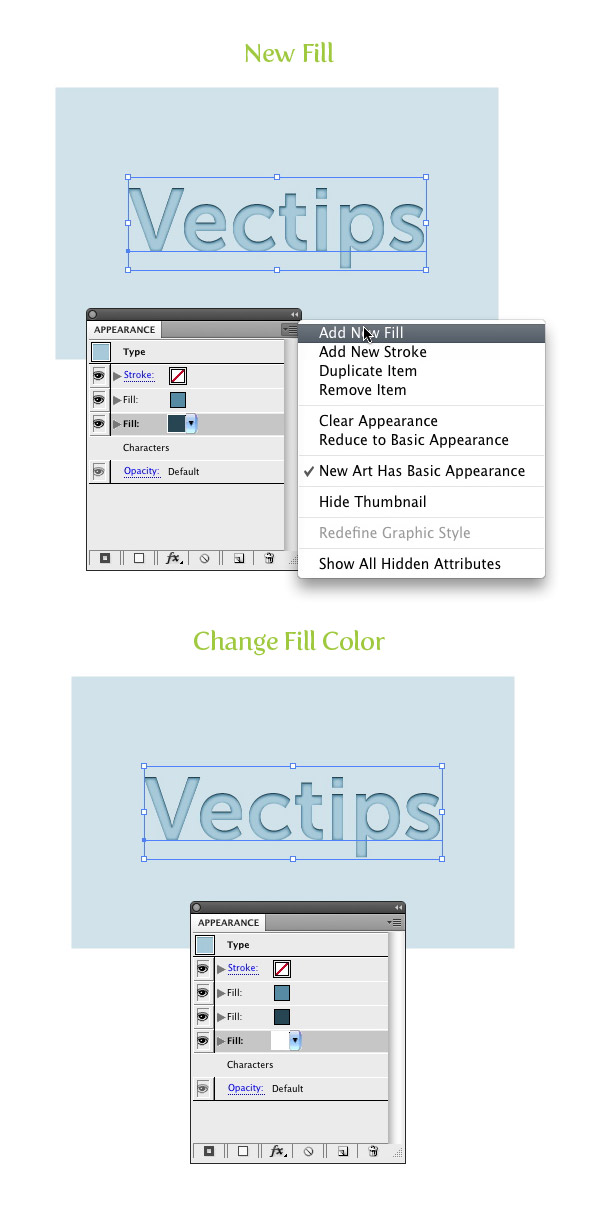
Create a new fill from the Appearance panel like before and fill it with white. Place the new fill below all the other fills.
Step 9
With the white fill selected in the Apperance panel, go Effect > Distort & Transform > Transform. In the Transform Effect dialog, change the Vertical Move to -1 px. Again, this might need to be increased depending on the size of your text.
Step 10
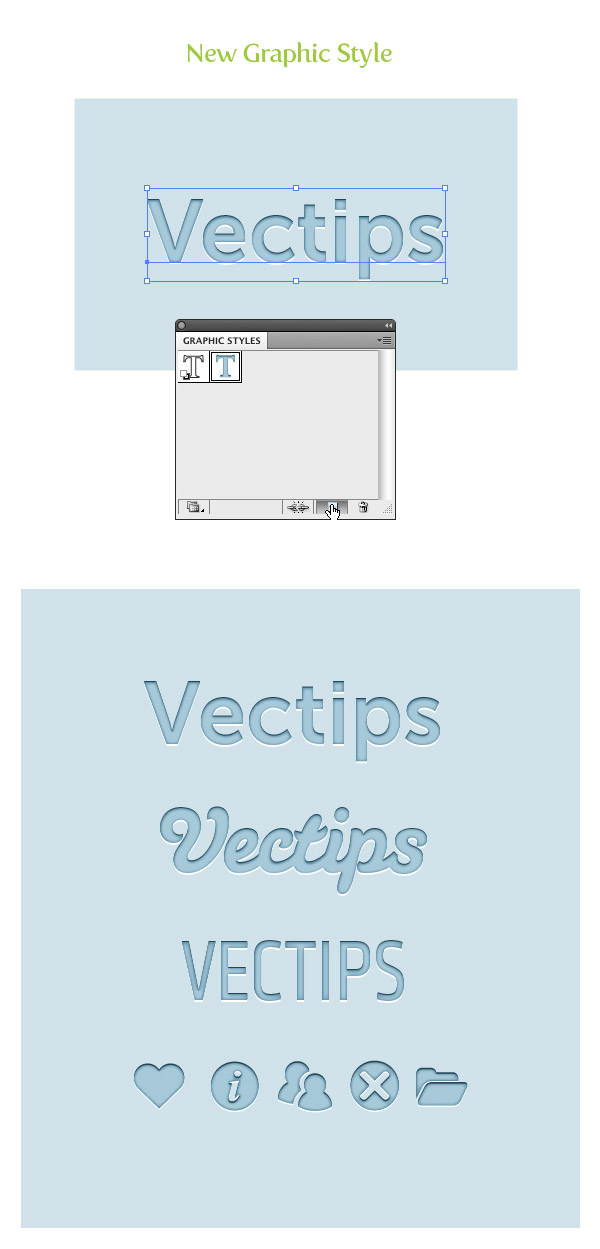
All done! That was pretty easy. Moreover, your embossed vector text is still editable! To make this technique more useful, we can create a Graphic Style. Select the text and press the New Graphic Style button in the Graphic Style panel. Now you can apply to Graphic Style to other fonts and even to other shapes and objects. Simply select some text or other vector paths and click the thumbnail of the graphic Style you just created.


Thanks for sharing your thoughts about free premium wordpress themes.
Regards
Mine looks nothing like that and I have tried several tutorials. Ive so dumbfounded on what I am doing wrong.
Hello there, just became alert to your blog through Google, and found that it is truly informative.
I am gonna watch out for brussels. I’ll appreciate if you continue this in future.
Numerous people will be benefited from your writing. Cheers!
How do you do the Inner Glow in CS6?
Hi,
It’s my understanding that glows and shadows are not vector objects. Is that correct? Should I avoid these techniques when working on something that would be scaled and printed (ex: logos)?
Awesome tutorial, we have featured it here : http://theneodesign.com/best-illustrator-tutorials-november-2014/
Very nice tutorial. I love how this looks on the icons!