

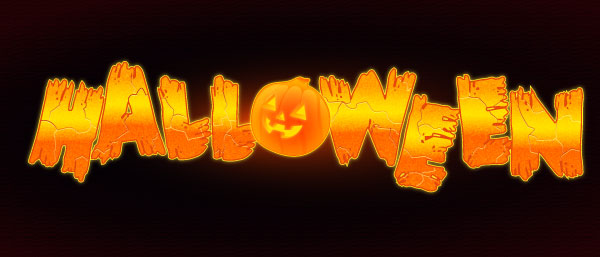
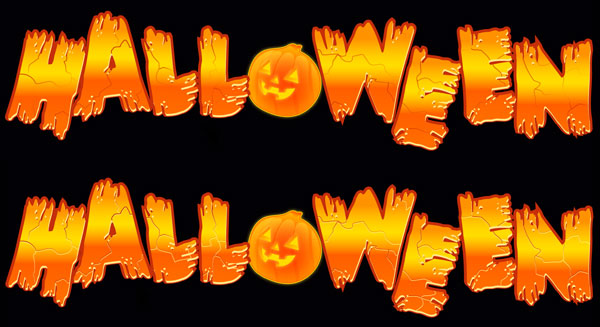
Skip the mess of carving jack-o-lanterns with this pumpkin-inspired spooky glowing Halloween text treatment! We’ll edit this Halloween text with gradients, vector effects, and create a custom pumpkin to complete the design.
Tutorial Details: Halloween Text Effect
- Program: Adobe Illustrator CC
- Difficulty: Intermediate
- Topics Covered: Gradients, Appearance Panel, and Text Effects
- Estimated Completion Time: 40 Minutes
Final Image: Halloween Text Effect
Step 1: Halloween Text Effect
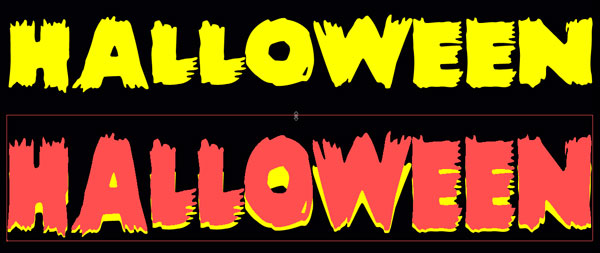
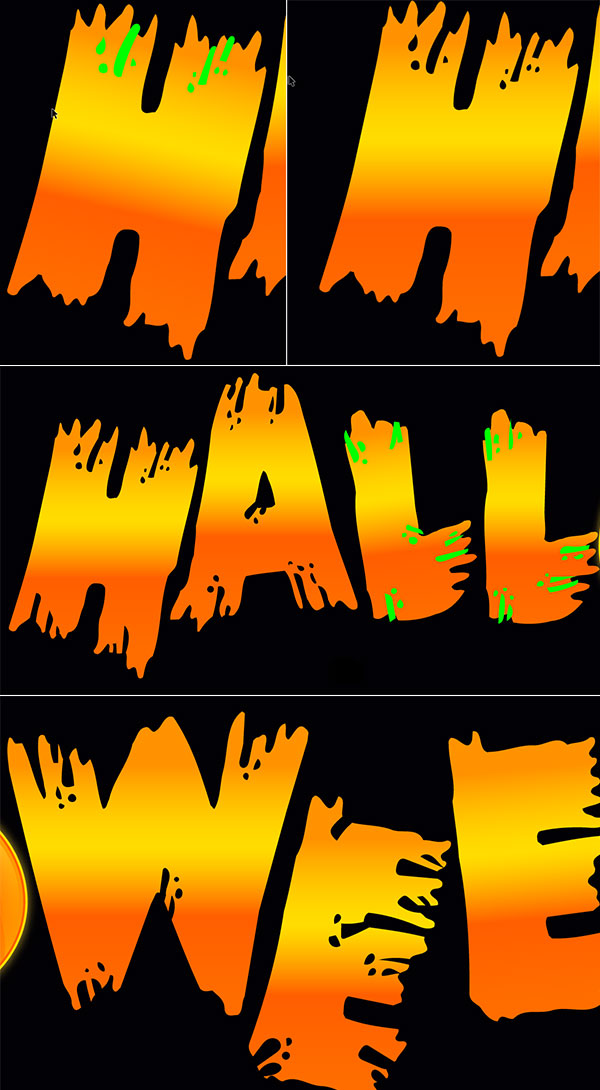
To start off this glowing Halloween text tutorial, create a New Document and use the Text Tool (T) to write out the holiday-inspired word of your choice in the font Alert Notice. Scale the text to your liking with the Selection Tool (V) and Expand the text under Object.
Step 2
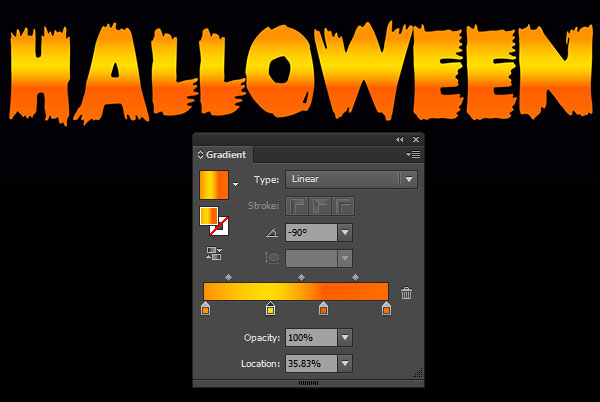
Use the Gradient Tool (G) to apply a Linear Gradient with the following colors, from left to right:
-
- Light Orange:
#FF9200
-
- Yellow:
#FFDC00
-
- Dark Orange:
#FF5E00
-
- Orange:
#FF6C00
Set the angle of the gradient to -90° in the Gradient panel.
Step 3
Ungroup the Halloween text to move and Rotate them around to a new, more pleasing formation with the Selection Tool. Group (Control-G) every letter together except for the O in the center (if you wrote a different word, consider another letter that can be replaced with a pumpkin).
Step 4
Select and Delete the O. Using the Pencil Tool (N) or the Pen Tool (P), draw a rounded shape with a short stem at the top (see below).
Step 5
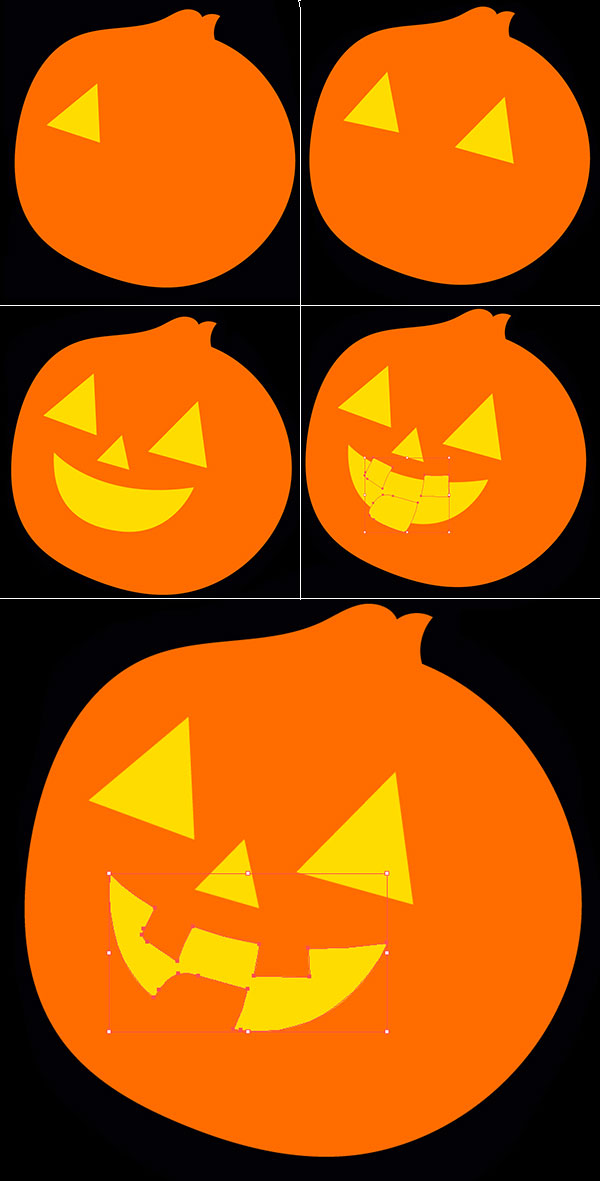
Let’s make the ‘o’ in this Halloween text a jack-o-lantern. Set the fill color of the pumpkin shape to Orange (#FF6C00). Using the Pen Tool or the Polygon Tool, draw triangles for the eyes and nose in Yellow (#FFDC00). Draw a large, curving half-circle for the mouth. Overlap the mouth with quickly drawn squares. Unite the squares in the Pathfinder panel. Select the united squares and the mouth with the Selection Tool and hit Minus Front in Pathfinder to complete the face.
Step 6
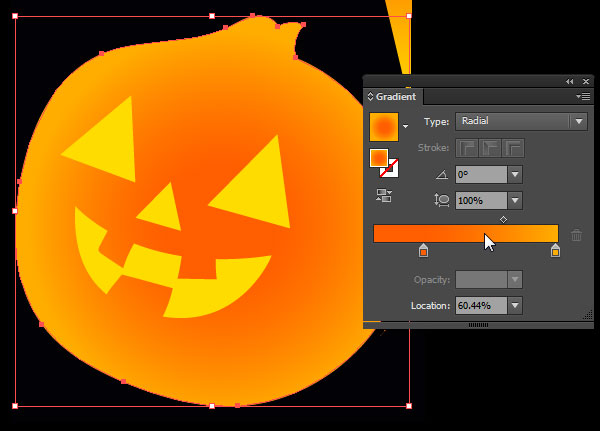
I chose to add Light Orange (#FF9200) to the fill color, setting it as a Radial Gradient in the Gradient panel with the darker color in the center of the shape.
Step 7
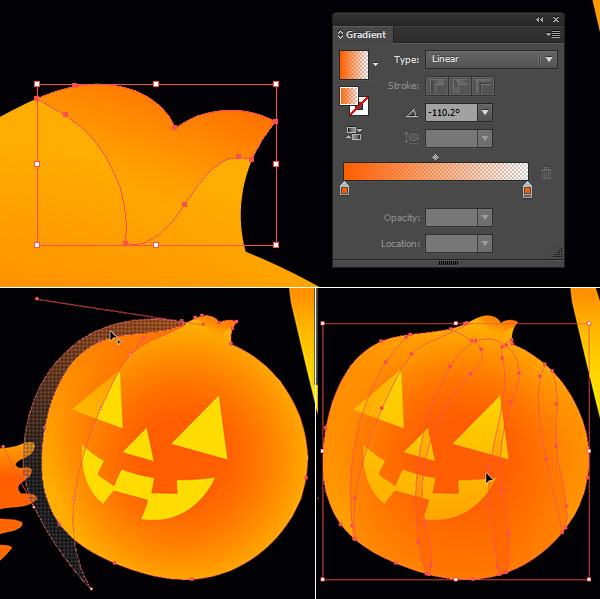
Using a gradient that goes from Dark Orange (#FF5E00) at 100% to 0% Opacity, draw overlapping shadow shapes on the pumpkin. I find it easiest to delete portions of the shape that do no intersect with the Shape Builder Tool (Shift-M). To do so, Select a shadow shape you just drew and the base pumpkin object. Then, select the non-intersecting portion of the shadow shape with the Shape Builder Tool. Deselect and delete the non-intersecting shape. Repeat as needed.
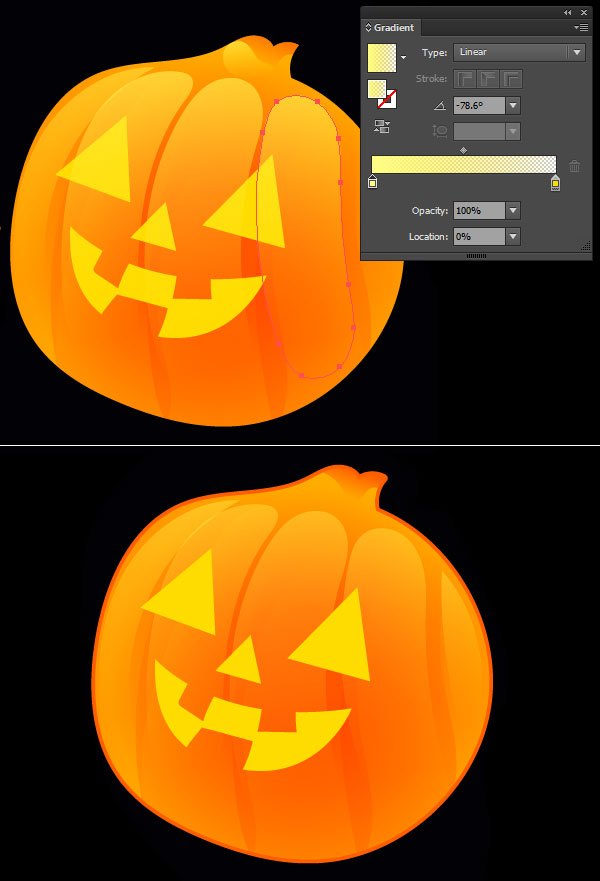
Step 8
In addition to overlapping shadow shapes, I also drew curving, oblong shapes for highlights. I can tell this jack-o-lantern is going to look great in our Halloween text. These feature a Linear Gradient that goes from Light Yellow (#FFFF84) at 100% Opacity to Yellow (#FFDC00) at 0% Opacity. Set the highlight shape’s Blend Mode to Screen in the Transparency panel. Now you’ve got a shiny, smiling jack-o-lantern. Apply a Dark Orange (#FF5E00) stroke to the main pumpkin shape with the Weight set to 2pts or more in the Stroke panel.
Step 9
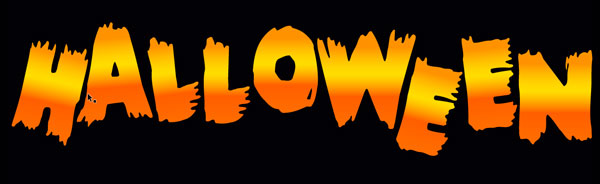
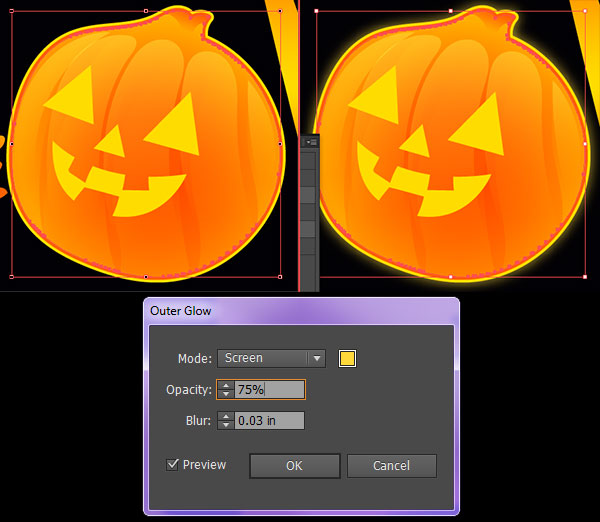
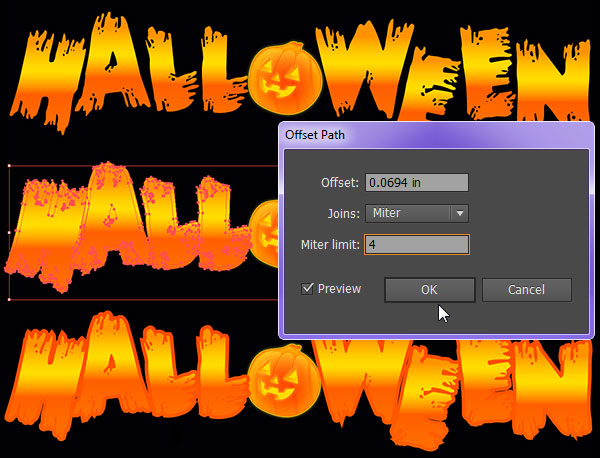
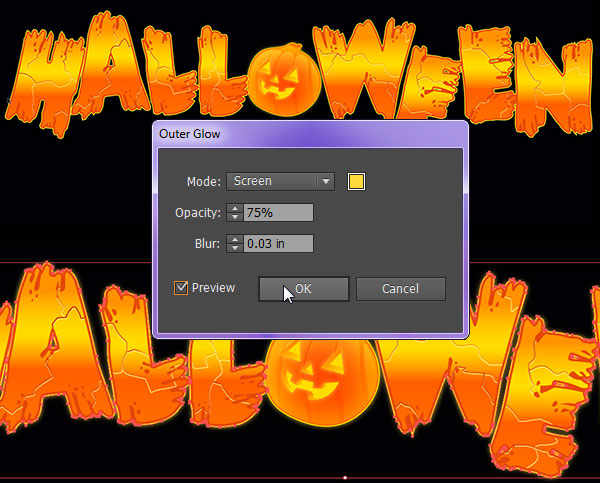
Select the main pumpkin shape and Offset the path by going to Object > Path > Offset by 3px – 7px (it depends on how much of it you’d like to appear). Set the fill color of the offset object to Yellow (#FFDC00). Apply an Outer Glow to the offset shape by going to Effect > Stylize > Outer Glow with the following attributes:
Mode:
- Screen
Color:
-
- Yellow (
#FFDC00
- )
Opacity:
- 75%
Blur:
- 0.03 in
Step 10
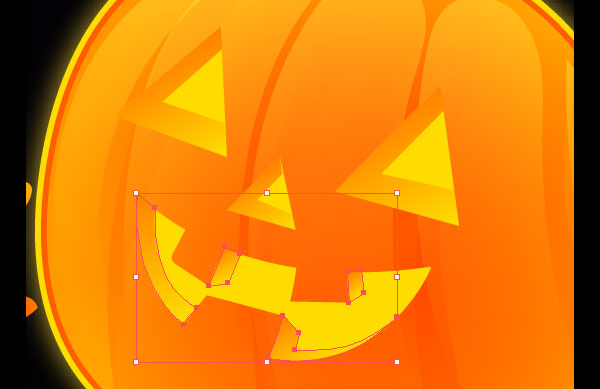
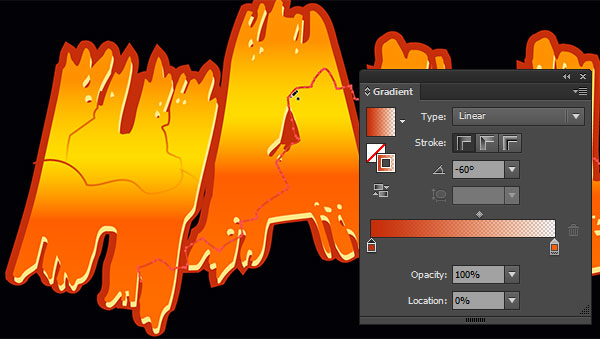
Use the Pen Tool to draw shapes in the eyes, nose, and mouth, that show dimension. Apply a Linear Gradient to these shapes that go from Orange (#FF6C00) to Yellow (#FFDC00).
Step 11
Apply the same Outer Glow from Step 9 to the base face pieces created in Step 5.

Step 12
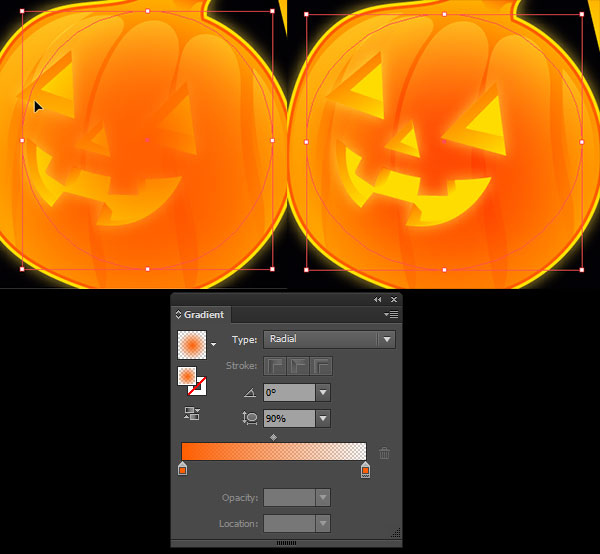
Draw a circular shape with the Ellipse Tool (L) in the center of the pumpkin. Apply a Radial Gradient that goes from Dark Orange (#FF5E00) at 100% to 0% Opacity. Place this shape below the face components in the Layers panel. Group all pumpkin components together and let’s work on the rest of the text!
Step 13
With the Pencil Tool, draw drips, drops, dots, oblong shapes and various objects over each letter in your Halloween text. Unite the scattered shapes in the Pathfinder panel. Select the letter and its overlapping united shapes and hit Minus Front in order to cut holes and further deconstruct the letterforms. Repeat all over the text so your word looks like it’s coming apart or decomposing.
Step 14
Select your Halloween text letter group (minus the pumpkin) and Offset the path by 4-6px. Set the fill color to Dark Orange (#FF5E00).
Step 15
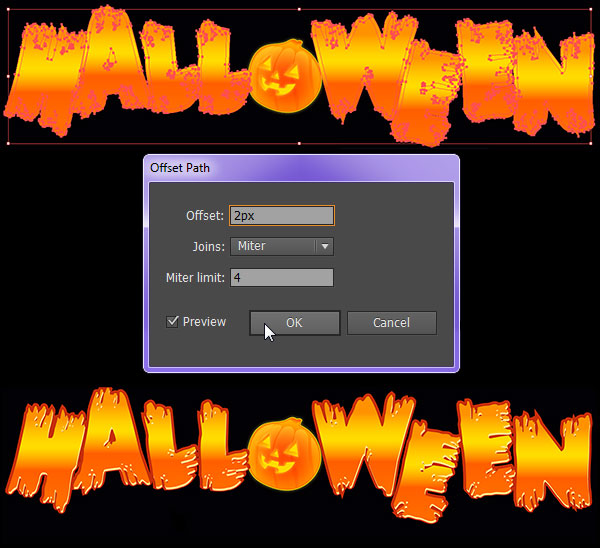
Offset the path of the main letter group again, this time by only 2px. Set the fill color to Light Yellow (#FFFF84) and place each light yellow offset letter down and to the right slightly (see below for placement).
Step 16
Use the Pencil Tool to draw 1-2pt weight lines representing cracks in each letter of your Halloween text. Set the fill color to null and the stroke color to a Linear Gradient going from Dark Orange (#FF5E00) at 100% to 0% Opacity. Repeat drawing cracked, jagged lines throughout your letterforms.
Step 17
Once your jagged lines are completed, Group them together. Copy and Paste the jagged line group. Place the copied group behind the original jagged line group and move them down and to the right slightly. Set the stroke color to Light Yellow (#FFFF84). Group together with the rest of the text (except for the pumpkin).
Step 18
I Offset the main Halloween text group once more so it matches the pumpkin with two outlines of Yellow and Dark Orange. Add an Outer Glow to the text group with the following attributes:
Mode:
- Screen
Color:
-
- Yellow (
#FFDC00
- )
Opacity:
- 75%
Blur:
- 0.03 in
Step 19
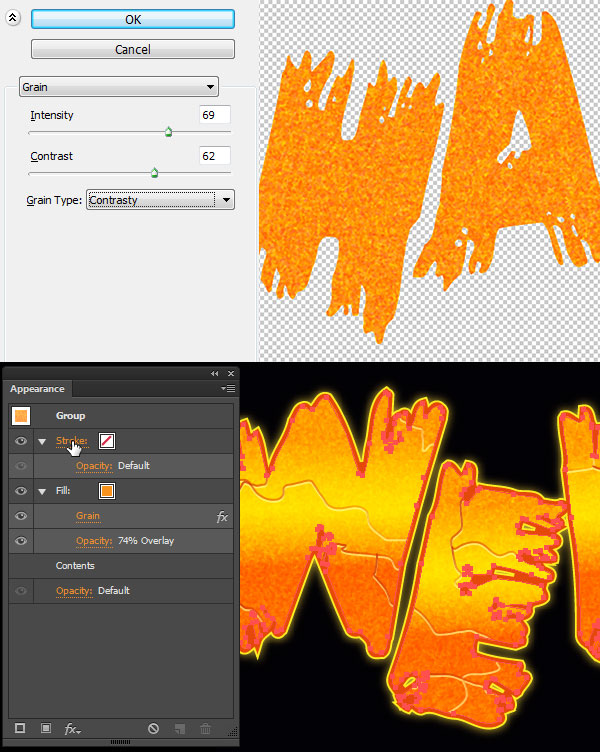
Select the main orange gradient text and add a new Fill Effect in the Appearance panel of Grain (Effect > Texture > Grain) with the following attributes:
Intensity:
- 69
Contrast:
- 62
Grain Type:
- Contrasty
Set the Opacity to 74% and the Blend Mode to Overlay (see Appearance panel in the image below).
Step 20
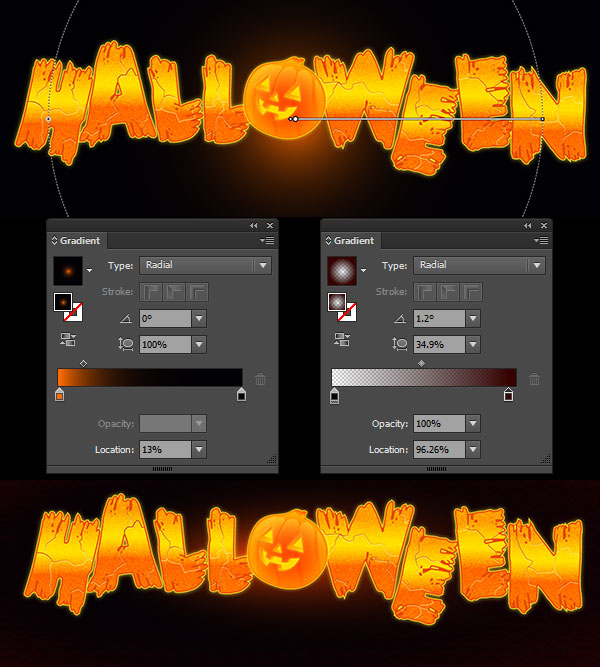
Draw a rectangle using the Rectangle Tool (M) behind the text with a Radial Gradient that goes from Orange to Black. Use the Gradient Tool to adjust the radius so it’s behind the pumpkin and squished down to the height of the text itself. Draw another rectangle over the first with a Radial Gradient going from Black at 0% Opacity to Maroon (#360100). Keep the Maroon at the edges of the rectangle.
Conclusion: Glowing Halloween Text
Congratulations! You’ve completed your pumpkin-inspired Halloween text just in time to celebrate in style. Share your results with us in the comment section below.
Author: Mary Winkler
Mary works under the brand Acrylicana® designing apparel, jewelry, and illustrating for companies like Disney, Jakks Pacific, Envato, and more. Check out Acrylicana.com for more artwork, tutorials, and more.


I’m obliged for the blog article. Really looking forward to read more. Really Great.
Nice tutorial for reference.I have to do a “Halloween Treats” Illustrator Project and these step by step instructions are really helpful.