 In today’s tutorial, we’re going to take a look behind the process of creating a compass icon, and learn how to build one of our own.
So, assuming you’ve poured yourself a fresh cup a coffee take a quick sip out of it and let’s get started!
Tutorial Details: Compass Icon
- Program: Adobe Illustrator CS6 – CC 2018
- Difficulty: Beginner
- Topics Covered: Design Theory, Compositional Construction, Shape Alignment, Grid Positioning
- Estimated Completion Time: 20 Minutes
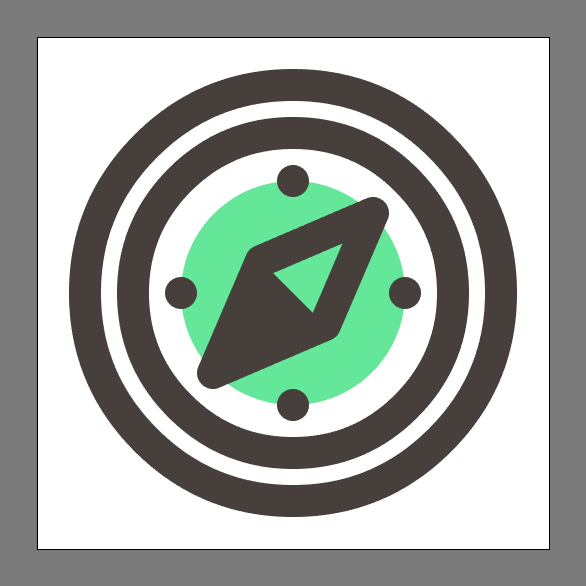
Final Image: Compass Icon

Step 1
As always, we’re going to kick off the project by setting up a New Document by going to File > New (or using the Control-N keyboard shortcut), which we will adjust as follows:
- Number of Artboards: 1
- Width: 64 px
- Height: 64 px
- Units: Pixels
And from the Advanced tab:
- Color Mode: RGB
- Raster Effects: Screen (72ppi)
- Preview Mode: Default
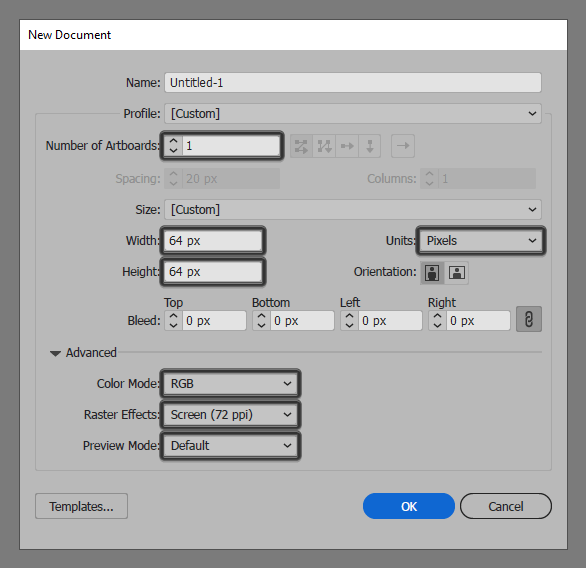
Quick tip: most of the indicated settings can be automatically triggered if you set the document’s Profile to Web, the only one that you’ll have to manually adjust being the Artboard’s Size (Width x Height).
Step 2
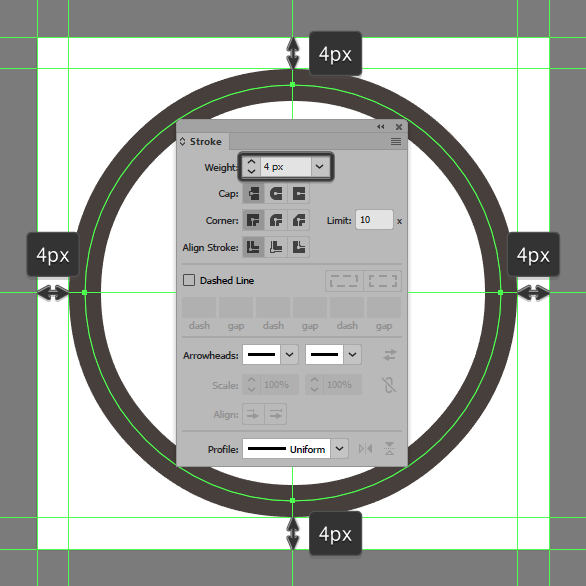
Start working on the actual compass, by creating the main shape for the outer section of its frame using a 52 x 52 px circle with a 4 px thick Stroke (#443D38), which we will center align to the underlying Artboard, giving us a 4 px all-around padding to work with.
Step 3
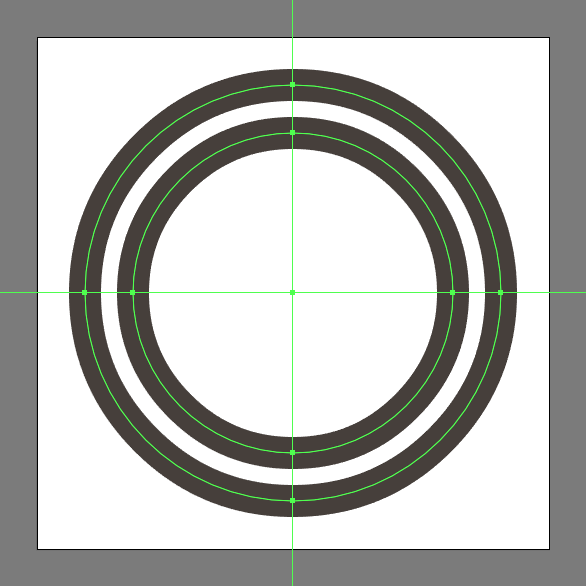
Add the inner section of the frame using a smaller 40 x 40 px circle with a 4 px thick Stroke (#443D38), which we will position to the center of the larger one. Once you have the shape in place, select and group both circles together using the Control-G keyboard shortcut.
Step 4
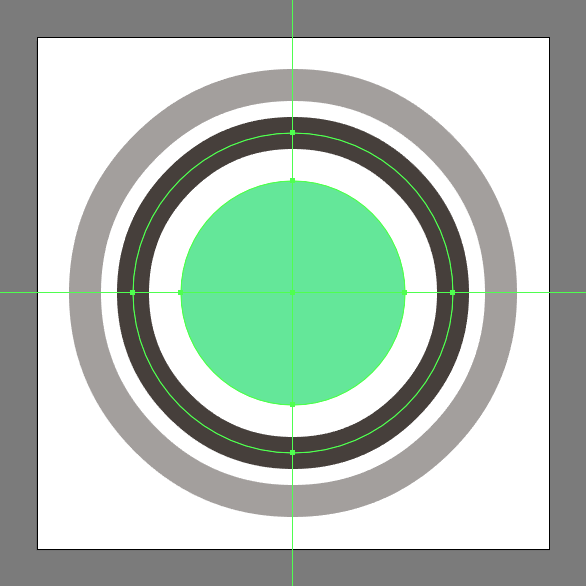
Create the orientation plate using a 28 x 28 px circle, which we will color using #64E89A, and then center align to the shapes that we’ve just grouped.
Step 5
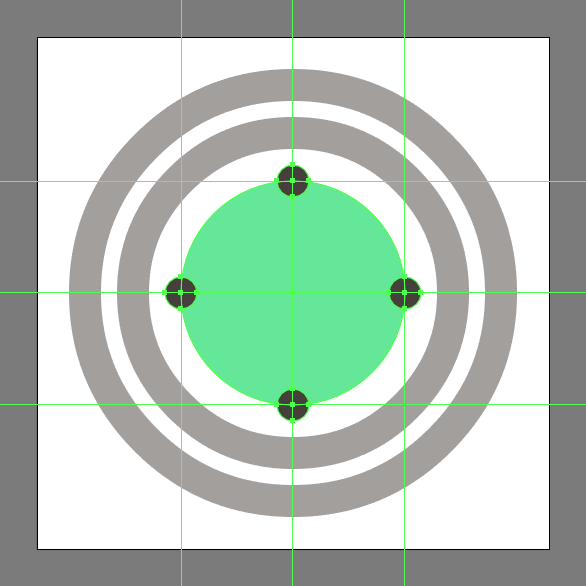
Add the orientation points using four 4 x 4 px circles (#443D38), which we will position onto the plate as seen in the reference image. Take your time and once you’re done, select and group them and the plate together using the Control-G keyboard shortcut.
Step 6
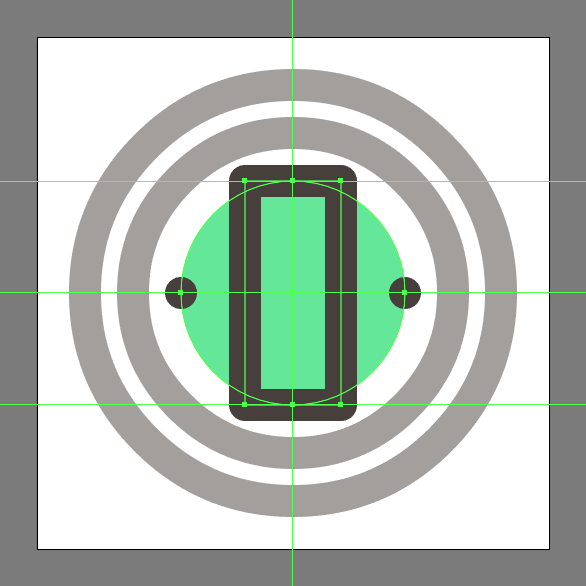
Start working on the needle by creating a 12 x 28 px rectangle with a 4 px thick Stroke (#443D38) with a Round Join, which we will center align to the underlying Artboard.
Step 7
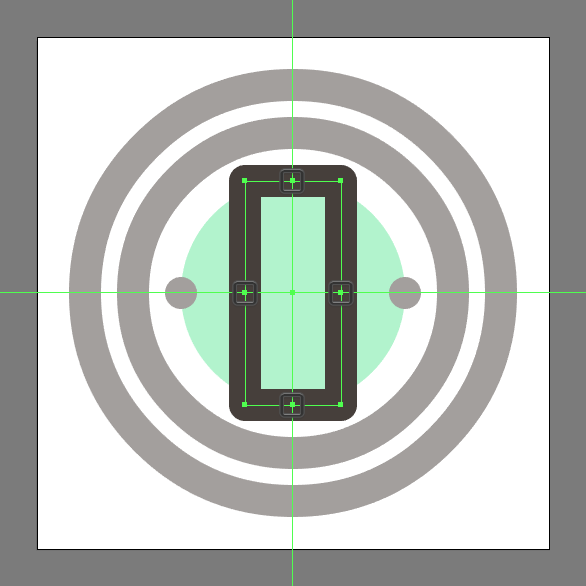
Adjust the shape of the rectangle that we’ve just created, by adding a new anchor point to the center of each of its edges by simply clicking on them using the Add Anchor Point Tool (+).
Step 8
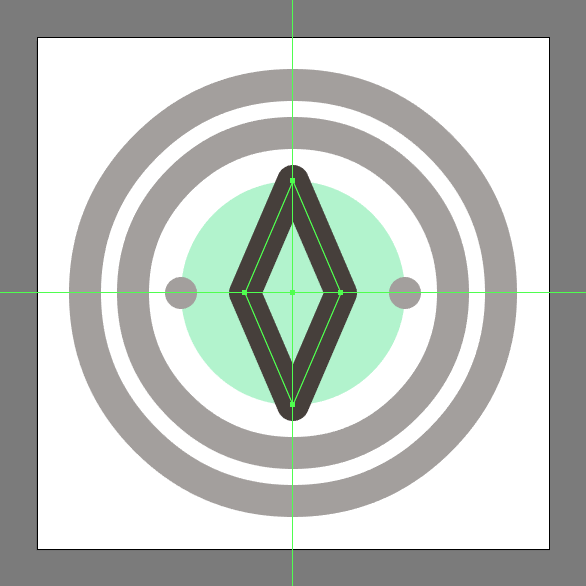
As soon as we’ve added the new anchors, we’ll need to remove the corners ones by simply clicking on them using the Delete Anchor Point Tool (-).
Step 9
Rotate the resulting shape towards the right side, by first selecting it and then using the Rotate tool (right click > Transform > Rotate > -45º).
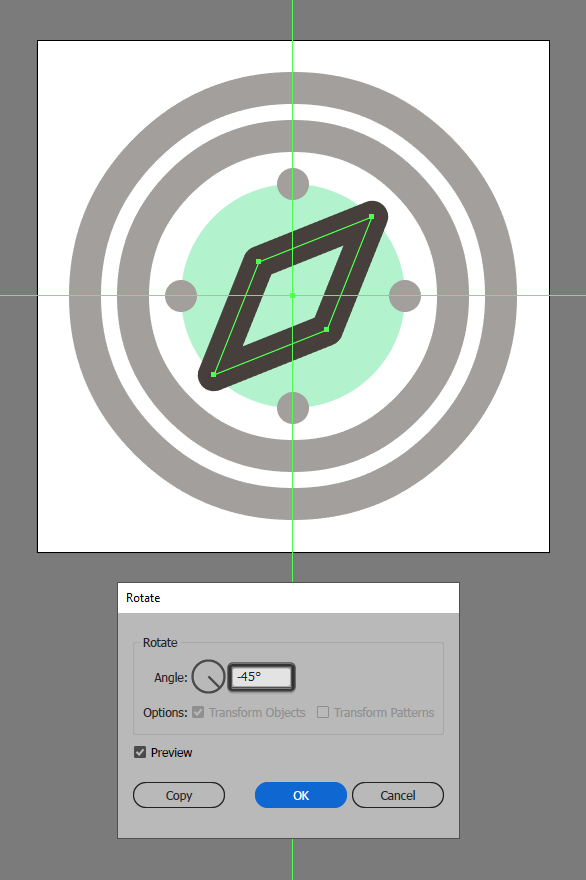
Step 10
Since we’re building the icon with Pixel-Perfection in mind, we’ll need to turn on the Pixel Preview mode (Alt-Control-Y) and then snap all of the rotated shape’s anchor points back to the Pixel Grid, by individually selecting them using the Direct Selection Tool (A) and then dragging them to the nearest grid intersection as seen in the reference image. Take your time, and once you’re done switch back to the Default preview mode (Alt-Control-Y) before moving on to the next step.
![]()
Step 11
Finish off the needle and with it the icon itself, by creating the filled section using a copy (Control-C > Control-F) of the shape that we’ve just created, which we will adjust by first flipping its Stroke with its Fill (Shift-X), and then cutting it in half by removing its top-right anchor point using the Delete Anchor Point Tool (-). Once you’re done, select and group (Control-G) all of the needle’s composing shapes, doing the same for the entire icon before hitting that save button.
![]()
Great Work!
As always, I hope you’ve had fun working on this little project and most importantly managed to learn something new and useful during the process.
That being said, if you have any questions feel free to post them within the comments section and I’ll get back to you as soon as I can!
Author: Andrei Ștefan
Just another coffee addict / pixel grinder, creating colorful projects one pixel at a time.


I still confused about creating Compass Icon if you provide me tutorials very thankful to you.