Follow this tutorial to create a trendy flat teacup logotype in Adobe Illustrator! We’ll be using and modifying basic geometric shapes, working with Align panel, Pathfinder functions and learning simple yet very useful tips and tricks. Let’s get started!
Tutorial details:
- Program: Adobe Illustrator CC
- Difficulty: Beginner
- Topics Covered: Logotype Design, Shape Building, Compositional Skills
- Estimated Completion Time: 20 Minutes
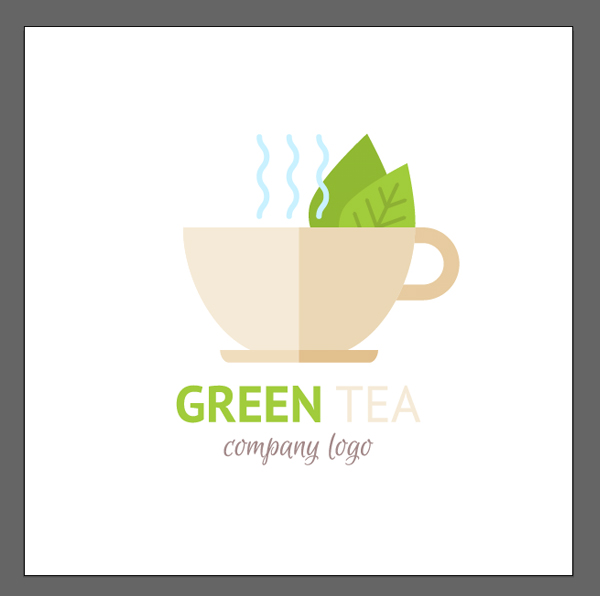
Final Image: Flat Teacup Logotype
Step 1
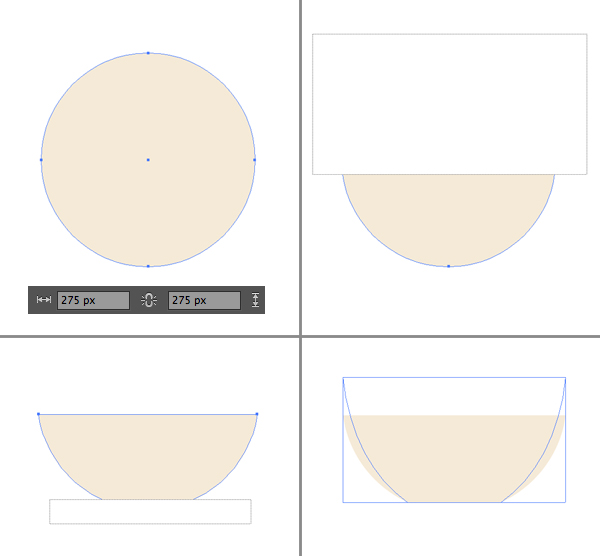
Let’s start shaping our cup from the circle. Use the Ellipse Tool (L) to make a 275×275 px shape.
Take the Eraser Tool (Shift-E), hold Alt and erase the top half of the circle. Do the same for the bottom of the shape, erasing a small part to make the bottom of the cup flat.
Extend the shape up a bit to make the cup taller.
Step 2
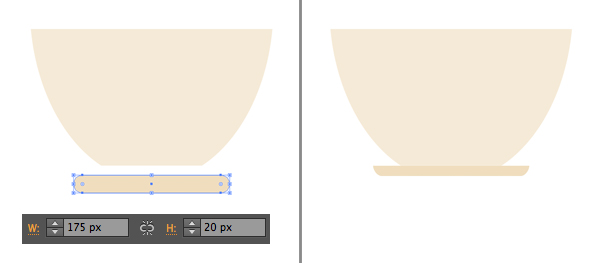
Take the Rounded Rectangle Tool and make a thin stripe of 175×20 px size for the saucer. Use the Eraser Tool (Shift-E) to delete the top part of the saucer and attach it to the cup.
Make the saucer a bit darker to make the shapes clearly visible.
Step 3
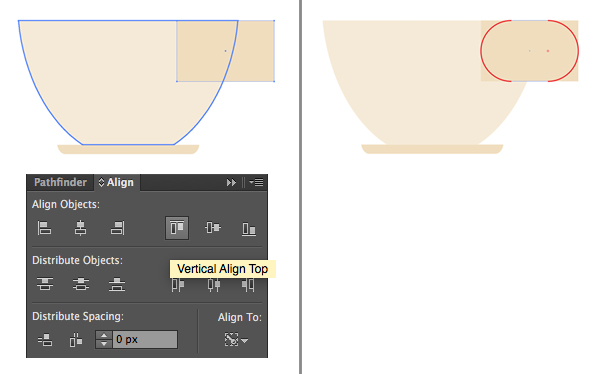
Let’s add a handle to our cup. Make a 130×80 px shape using the Rectangle Tool (M). Select both the cup and the rectangle and click the cup once again to make it a Key Object (you will see a thick selection). Head to the Align panel and click Vertical Align Top to align both shapes to the top of the cup.
Now we can use the Direct Selection Tool (A) and the Live Corners feature to make the handle rounded by pulling the circle markers.
Step 4
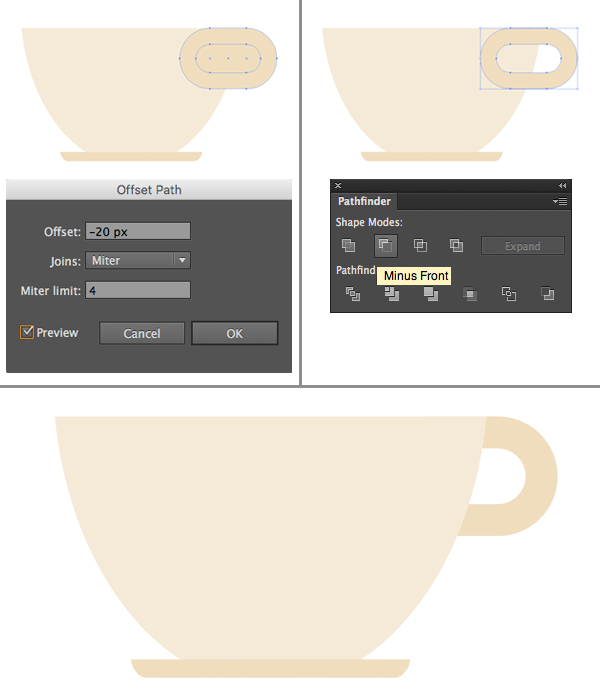
Select the handle and go to Object > Path > Offset Path, setting the Offset value to -20 px in order to create a smaller shape inside.
Select both shapes and use the Minus Front function of the Pathfinder to cut out the inner shape.
Finally, place the handle behind the cup by using the Shift-Control-[ keys combination.
Step 5
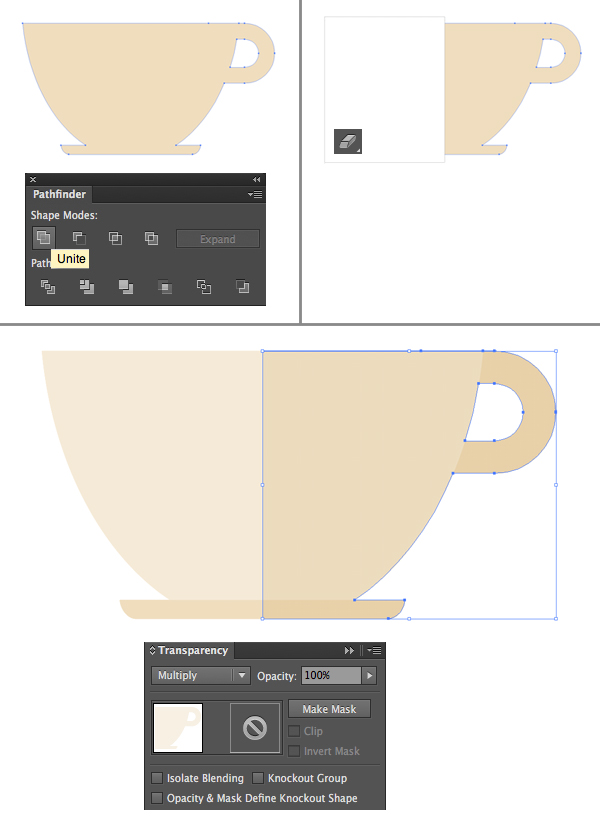
Let’s add a trendy semi-transparent shadow to our flat cup. Select all the elements of the cup and duplicate them (Control-C > Control-F). Keeping the copies selected, Unite them in the Pathfinder into one single shape.
Use the Eraser Tool (Shift-E) while holding Alt to delete the left half of the merged shape. Switch the Blending Mode of the remaining shape into Multiply in the Transparency panel and adjust the color, darkening the right part of the cup.
Step 6
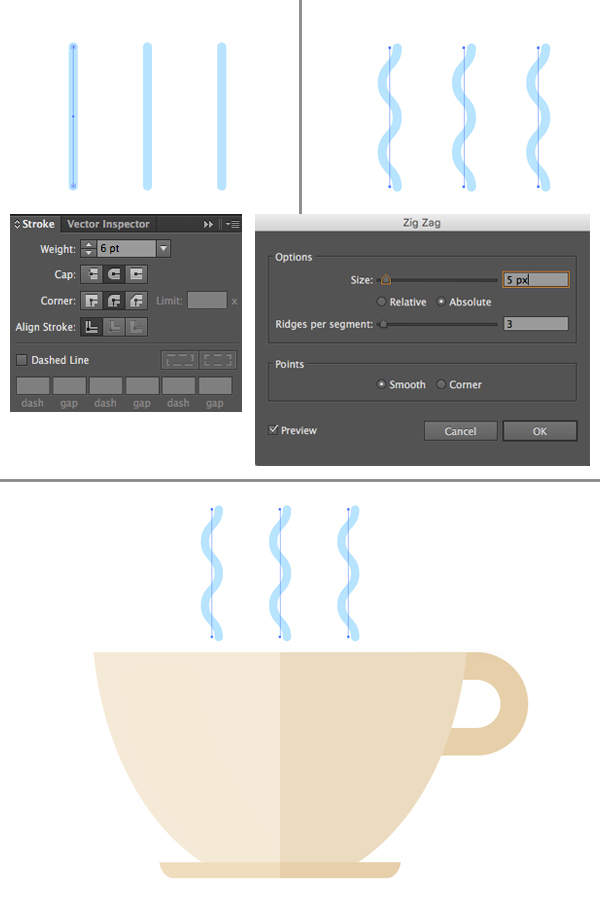
Now let’s make a stylized steam rising from our hot cup. Use the Line Segment Tool (\) and hold Shift to make three vertical lines. Head to the Stroke panel and set the Weight to 6 pt, Cap and Corner to middle positions, this way making the tips of the lines rounded.
Go to Effect > Distort & Transform > Zig Zag. From here, set the Size to 5 px, Ridges per Segment to 3 and Points to Smooth, creating wavy flowing lines.
Step 7
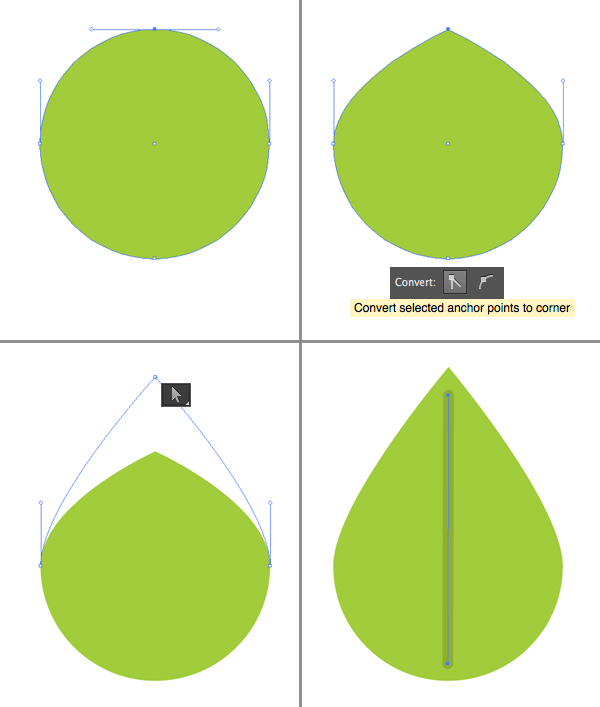
Let’s make a simple green leaf for our tea. Use the Ellipse Tool (L) to make a 90×90 px circle. Select its top anchor point with the Direct Selection Tool (A) and Convert selected anchor point to corner from the control panel on top.
Drag the point up a bit, making the leaf bigger and use the Line Segment Tool (\) to draw a vertical line across the leaf for the midrib.
Step 8
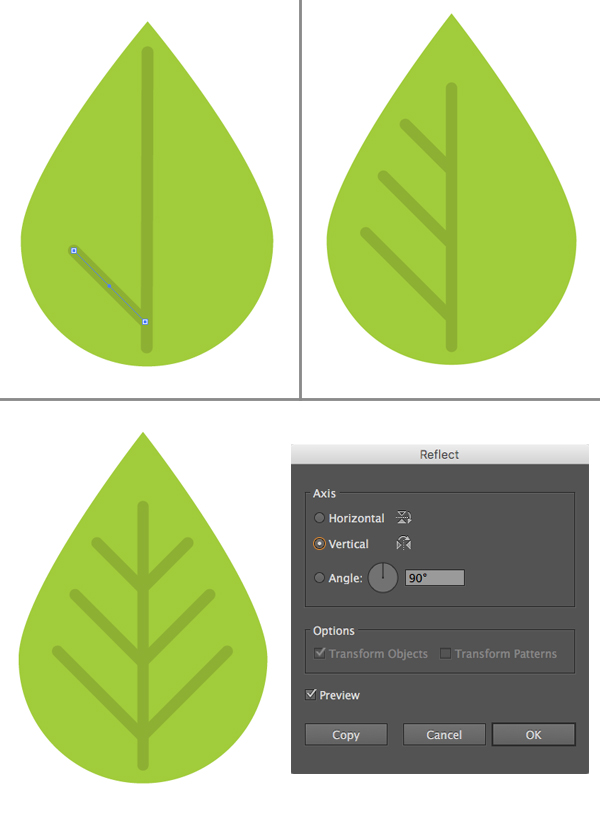
Add a few veins to the leaf. Select the veins, double-click the Reflect Tool (O) and select the Vertical Axis. Click Copy to flip the shape horizontally and attach the veins to the opposite side of the midrib.
Step 9
Make another leaf of darker color and place both elements behind the cup, making them fit the composition.
Step 10
Let’s finish up with our logo by adding some text to make the overall composition look balanced and completed.
Use the Artboard Tool (Shift-O) to make your canvas square, setting its size to 600×600 px. Place the cup in the center of the Artboard and add some text to your liking with the help of the Type Tool (T). I’m using free fonts like Source Sans Pro and Euphoria Script.
Congratulations! Our Teacup Flat Logotype is Finished!
We’ve did a great job and created a trendy flat-style logotype. We can make it look even more completed if we add a dark background of deep brown color. Go ahead and feel free to add any minor details and elements to your liking, for example, a gentle highlight above the cup.
Have fun and don’t forget to share your results!
Author: Yulia Sokolova
Yulia Sokolova (Yuzach) is an illustrator and designer working with such companies as Envato, Disney, Ask.fm and many others. She creates whimsy patterns, characters, app stickers and trendy icons and shares her knowledge and techniques in tutorials. To learn more, visit her Behance. Follow Yulia on Facebook, Twitter and Dribbble!





Very detailed tutorial and output looks very good!
nice very well prepared
wow ! Very useful! I’m new to AI, I learned alot from your tutorial
Thanks a lot
there is only problem with blending mode: after I apply it I can not bring leafs back – because they are visible behind the cup.
Thanks for the tut, very easy to follow. I make one for myself 😀
nice and informative tutorials, can we use Photoshop for logo design?
Thanks for the tut, easy to follow and very nice result