
 Summer is in full swing here in the states! It’s a perfect time to grab your skateboard and go cruising. Today we’re going to learn how to design flat skateboards and colorful vector longboards in Adobe Illustrator! We’ll be working with Clipping Masks, Stroke, and Pathfinder panel. Let’s get started!
Tutorial Details
- Program: Adobe Illustrator CC
- Difficulty: Intermediate
- Topics Covered: Shape Building, Flat Design, Clipping Masks, Stroke Panel
- Estimated Completion Time: 20 Minutes
How to Design Flat Skateboards
Below is the final image we’ll have by the end of this tutorial:

Step 1
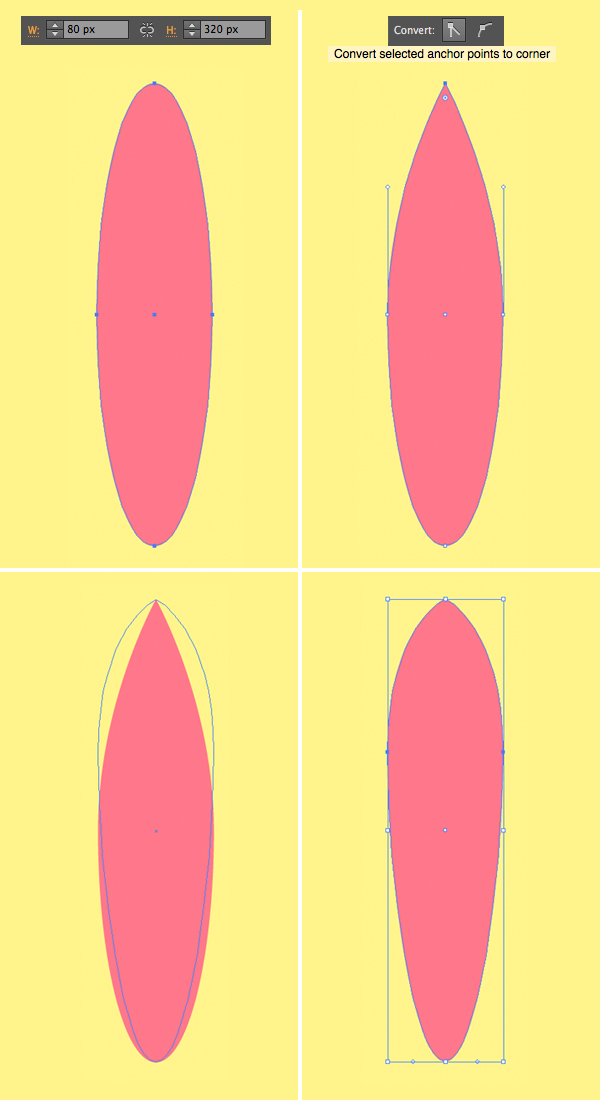
Let’s start shaping our skateboard from its deck. Use the Ellipse Tool (L) to make an 80×320 px ellipse. Select the top anchor point with the Direct Selection Tool (A) and use the Convert function in the control panel on top to make the corner sharp.
Select both side anchor points and drag them up to make the top of the shape wider.
Step 2
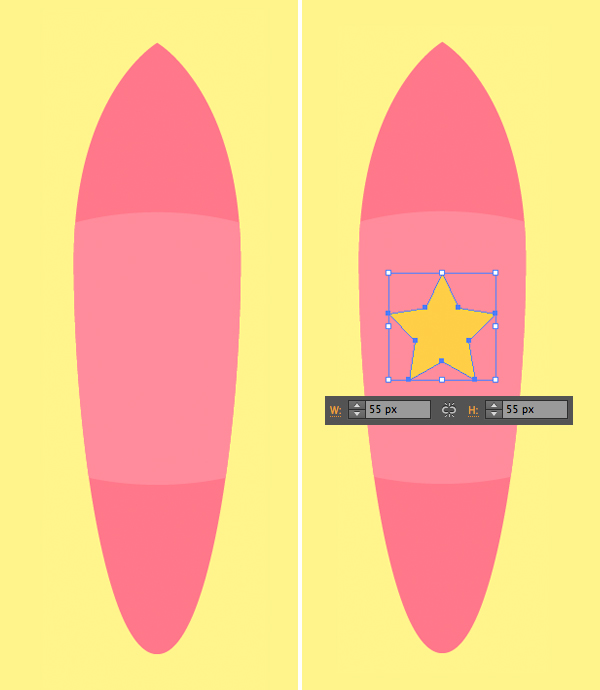
Now we’ll add some decorative elements to the deck. Make another ellipse of 220×140 px size, filling it with lighter-pink color.
Select the deck and duplicate it (Control-C > Control-F). Bring the copy to front (Shift-Control-]).
Now select the top shape and the light-pink ellipse, click right mouse button and Make Clipping Mask. Now the unneeded parts are hidden inside the mask.

Step 3
Use the Star Tool to add a 5-pointed yellow star of 55×55 px size right in the center of our board.
Step 4
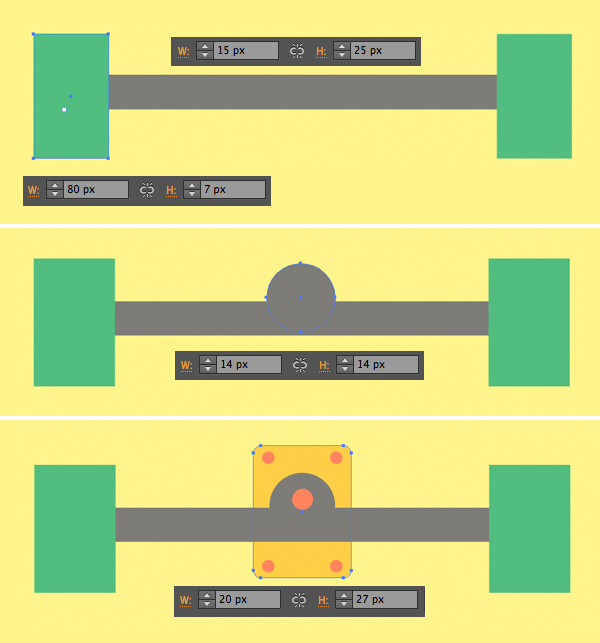
Now let’s add the wheels to the deck. Use the Rectangle Tool (M) to make the wheels and the truck between them. Make two 15×25 px green shapes for the wheels and long dark-grey shape of 80×7 px size for the truck.
Take the Ellipse Tool (L) and make a 14×14 px circle in the middle for the truck.
Use the Rounded Rectangle Tool to add a 20×27 px yellow rectangle for the baseplate and finish up by adding a few circular bolts that will hold the elements together.
Step 5
Add any details to your liking, for example a couple of stripes to the wheels. Group (Control-G) the elements and attach the wheels to the top of the deck. Hold Alt-Shift and drag down to make a copy for the bottom part of the board. Don’t forget to rotate the bottom copy upside down.

Step 6
Now that you know how to design flat skateboards, you’re ready to shape your second longboard! This time we’re going to create a smaller cruiser board.
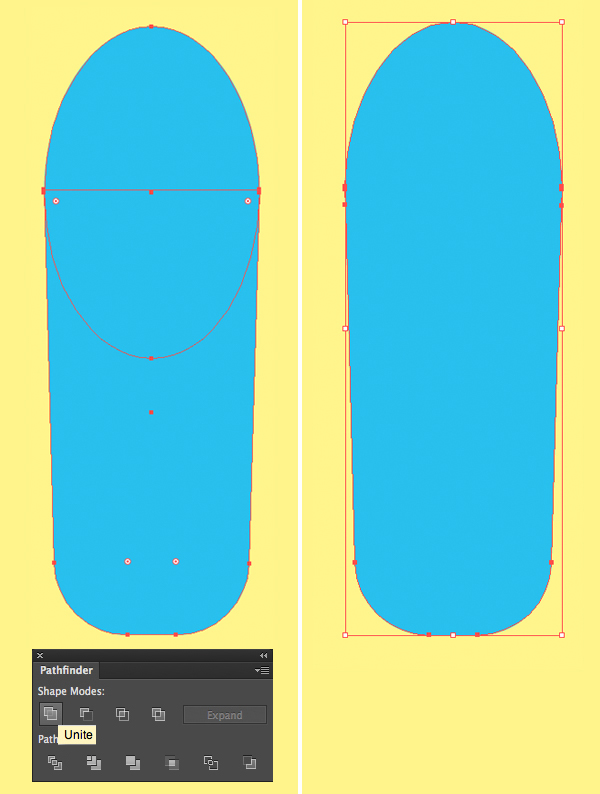
Start shaping its deck by making a 105×160 px blue ellipse and a 105×215 px rectangle of the same color. As you can see, both shapes have the same width, so we can combine them as shown in the screenshot below.
Select the bottom left anchor point of the rectangle with the Direct Selection Tool (A) and press right arrow key while holding Shift to move the point closer to center. Repeat the same for the opposite side, making the bottom of the deck narrower.
Finally, select both anchor points with the Direct Selection Tool (A) and use the Live Corners feature to make the corners rounded. You can set the needed Corner Radius in the control panel on top.

Step 7
Now we can select both parts and Unite them in the Pathfinder.
Step 8
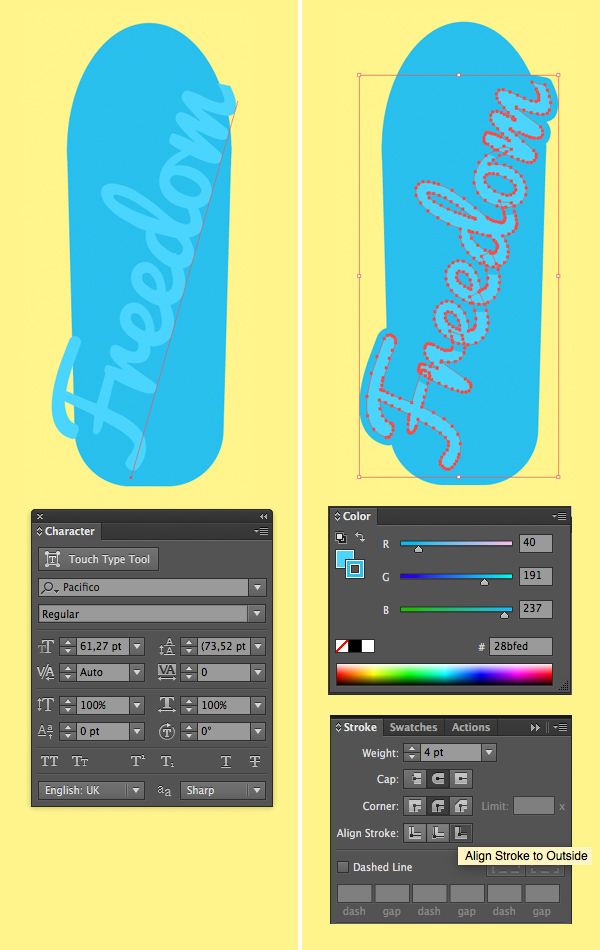
Let’s add some design work to the deck. Take the Type Tool (T) and type a word. (For example, with Independence Day coming up here in the U.S., I’m typing, “Freedom”.) Rotate your word and place across the deck. I’m using the Pacifico free font and a lighter-blue color for the text.
Object > Expand the text to turn it into vector shapes. Now we can add a Stroke to the text. Apply the same darker-blue color, switching to Stroke in the Color panel and using the Eyedropper Tool (I) while holding Shift. Head to the Stroke panel, set the Weight to 4 pt and Align Stroke to Outside, making it thicker.
Step 9
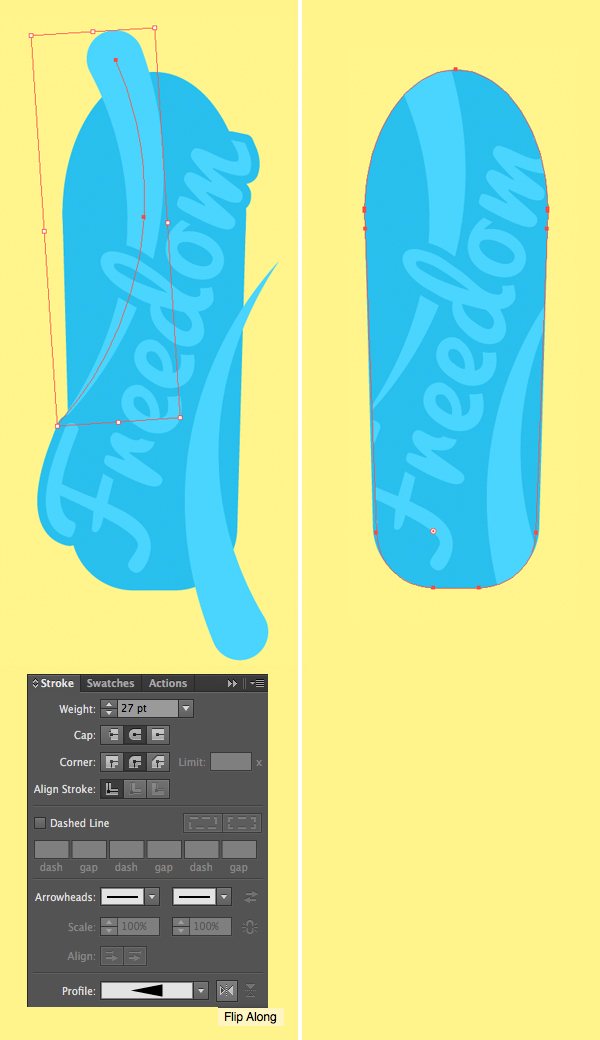
Use the Arc Tool or the Pen Tool (P) to make two arched light-blue strokes. Set the Stroke Weight to 27 pt and change the Profile in the bottom of the Stroke panel. Use the Flip Along button next to the Profile menu to mirror the parts of the stroke.
Create a Clipping Mask, using the deck shape as we did previously to hide the unneeded elements inside.
Step 10
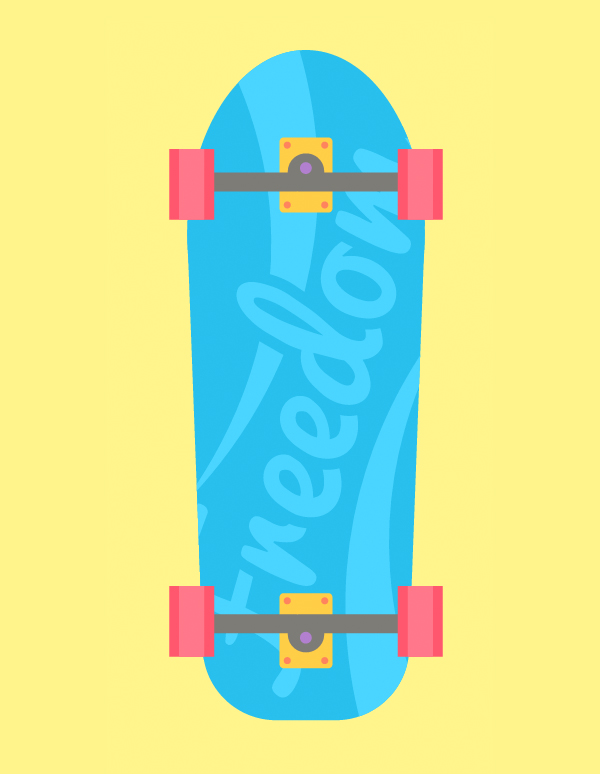
Finish up by adding the wheels to the deck. We can copy the wheels from the first longboard and change the colors, adding variety to our illustration.
That’s it! Now you know how to design flat skateboards in Illustrator!
Great job! I hope you’ve enjoyed following this tutorial and learned some simple tips and tricks that will help you with your future illustrations. Stay tuned for more!


I definitely wanted to post a word so as to express gratitude to you for some of the unique advice you are posting on this website. My long internet investigation has now been recognized with good tips to talk about with my company. I ‘d say that most of us site visitors are definitely fortunate to exist in a superb place with very many outstanding individuals with great secrets. I feel pretty fortunate to have encountered your webpages and look forward to many more exciting minutes reading here. Thanks again for a lot of things.
You have brought up a very good details , thanks for the post.
I think this is a real great post. Awesome.
Thanks to the great guide
Awesome steps! thanks