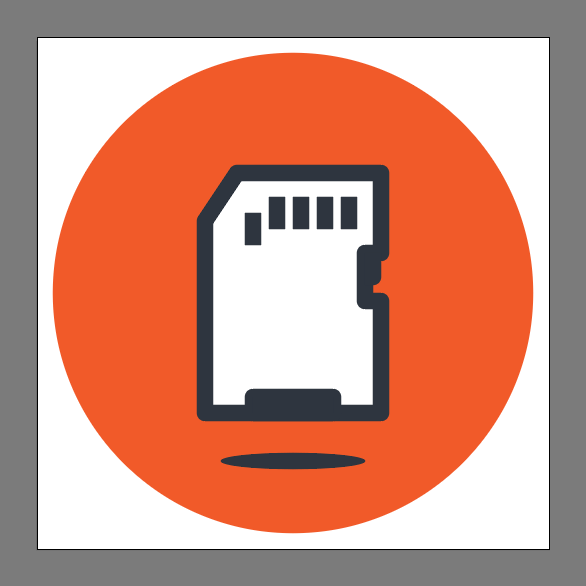
 In today’s tutorial, we’re going retro again! We’re going to learn how to create a memory card icon, using some of the basic shapes and tools that you work with on a daily basis.
So, assuming you already have the software running in the background, bring it up and let’s get started!
Tutorial Details: How to Create a Memory Card Icon
- Program: Adobe Illustrator CS6 – CC
- Difficulty: Beginner
- Topics Covered: Design Theory, Compositional Construction, Shape Alignment, Grid Positioning
- Estimated Completion Time: 25 Minutes
Final Image: Memory Card Icon

Step 1
Thanks for joining us for another tutorial from our retro hardware series. As always, we’ll start by setting up a New Document by heading over to File > New (or by using the Control-N keyboard shortcut), which we will adjust as follows:
- Number of Artboards: 1
- Width: 128 px
- Height: 128 px
- Units: Pixels
And from the Advanced tab:
- Color Mode: RGB
- Raster Effects: Screen (72ppi)
- Preview Mode: Default
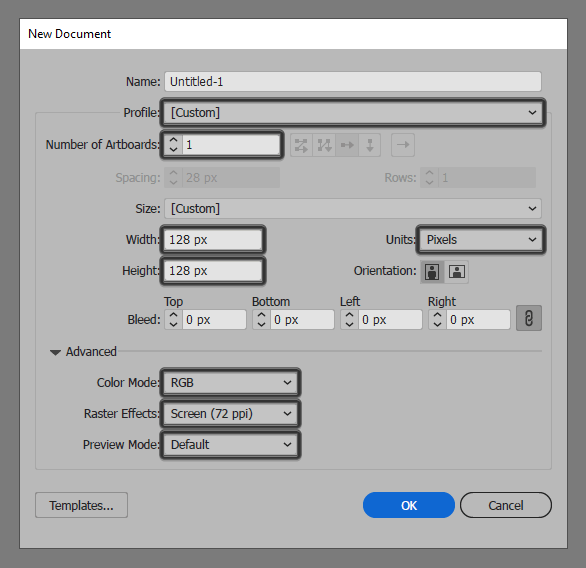
Quick tip: most of the indicated settings can be automatically triggered if you set the document’s Profile to Web, the only one that you’ll have to manually adjust being the Artboard’s Size (Width x Height).
Step 2
Once we’ve set up our project file, we can start working on the actual icon and we will do so by creating the background using a 120 x 120 px circle which we will color using #F15A24, and then position to the center of the underlying Artboard.
![]()
Step 3
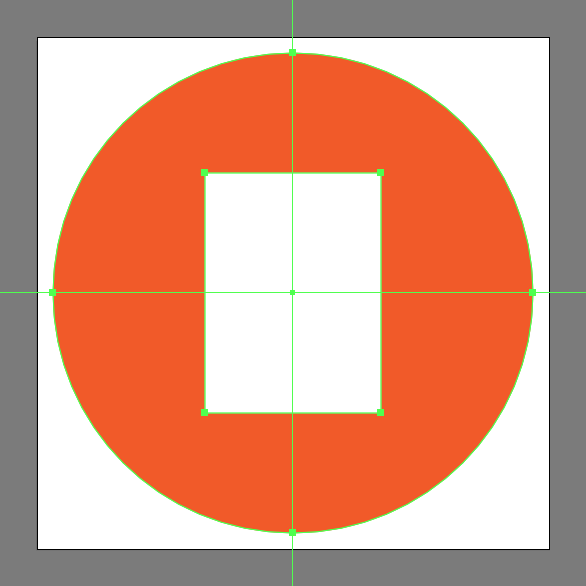
Add the main shape for the memory card’s body using a 44 x 60 px rectangle which we will color using white (#FFFFFF), and then center align to the larger underlying circle.
Step 4
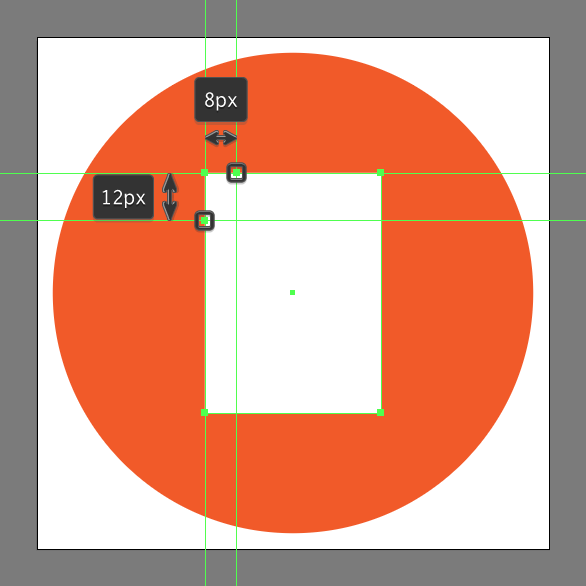
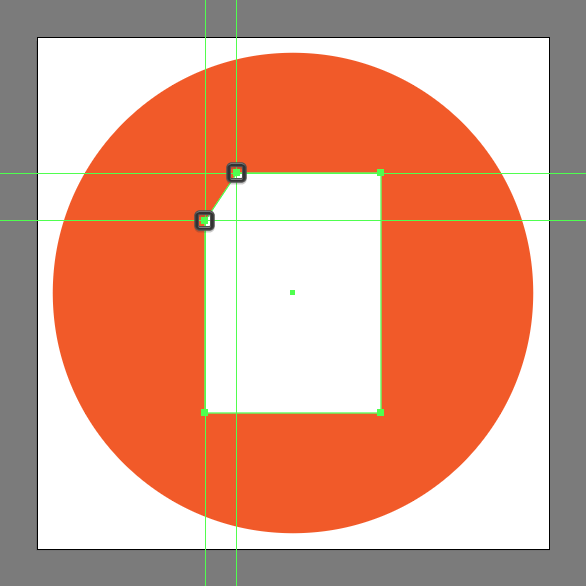
Start adjusting the shape that we’ve just created by grabbing the Add Anchor Point Tool (+) and then using it to add two new anchor points positioning them as seen in the reference image. Take your time and once you’re done, move on to the next step.
Step 5
Remove the corner anchor found in between the two new ones that we’ve just added, by simply clicking on it using the Delete Anchor Point Tool (-).
Step 6
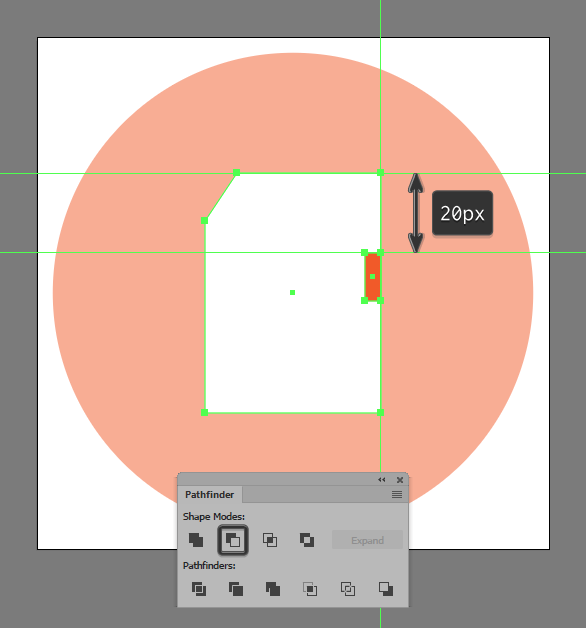
Continue adjusting the shape by creating a 4 x 12 px rectangle (highlighted with red), which we will position at a distance of 20 px from its top-right corner, and then cut out using Pathfinder’s Minus Front Shape Mode.
Step 7
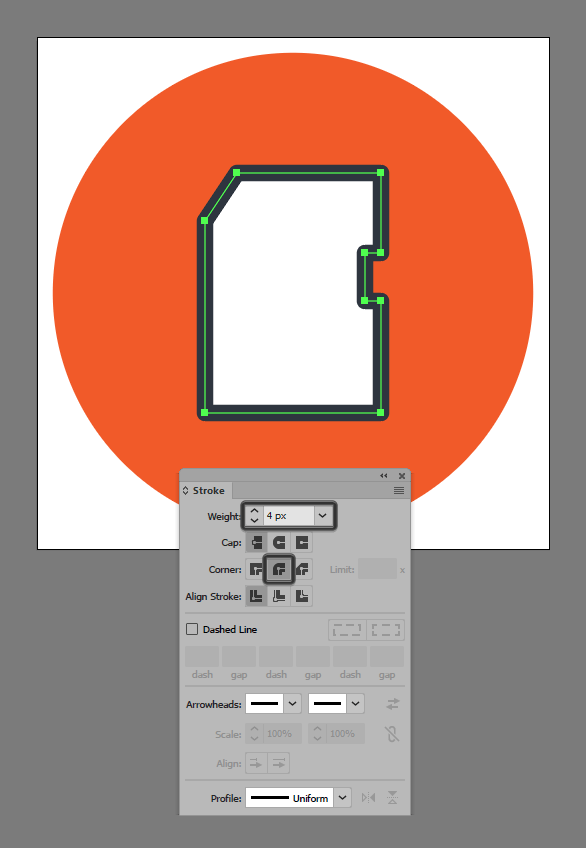
Give the resulting shape an outline using the Stroke method, by creating a copy of itself (Control-C) which we will paste in front (Control-F) and then adjust by first changing its color to #2A323D. Then, flip its Fill with its Stroke (Shift-X) setting its Weight to 4 px and its Corner to Round Join, making sure to select and group the two shapes together using the Control-G keyboard shortcut.
Step 8
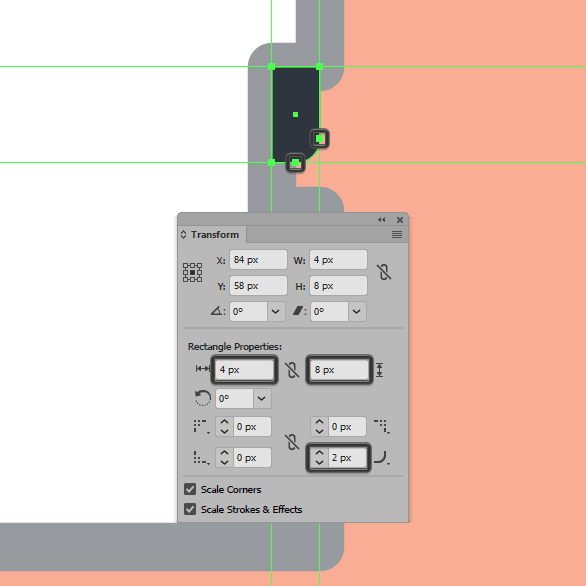
Add the little lock slider using a 4 x 8 px rectangle which we will color using #2A323D, and then position onto the upper side of the card’s cutout, making sure to set the Radius of its bottom-right corner to 2 px from within the Transform panel’s Rectangle Properties.
Step 9
Create the pins using five 4 x 8 px rectangles (#2A323D), which we will horizontally distance at 2 px from one another, positioning them as seen in the reference image. Once you have the shapes in place, make sure you select and group all of them together using the Control-G keyboard shortcut.
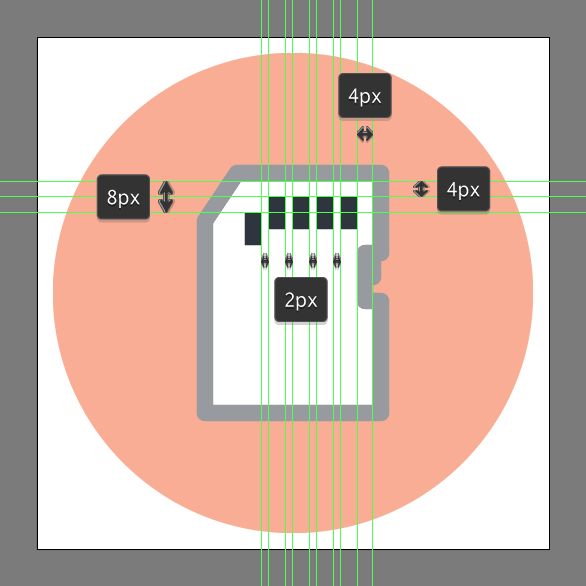
Step 10
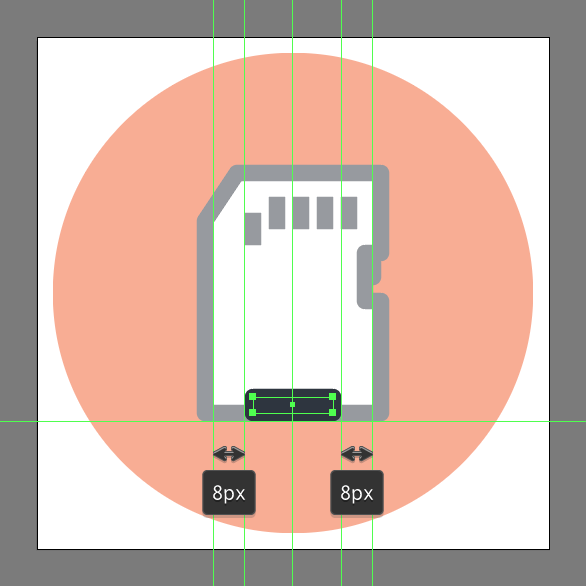
Add the bottom insertion using a 20 x 4 px rectangle (#2A323D) with a 4 px thick outline (#2A323D), which we will group (Control-G) and then center align to the larger body’s bottom edge, making sure to select and group all of the card’s composing shapes together using the Control-G keyboard shortcut.
Step 11
This is the last step when learning how to create a memory card icon! Finish off the project by adding the circular shadow using a 36 x 4 px ellipse which we will color using #2A323D, and then center align to the card, positioning it at a distance of 8 px from its bottom edge. Once you’re done, select and group all of the icon’s composing shapes together using the Control-G keyboard shortcut.
![]()
Awesome Work! You now know how to create a memory card icon!
As always I hope you had fun working on the project, and if you have any questions feel free to post them within the comments section and I’ll get back to you as soon as I can.
