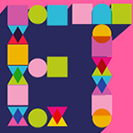
 Let’s have fun with pops of color in this text treatment tutorial! We’ll use simple shapes to transform text into a fantastic geometric poster vector design in seven steps flat!
Tutorial Details: 7 Steps to Create a Geometric Poster Design
- Program: Adobe Illustrator CS6 – CC
- Difficulty: Intermediate
- Topics Covered: Design Theory, Shape Building, Compositional Skills
- Estimated Completion Time: 30 Minutes
Final Image: Geometric Poster Design
Step 1
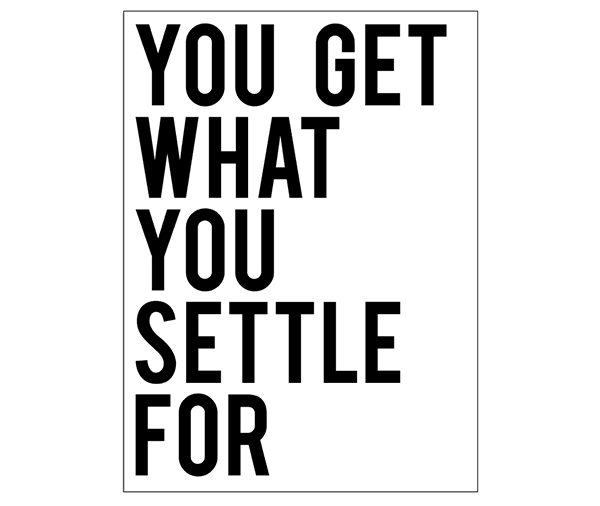
In a New Document set up your type within your Artboard. Use a bold sans-serif font, like Bebas Neue and fill up your space like I’ve done below.
Step 2
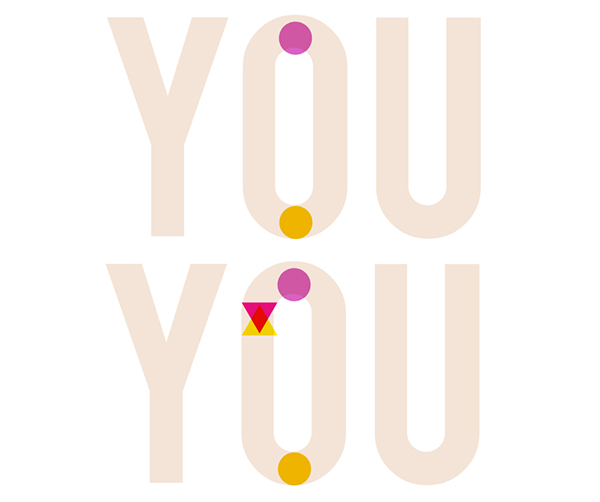
Set the fill color of your type to something light so you can still see your letters. Lock them in the Layers panel. Use triangles, circles, and squares that fit easily into the width of your letters. Stack and overlap them, taking note of their shape and how they fit with each letter. Settle on a color palette that flows well together. Personally, I’m a fan of a full spectrum.
Step 3
For corners and curves, round out one side of a square using its Live Corners. Consider emphasizing the edge of letters like “U” with a square while the top and bottom curve of an “O” are simple circles. We’ll be deleting the base letters later, so we want these shapes to work together in creating the letter forms. Feel free to repeat sections of your design and simply change the color of your shapes. Set each shape to Multiply in the Transparency panel to overlap shapes as I’ve done below.
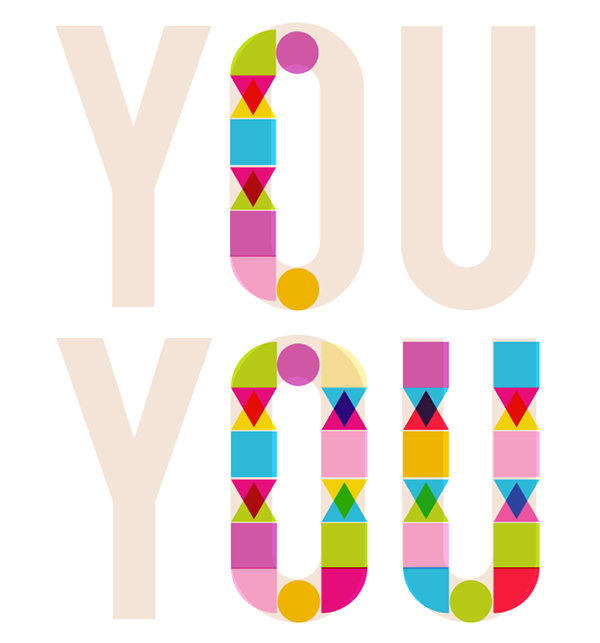
Step 4
Continue adding shapes to each letter. Play with different kinds of triangles, orientations of shapes, and repeated motifs.
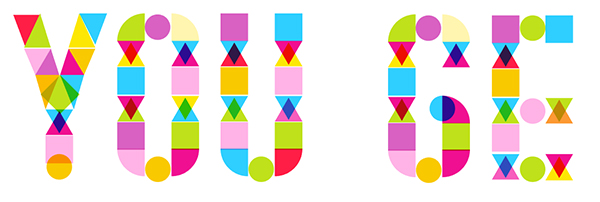
Step 5
As you work up letters, feel free to Copy and Paste like letters around your composition. The same goes for like shapes within letter forms. This will speed up your process quite a bit. If you find too much of it is the same, change the fill colors of the shapes to give each letter a refreshing look.
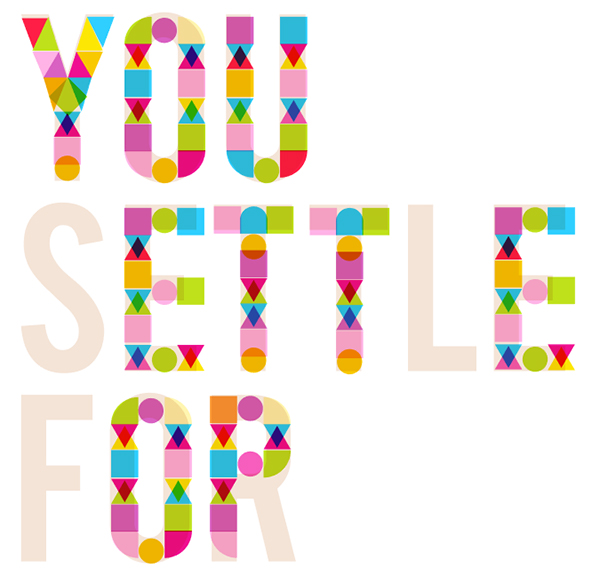
Step 6
When you’re done with assembling your shapes, Group everything together and delete the base text group. Copy and Paste your group and Unite it together in the Pathfinder panel. Place it behind your original shape group. Since we’ve set the shapes to Multiply you’ll want a solid background.
Duplicate the background shape group twice. Offset one quite a bit and use the Blend Tool to create a smooth blend of 50 Steps or more. Place the blend behind your design.
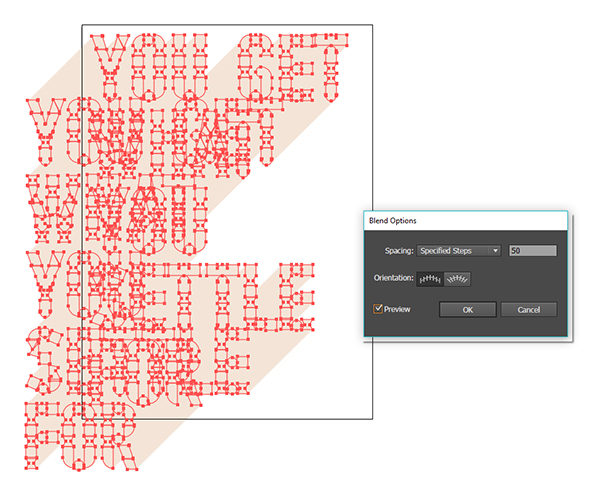
Step 7
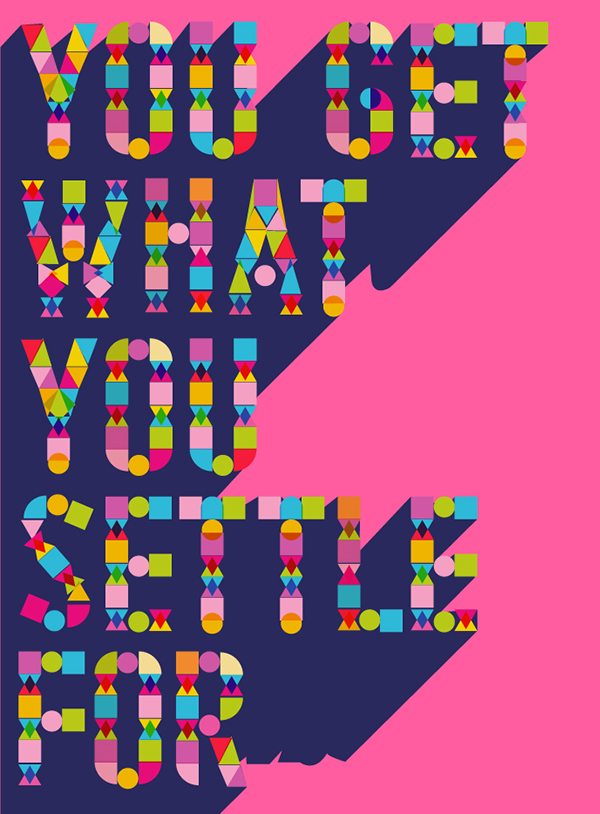
Play with your design colors. Add a bright rectangle in the background and consider a dark, bold shadow for the final design.
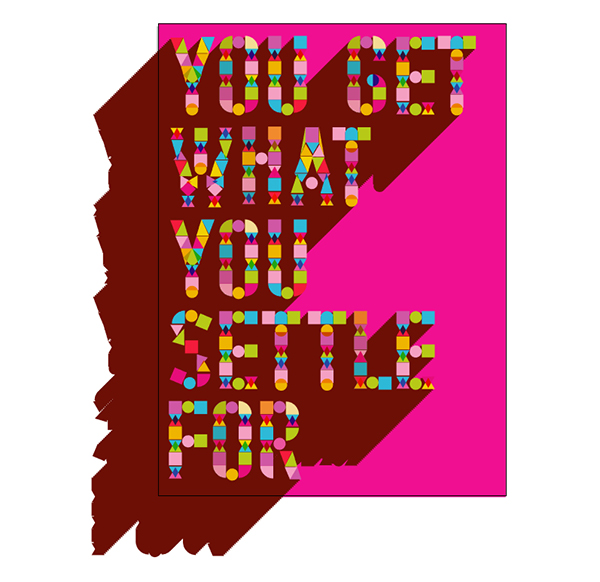
Conclusion: Geometric Poster Design
Great job, you’re done! Crop your final poster design and share it in the comment section below. Go further than this tutorial and create a whole, fabulous alphabet with colorful geometric shapes!

Author: Mary Winkler
Mary works under the brand Acrylicana® and has illustrated and designed for companies like Disney, Jakks Pacific, Jada Toys, Envato, and more. Check out Acrylicana.com for artwork, tutorials, and more. Follow Acrylicana on Instagram, Facebook, and Twitter!


Enjoyed every bit of your article. Thanks Again. Cool!.
Hi, I’m at step six and you lost me. Can you explain it differently I just spent three hours getting to this step.
“Estimated Completion Time: 30 Minutes” – my completion time was X hours 🙂 Please look at my version, with another quote. Thank you, Mary.
Please look at my version with another quote.
http://agotaaa.deviantart.com/art/Geometric-Poster-Design-614150040?ga_submit_new=10%253A1465439410&ga_type=edit&ga_changes=1&ga_recent=1