

In this tutorial, we’ll use basic shape design and 3D modeling in Adobe Illustrator to draw a cool cloud bookshelf illustration. Then, we’ll add interest to our design by applying textures and shading to our shelf.
Tutorial Details
- Program: Adobe Illustrator CS5 – CC
- Difficulty: Intermediate
- Topics Covered: 3D modeling
- Estimated Completion Time: 90 minutes
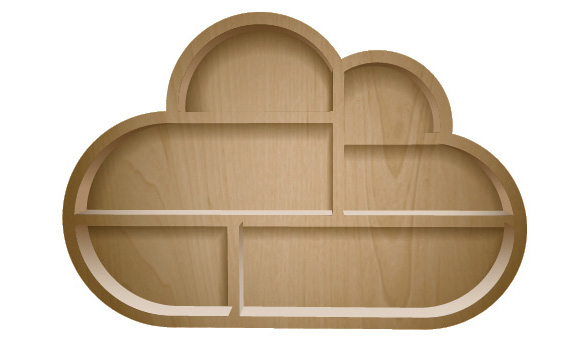
Final Image

Step 1
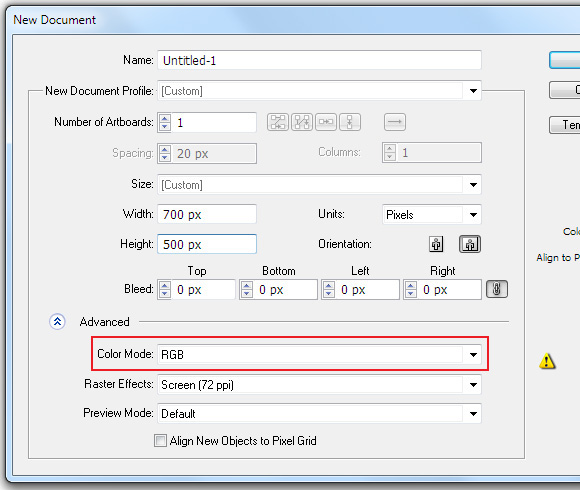
Start Adobe Illustrator, then go to the File > New…. In the opened dialog box, set the necessary size of our artboard and choose the RGB color mode.
Step 2
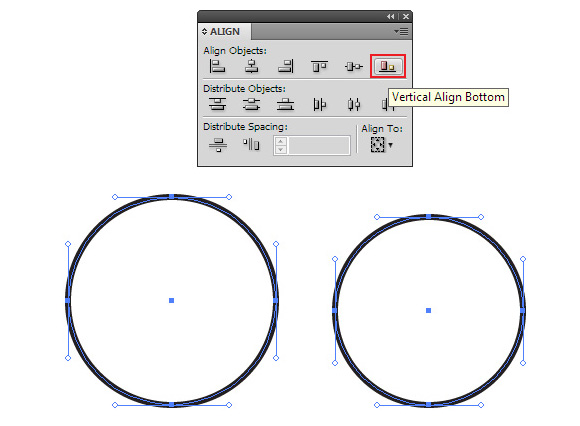
Draw two circles of different sizes with the help of the Ellipse Tool (L). Apply a stroke and set the fill to blank using the Tools palette. Select both objects with the Selection Tool (V), then click on the Vertical Align Bottom button in the Align panel.
Step 3
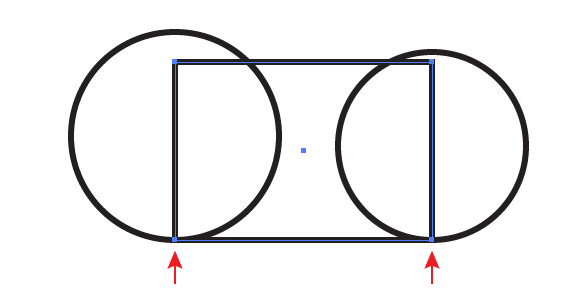
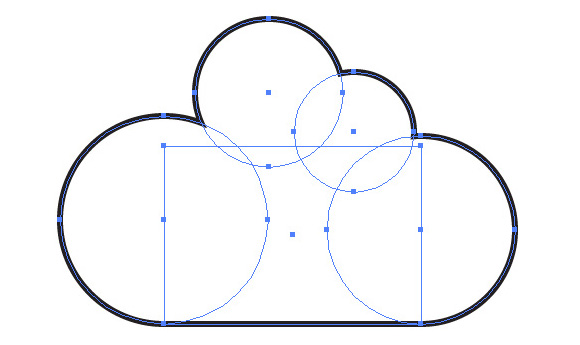
Create a rectangle with the help of the Rectangle Tool (M). The lower vertices of our rectangle should match the lower points of the circle. It’s not very difficult to do if you work in the Smart Guides mode (Cmd/Ctrl + U).
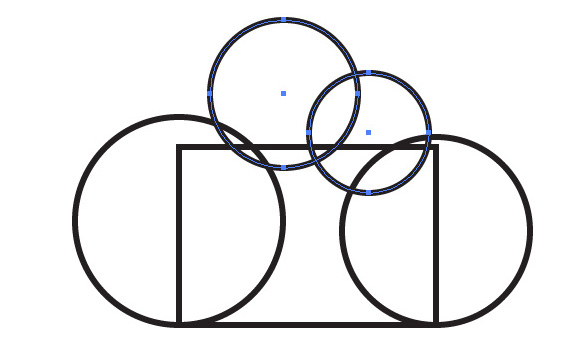
Draw two more circles as it is indicated on the figure below.
Step 4
With the help of simple shapes, we created a cloud, but it is difficult to estimate its shape like this. Select all the objects, then group them (Cmd/Ctrl + G). Keep the group selected, go to the Effect > Pathfinder > Add. The forms were united into one, but we’re still able to edit the location and size of the objects included in the group.
Let’s use this opportunity and make the cloud’s form perfect.

To finish combining the objects, go to Object > Expand Appearance.
Step 5
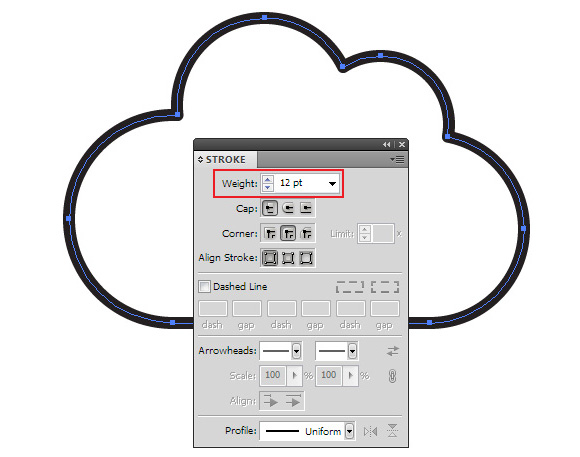
Next, pick the required thickness of the stroke in the Stroke panel.
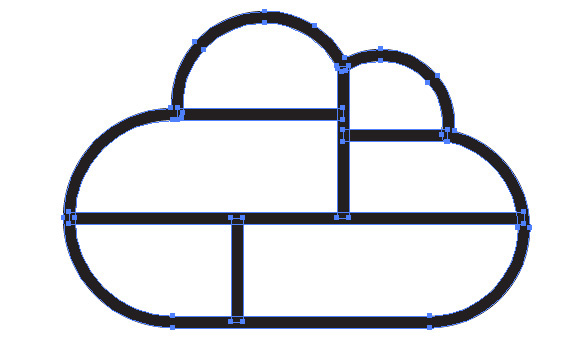
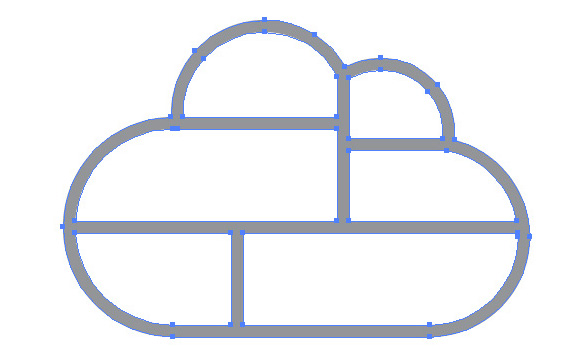
And now with the help of the Line Tool (\) + Shift create a couple of horizontal and vertical segments as it is indicated on the figure below.

Step 6
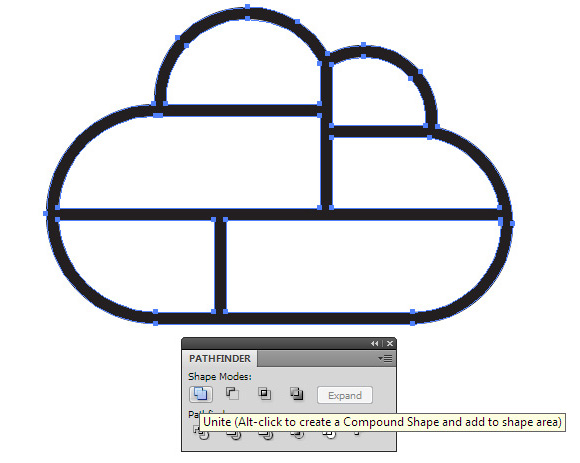
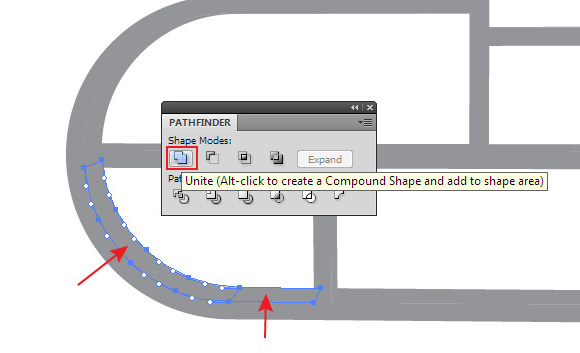
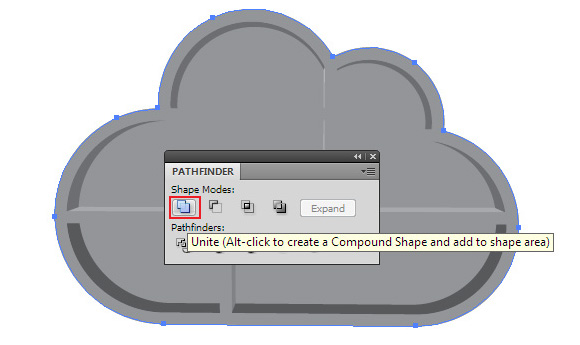
Select all the objects, then go to the Object > Path > Outline Stroke.
Now click on the Unite button in the Pathfinder panel. As a result of these actions, we received the Compound path.
Step 7
Fill the compound path with a neutral color.
Let’s start the 3D modeling. Keep the object selected, go to the Effect > 3D > Extrude & Bevel… and set the parameters indicated on the figure below.
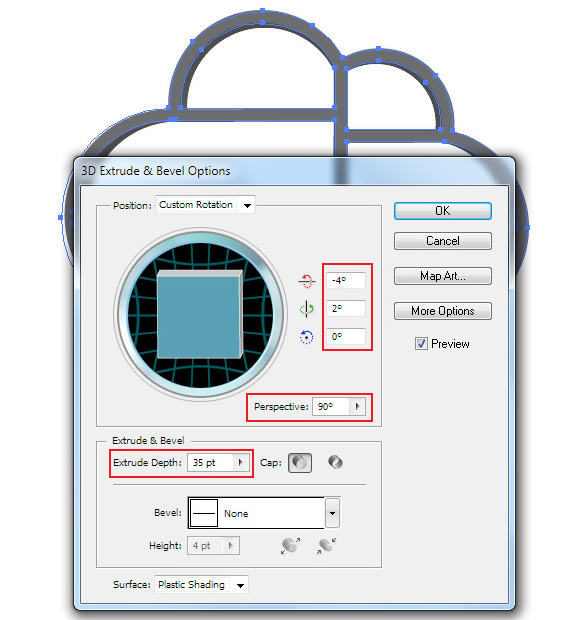
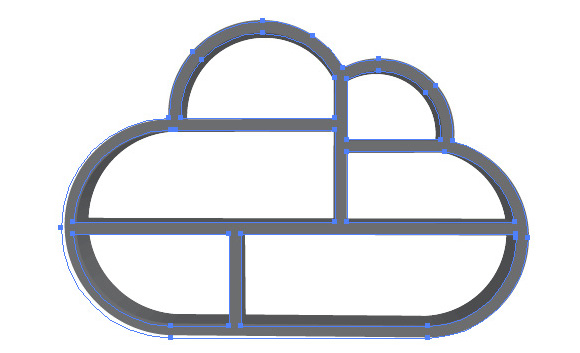
Visually, rate your 3D object and if you don’t like something, change the effect’s parameters.
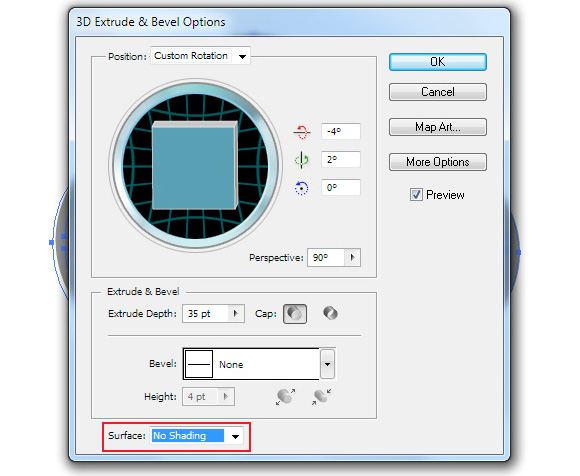
To simplify the process further, choose No Shading for the surface in the 3D Extrude & Bevel Options window.
Step 8
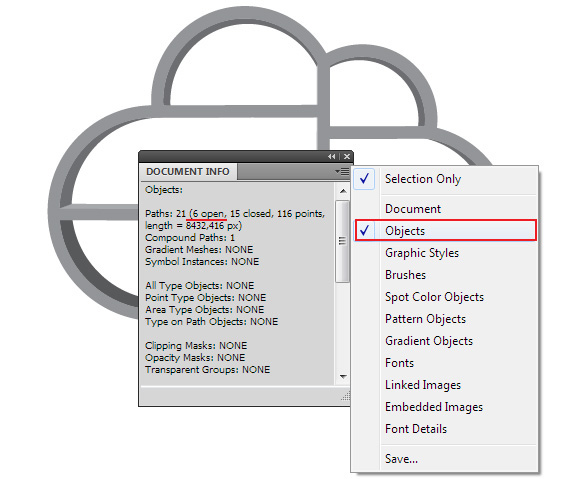
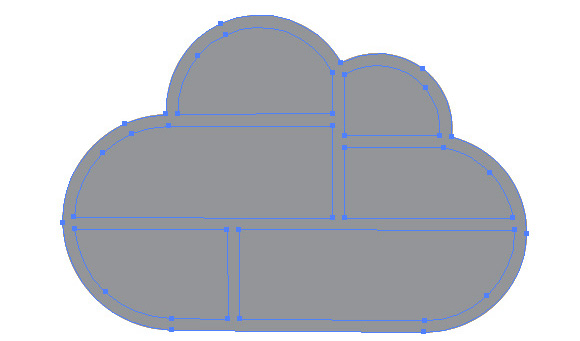
The process of 3D object construction is complete, so let’s continue working with ordinary vector objects; to do so, go to the Object > Expand Appearance…

Now we need to unite objects that belong to one surface. Select such objects with the help of the Direct Selection Tool (A) then click on the Unite in the Pathfinder panel.
Similar actions should be performed on all surfaces if they consist of a couple of objects. Usually I color surface into different colors so I don’t get confused from the big number of objects.

Step 9
Often the objects received from 3D modeling have open paths which may complicate their further processing.
To use the quick closing, use the Close All Paths script, which you can download here.
Step 10
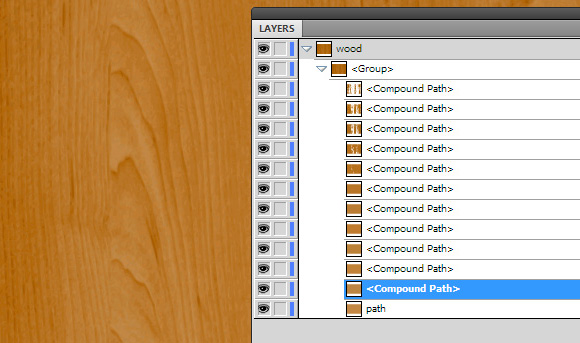
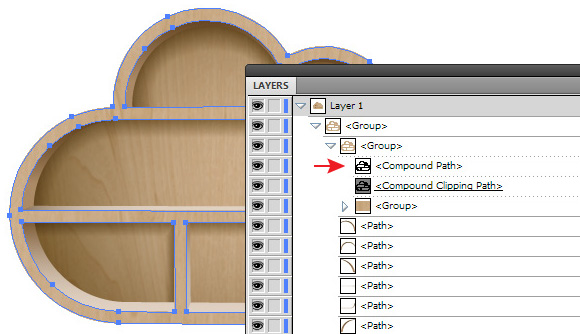
Create a back wall for our book shelf. Select the compound path indicated on the figure below.
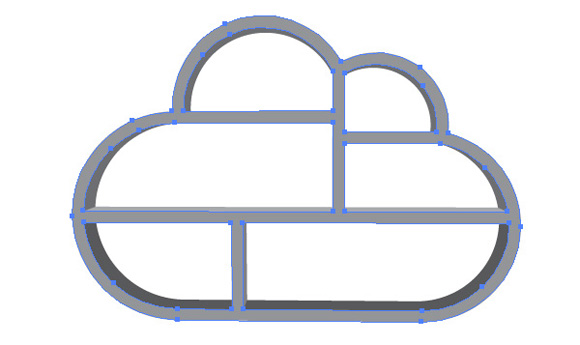
Copy and paste it back (Cmd/Ctrl + C; Cmd/Ctrl + B), then place it below all the created objects (Object > Arrange > Send to Back). Now go to the Object > Compound Path > Release.
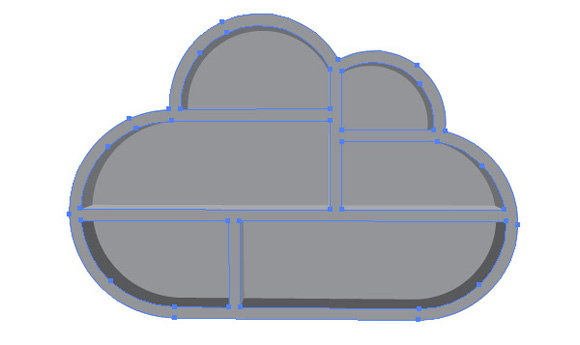
Click on the Unite in the Pathfinder panel.
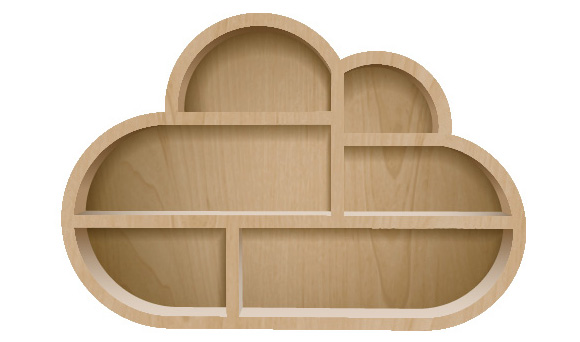
Recolor the back wall into another shade of grey for clarity. As you can see, all the forms of the shelf are ready.

Step 11
Create a wooden vector texture for the shelf. I’ve used a free raster image for it; you can download it on the following website freestocktextures.com.
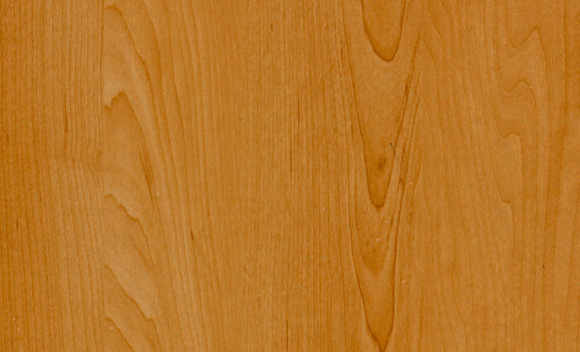
You can turn it into the vector texture by using the Live Trace function in Adobe Illustrator. However, such vector texture will have many colors and points which will increase the size of your file. I prefer to use the free vector software – Inkscape for tracing. And if you want to find out how to trace in the Inscape and about advantages of this method, then you can read about it in my article here. The received vector texture is pasted in illustrator’s document.
Step 12
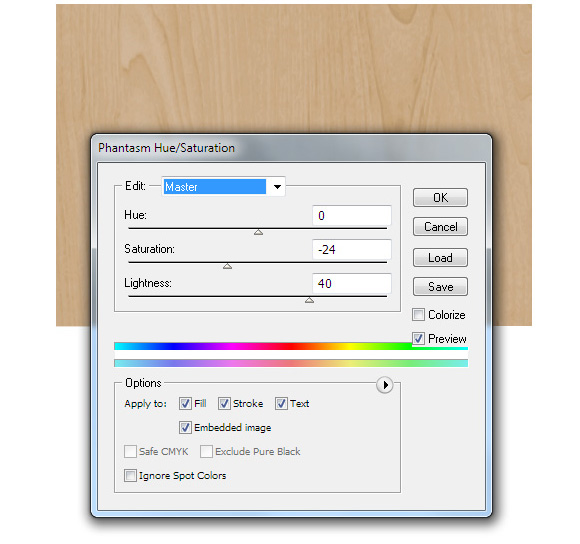
If the color of the vector texture doesn’t quite suit you, then before turning it into a vector, you need to edit the colors in Photoshop or in any other raster editor. If you use the Phantasm plug-in, which is probably one of the most popular plug-ins for working with colors in Adobe Illustrator, then you can perform the color correction of the vector texture. This is the plug-in I used to change the Lightness and Saturation of the texture.
Step 13
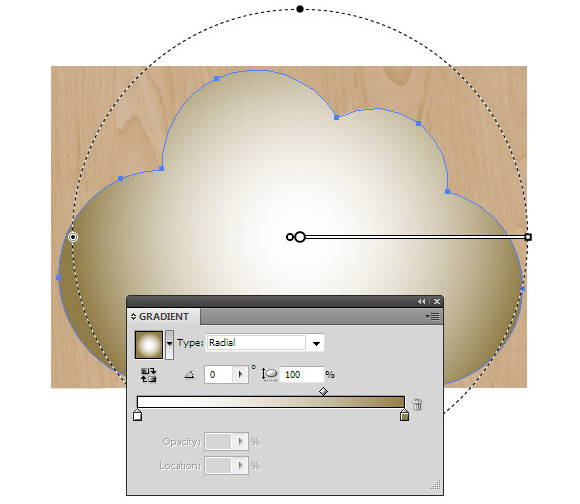
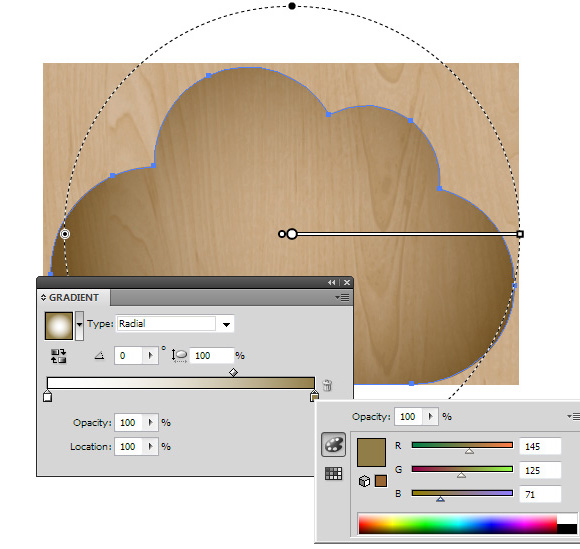
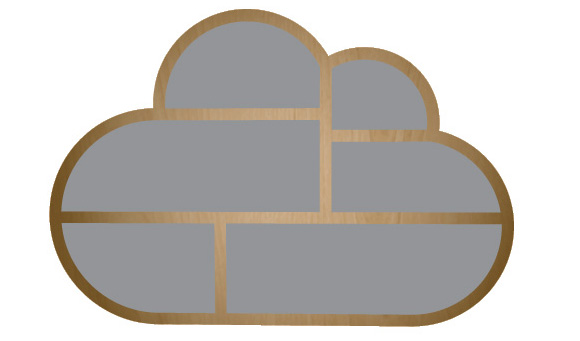
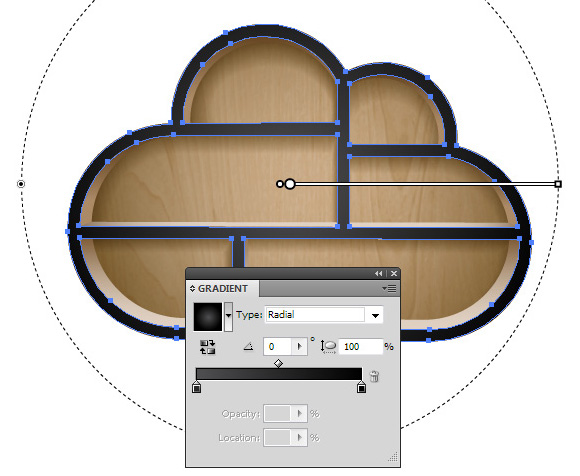
Place the wooden texture underneath all the created objects. Fill the back wall of the shelf with the radiant gradient from white to brown.
Apply the Multiply blending mode to this object using the Transparency panel.
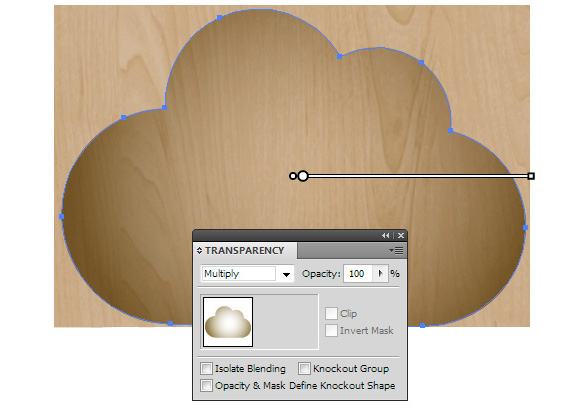
Only after the blending mode has been applied, you can edit brown if obtained shadow does not satisfy you.
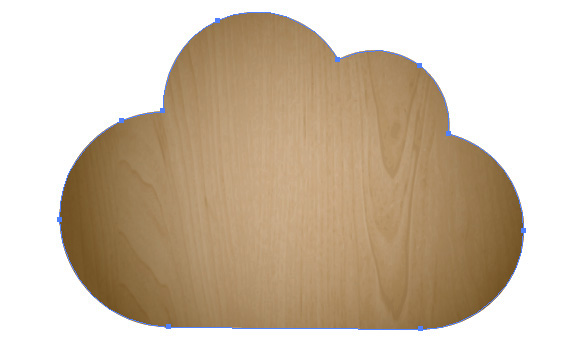
Step 14
Copy the back wall and paste it to the front (Cmd/Ctrl + C; Cmd/Ctrl + F). Select both forms of the back wall and wooden texture, then use the Cmd/Ctrl + 7 shortcuts to create the Clipping Mask. As a result, we’ve hidden the parts of the texture which go beyond the borders of our shelf.
Step 15
Duplicate the front part of the shelf (Cmd/Ctrl + C; Cmd/Ctrl + F). Keep the new object selected, go to the Object > Compound Path > Release.
Remove the outer shape of grey cloud.
We will need the remaining parts to create some local shades inside the shelf.
Step 16
Fill one of these forms with brown.
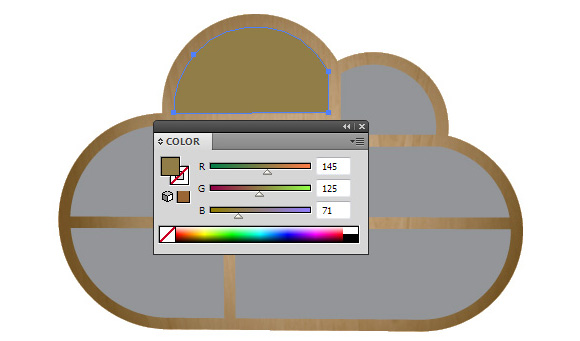
Duplicate the brown shape (Cmd/Ctrl + C; Cmd/Ctrl + F) then fill it with white.
Select the brown and the white shape (it can be easily done in the Layers panel), then go to the Object > Blend > Make.
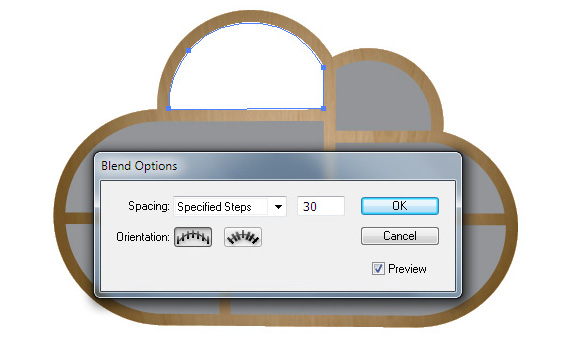
Step 17
Click twice on the Blend Tool (W) icon to open the Blend Options of the dialog box. Set the number of specified steps. I seldom use more than 30 steps because it increases the size of the file.
Step 18
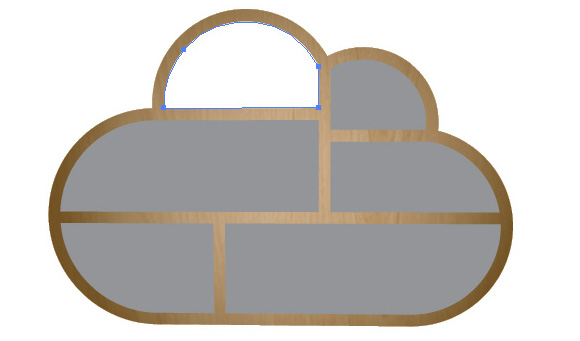
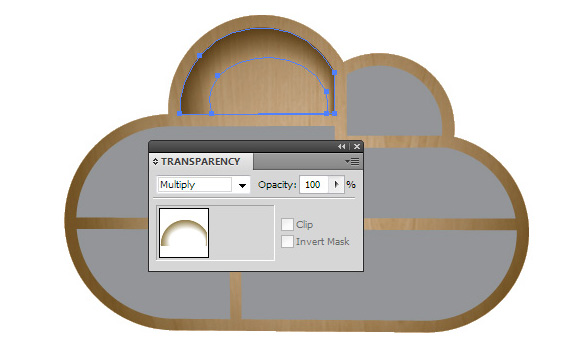
Move the points of the white object inside as it is indicated on the figure below.
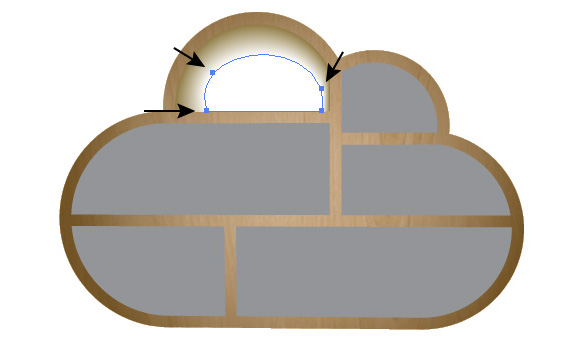
Select the entire blend object and set the Multiply blending mode in the Transparency panel.
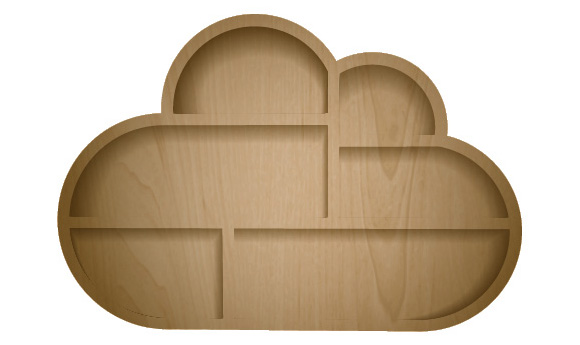
If you don’t like the form of the shade, you can always change the points’ location in the white object. Using the described technique create some shades in the remaining sections of the shelf.
Step 19
Fill the side walls of the shelf with linear gradients in accordance with the light direction (downward).

Step 20
For the front part of the shelf, I used the same vector texture. However, I turned it to 180 degrees to make the front and back textures look different.
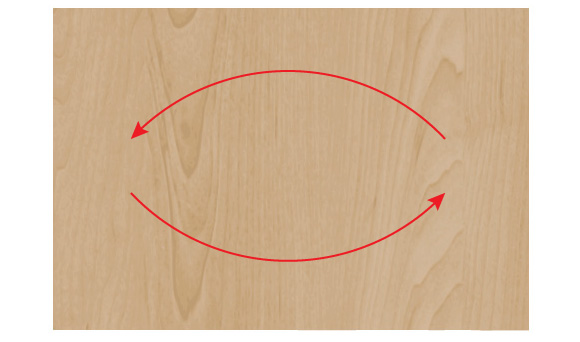
Place this texture underneath the front part of the shelf.

Select the texture and the front part of the shelf. Then use the Cmd/Ctrl + 7 shortcuts for the Clipping Mask creation.
Step 21
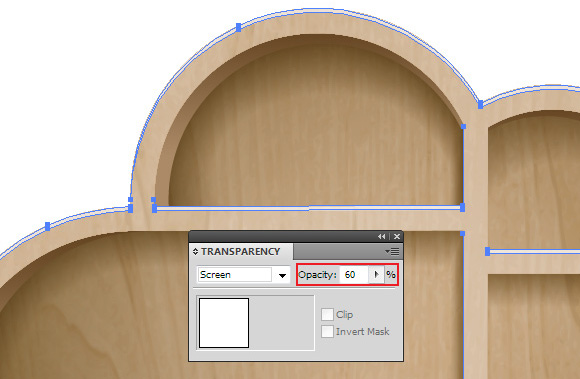
Duplicate the Compound Clipping Path (Cmd/Ctrl + C; Cmd/Ctrl + F).
Fill the new object with radial gradient from dark-grey to black.
Apply the Screen blending mode to this form using the Transparency palette.
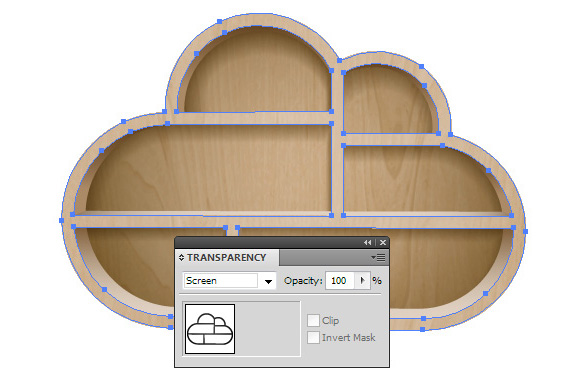
This should result in the lightening of the front part of the shelf.
Step 22
Duplicate the front part of the shelf, then fill the new object with white.
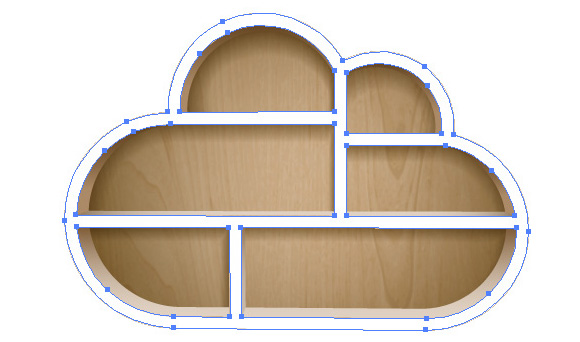
Duplicate the white object and shift the copy a couple of pixels down using your keyboard arrows.
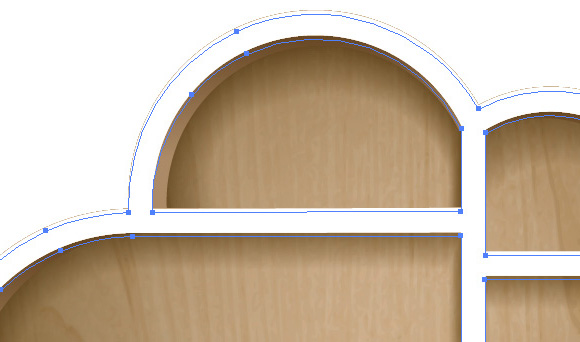
Select both white forms, then click the Minus Front option in the Pathfinder panel.
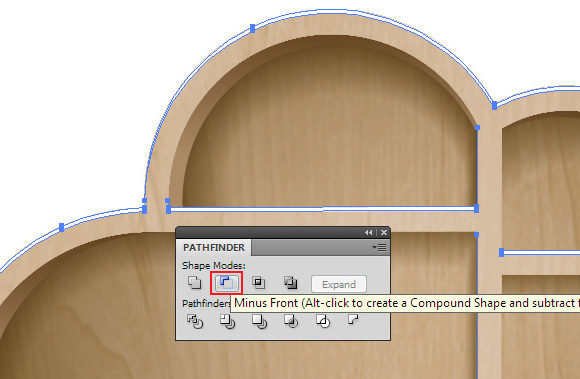
Reduce the opacity of the received form in the Transparency panel.
We’ve now have some highlights on the faces of our shelf.
Step 23
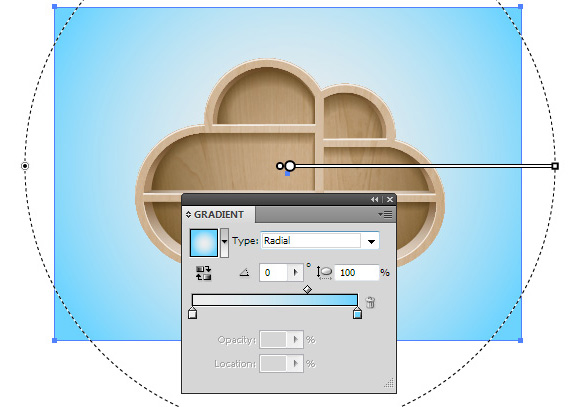
Next, we’ll create the background. Create a rectangle with the help of the Rectangle Tool (M); the size of the rectangle should correspond to the size of our artboard. Fill the rectangle with the radiant gradient from light-grey to blue.
Step 24
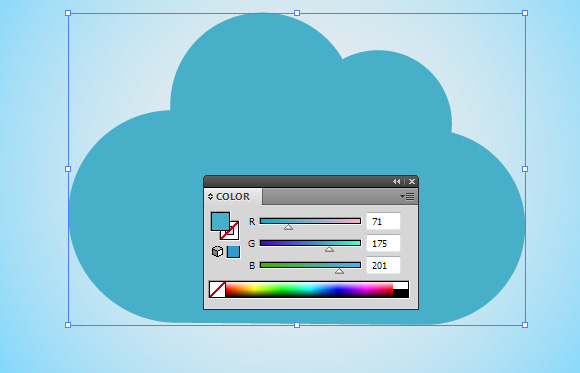
I created the shadow from the cloud with the help of the blend object. Copy the back wall of the shelf and paste it to the back (Cmd/Ctrl + C; Cmd/Ctrl + B). This object should be located underneath all objects of the shelf and above our background. Fill the cloud form with blue ( for clarity, I turned off the visibility of all clouds above).
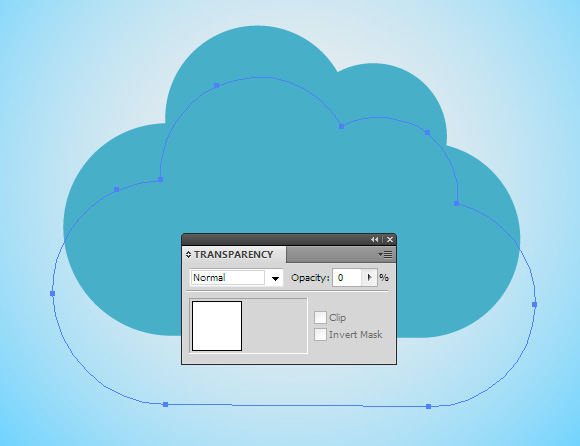
Copy the form of the cloud and paste it to the back. Color the new object with white then shift it down and a little to the right.

In the Transparency panel set 0% opacity for the white object.
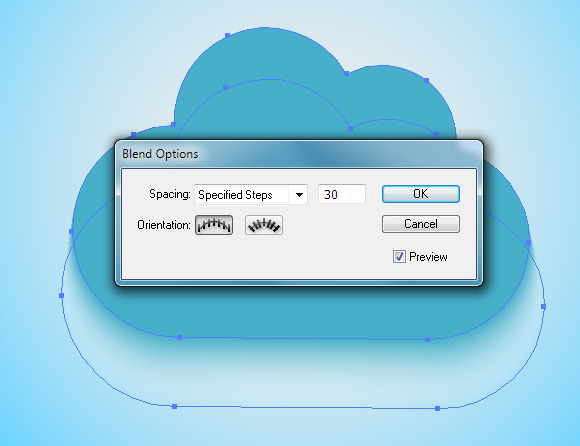
Select blue and transparent form of the cloud then go to the Object > Blend > Make.
Click twice on the Blend Tool (W) icon to open the Blend Options of the dialog box. Set the number of specified steps.
And we’re done with the shelf! It’s now ready for whichever web or app icons you choose to be placed in it. For more 3D vectors, check out what FreeVector.com has to offer.

Author: Iaroslav Lazunov
My name is Iaroslav Lazunov, I am a graphic designer from Ukraine. I am glad that I finally found the job in my life that I can share my knowledge and experiments with you in my tutorials. Follow me on Twitter or visit my blog Vectorboom.com.


Major thanks for the blog. Really Great.
i don’t understand the step 15..what you doing in step 15…and which object is releasing…i nothing understand in 15 step and after that…please reply what are you doing in step 15..please reply as soon as you possible.
A great tutorial from start to finish. Thanks for taking the time to put this together, and also giving the extra links to the textures, software, color and plug-ins that make it possible.
Definitely give this a 10…Thanks!!
(Hope you’re doing okay in the Ukraine Laroslav)
i like this! especially the flat icons!