
 Are you ready for our next adventure? This time we’ll be creating a flat backpack for camping using geometric shapes, Stroke panel and various tools and functions of Adobe Illustrator. Let’s do this!
Tutorial Details
- Program: Adobe Illustrator CS6 – CC
- Difficulty: Intermediate
- Topics Covered: Shape Building, Live Corners, Stroke panel, Objects Aligning
- Estimated Completion Time: 20 minutes
Final Image: Hiking Backpack

Step 1
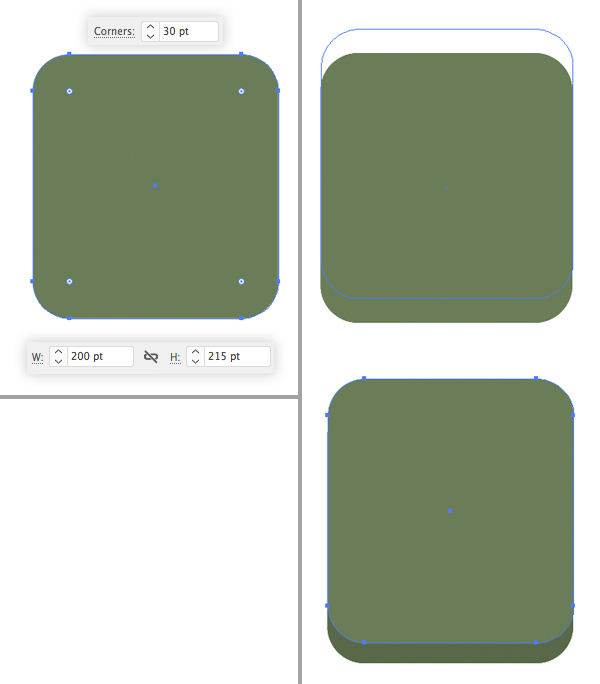
Take the Rounded Rectangle Tool and make a 200 x 215 px dark-green base for our backpack.
Another way to make a rounded rectangle is to use the Rectangle Tool (M) and then select the shape with the Direct Selection Tool (A). Once you see a circle marker of the Live Corners, pull it to the center, making the selected corners rounded. Finally, you can adjust the value of the corner radius by typing the exact number in the Corners window on the control panel on top. Let’s set it to 30 px for all four corners.
Now let’s select the created shape, hold down Alt-Shift and drag it a few pixels up, this way creating a copy. Fill the bottom copy with a darker green color.
Step 2
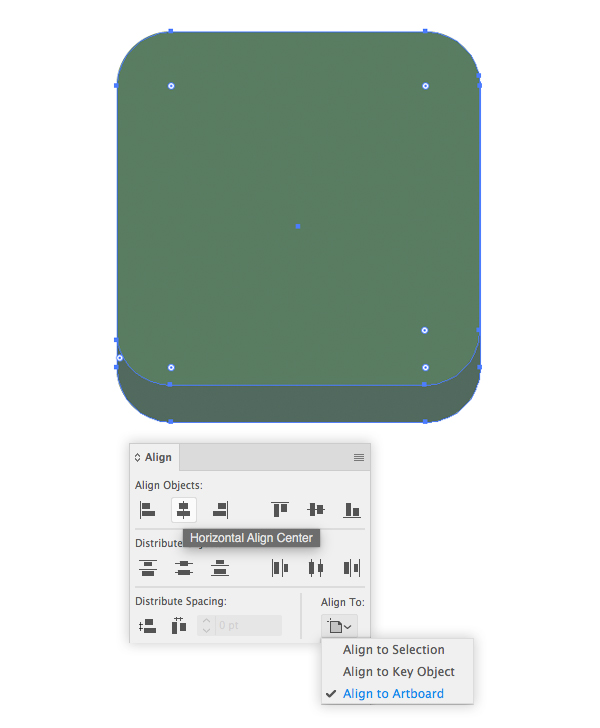
In order to make sure that our shapes are perfectly aligned, select everything and open the Align panel (Window > Align). Set the Align To Artboard parameter and click Horizontal Align Center to place our backpack in the center of the Artboard.
Step 3
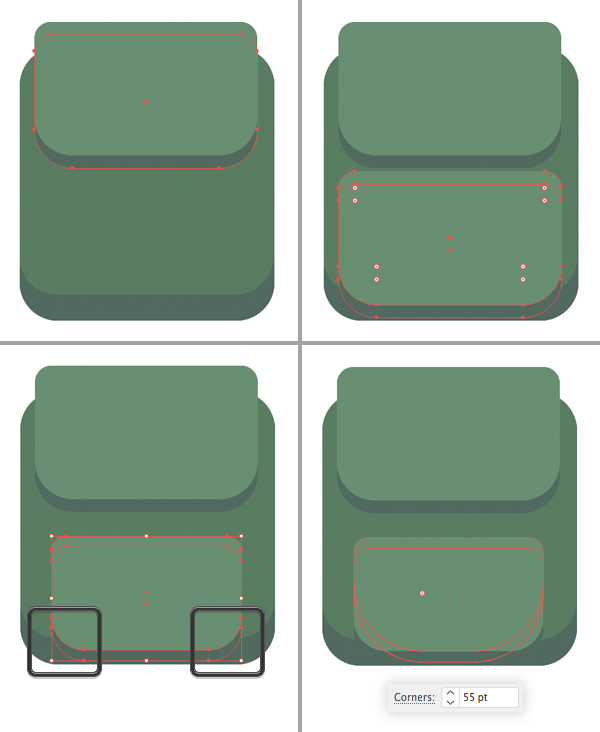
Let’s add the top part. Use the Rectangle Tool (M) to create a 175 x 105 px light-green shape.
Select its top left and top right corners with the Direct Selection Tool (A) and make them slightly rounded (15 px corner radius) using the Live Corners feature.
Repeat the same for the bottom corners, this time increasing the corner radius to 30 px.

Step 4
Let’s Copy (Control-C) the created light-green shape and Paste in Back (Control-B). Move the bottom copy a few pixels down and fill it with dark-green color, thus creating a shadow.
Now let’s add another pocket. Select the top shape together with its shadow, hold Alt-Shift and drag the objects down, creating a copy.
Make the shapes a bit smaller and use the Direct Selection Tool (A) to select the bottom corners (you can do so by clicking the anchor points that are marked on the screenshot below). Pull the circle mark of the Live Corners up to make the corners 55 px rounded.
Step 5
Let’s Copy (Control-C) the pocket shape together with its shadow and Paste in Front (Control-F). Drag its bottom side up, squishing the shape. Make the shadow-shape slightly lighter.

Step 6
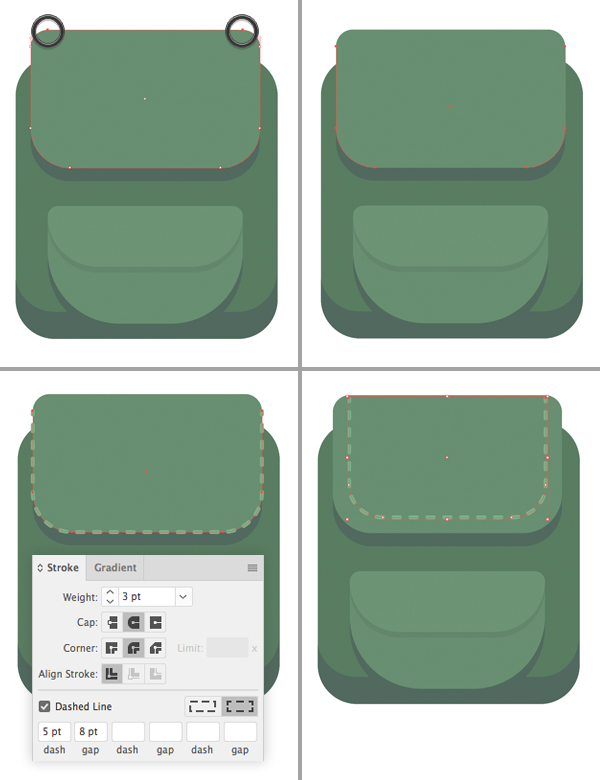
Now let’s add a stitch to the top part of the backpack. Select the light-green shape on top and duplicate (Control-C > Control-F) it.
Take the Direct Selection Tool (A), click the anchor points that are marked in the image below and press the Delete (Backspace on Mac) key to delete the top edge on the shape.
Set the Fill color to None and the Stroke color to light-green in the Color panel.
Open the Stroke panel (Window > Stroke) and set the Weight to 3 pt, Cap to Round Cap. Tick the Dashed Line box and set the dash to 5 pt, gap to 8 pt, making the line look like a stitch.
Shrink the shape a bit, making it fit the backpack and drag its top anchor points all the way up, using the Direct Selection Tool (A).
Step 7
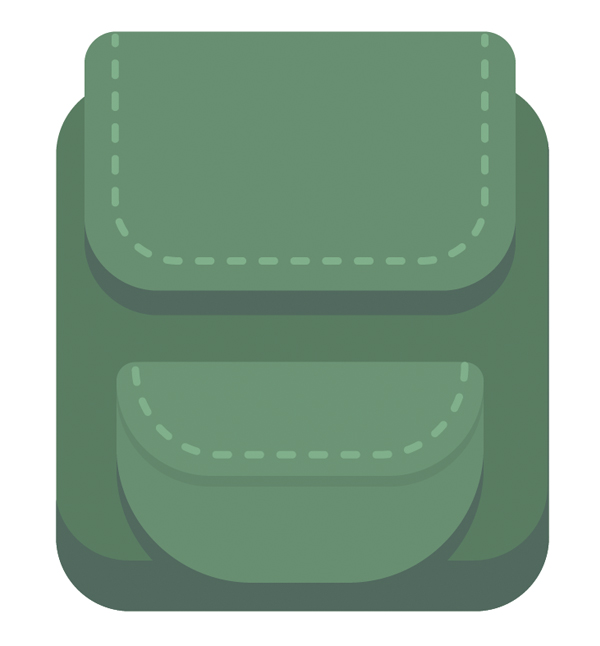
Add the same stitch to the bottom pocket of the backpack.
Step 8
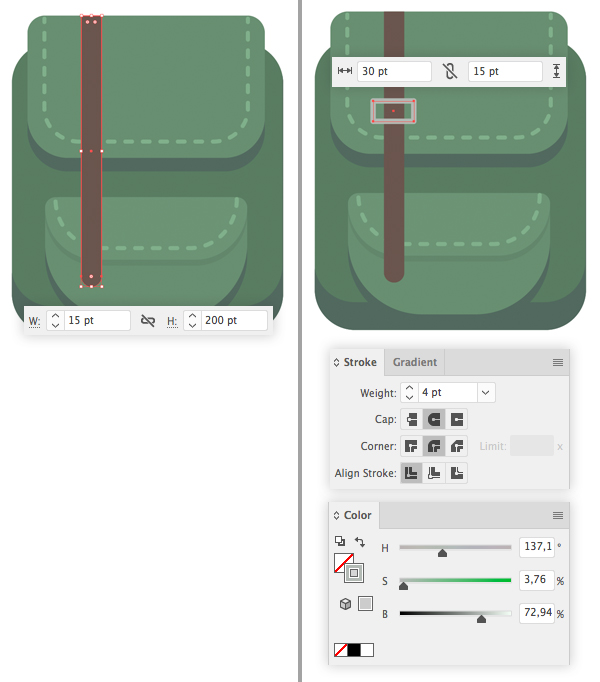
Create a 15 x 200 px dark-brown rectangle for the strap and make its bottom part fully rounded.
Add a 30 x 15 px rectangle with grey stroke for the buckle. Set its Stroke Weight to 4 pt.
Step 9
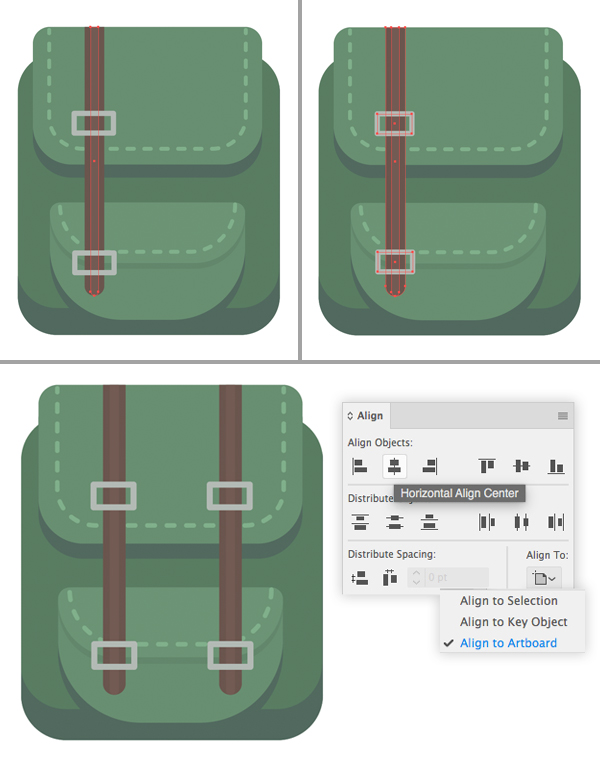
Duplicate (Control-C > Control-F) the strap and make the top copy lighter and narrower. Add a silver buckle to the bottom pocket of the backpack as well.
Now we can Group (Control-G) all the elements of the strap and buckles, duplicate them and add a copy to the opposite side.
Finally, group both straps together and align to the horizontal center of the Artboard.
Step 10
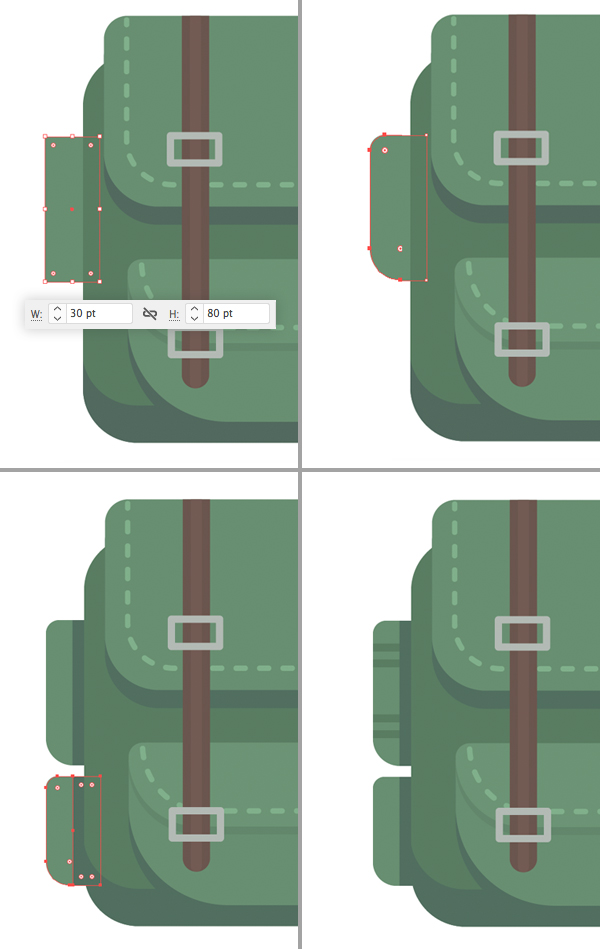
Let’s create a 30 x 80 px rectangle for the side pocket of our hiking backpack. Press Shift-Control-[ to Send to Back, placing it by the left side of the backpack.
Make the top and bottom left corners of the pocket slightly rounded (7 px corner radius for the top and 15 px for the bottom), using the Direct Selection Tool (A).
Add a smaller copy of the shape for the second pocket and don’t forget the dark-green shadows.
Finish up with the side pockets by decorating the top one with horizontal green stripes.
Step 11
Keeping both side pockets selected, double-click the Reflect Tool and select the Vertical Axis. Click the Copy button to create mirrored pockets. Attach them to the opposite side of the backpack.
Group all the side pockets and align them to the horizontal center of the Artboard.

Step 12
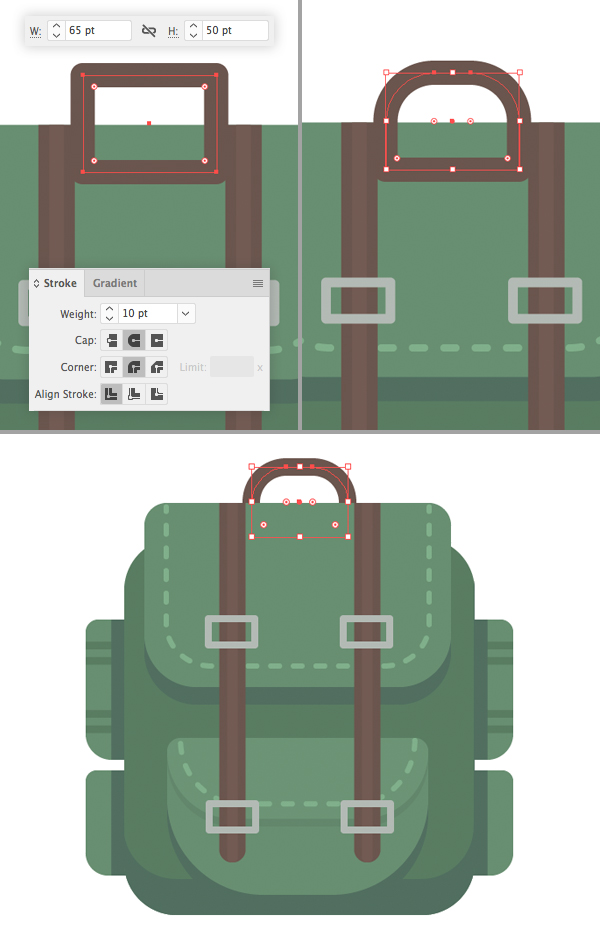
Let’s finish up with our backpack by adding a handle on the top. Make a 65 x 50 px rectangle with dark-brown stroke. Set the Stroke Weight to 10 pt.
Use the Direct Selection Tool (A) to make the top of the handle 20 px rounded.
Place the handle beneath the backpack by pressing Shift-Control-[.
All right! Our Hiking Backpack is Finished!
Great work! Now we’re ready to go hiking! I hope you’ve enjoyed following this tutorial and discovered some new useful tips and tricks.
Happy designing!


Amazing post that is
Amazing and really informative post thanks for sharing this information.
Thanks. Your guidance and tips are important and we appreciate your efforts for sharing this great information.
It was a beautiful thought! Just wanna say thank you for the tutorials you have shared. I really like the idea. Thanks for sharing this.
Thanks Author , I got completely wrong #1 I put true but you correctly explained. God bless you.