

In today’s tutorial we will learn how to control transparency of gradient meshes with the help of blending modes, and by adjusting color transition between mesh points and changing its opacity, create a pearl brush. Moreover after reading this tutorial, you’ll be able to create Illustrator brushes from gradient meshes of any difficulty with the help of free Mesh Tormentor plug-in. Let’s get started!
Tutorial Details: Pearl Brush + Gradient Meshes
- Program: Adobe Illustrator CS5 – CC
- Difficulty:Beginner-Intermediate
- Topics Covered: Gradient Meshes
- Estimated Completion Time: 45 minutes
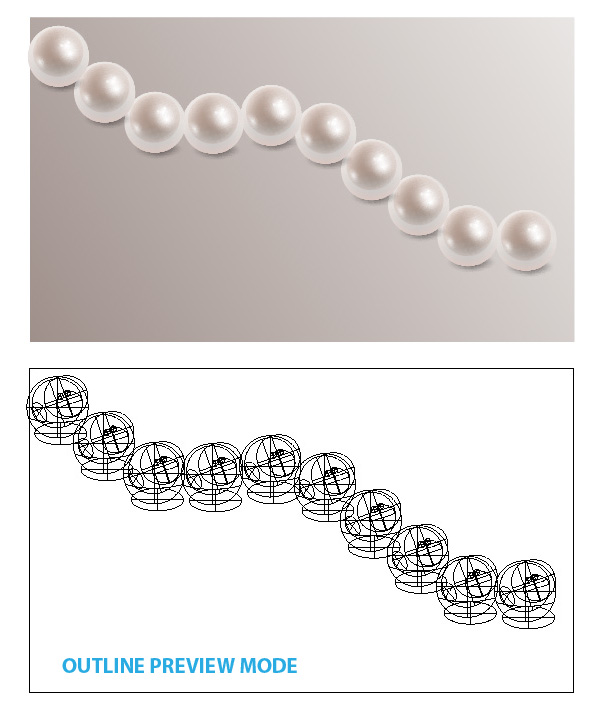
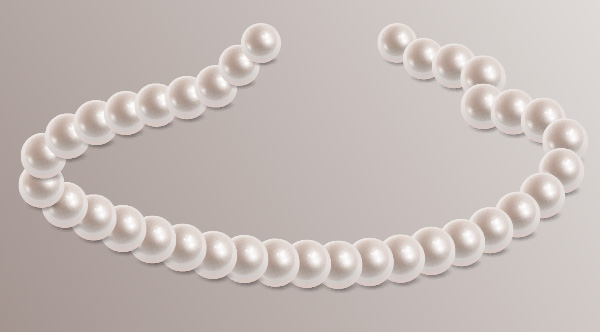
Final Image: Pearl Brush + Gradient Meshes
As always, this is the final pearl brush image that we’ll be creating:

Step 1: Pearl Brush + Gradient Meshes
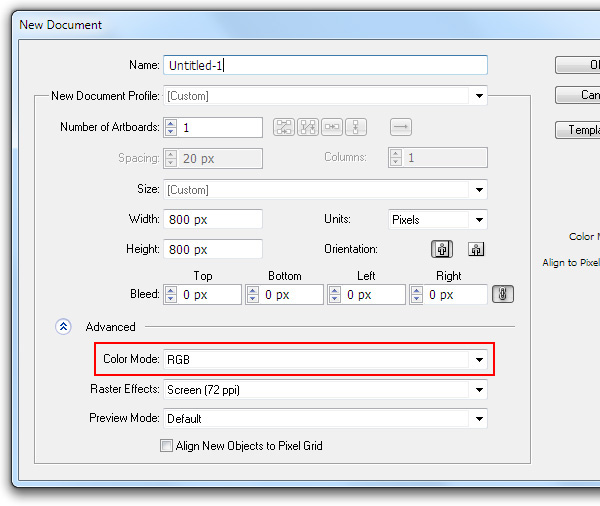
To create your pearl brush, open Adobe Illustrator and create a new document (File > New). In the dialog box, set the RGB color mode and the size of the artboard, which depend only on your personal preferences.
Step 2
Take the Rectangle Tool (M) and create a rectangle with linear gradient fill. I used two colors for this gradient: R= 233; G = 230; B =228 and R= 158; G = 143; B =138.
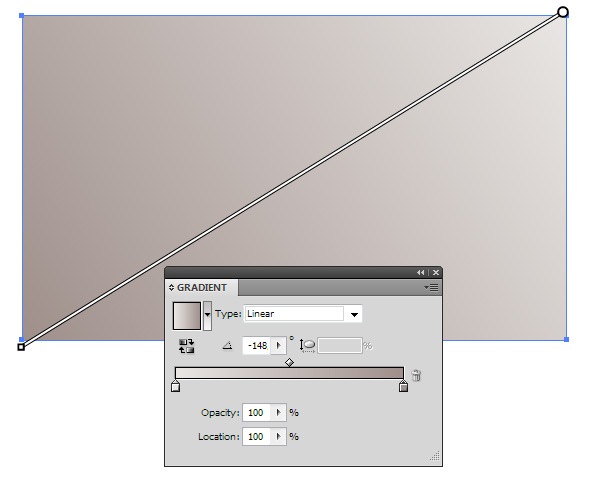
This created rectangle will be used as our background, so you can use completely different fill. But the background should exist as an object.
Step 3
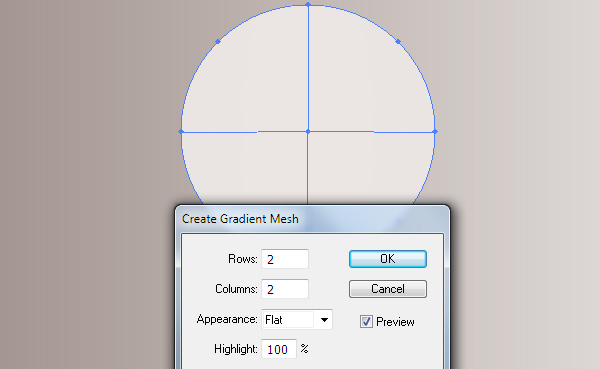
Let’s begin creating our pearl. Take the Ellipse Tool (L) and draw a circle with light-brown fill R= 235; G = 230; B =227.

And now transform our circle into a gradient mesh. To do so, go to the Object > Create Gradient Mesh… and in the dialog box set a number of rows and columns which is two.
Step 4
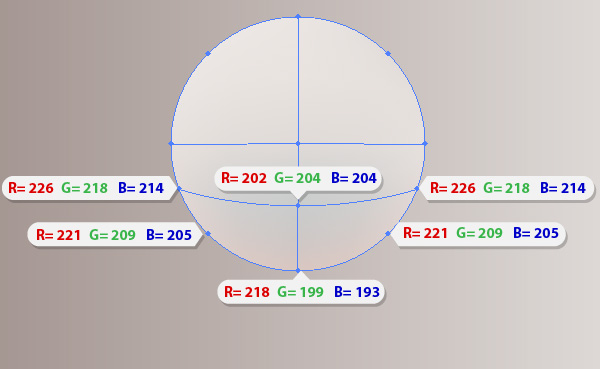
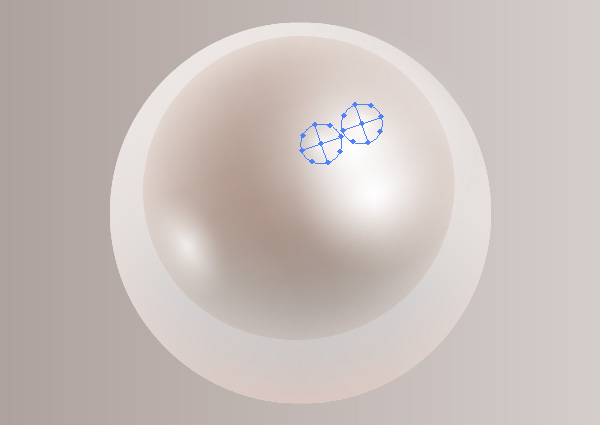
Take the Mesh Tool (U) and create a new mesh point by clicking on the point A.
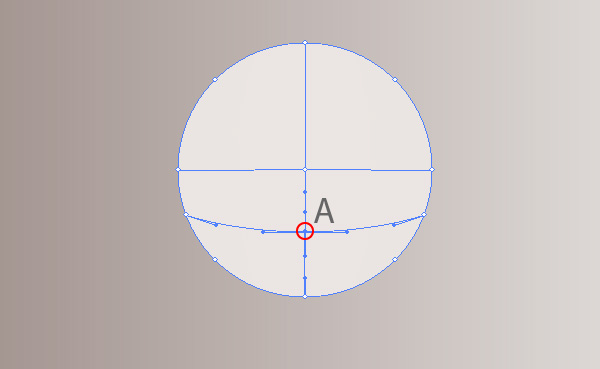
Now we need to recolor a couple of mesh points. Use the Direct Selection Tool (A) to select them. The points’ location and their new colors are indicated on the figure below.
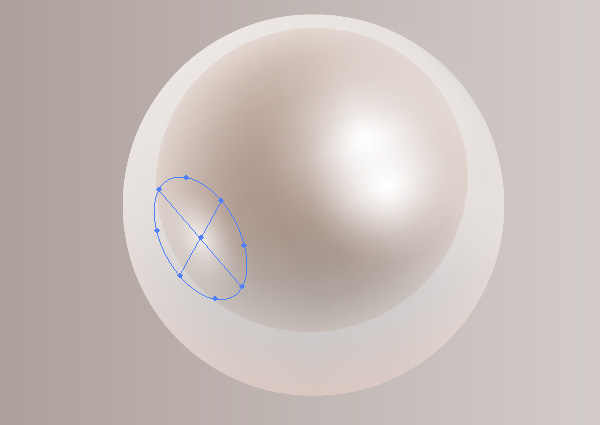
Step 5
Create an ellipse with the color of fill R= 247; G = 239; B =235 with the help of the Ellipse Tool (L) and rotate it to some angle with the Selection Tool (V), as it is indicated on the figure below.
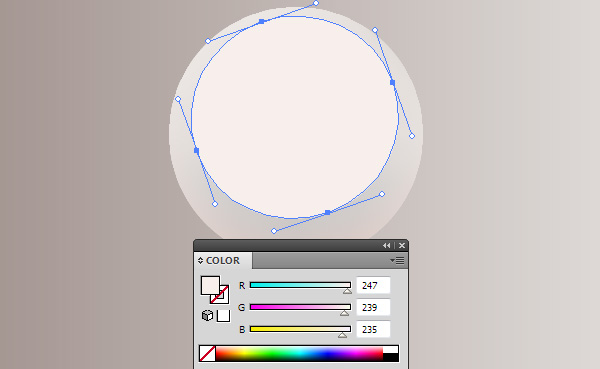
Transform the ellipse into a gradient mesh (Object > Create Gradient Mesh).
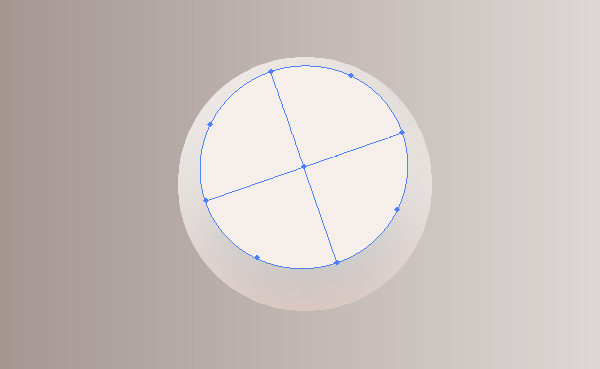
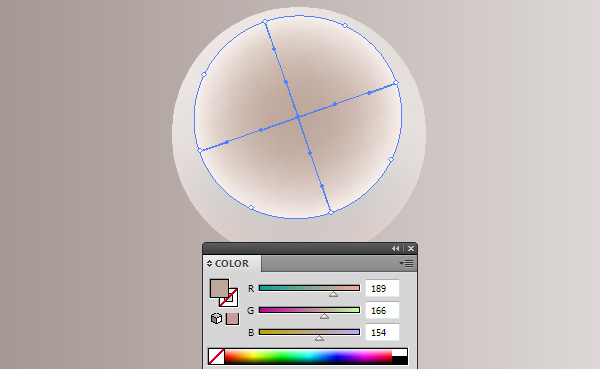
Step 6
Select and color the center point of the gradient mesh into brown R= 189; G = 166; B =154.
Now select the entire gradient mesh and set the Multiply blending mode in the Transparency panel.
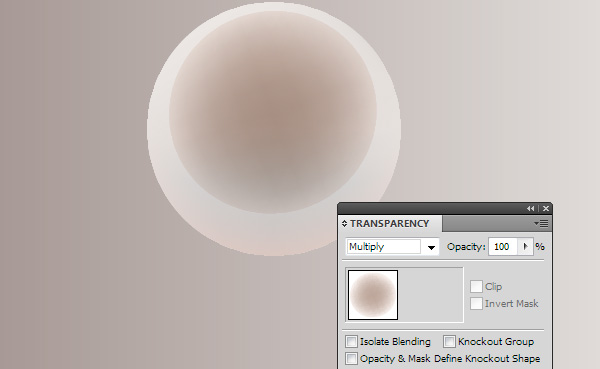
This action allowed us to make the light edges of the gradient mesh semi-transparent. I want to remind you that white became transparent after the Multiply blending mode application.
Step 7
Let’s create some highlights on the surface of our pearl. Create one more gradient mesh in black (R= 0; G = 0; B =0) as an ellipse as we did in our previous steps. Color the center point of the gradient mesh white.
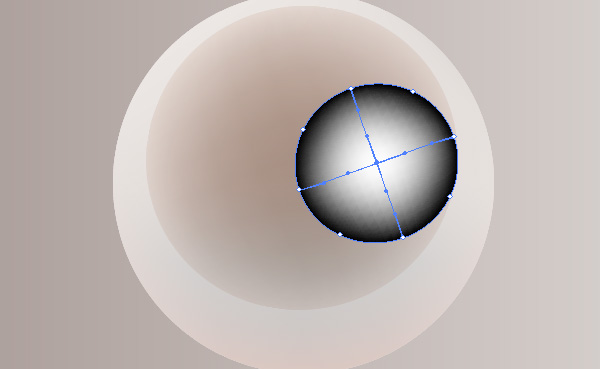
Select the entire gradient mesh, then in the Transparency panel, set the blending mode to Screen.
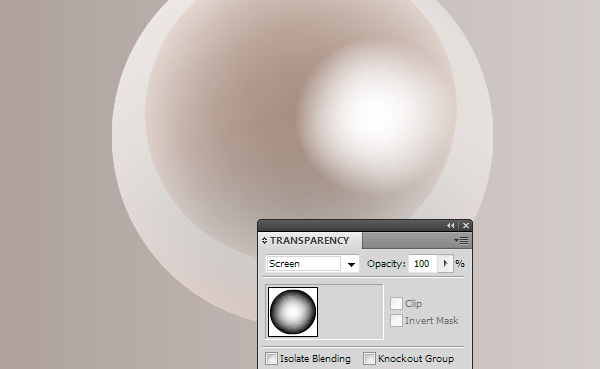
As you can see, the edges of the object became transparent, since black becomes transparent after application of the Screen blending mode.
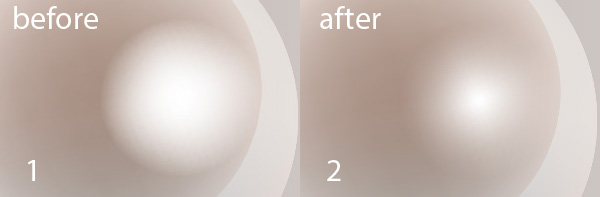
Step 8
I don’t like the way transparency is spread from edges to the center of the object. So let’s see how we can control the transparency in gradient meshes. The distribution of color between adjacent mesh points depends on the length ratio of handles on their connecting mesh line, i.e. if I want to distribute some transparency to the center I need to reduce the handles of white point and increase the handles of black points on the outer edges of the object.
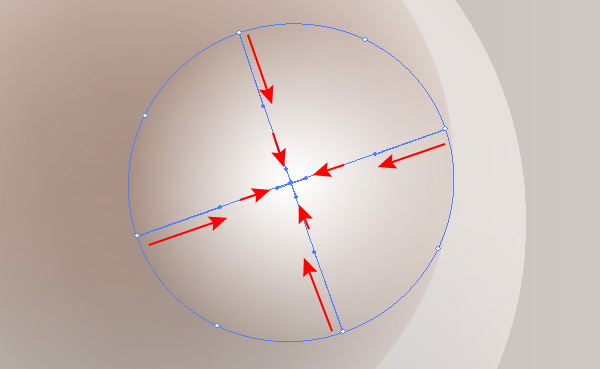
Undoubtedly, these actions changed the picture, but this is still not quite the effect I’m trying to reach.

Step 9
Select all the points which are located on the edges of the gradient mesh (the central point should remain unselected) and set 30% Opacity in the Transparency panel. Starting with Adobe Illustrator CS5, we can control the mesh point opacity.
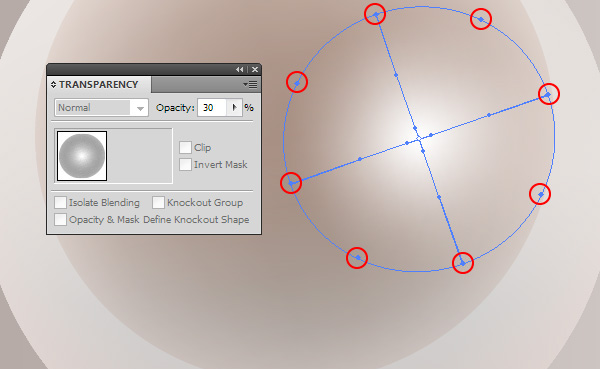
Now, I finally have the desired result.
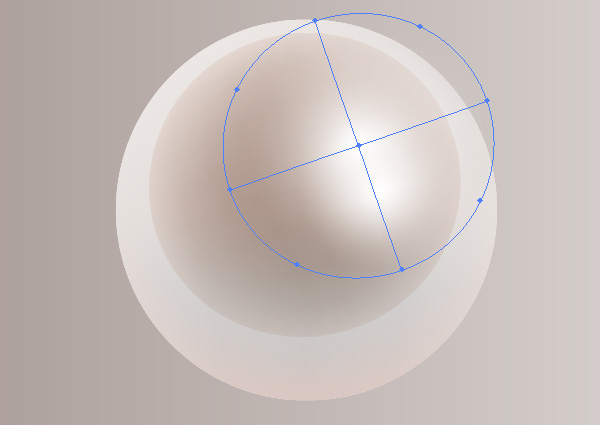
Step 10
Using the described technique, let’s work on creation of some more highlights on the pearl brush. Its location is indicated on the figures below.
Step 11
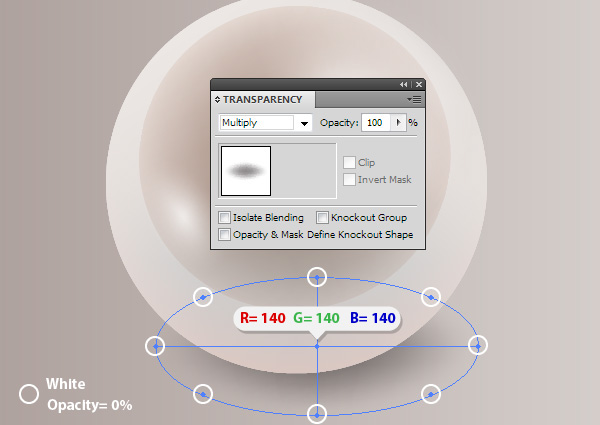
Now, let’s use the principles described above to create a drop shadow. The points that are located on the borders of gradient mesh are white and have 0% opacity. The central point is colored in grey R= 140; G = 140; B =140. The Multiply blending mode is applied to entire gradient mesh.
Step 12
The pearl is ready, let’s group all its objects for our convenience (Cmd / Ctrl + G). Now we can create brushes from this group despite the fact that Illustrator’s brushes cannot contain gradient meshes.
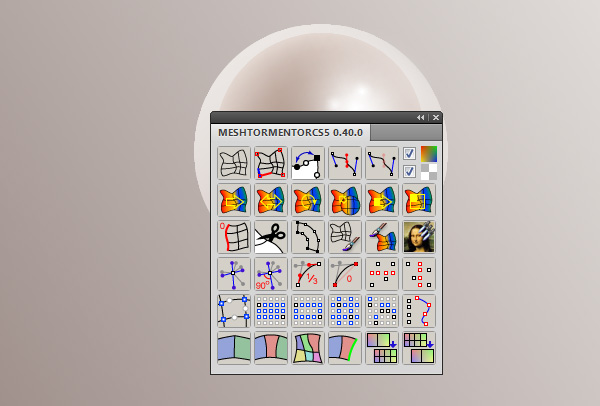
The opportunity became available only due to free Mesh Tormentor plug-in, which you can download here. After installation of the plug-in, open its panel (Window > Mesh Tormentor)
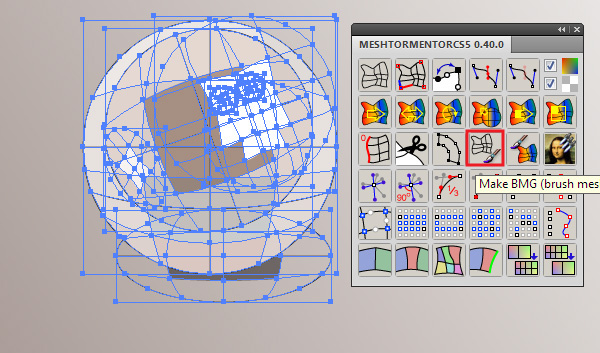
Step 13
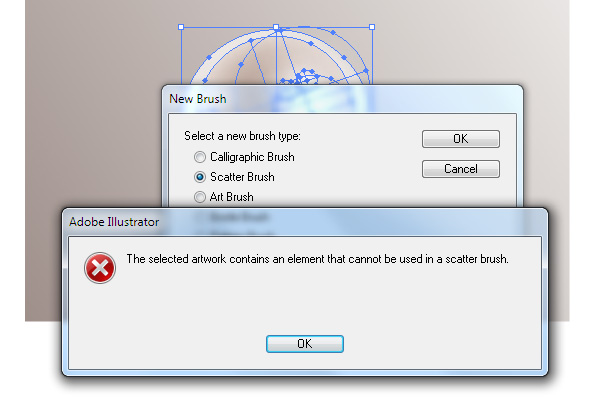
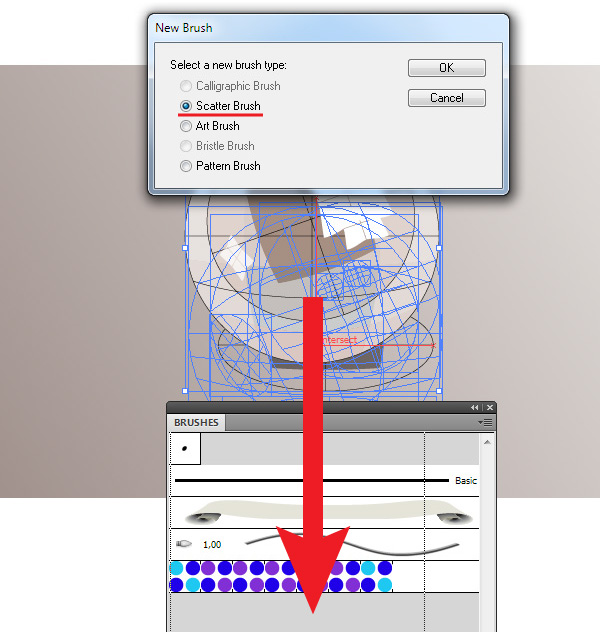
Select a group with a pearl, then click on the Make BMG button in the Mesh Tormentor panel.
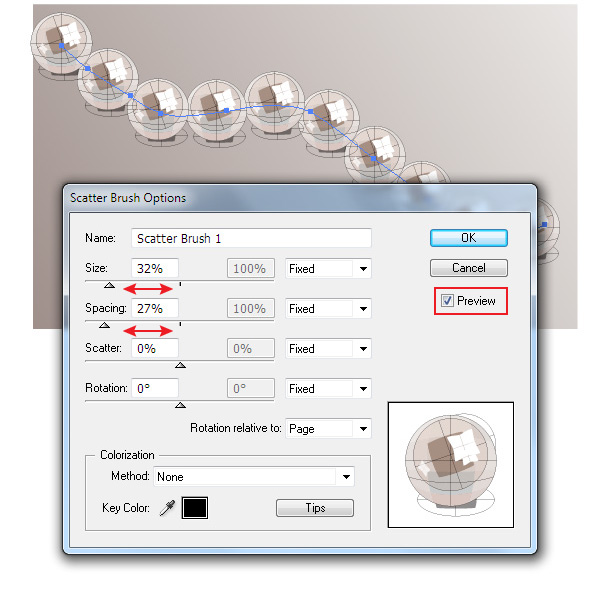
Drag the received objects into the Brushes panel, then choose Scatter brush in the opened dialog box.
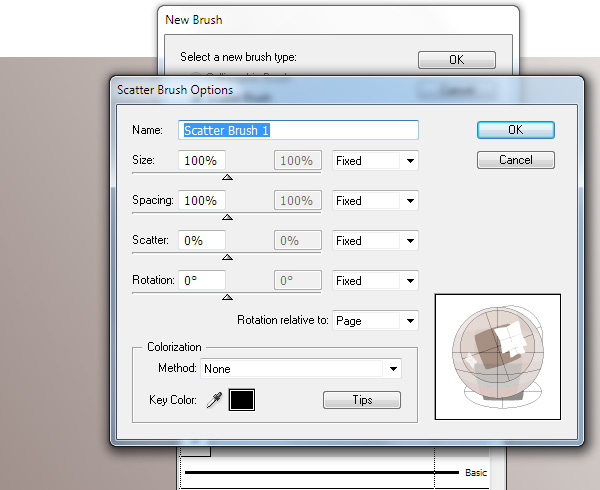
Step 14
Leave the brush’s parameters unchanged in the opened dialog box of Scatter Brush Options. We’ll work with parameters after our brush is created and applied.
Take the Paint Brush Tool (B) or any other drawing tool and create an arbitrary path.
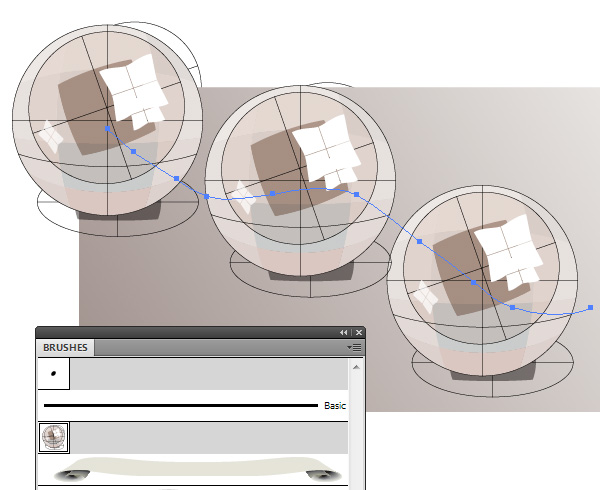
Step 15
And now let’s specify the pearl brush settings. To do so, click twice on the icon for this brush in the Brushes panel, which opens the dialog box with parameters. Check the Preview option to observe the current changes.
Everything is ready to transform the brush stroke back into gradient meshes. Keep the path selected, go to the Object > Expand Appearance.

Step 16
Click on the Convert BMG into mesh in the plug-in’s panel.
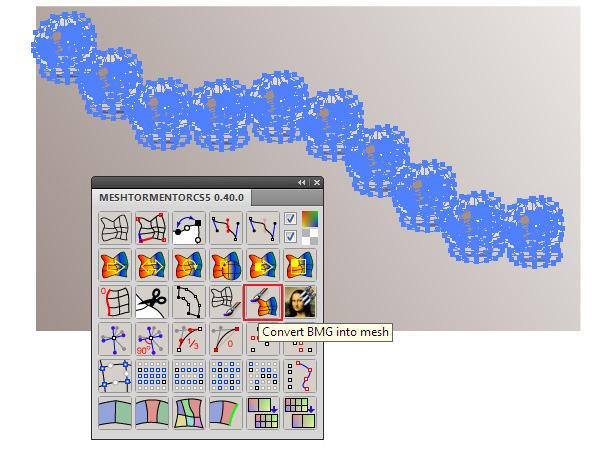
As you can see, we received a string of pearls, which are gradient meshes.
Step 17
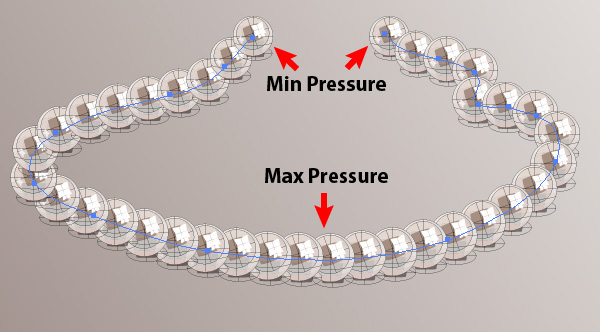
If in your work you use Graphic Tablet, then you can set the brush size to be determined by pressure. You also need to set a range for the size of your brush.
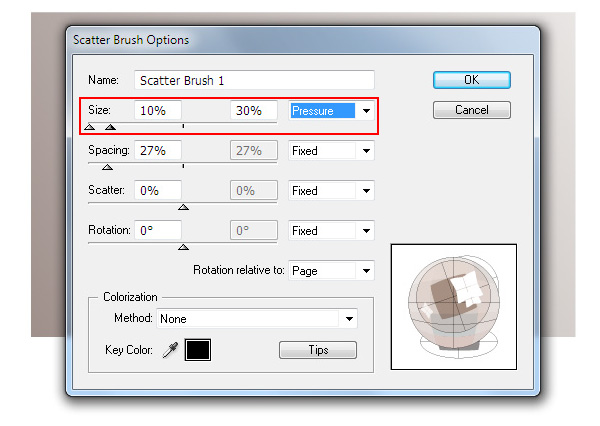
The brush with such parameters allows to create an illusion of perspective, where objects that are closer to the viewer look bigger than the ones further away.
Step 18
After transformation of the brush stroke into a group of gradient meshes (Object> Expand Appearance, then click on Convert BMG button), we need to change the sequence of the pearls on the left part of the necklace so they’re perspective appears from front to back.
The sequence of the pearls can be altered with the help of the Send Backward command (Cmd/Ctrl + [ ) and Send to Back command (Shift + Cmd/Ctrl + [ ).

Step 19
In additional to the drop shadow we added previously, we also need to add a shadow from the neighboring pearls to enhance the realism of the perspective. Create a circle with gradient mesh fill from brown to white. Apply the Multiply blending mode to it and place it on one of the pearls.

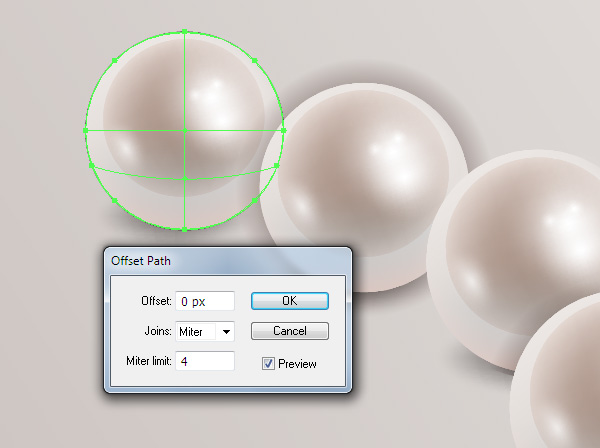
Step 20
Now we need to hide parts of shadow which extends beyond the neighboring pearl. Select the gradient mesh which forms the shape of the neighboring pearl, then go to the Object > Path > Offset Path and set the offset value to 0 px.
Step 21
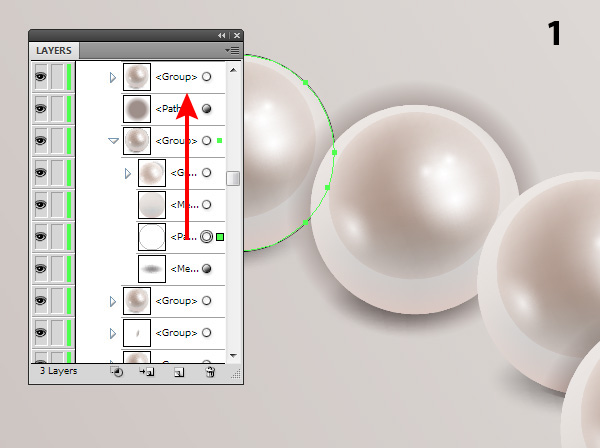
Move this path up from its current group to above the form of a shadow in the Layers panel.
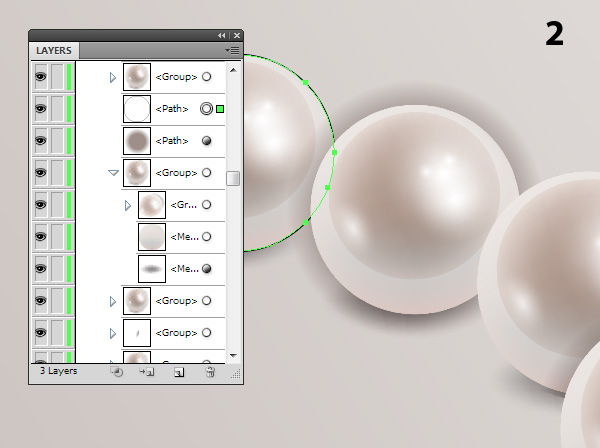
Step 22
Select this path and a form of the shade and go to the Object > Clipping Mask > Make or use Cmd/Ctrl +7 shortcuts.
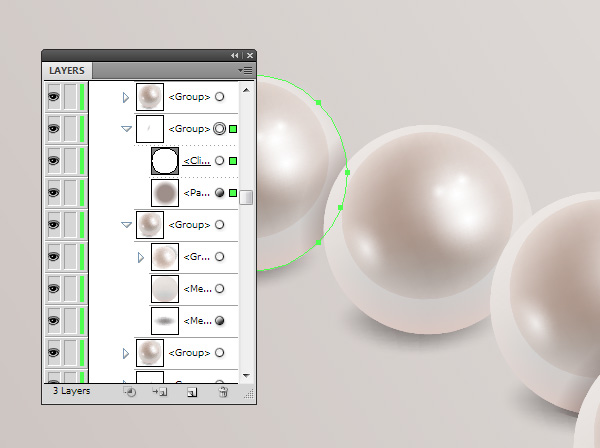
Using this technique create shadows on other pearls.

Author: Iaroslav Lazunov
My name is Iaroslav Lazunov, I am a graphic designer from Ukraine. I am glad that I finally found the job in my life that I can share my knowledge and experiments with you in my tutorials. Follow me on Twitter or visit my blog Vectorboom.com.


Very interesting subject , appreciate it for putting up.
Very useful information for my print or design work, Thank!
Thanks for sharing!
Thank you for best Tutorial
I got stuck at step 13. After I used the mesh tormentor I went to try and make the brush but I kept getting a message saying the selected artwork contains an element that cannot be used in a scatter brush. Where did I go wrong?
Ignore my last message I figured out what I did wrong.
Greetings from California! I’m bored to tears at work so I decided to browse
your blog on my iphone during lunch break. I enjoy the information you provide here
and can’t wait to take a look when I get home. I’m amazed at how quick your blog loaded
on my mobile .. I’m not even using WIFI, just 3G ..
Anyways, great blog!
nice tutorial. i luff pearls =)
I loved the Pearls tutorial. However I found the steps from 22 onwards a little confusing. I did manage to create a “shadow” and placed this around the pearls but moving the layers around was confusing. I was happy with my finished project though. I will definitely be attempting more of them. Thnaks.
Excellent tutorial 😉
Fantastic! I was looking for something that helps me to get a start in creating shimmering objects and loved this tutorial.
“We’ll work with parameters after our brush is created and applied.
Take the Paint Brush Tool (B) or any other drawing tool and create an arbitrary path.
”
I do not agree. Read http://www.dezeen.com/2013/11/17/greem-hair-salon-artifical-light-and-shadow-takara-space-design/
Sincerely, Rena